Summary: Are you annoyed with your grainy photos which contain spots, lack colour, and sharpness? Don’t worry, there are various methods you can try to fix grainy photos, even when the noise is in abundance. In this post you will learn to fix grainy photos with various tools. Also know how to fix grainy photos without Photoshop or Lightroom at the pre-editing stage.


Contents
Noise is one of the common challenges faced by photographers and editors, whether professionals or amateurs. Most of the time, it does not affect the picture quality, but when you zoom in, the photo appears grainy with small dots all over it. Irrespective of the camera, shooting in low light or at high ISO can often ruin your pictures. But thankfully, you can repair the distorted videos at the editing stage of the photos.
Why are your photos grainy?
There can be one or more reasons that make your photos grainy. These include various photography aspects like ISO, shutter speed, camera specifications, camera exposure, or aperture. Below are the prime reasons why your pictures turned grainy:
Low light condition ? In the absence of enough light, the pictures turn grainy. For example, if your shot is taken at sunset or in a poorly lit room, you could not manage a proper low aperture and higher ISO ratio or if you turned on the flash. In such cases, your photos get grainy.
High ISO ? A simple rule is that the greater the ISO of your camera, the more the noise or grains in the picture. Increasing ISO is often required when shooting in low light or at night.
However, only you can decide how much noise is tolerable to not spoil the sharpness and overall quality of the image.
To put it simply, the ISO setting in photography is the sensitivity of your camera?s imaging sensor to the light. High-end professional cameras are designed to produce minimal or negligible noise even at a higher ISO of 3000. Some latest digital cameras can also manage picture quality with the least noise up to ISO 1000.
Camera with small sensor ? If the grainy photo problem is persistent with your specific camera, this means your camera has a small sensor. It is not sensitive enough to capture in low light. This is usually a complaint with some point-and-shoot cameras, low-end DSLRs, and smartphone cameras.
How to repair my grainy photos?
There are ways to make your grainy photos look better, such as photo editing software, plugins, or third-party photo repair tools. These methods can decrease the noise and enhance grainy photos.
1. Repair grainy photos with Photoshop


Adobe Photoshop is a photo editing software that can repair grainy pictures to some extent. Although complete noise removal might not be achievable with Photoshop, you can still repair the images to some extent. It has this built-in filter feature that can reduce noise. To use Noise Filter in Photoshop, follow the below steps:
- Open your grainy photo in Photoshop
- On the top bar, click on Filter > Noise > Reduce Noise
- In the Reduce Noise window, adjust the three sliders ? Strength, Reduce color noise, and Sharpen Details until you reduce the grains and obtain the required quality.
- You can view the outcome in the Preview box on the right side by checking the Remove JPEG Artifact box.
- Click OK and save the edited image.
Watch the video on some common Photoshop methods to fix damaged photos.

2. Fix grainy photos with Lightroom

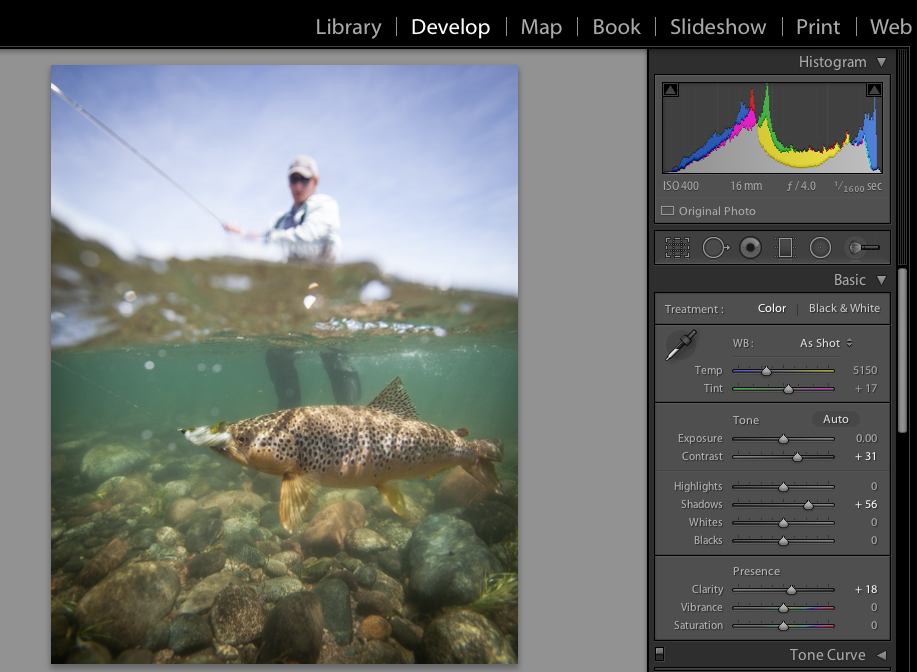
Lightroom developed by Adobe is also a photo editing software that has a photo noise reduction feature.
- Open the image in the Lightroom application.
- Go to the Develop module of Lightroom.
- Open the Detail Panel. On the left pane under Noise Reduction, you will see Luminarc and Color.


- Start with Luminarc and adjust the given noise reduction bars ? Detail and Contrast, until you get satisfactory grainy image correction. Similarly, adjust the sliders and preview the changes on the right pane. Once done, save the edited photo.
Adobe Lightroom is effective in repairing the grainy and sandy corruptions of the photos. But the drawback is that the correction is applied to the whole image, not just the grainy area on the photo. This might disturb the original settings of your photo.
3. Repair corrupt grainy photos with software
One of the most preferred, time-saving, and better procedures to fix grainy photos is through a photo repair software ? Stellar Repair for Photo. The best part of the tool is that, unlike Photoshop or Lightroom, the application does not let you lose the details of the photo and keeps your original image intact.
Before Repair:


Stellar Repair for Photo fixes not only grainy photos, but also repairs distorted, split, blurred, or pixelated photos making them sharp and clear. The software can even repair completely unreadable files with corrupt headers, data, and invalid file structures.
After Repair:

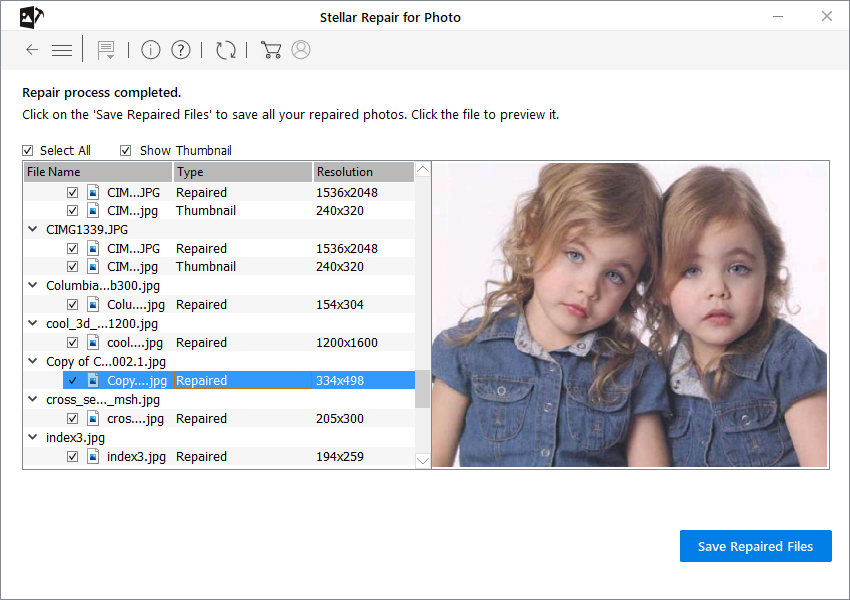
It can repair multiple images at one go and has a very intuitive do-it-yourself interface. The software?s trial version is free and offers a Preview of the repaired grainy photos. Once satisfied with the repair, you can buy the software online to save the corrected photos.


4. Use Plugins to remove grains in photos
If you are already using some photo editing applications, buying plugins for noise reduction can be considered. Plugins significantly reduce noise and fix grainy photos. The good part of using plugins is that you can apply the correction only to the selected grainy parts of the photo and not the whole image. Some plugins are even capable of repairing severely damaged pictures. Some commonly used plugins by professional photographers include Noise Reducer Pro, Noise Ninja, Neat Image, NoiseWare, Photo Ninja, Topaz DeNoise, etc.
Check out the popular plugins to fix grainy photos:
| DxO OpticsPro 11 Elite: The DxO Optics Pro 11 Elite is one of the top plugins known for its noise-reduction skills. Appropriate for Lightroom, it converts grainy and noisy RAW and JPEG images into high-quality photos. The plug-in is compatible with the latest Mac OS and Windows versions, DxO Optics Pro 11 Elite supports over 300 cameras. However, in terms of cost, DxO Optics Pro 11 is among the most expensive plugins with its Elite edition at £159. |
| Noise Reducer Pro: Equally used by beginners and professional photographers, Noise Reducer Pro supports Windows, Mac, iOS, and Android platforms. The tool efficiently removes the grainy spots from the photos, making them crisp and sharp. It comes with three noise reduction levels ? Light, Medium, and Custom, depending upon the intensity of repair required by your grainy photos. |
| Neat Image: This is one of the popular noise filters that repairs grainy photos captured under dim light or at night by any digital cameras or DSLRs. Although commonly used by Photoshop users, Neat Image also works as a standalone tool. It supports Photoshop CS/7/6/5, Photoshop Elements 2/3, Photopaint, Paint Shop Pro 7/8/9, PhotoImpact 8/10/XL, Microsoft Digital Image Pro, and Photoline on Windows, Mac, and Linux platforms. |
| Noise Ninja: Commonly used by Photoshop users, Noise Ninja is competent in removing the noise from the photos captured in low light at high ISO. The tool provides varied options to reduce noise in the photos. Its ?Noise Brush? feature helps to selectively apply noise reduction on the grainy part, like masking in Photoshop |
Tips – How to fix grainy photos without Photoshop or Lightroom
Although several noise reduction software is available, it will be much easier to acquire clear and sharp images if you can avoid noise from the start of the shoot.
Here are some ways that can help you control noise and grains in photos:
1. Set the digital camera to low ISO
As mentioned earlier, ISO is a setting in a digital camera that helps to manipulate the amount of light entering the lens. It?s recommended to keep the ISO as close to 100 as possible. But when you are shooting indoors, set your camera to a higher ISO. In this case, you should change the aperture first, followed by shutter speed (maximum 1/60 without a tripod/wall), as this will compensate for high ISO.
2. Get artificial lights and reflectors
If you find yourself in a low light setting, we recommend using artificial lights like a strobe or flashlight. These external light sources can help to expose the object better. You can also use reflectors to brighten some dark areas. Reflectors help to bounce light to areas where light is not reaching, thus enhancing the experience.
3. Increase exposure
Slightly overexpose your pictures in the camera if you have no option but to shoot at high ISO. In addition, either increase the aperture or lower the shutter speed. Always keep in mind that overexposing photographs can have a negative impact. If you blow out your photos, you?ll lose a lot of detail, which would be difficult to recover in post-production.
4. Turn off the noise reduction
Many new cameras have built-in noise reduction that assists in repairing grainy photographs without having to edit them. Each camera has its own method of enabling noise reduction.
You have to activate the function from the camera menu. It may show different noise reduction levels for fixing the grainy photos ? low, medium, and high. We recommend using either the low or medium level. Setting the noise reduction to high may obliterate the details of your images. Note that the noise reduction function in cameras only works with JPEG photos.
5. Shoot in RAW instead of JPEG
It will be better if you switch off the noise reduction in cameras and utilize the RAW file format to have more control. Having the main file in RAW format makes the file more editable while utilizing the photo editing software and preserves the detail of images.
Still confused? Read our blog on – Which is better RAW vs JPEG.
The Bottom Line
With Photoshop and Lightroom, you have to experiment and intelligently play with the settings to remove grains and obtain an acceptable picture quality.
Meanwhile, Stellar Repair for Photo fixes image noise or distortions occurred due to file corruption. If you are willing to spend a little more, plugins can also be of use to enhance grainy photos. Just remember, the free noise filters are not as efficient as the paid ones, and ensure that you download a secure one! Each tool works differently and gives different levels of quality. It is safest to try out the demo versions and see which works best for you.
You may like to know: How to fix grainy videos

