Summary: Sometimes, you need to roll back the migration of public folders from Exchange Server to Exchange Online due to issues with public folder migration or any other reason. In this post, we’ll discuss the step-by-step process to roll back the public folder migration.


During a migration from local Exchange Server to Exchange Online, you might encounter issues with the migration of the public folders. For this or any other reason, you need to reactivate the public folders in your Exchange Server or roll back the public folder migration. Below, we will be discussing the procedure to roll back the migration of public folders from local Exchange Server to Exchange Online.
Process to Roll Back Public Folder Migration
Before you begin, you need to ensure that there are no changes to the public folders in the Exchange Online setup. Once you roll back the public folders, any changes in the online version of the public folders will be lost. If users might have added content to the public folders in Exchange Online, you can export the post-migration public folder mailboxes to PST using the Compliance page. For this,
- Click on Content Search.


- Create a new Search.
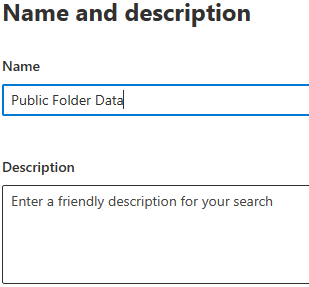
- Enter a friendly name.

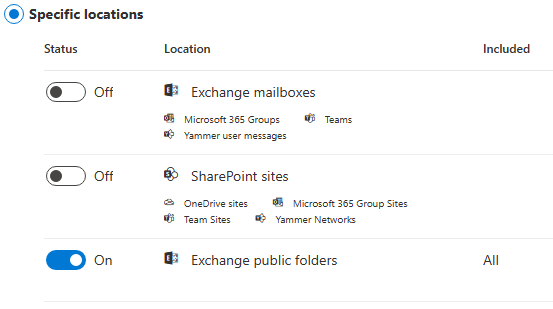
- Select Exchange public folders.

- Add the conditions required.
- Once the search is done, click on the Export tab. This will start the process to export the contents to PST.
After exporting, keep the PST files at a safe place to import them after the rollback. Now, follow the below steps to roll back the public folder migration.
1. Unlock the Public Folders
The first thing to do is unlock the public folder in the local Exchange Server. To unlock the local Exchange Server public folder, use the Set-OrganizationConfig PowerShell command in the Exchange Management Shell (EMS) as given below.
Set-OrganizationConfig -PublicFolderMailboxesLockedForNewConnections:$false -PublicFolderMailboxesMigrationComplete:$false -PublicFoldersEnabled Local


This command will unlock all the public folders which were marked as completed after a cutover migration.
2. Reverting the External Email Address
A part of the migration, using the batch migration, was to use the SetMailPublicFolderExternalAdress.ps1 script to change the external email address of all mail-enabled public folders. You need to revert the changes done by this script.
To get the changes done to the public folders, you can refer to the summary file which was created by the said script during the migration or check the OnPrem_MEPF.xml which was created during the migration process to get all the details on how these were configured.
3. Clean-up the Exchange Online
Since you have migrated the users to Exchange Online, you have the same public folders in your local Exchange Server and Exchange Online. Therefore, you need to remove the public folders from the Exchange Online public folders and mailboxes. For this, you need to use a combination of Get-MailPublicFolder, Get-PublicFolder, and other commands using PowerShell in the Exchange Online (see below).
Get-MailPublicFolder -ResultSize Unlimited | where {$_.EntryId -ne $null}| Disable-MailPublicFolder -Confirm:$false
Get-PublicFolder -GetChildren \ -ResultSize Unlimited | Remove-PublicFolder -Recurse -Confirm:$false
$hierarchyMailboxGuid = $(Get-OrganizationConfig).RootPublicFolderMailbox.HierarchyMailboxGuid
Get-Mailbox -PublicFolder | Where-Object {$_.ExchangeGuid -ne $hierarchyMailboxGuid} | Remove-Mailbox -PublicFolder -Confirm:$false -Force
Get-Mailbox -PublicFolder | Where-Object {$_.ExchangeGuid -eq $hierarchyMailboxGuid} | Remove-Mailbox -PublicFolder -Confirm:$false -Force
Get-Mailbox -PublicFolder -SoftDeletedMailbox | Remove-Mailbox -PublicFolder -PermanentlyDelete:$true
This will remove all public folders in your Microsoft 365 tenant.
4. Redirect Users to the Local Public Folder
The next step is to redirect the users from their online mailboxes to the public folders, rather than the online ones. This way you do not need to re-configure the client?s Outlook profiles to access the reverted public folders in the on-premises Exchange Server.
For this, you need to run the following Set-OrganizationConfig PowerShell command in your local Exchange Server.
Set-OrganizationConfig -PublicFoldersEnabled Remote


5. Import the Post-Migration Data
Now that the users have been redirected to local public folders, you can import the data. To do so, you can use the Outlook Import File/PST feature. This will complete the roll back of your public folder from Exchange Online to the local Exchange Server.
Note: If you have different identities on-cloud, you can refer to the Microsoft document – Configure Exchange 2013 public folders for a hybrid deployment. This will help you to reconfigure the access to local public folders so that the Exchange Online users can access them.
Conclusion
Migration can be a difficult and complex process if not done using the right tools. To ease the migration process of public folders, you can rely on applications, such as Stellar Converter for EDB to easily export public folders to Microsoft 365. With this application, you can open multiple Exchange Server mailbox and public folder databases with no size limit. You can explore the databases and granularly export the data to PST and other formats, or export directly to Microsoft 365 tenant. The application can also export user mailboxes, archives, shared mailboxes, and disabled mailboxes. You can also use the application to export to another Exchange Server.


