Summary: Accidentally erased a hard drive on macOS Sonoma using Disk Utility? No worries! Read this guide to learn how to unerase hard drive data on macOS Sonoma. Download this free Mac data recovery software to recover lost or deleted files on the latest macOS.


Disk Utility is an essential tool available on the latest macOS and other OS X versions. It helps in verifying and repairing errors on the Mac startup volume and secondary disks. But what if you end up erasing your entire hard drive while fixing errors using Disk Utility?
Sure, you may feel overwhelmed! Don?t Worry. We all make mistakes at some point.
Calm your nerves and focus on retrieving the hard drive data!
Is it possible to unerase Mac hard drive?
Yes, indeed! Read this guide to learn how to unerase a hard drive on macOS Sonoma after Disk Utility? erase operation. Although, if you know how you erased Mac hard drive, recovering it would be a lot easier.
Let?s see what situations may make you erase your Mac hard drive!
How you may have erased the Mac hard drive??
Scenario 1: Accidentally erased external drive with Disk Utility
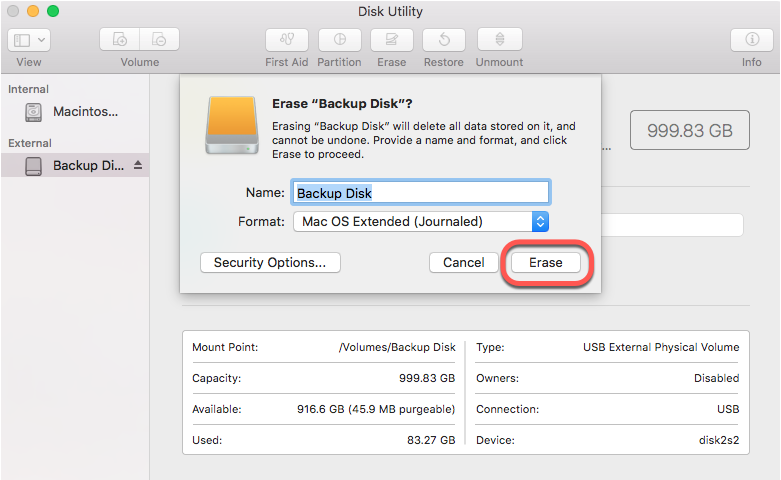
Suppose you have an external hard drive connected to your macOS Sonoma, on which you were facing some formatting and directory structure errors. To fix the errors, you tried to change the drive’s file system but ended up erasing the hard drive.

Scenario 2: Installed macOS afresh/Upgraded to new macOS
- Your Mac system was running slow. To speed up Mac, you wanted to reinstall the macOS. So, you erased the Macintosh hard drive but forgot to take its backup. Now, all the data on the drive is gone.
- Or you wanted to upgrade to a new macOS, and to do so, you erased the macOS startup drive without taking backup, and then installed the latest macOS.
Irrespective of the scenarios, you can unerase Mac hard drive after Disk Utility?s erase operation on Sonoma using some effective DIY methods.
How to Unerase Mac hard drive?
Method 1: Unerase Mac Hard Drive with Time Machine Backup
Several Mac users set Time Machine backup application to take regular backups of the system data. So, whether you erased the Mac hard drive while installing the macOS afresh or upgrading to the latest version, having a Time Machine backup makes it easy for you retrieve lost hard drive data.
Follow these steps to do so:
Step 1. Connect an external storage media drive to your Mac system.
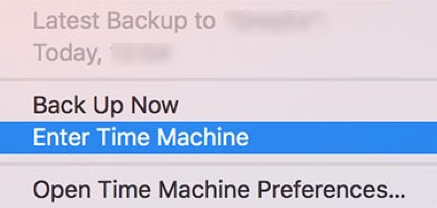
Step 2. Locate the Time Machine icon in the menu bar and select Enter Time Machine.

Step 3. If you can?t find the Time Machine icon in the menu bar, follow the Apple menu > System Preferences > Time Machine > Show Time Machine in the menu bar.
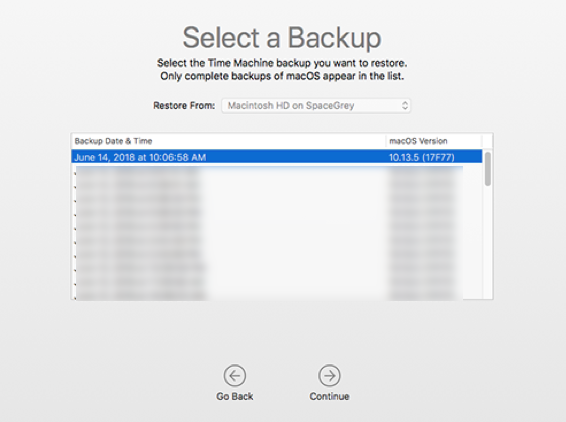
Step 4. Now, find and select the latest backup from the available backup timelines and click ?Continue.?

Step 5. Now, choose the files you want to retrieve and click Restore.

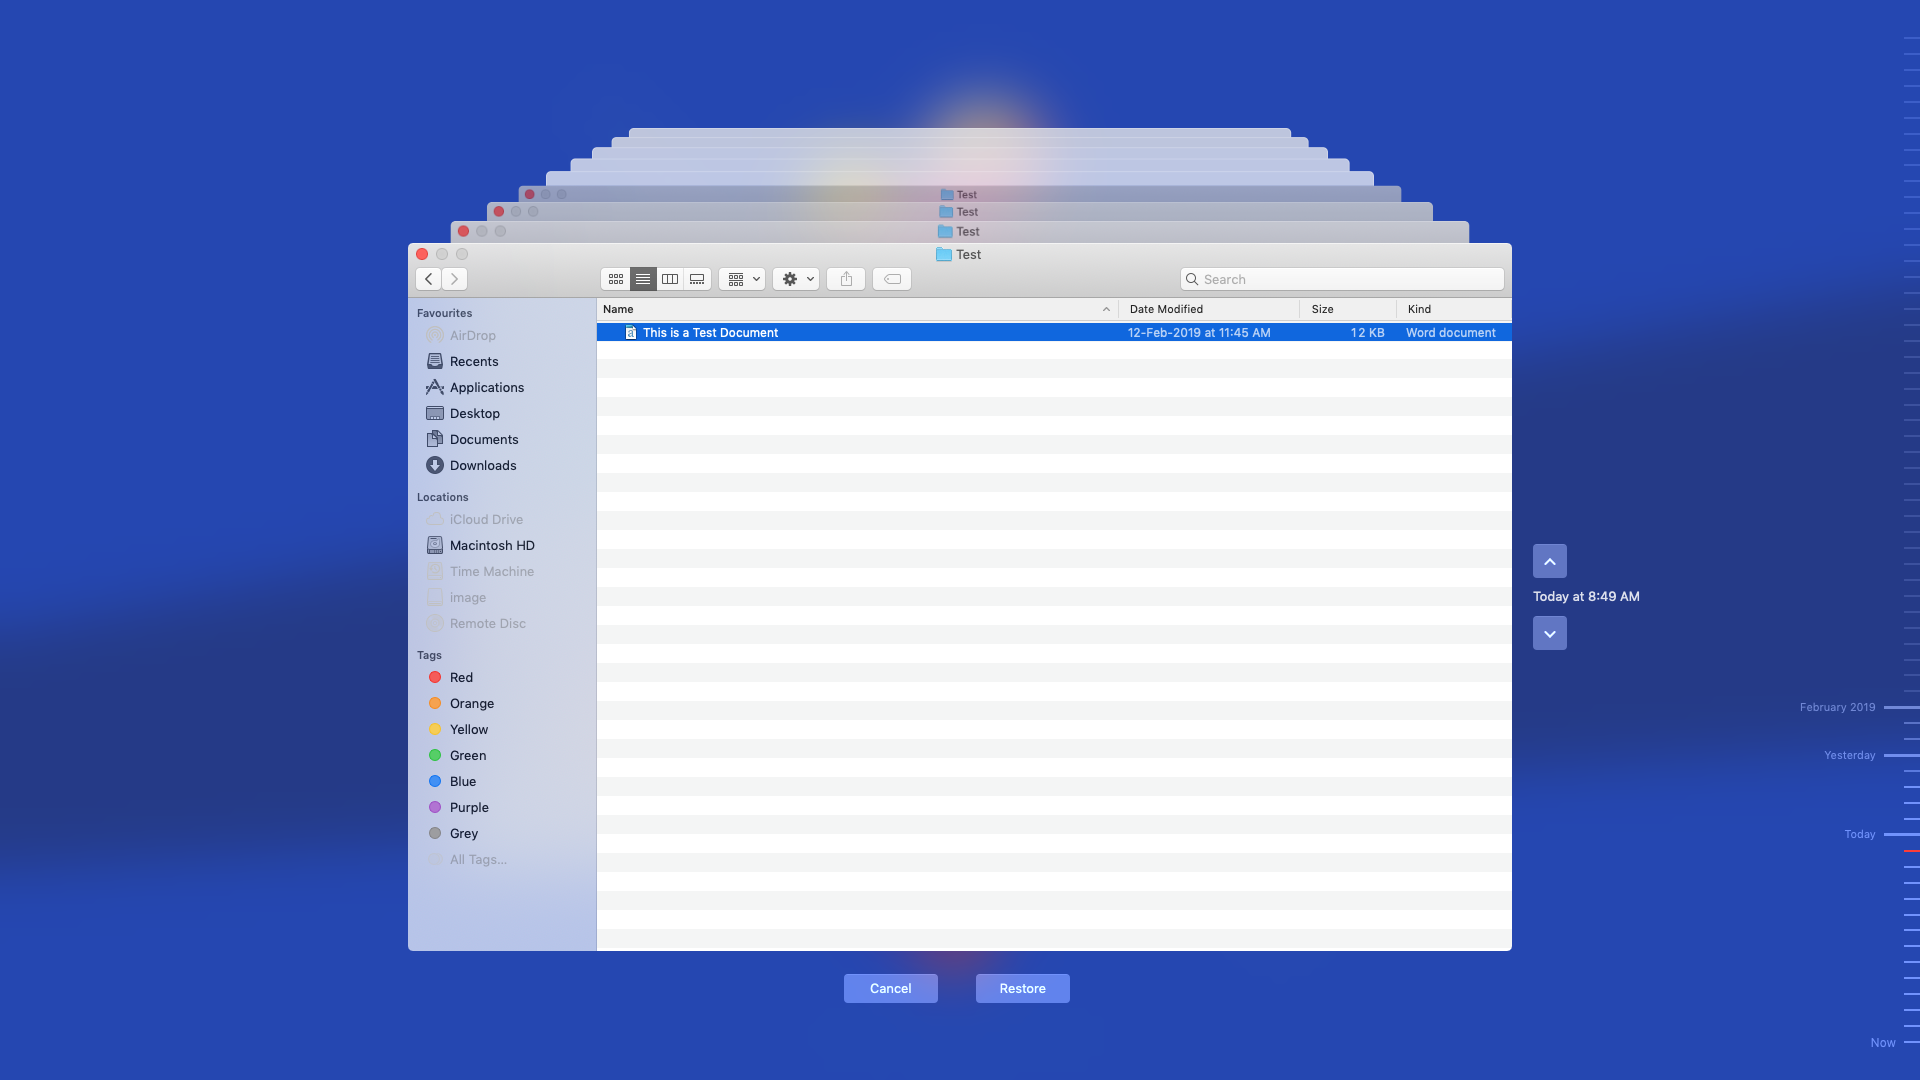
Step 6. Choose the external hard drive to store the restored data.
Method 2: Unerase Hard Drive with Free Data Recovery Software
If you have erased an external hard drive on macOS Sonoma, you may try using a free Mac hard drive recovery software. The disk recovery software can help you recover lost or deleted data, including documents, photos, videos, audio, email & more. The software also supports the recovery of files lost due to Startup disk formatting or drive corruption. You can quickly recover files and folders from Mac or external hard drives with this software. You can follow the given steps to recover files after accidentally erasing the hard drive with disk utility:
a) Download, install, and run Stellar Data Recovery Free Edition on the affected Mac system.


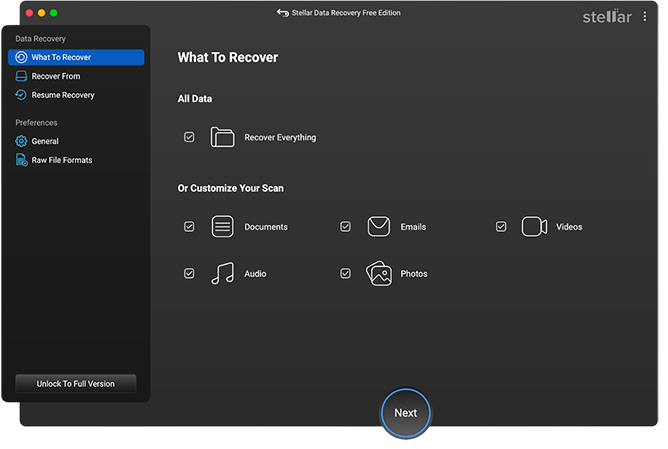
b) Select the type of data you want to retrieve from the ?Select What to Recover? screen, and click Next. (See Image 4)

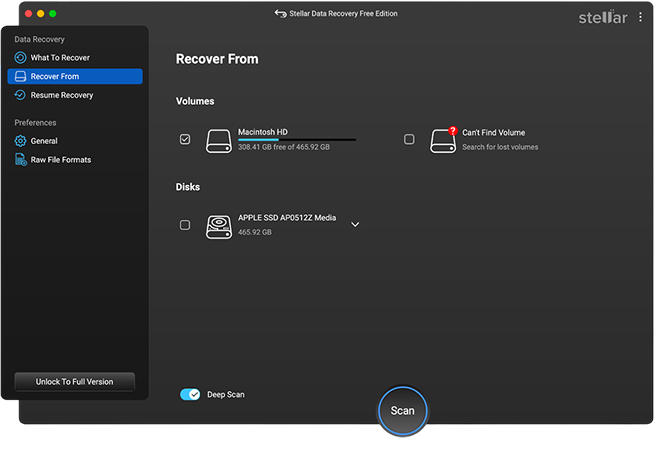
c) Now, select the hard drive from which you want to restore data from the ?Select Location? window, and click ?Scan.? The scanning process will initiate.

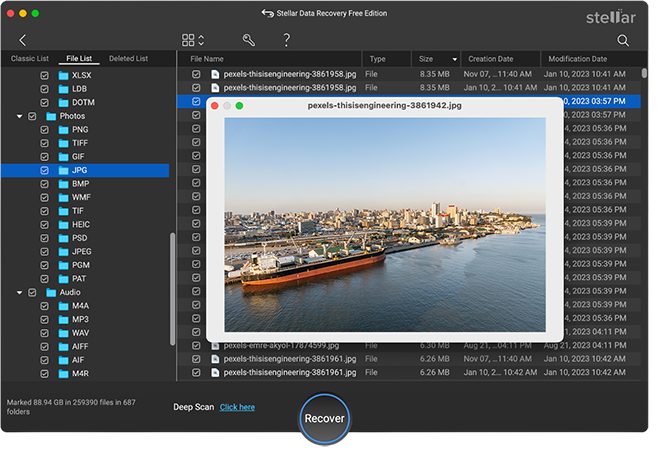
d) Once the scanning process is done, select the files you want to restore. You may also preview it before retrieving it.
e) Once satisfied with the results, click Recover.

f) Now, you?re all set to recover your files.
Important Note:The free edition lets you recover data up to 1 GB of lost or deleted data on Mac devices, free of cost. If you want to recover unlimited data, we recommend using Stellar Data Recovery Professional for Mac.The Pro version also enables you to create a bootable media recovery drive to recover data from crashed or non-booting Mac.
Wrapping Up
There could be different circumstances under which you may have used Disk Utility to erase Mac hard drive. Fortunately, you can unerase Mac hard drive using the effective methods shared in this post. If you have Time Machine backup, you may use it to recover or unerase Macintosh HD. However, if you have run out of backup or erased an external hard drive on macOS Sonoma, go with the highly recommended software, i.e., Stellar Data Recovery Free Edition.
The software provides support for data recovery on Apple?s Fusion drive, Hybrid disks, Time Machine, SSD, and more.


