
Contents
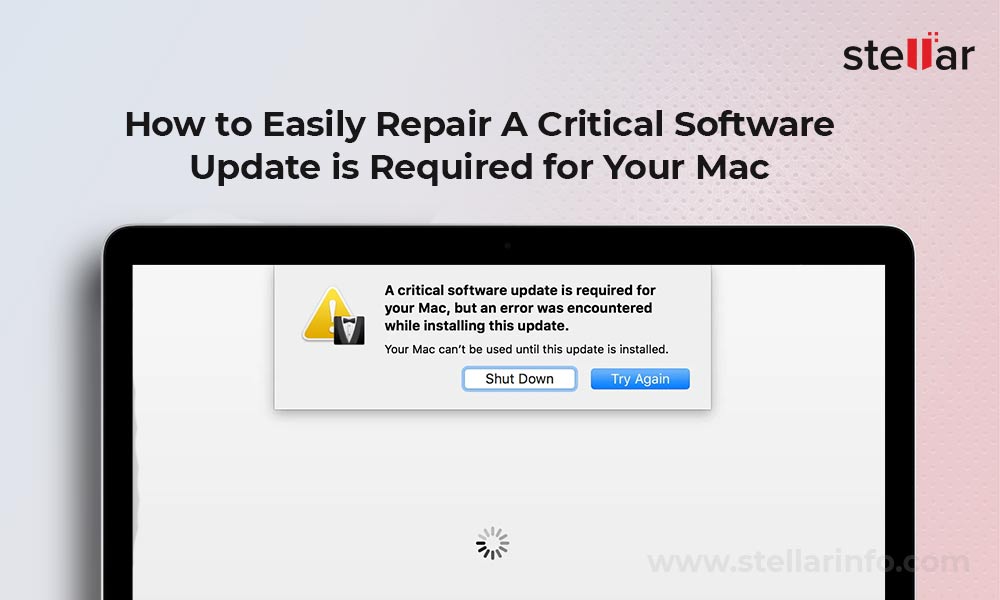
If you begin to see the error message “A critical software update is required for your Mac,” it means that you have run into trouble installing the update. You will also have two variants to fix the issue: to Shut Down your Mac or Try Again to accomplish the update.
However, selecting any of the options, the error will appear again, preventing you from using your Mac. If you are attempting to accomplish the update by clicking the Try Again button, the problem tends to remain and will return after the computer is restarted.
Why does “Error A Critical Software Update Is Required for Your Mac” Appears?
You should be aware of two possible causes for this error:
- macOS needs to install a new version that it considers an important update. This may be a security update or a bug fix. Without first installing the update, you won’t be able to continue using your Mac for whatever reason.
- macOS is unable to connect to the internet to download the update—and there are a number of potential causes for this—the system is unable to install the update.
How to Fix the “A Critical Software Update is Required for Your Mac” Error?
Below we have compiled several fixes to get rid of the message saying “A Critical Software Update is Required for Your Mac.”
I. Switch to Another Internet Connection
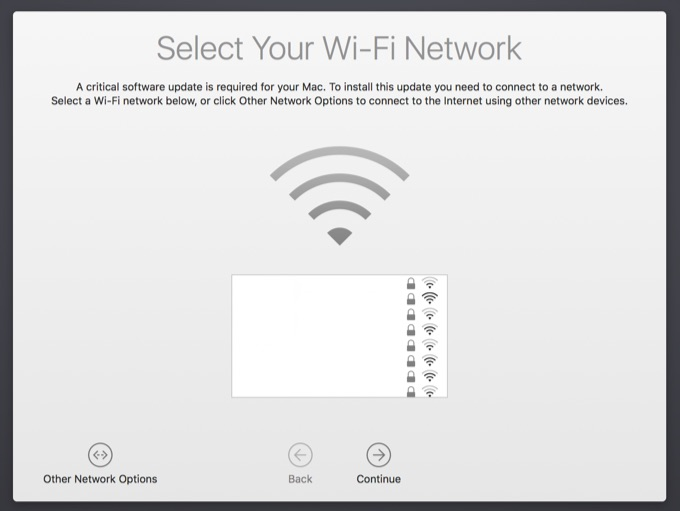
You can try connecting to the internet via another Wi-Fi network. Simply the needed network from the list, enter the password, and click Continue. If you have a wired connection, or there is no way to connect at all at the moment, click the “Other Network Options” button and select the option you need.

II. Unplug Peripherals
Furthermore, peripheral devices such as USB drives, monitors, SSD or HDD, etc., may prevent macOS from booting the additional OS software. If you’re using a variety of external devices with your Mac and suddenly receive the message “A critical software update is required for your Mac” on Monterey. If this is the case, try to unplug them and restart your Mac.
III. Renew DHCP in Safe Mode
If the DHCP is the reason for the problem, the connection issue can be fixed by simply renewing it. To do that, you will need to enter the Safe mode first.
Safe Mode can be used to fix “Your Mac requires a critical software update” Safe Mode prevents the launch of third-party software. It clears caches and examines and repairs the startup disk.
How to Boot Safe Mode on Intel-based Macs
- Turn on your Mac. If it is already turned on, then restart it.
- Press and hold the Shift key while turning on your Mac.
- The Apple logo should appear on the screen.
- When the login window appears, release the Shift key and log in with your account.
- You may need to sign in twice if FileVault encryption is enabled.
How to Boot Safe Mode on Apple Silicon
- Press and hold the Power button until you see a menu with startup options.
- Select your boot drive.
- Press and hold the Shift key, and the Continue option will change to Continue in Safe Mode.
- Click Continue in Safe Mode.
- Release the Shift key.
To accomplish renewing DHCP, you will need to carry out the following steps:
- Go to the Apple menu.
- Click on System Preferences from the menu.
- Choose the Network option.
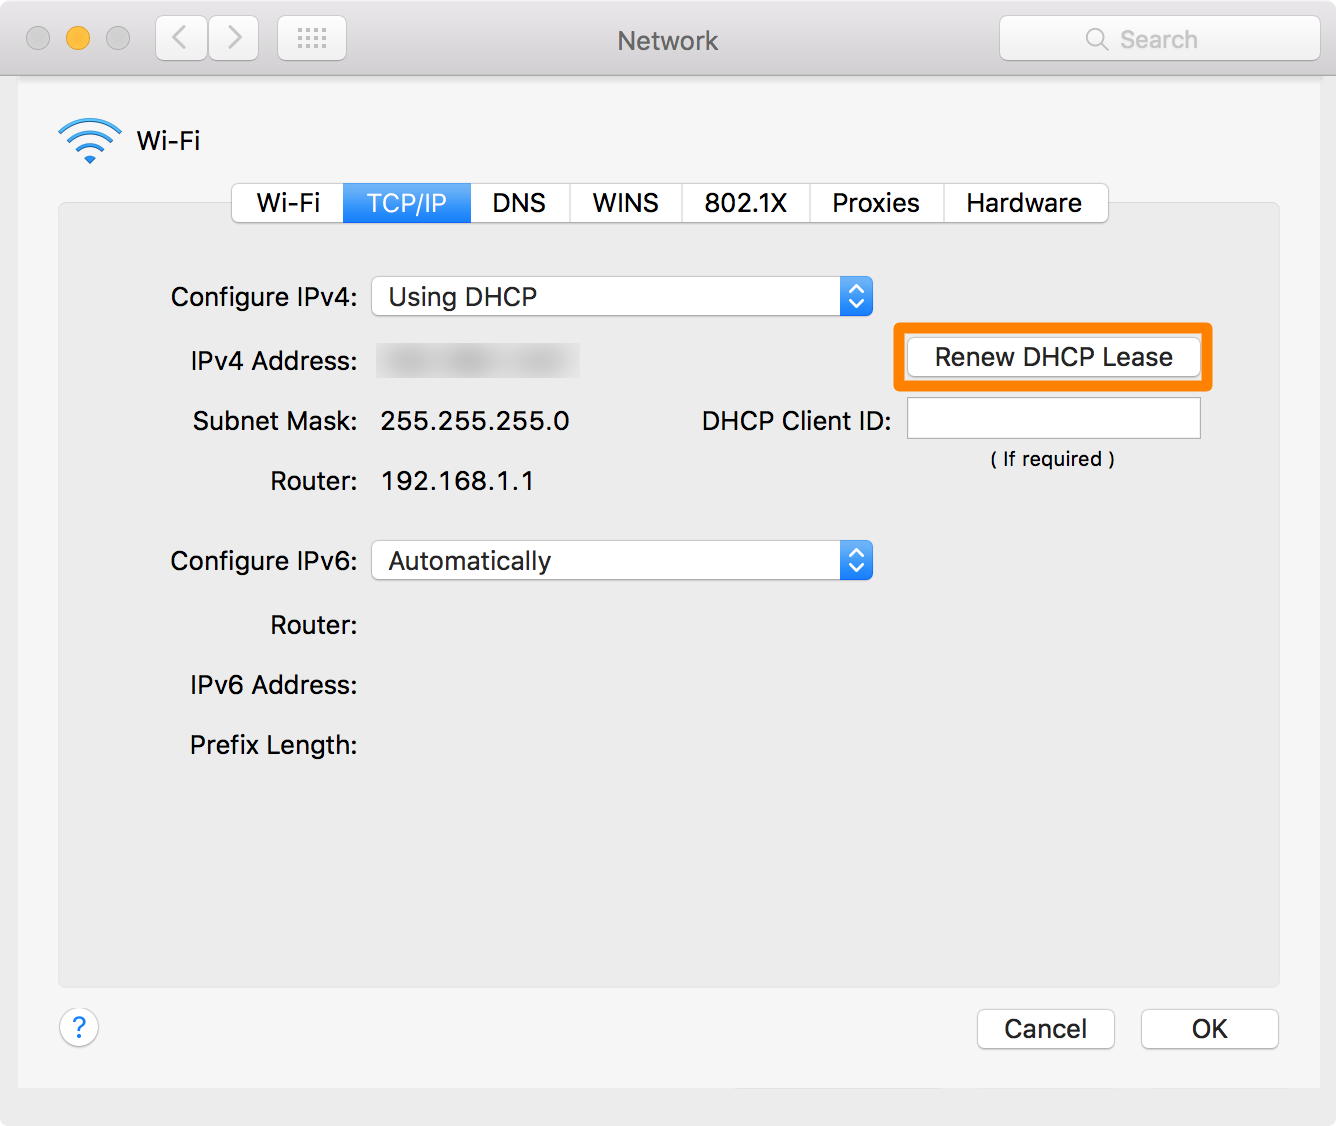
- Select your WiFi network from the list > click the Advanced button > navigate to the TCP/IP section, and click the Renew DHCP Lease option.

Following that, you are free to restart your Mac and continue with the update if prompted.
IV. Reset the SMC
By resetting the SMC (System Management Controller), which restores the default settings related to low-level functions like the battery and keyboard backlighting. Some users have been able to fix the error message “A critical software update is required for your Mac.”
Note to users who own M1 Macs: You can safely skip this section as there is no way to reset the SMC on Apple Silicone Macs. The M1 processor now handles everything that the SMC was previously responsible for, so its name has been changed to reflect this change.
It is always recommended that you reset SMC whenever you experience a problem related to the hardware. In the extremely unlikely event that your system’s SMC is in an error state, this may affect your Mac’s performance, including the issue of “A Critical Software Update is Required for your Mac.” That is why it is possible that resetting the SMC will help fix the problem.
To reset the SMC on Macs equipped with a T2 chip, do the following:
- Restart your Mac
- After pressing and holding the Power button for approximately ten seconds, you can let go of it.
- Before you press the Power button to turn the device back on, please wait a few more seconds.
Please follow these instructions if you are working on a desktop Mac:
- First, ensure your Mac is turned off, then unplug its power cord.
- Press and hold the Power for approximately 15 seconds.
- After releasing the button, you should plug it into the power source.
- Please wait 5 seconds before turning on your Mac by pressing the Power button.
V. Reset the NVRAM/ PRAM
Information for M1 Macs users: No key combination or button needs to be pressed to reset the NVRAM. When you turn on your M1 Mac, the NVRAM will inspect it to determine whether it needs to be reset automatically. If you want the computer to check the NVRAM, you need to power it off completely and then wait a few seconds before turning it back on again.
Resetting the NVRAM on your Mac will cause the settings to be updated. As a direct consequence of this, you should no longer be bothered by the message “A Critical Software Update is Required for your Mac.” When all of the settings have been up to date, the power consumption normally associated with the USB ports will no longer be a problem.
To reset the NVRAM on an Intel-based Mac, follow these steps:
- Restart your Mac.
- While the computer is booting up, press and hold the following four keys simultaneously: Option, Command, P, and R.
After the second sound of the startup process or after the Apple logo has appeared and disappeared for the second time, you are free to let go of the keys.
VI. Reinstall macOS
Reinstalling the most recent version of macOS can also be helpful in getting rid of the issue. Please use Time Machine to back up your data if you haven’t done it before.
Here’s how to use your Mac’s Time Machine to make backups:
- Connect the Time Capsule or external hard drive.
- Go to Apple Menu > System Preferences> General > Time Machine > Add Backup Disk to start Time Machine.
- Click the Use Disk button after choosing the backup disk you want to use.
Done. The most recent backup of your system is now in Time Machine.
In case you need to restore your files from Time Machine, you need to do the following:
1. Enter Recovery Mode.
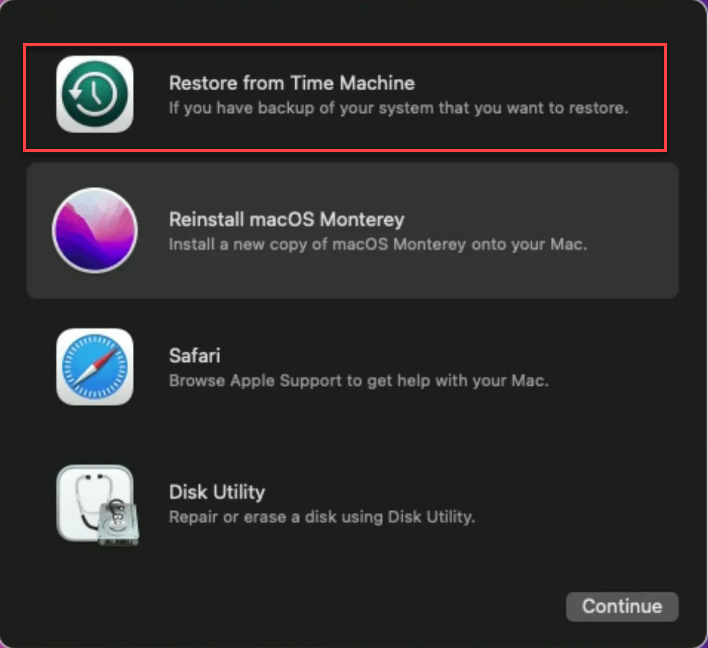
2. When you are in Recovery Mode, select Options > Continue.
3. Choose Restore from the Time Machine Backup option.

4. Follow the onscreen instructions to restore the needed macOS version.
And let’s talk about how to update the macOS.
To update macOS to the latest version:
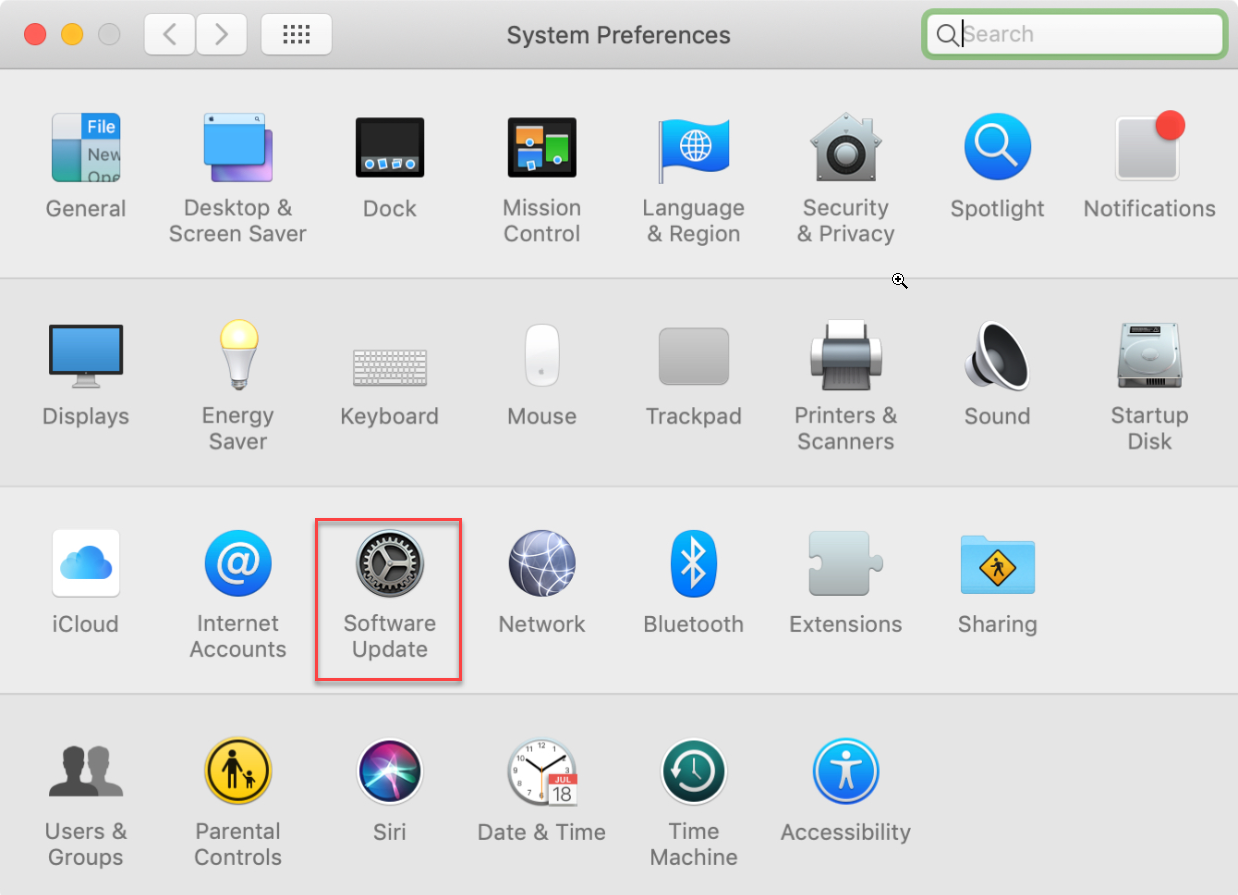
1. Select System Preferences from the Apple menu in the upper right corner of your screen.
2. Choose Software Update.

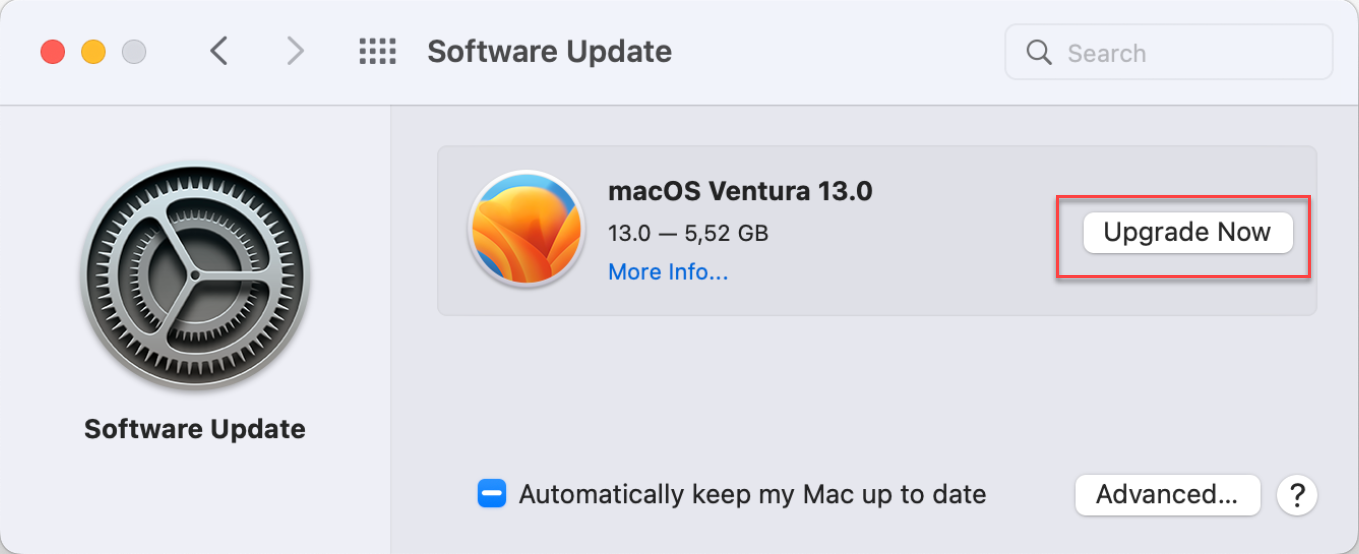
3. Click Upgrade Now.

What to Do in case of Lost Data
In case you lost your data after upgrading to the latest software, Stellar Data Recovery Professional is the most effective method for retrieving lost or deleted files on a Mac. It is possible to recover files even if they have been formatted, deleted, hidden, corrupted, or broken. It supports internal and external drives, SD cards, USBs, and other storage devices. It is possible to quickly and effectively repair and recover the data regardless of the state in which it is currently stored.
The following steps need to be taken to recover your files:
1. Download and install Stellar Data Recovery Professional for Mac.


2. On the screen “Select What To Recover,” choose to Recover Everything or select the needed file types.


3. When you have chosen the file types to recover, click the Next button.
4. Select the disk where to do a search for the lost data and click on Scan.


5. After the scan, perform a preview of the files and choose the required ones.


6. Click the Recover button.
7. Click Save after you have selected an external hard drive to store the recoverable files on.
Wrapping Up
Now you know how to fix the “A Critical Software Update is Required for your Mac” issue. In case any of the methods work in your situation, you may contact a professional who will make sure the problem is fixed.
Read more: