Summary: “No mountable file systems” message appeared on your Mac’s screen? No worries! In this article, we will show you how to fix this issue. Once you follow the steps provided, you will mount the DMG file. But before proceeding, back up all your personal information. However, if some of your files went missing, try using specific software like Stellar Data Recovery to restore your data.

![[Fixed] “No Mountable File Systems” on Mac](https://www.stellarinfo.com/public/frontEnd/images/product/free-download-mac-blue-button.png)
Contents
Although macOS is one of the most reliable operating systems, it?s not free from random glitches. No matter which macOS you run, Catalina, El Capitan, or Big Sur ? you may unexpectedly face a ?no mountable file systems? issue when opening a DMG file. And as a result, your Mac system may be unable to process your other requests. The overall situation might be confusing. But we know how to remedy it.
This ?No mountable file systems? guide will cover symptoms, causes, and solutions to fix the error.
Signs of the “No Mountable File Systems” Issue
- The system is terminated automatically after just a few minutes of work.
- Slow and sluggish Mac performance.
- System files are getting corrupted.
- Installed programs crash or freeze frequently.
- Such error messages as ?Unable to find. dmg file?, ?File not found,?, or ?Access is denied? keep popping up when trying to perform some actions.
What Causes the ?No Mountable File Systems? Problem?
There are numerous reasons why the ?no mountable file systems? issue occurs Any inconsistencies relating to the macOS file system can corrupt the data, thus making it completely inaccessible. Here are some of the likely reasons:
- Power failure: the system suddenly stops working, some of the files cannot load and stop responding.
- Malware threat: although macOS is considered a virus-free operating system, such a malicious attack on the file system may cause system failures.
- Corrupted header file: the header file contains all the information about the file you are about to open. Therefore, if there is a problem, the requested file does not respond, and you get the ?no mountable file systems? error message.
- Bad sectors on the hard drive: when there is an issue with the boot sector, the macOS won?t load. As a result, you cannot access stored data files.
- Accidental Mac file removal: a user may delete the essential file system or accidentally start the system formatting (the so-called human factor).
- Problems with program installations: installing unreliable applications from unknown sources.
Steps to Fix “No Mountable File Systems”
Let?s troubleshoot this error by trying the four methods described below.
1. Restart Your Mac
Restarting your Mac is one of the most recommended and working methods to fix troubles with your Mac. Before proceeding to the following steps, restart your computer and open the file again.
2. Download the DMG File Again
The most common reason for a corrupted DMG file is an incorrect file download. You should re-download the file without using any download assistant plug-ins if this is the case. If the file you?ve just downloaded is still inaccessible, try downloading it again using a different browser.
Also, you can download the needed DMG file using Terminal. Follow these steps:
- Copy the DMG download address (right-click DMG in the Finder and click Get Info > More Info > Where from).
- Open Terminal.
- Type curl -O url and hit the Enter key to run the command.
Note: You need to replace ?url? with the exact DMG download URL.


3. Check the File System Format
Usually, macOS Sierra (10.12) and previous macOS versions do not support APFS (new Apple File System). To check if this is the case on your Mac, do the following:
- Open Terminal by clicking on the Spotlight (little magnifying glass at the upper right corner of your screen) > search for Terminal > press Enter to open the Terminal app.
- Type diskutil info / and hit Enter.

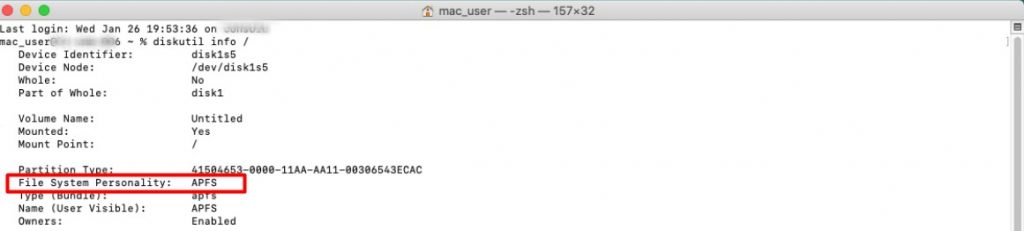
Tip: We recommend getting the latest macOS, if you?re using a file format other than APFS.
4. Mount the DMG File via Terminal
If none of the above helps and you still get an error, you can manually mount the DMG file. Do this:
1. Open Terminal and type hdiutil attach -verbose. Add a space and drag the dmg file from Finder onto the Terminal window. Then press Enter.


2. If the needed DMG file appears on the desktop or Finder, it means that it is mounted successfully, and you can proceed with opening it.
Bottom Line
Now you know what?s behind the ?no mountable file systems? error. We hope that the fixes provided in this guide will help you mount and re-open any DMG files on your Mac with no effort.
FAQs
How to Avoid the ?No Mountable File Systems? Error on Mac?
- Keep your macOS and all the apps up-to-date.
- Avoid installing apps from unauthorized developers and sketchy websites.
- Restart your Mac occasionally.
- Clean your computer from viruses and unneeded files.
Tip: In addition to the steps mentioned above, backup your macOS once in a while.
How to Recover Corrupted Files?
Now that you?ve fixed the ?no mountable file systems? issue on your Mac, you?ll probably need to recover lost data after deleting the corrupted files. We recommend using specific software like Stellar Data Recovery for Mac to retrieve the missing items. It?s a handy tool that will help you get your files back no matter when you?ve lost them. Follow the steps below to recover lost data:
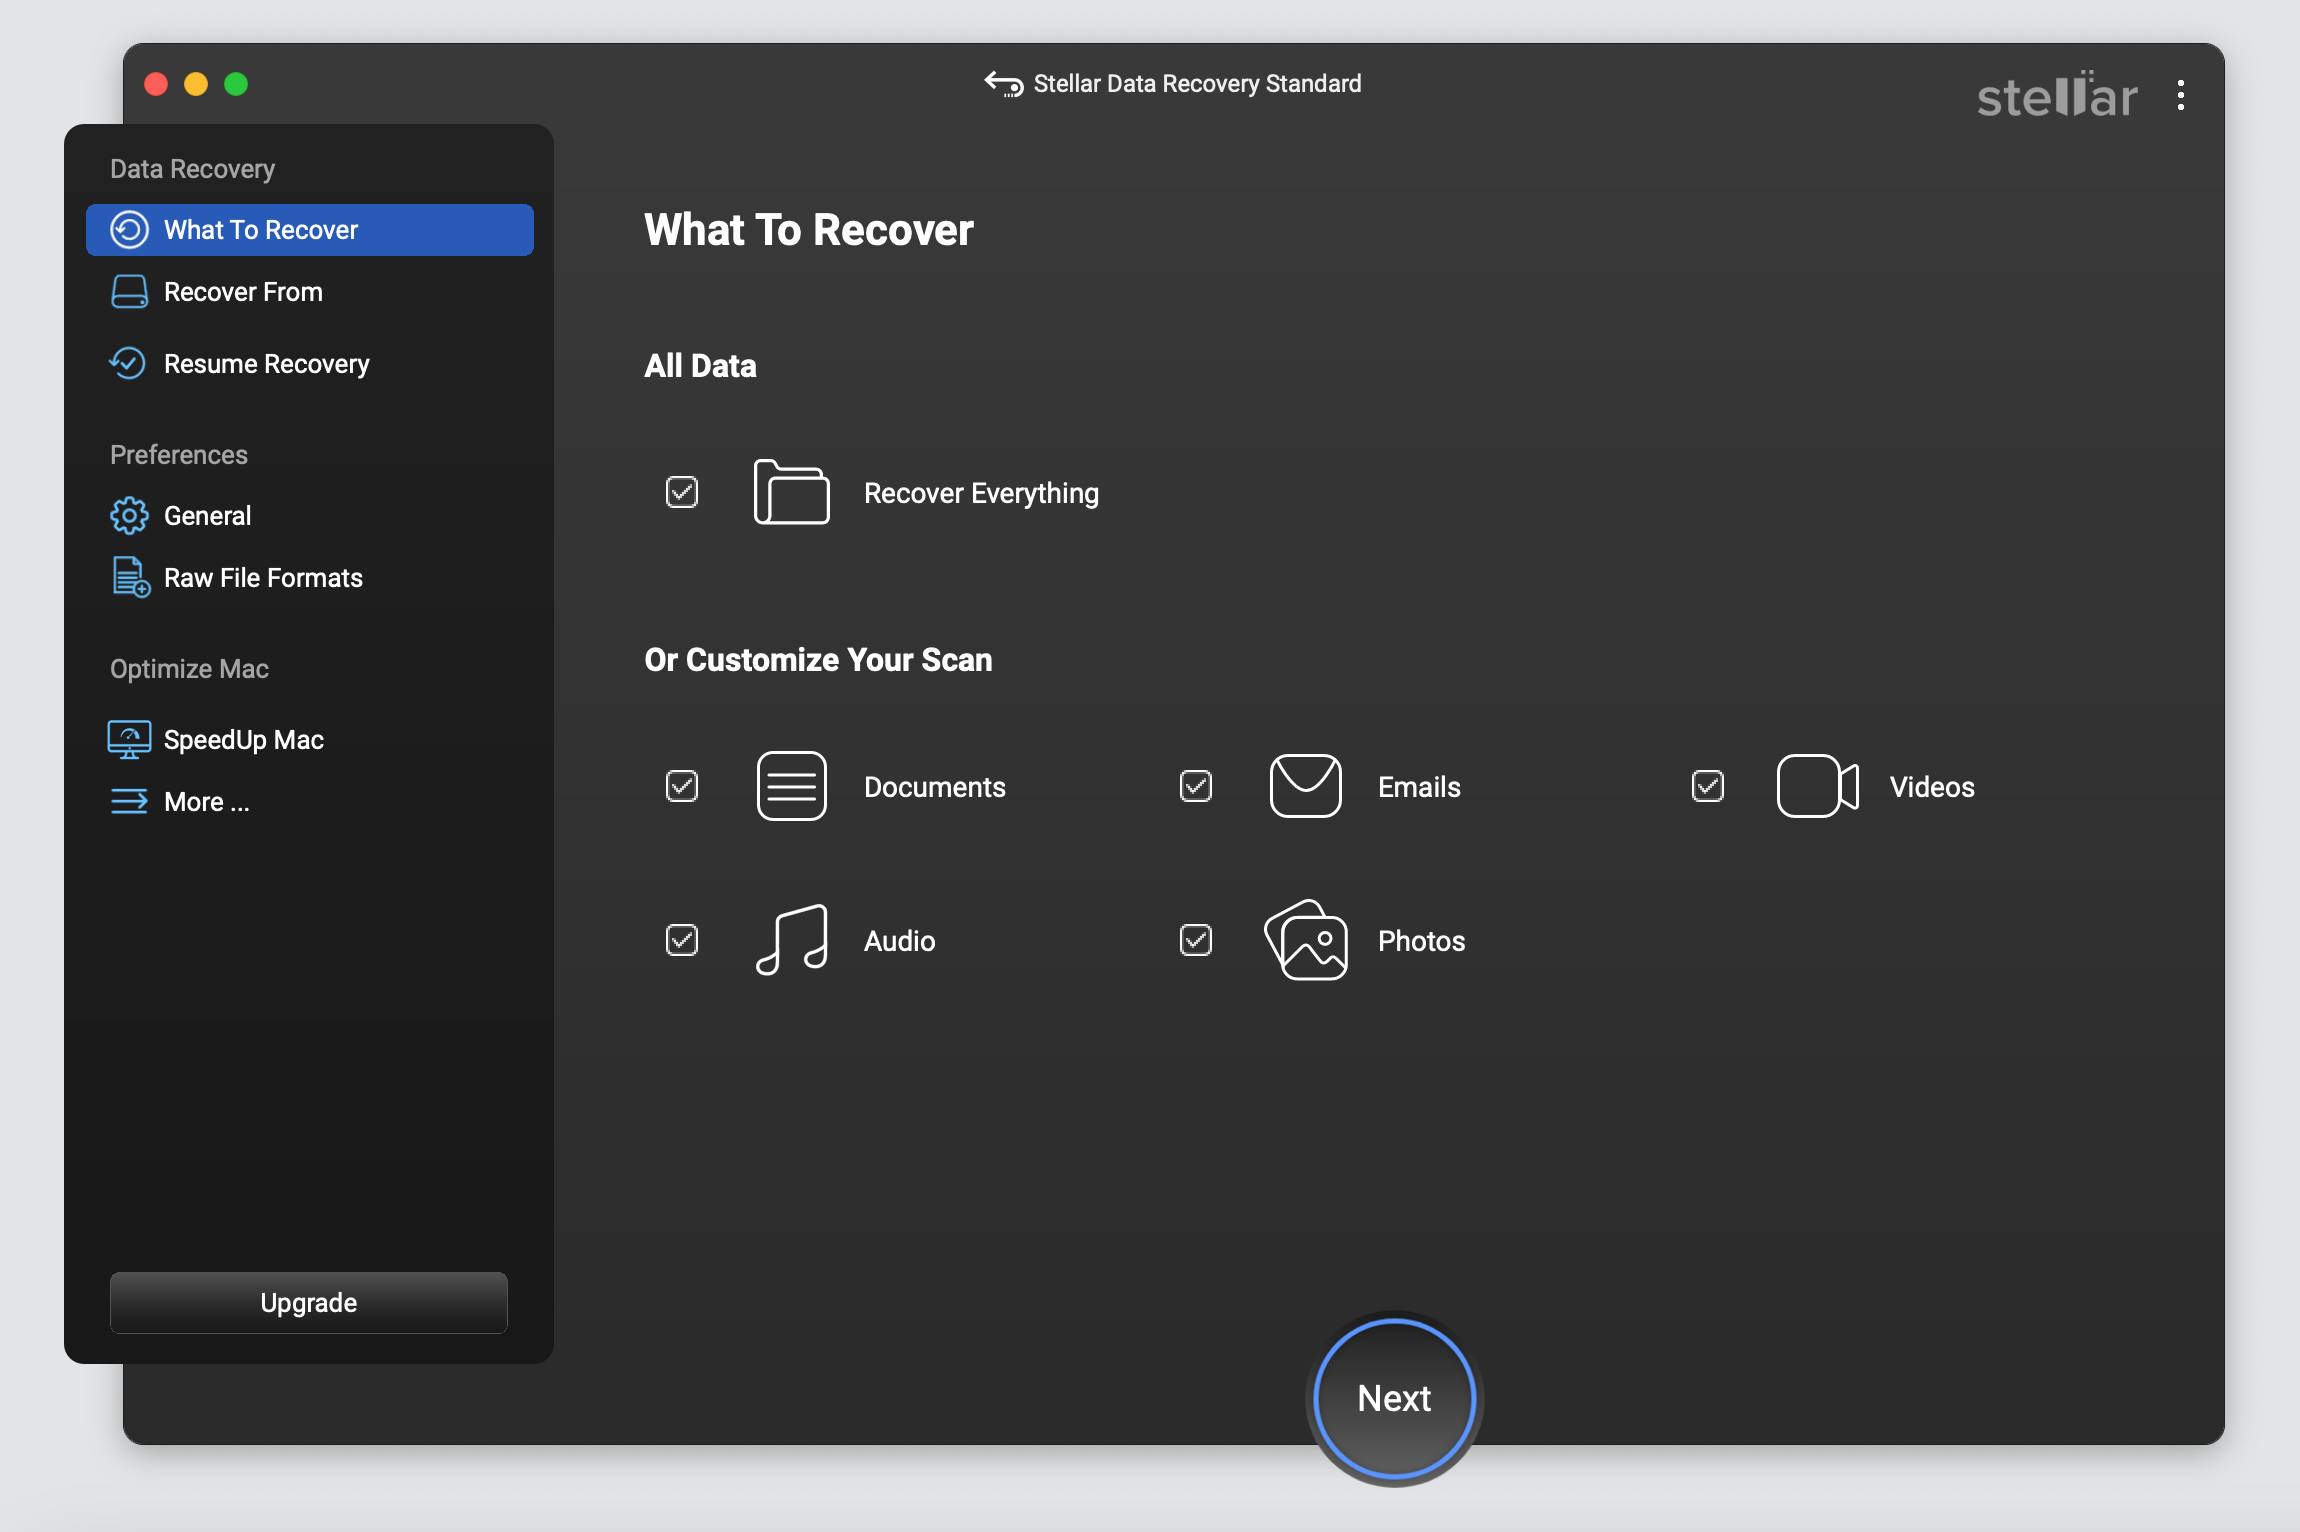
1. Download and install Stellar Data Recovery for Mac software.


2. After installing the software, the app will ask you to select the data you want to recover (photos, videos, documents, etc.). You can choose specific or all suggested file types.

3. Then, you?ll need to decide from which volume you want to recover the selected files.

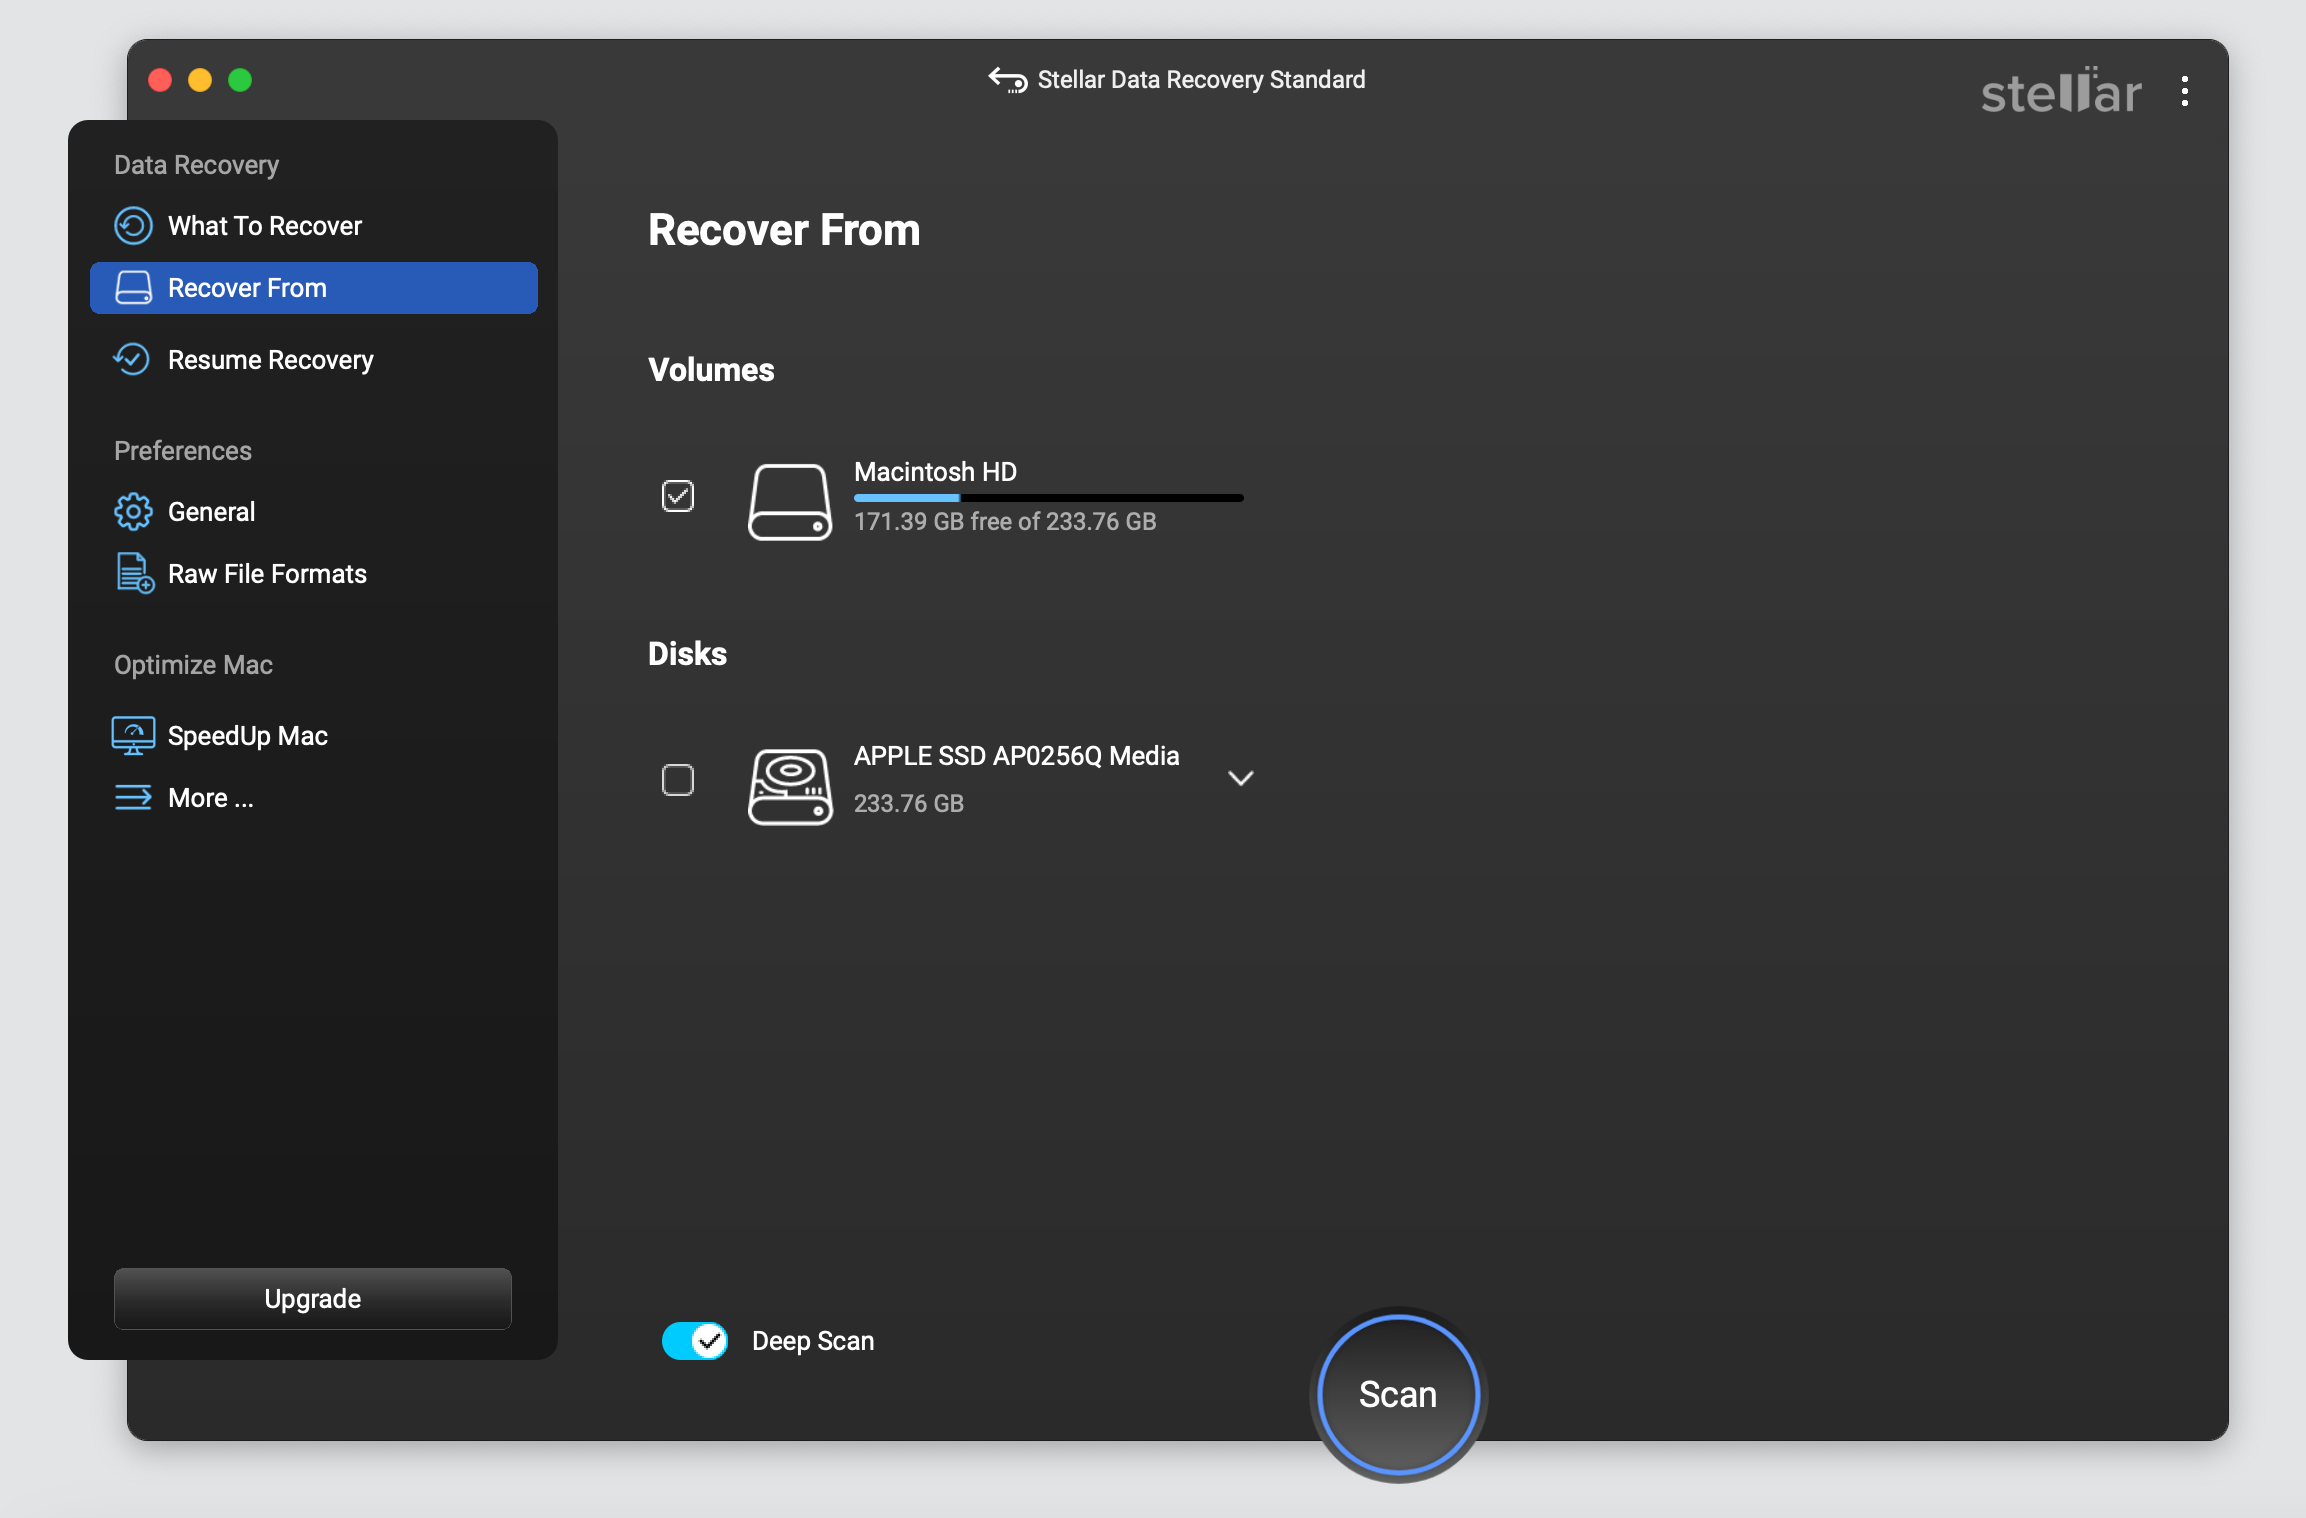
4. After the deep scan, you will see the files Stellar Data Recovery can retrieve.

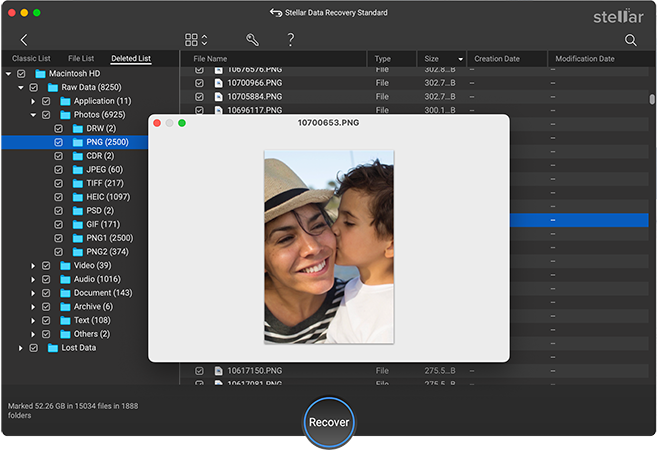
5. Tick which files to retrieve, choose the destination folder on your Mac, and start the recovery process.


