


How to Recover Deleted Files from Empty Mac Trash (Step-by-Step Guide)
July 23, 2026| 10 min read


Our content follows trusted Editorial Standards - accurate & unbiased.
Summary: To update your Mac to its latest version, use the Software Update option in System Settings (or System Preferences for old systems). You can update your apps from the App Store, use Terminal for advanced control or just reinstall macOS through Recovery if something goes wrong.
Free Download 100% SecureAlthough usual OS updates in Macs are pretty simple to do, upgrading everything in your Mac can be tricky. New macOS versions, app updates, and even those security updates. But keeping your Mac up to date is absolutely crucial as security patches, bug fixes, and new features get deployed to your devices through such updates. In this comprehensive article, we will walk you through the recommended methods for updating a Mac system, from updating via System Settings to advanced ways like using Terminal or Recovery Mode. We’ll also cover updating apps and what you have to do if something goes wrong during the process.
The easy and fast way to update macOS is simply updating through System Settings (System Preferences for macOS Monterey and earlier). Let jump in and find out how to do it:
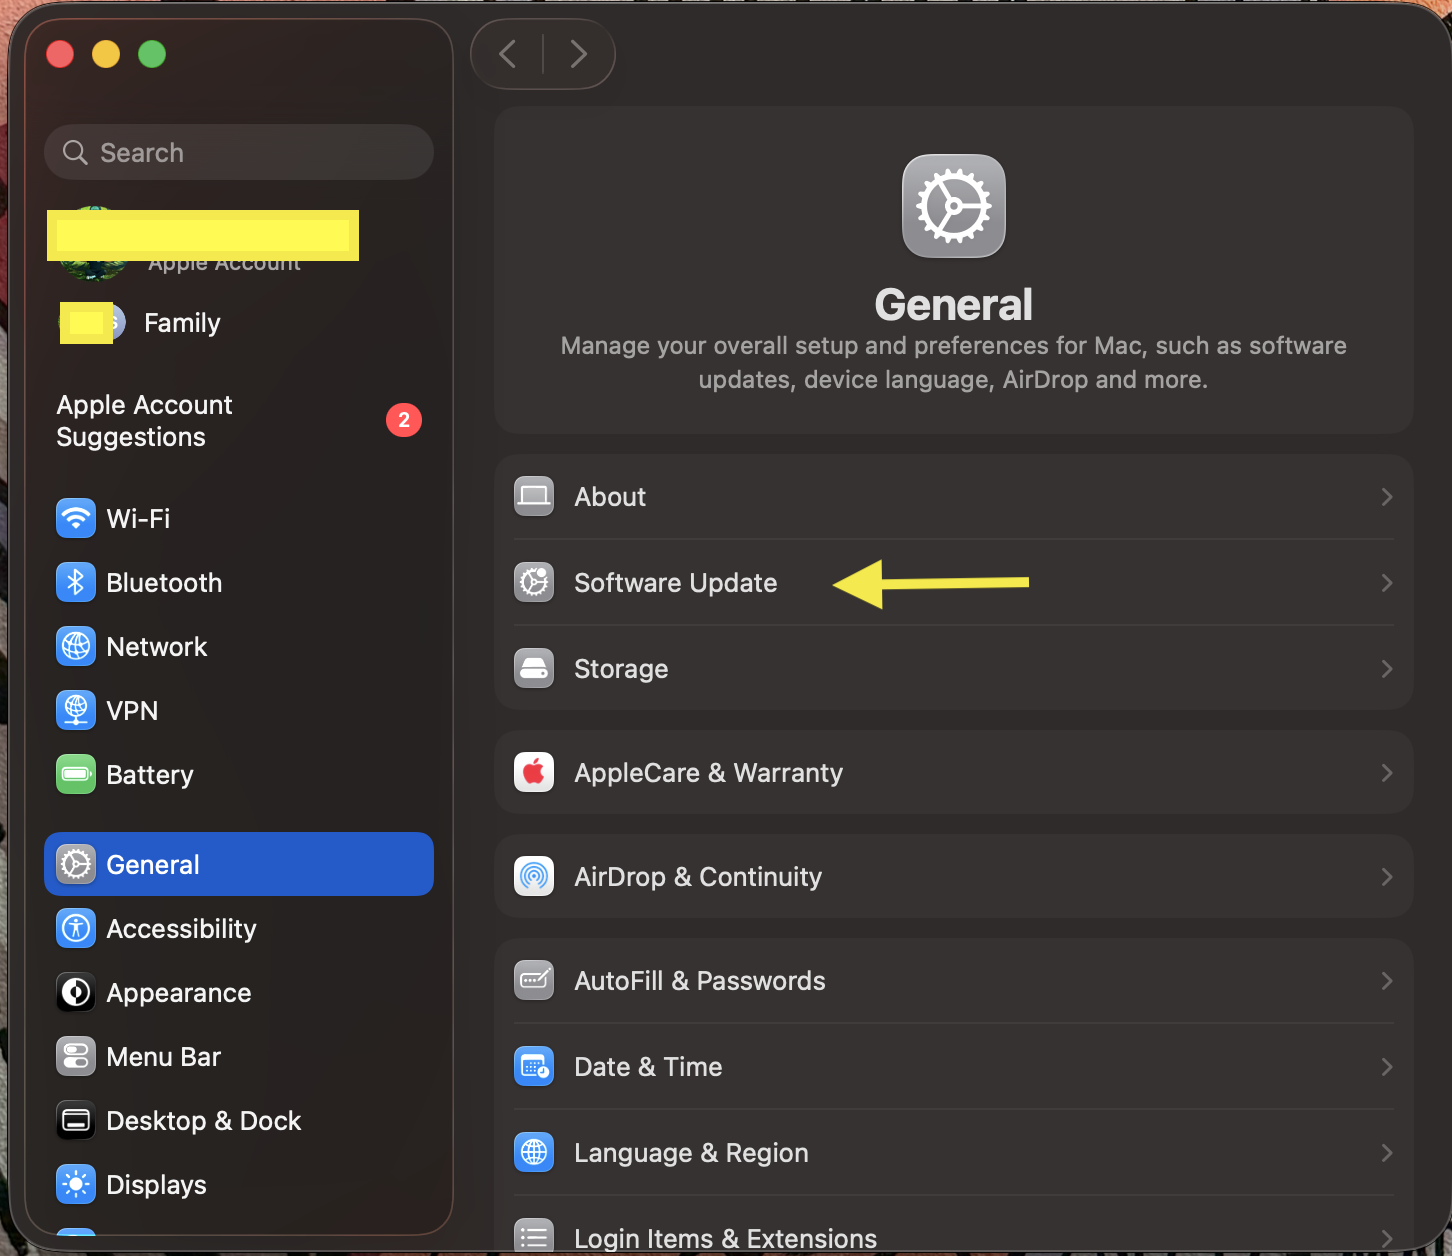
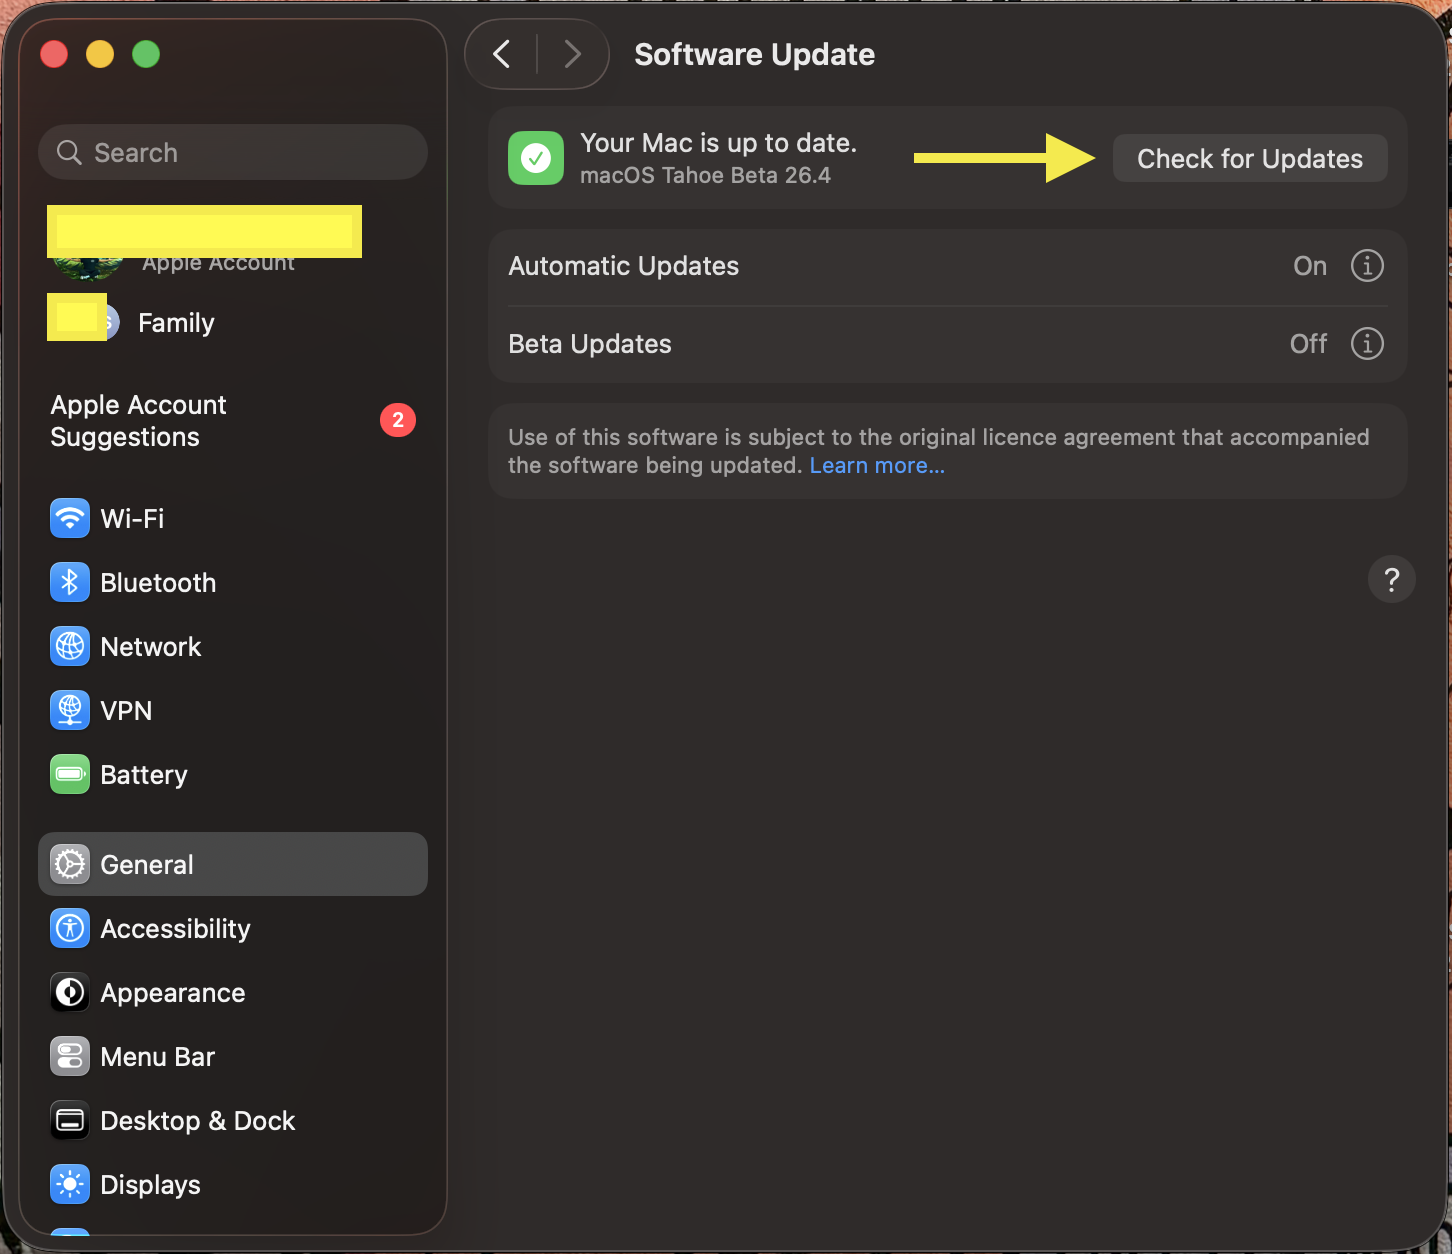
Using Software Update basically ensures you get Apple’s latest fixes and features safely. If it straight-away says “Your Mac is up to date” then you know that you have the latest software Apple has released for your Mac model.
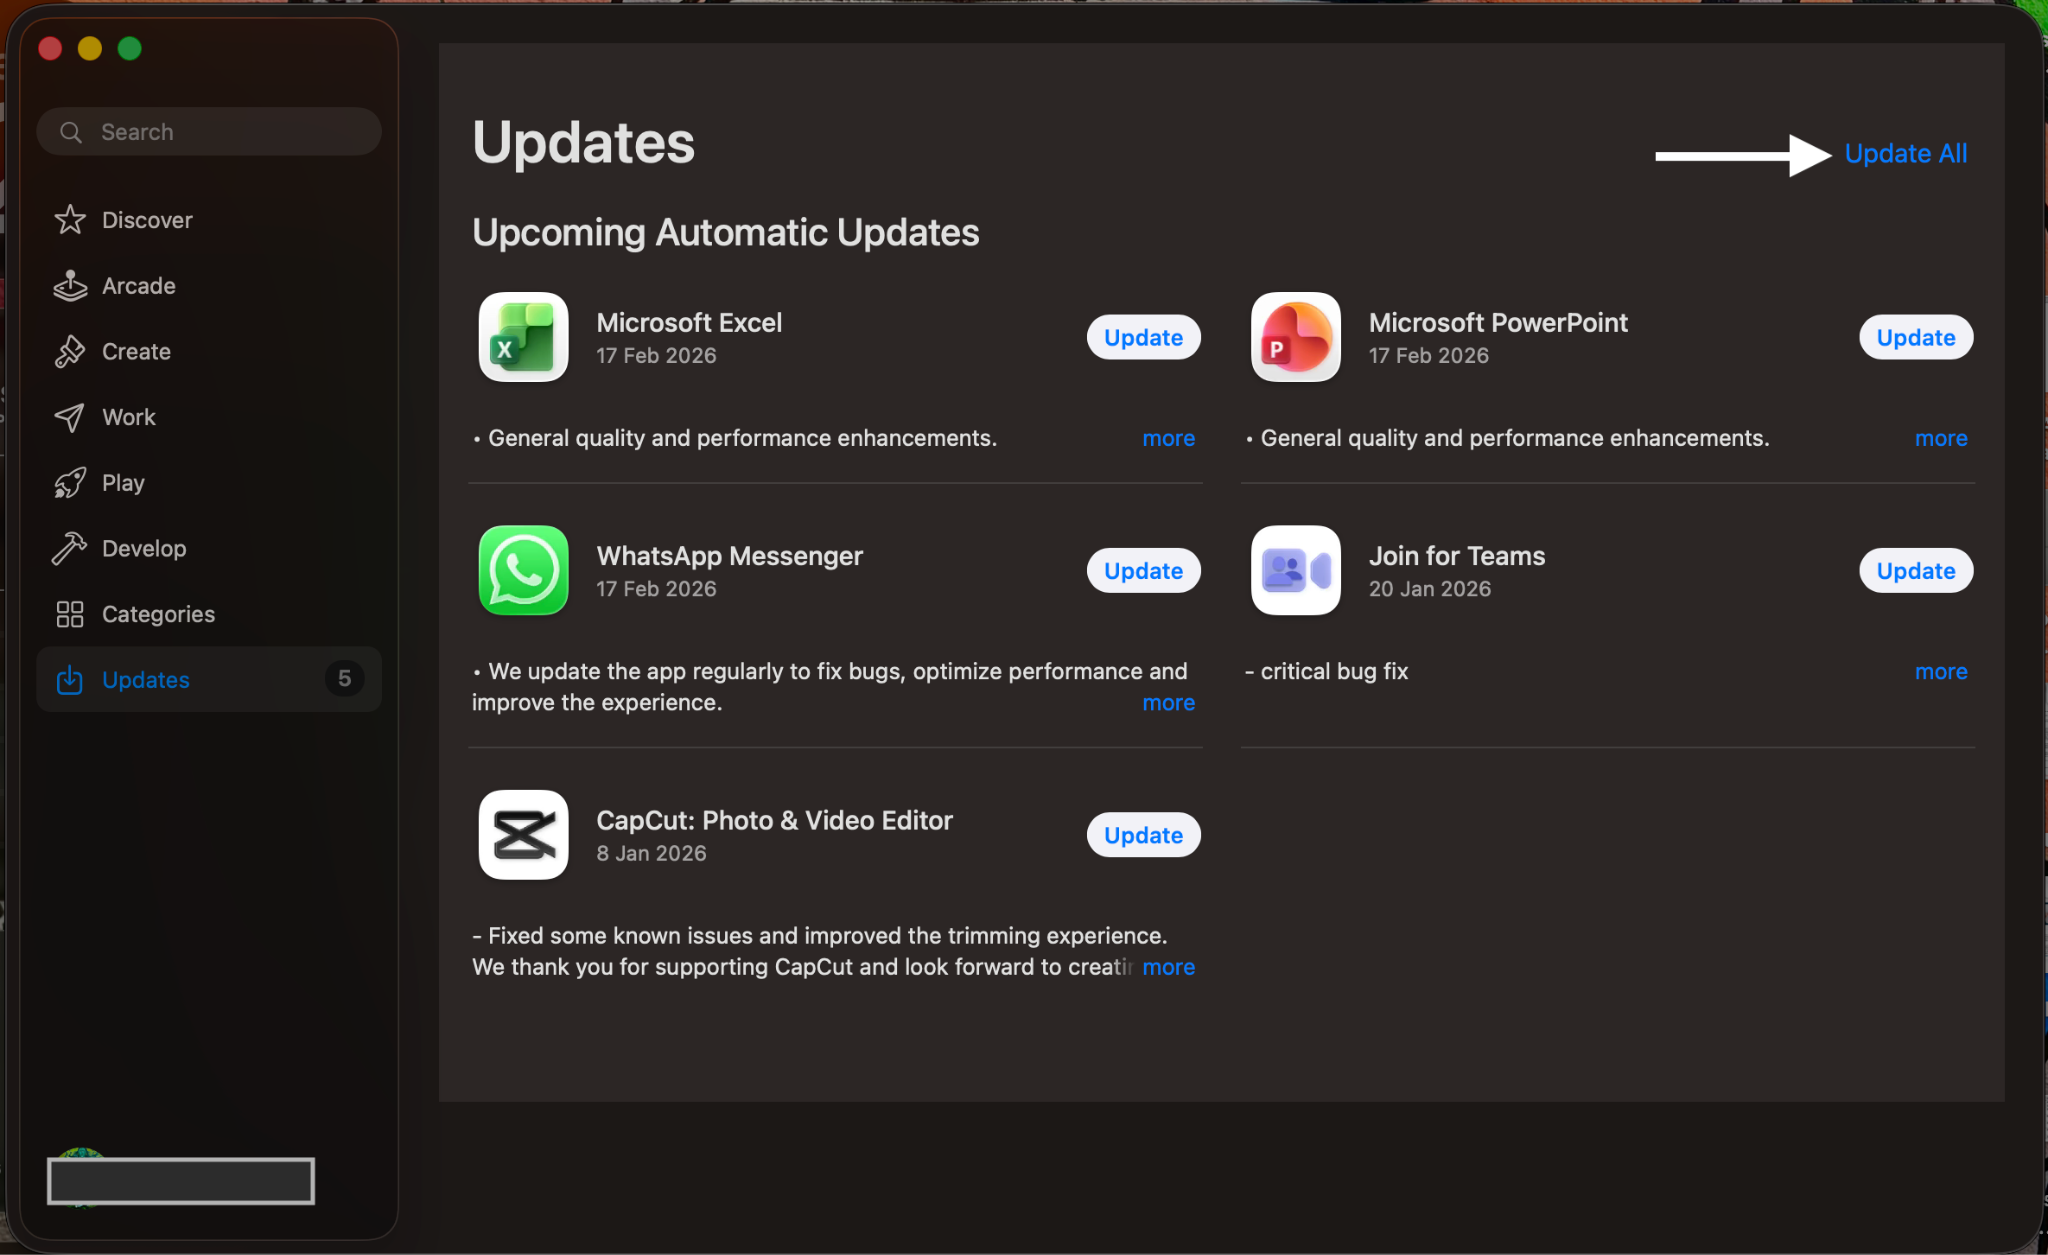
Many of your Mac’s apps, including those Apple apps like GarageBand or third-party apps, are updated through the Mac’s App Store. Here’s how to update apps:


Furthermore, for old macOS versions like High Sierra or earlier, you might find the macOS installers in the App Store itself.

When you are done downloading this macOS installer from the App Store, just simply follow the steps on your screen and finish that installation. This option is particularly helpful to you when you are using an older Mac and you prefer to install a specific macOS version rather than going ahead with a latest release.
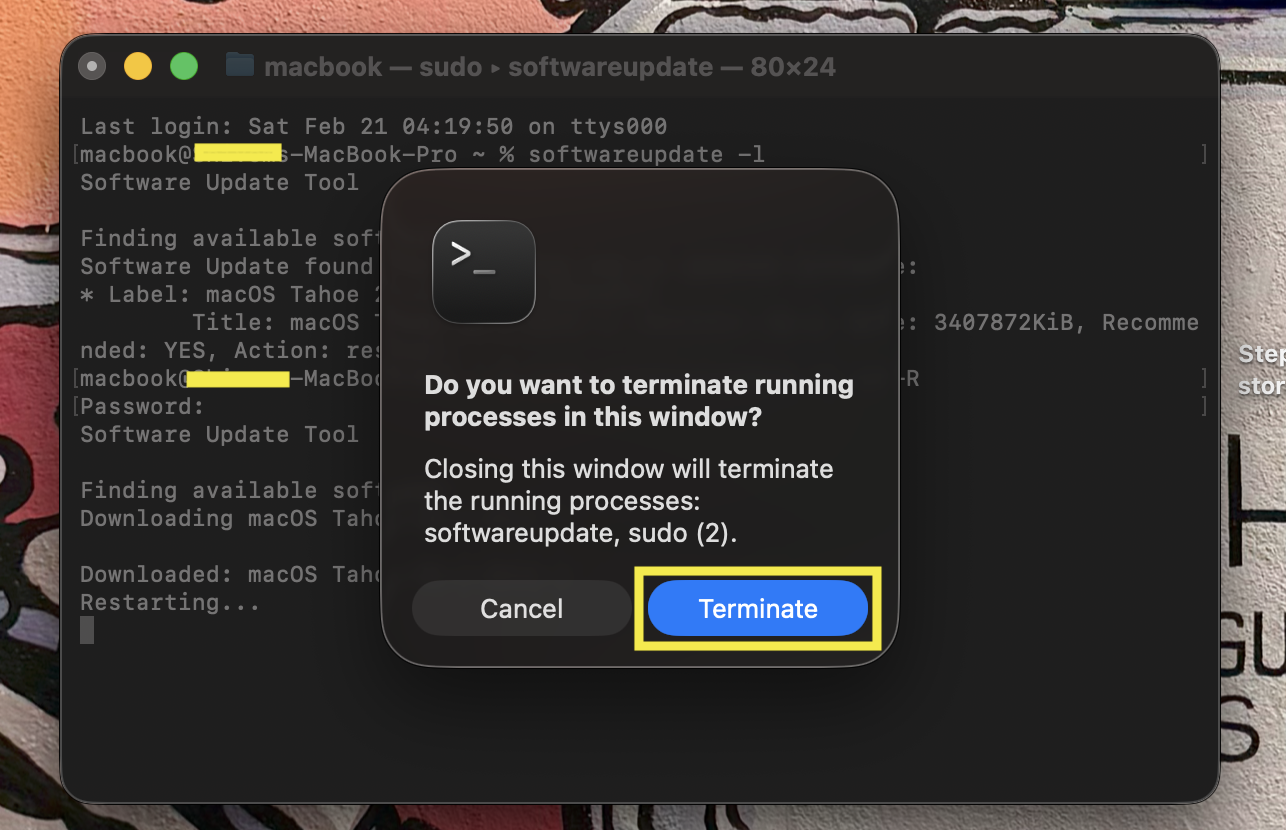
For some power users, macOS has got a command-line tool called softwareupdate built-in. This Terminal command for Mac is of use actually when you have to manage Macs remotely, automate a patch deployment, troubleshoot those GUI update failures, and control macOS version installations in your professional or enterprise environments, to be precise. Let’s dig in and explore those steps:

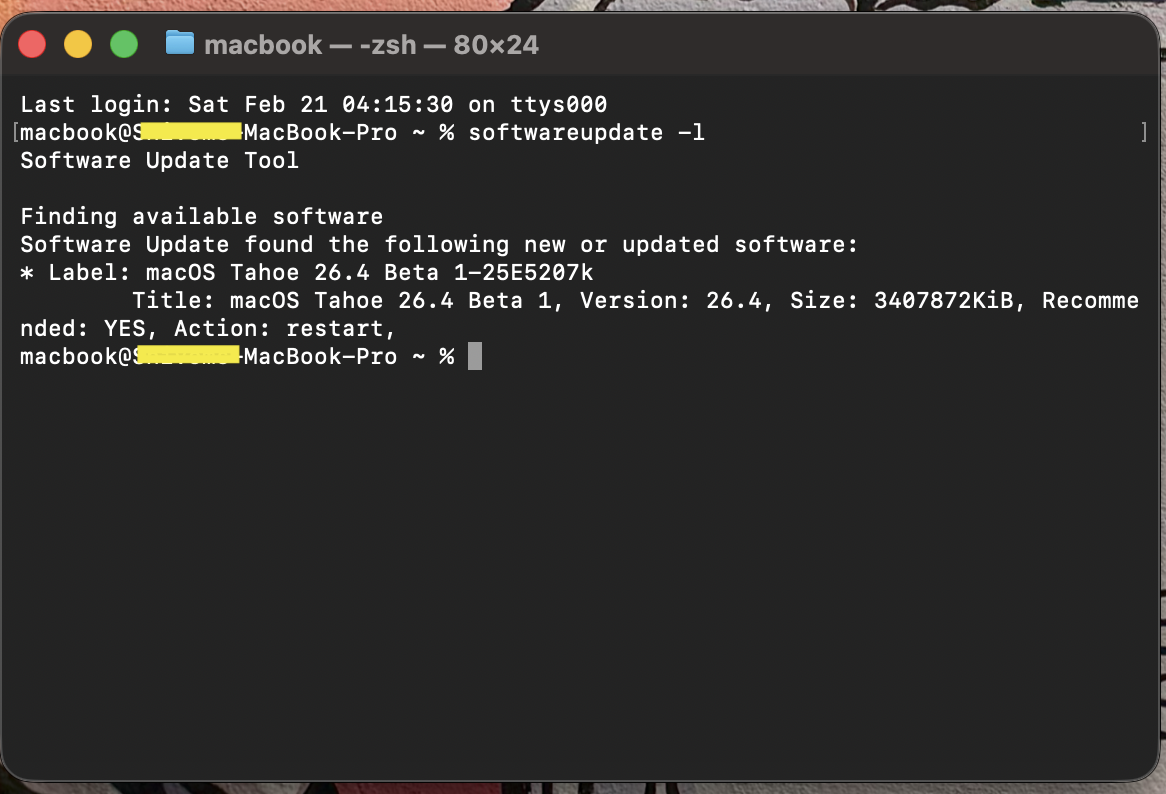
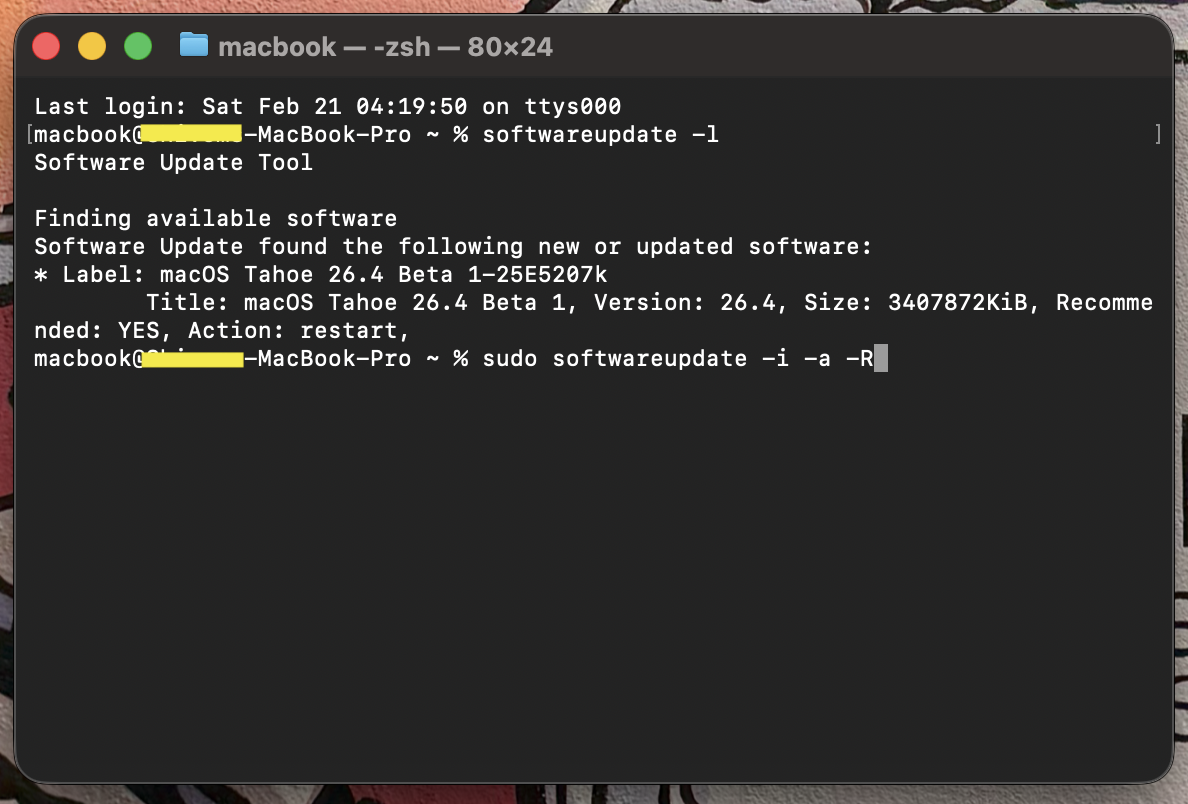
Using softwareupdate can be much faster than the App Store interface. This command-line method is great for scripts or fixing cases where the normal update pane isn’t working.
Note: Terminal commands are only recommended for tech-savvy users and IT professionals as they can put your Mac at risk.
If a standard update won’t install at all or if your Mac isn’t booting properly… don’t worry. There’s another way around it. You can use macOS Recovery to reinstall macOS. Recovery is a special startup mode built into your Mac. Here’s how:
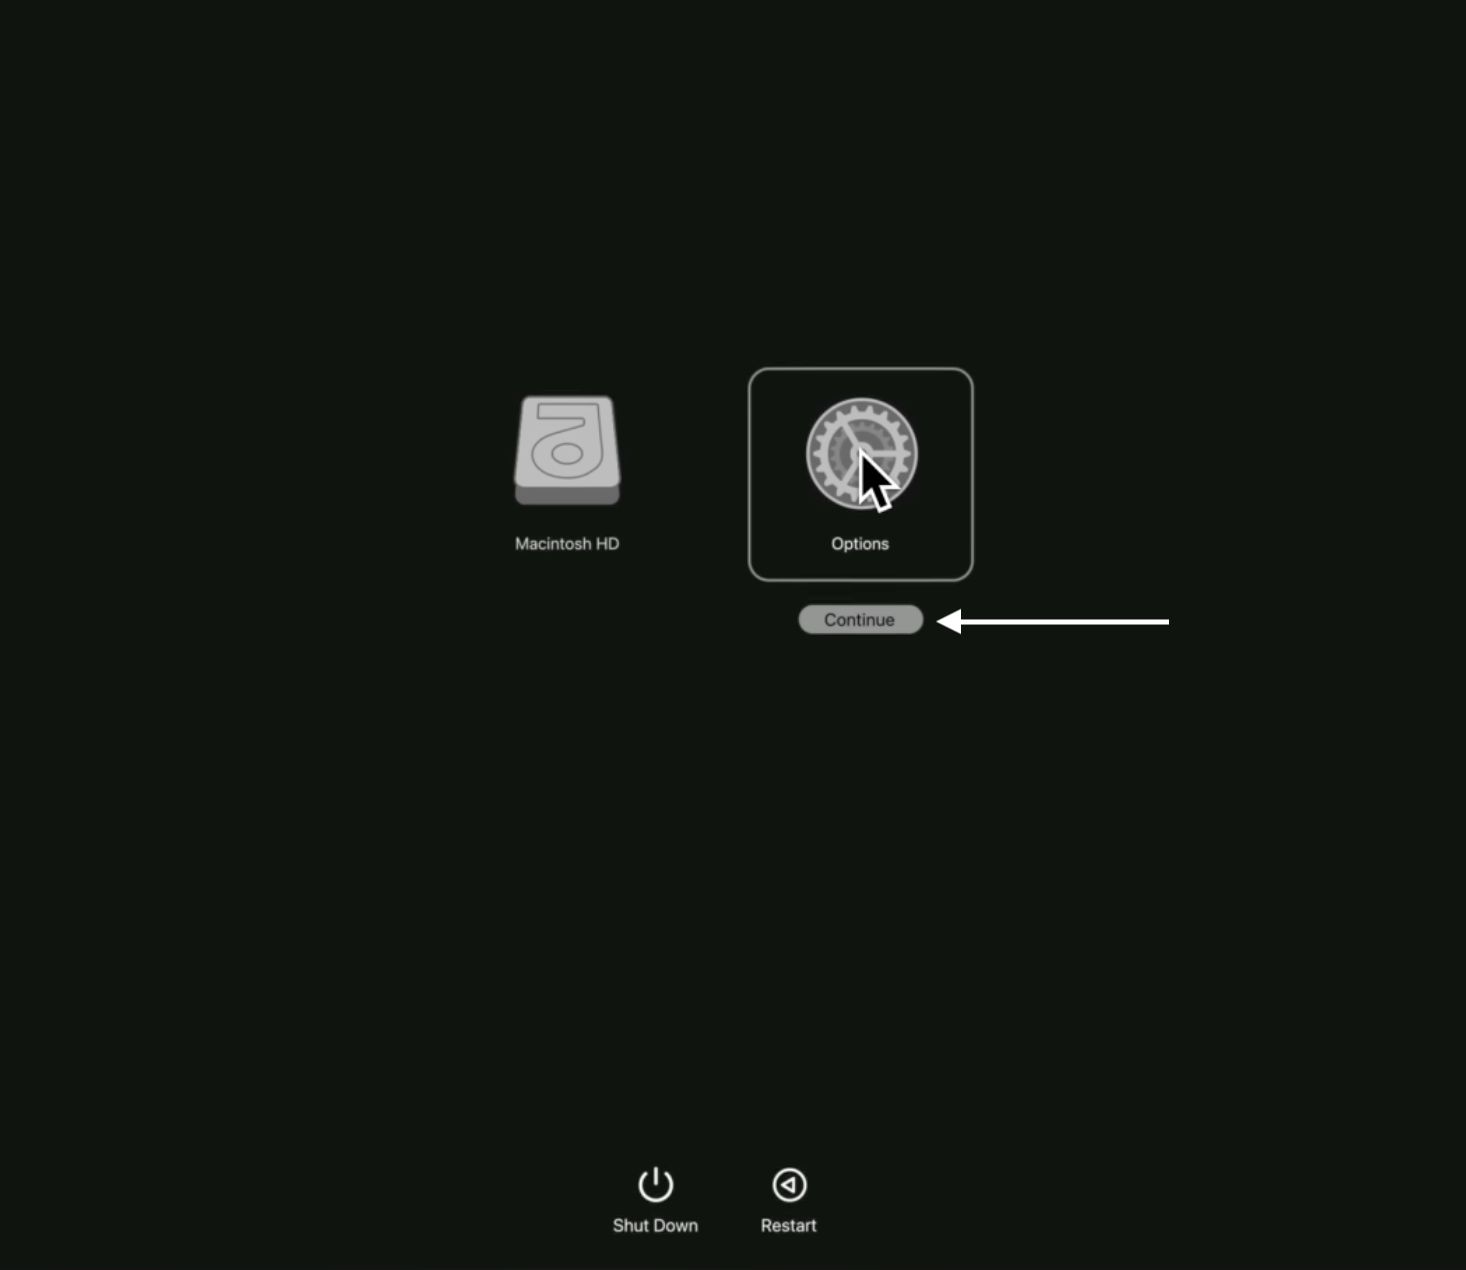
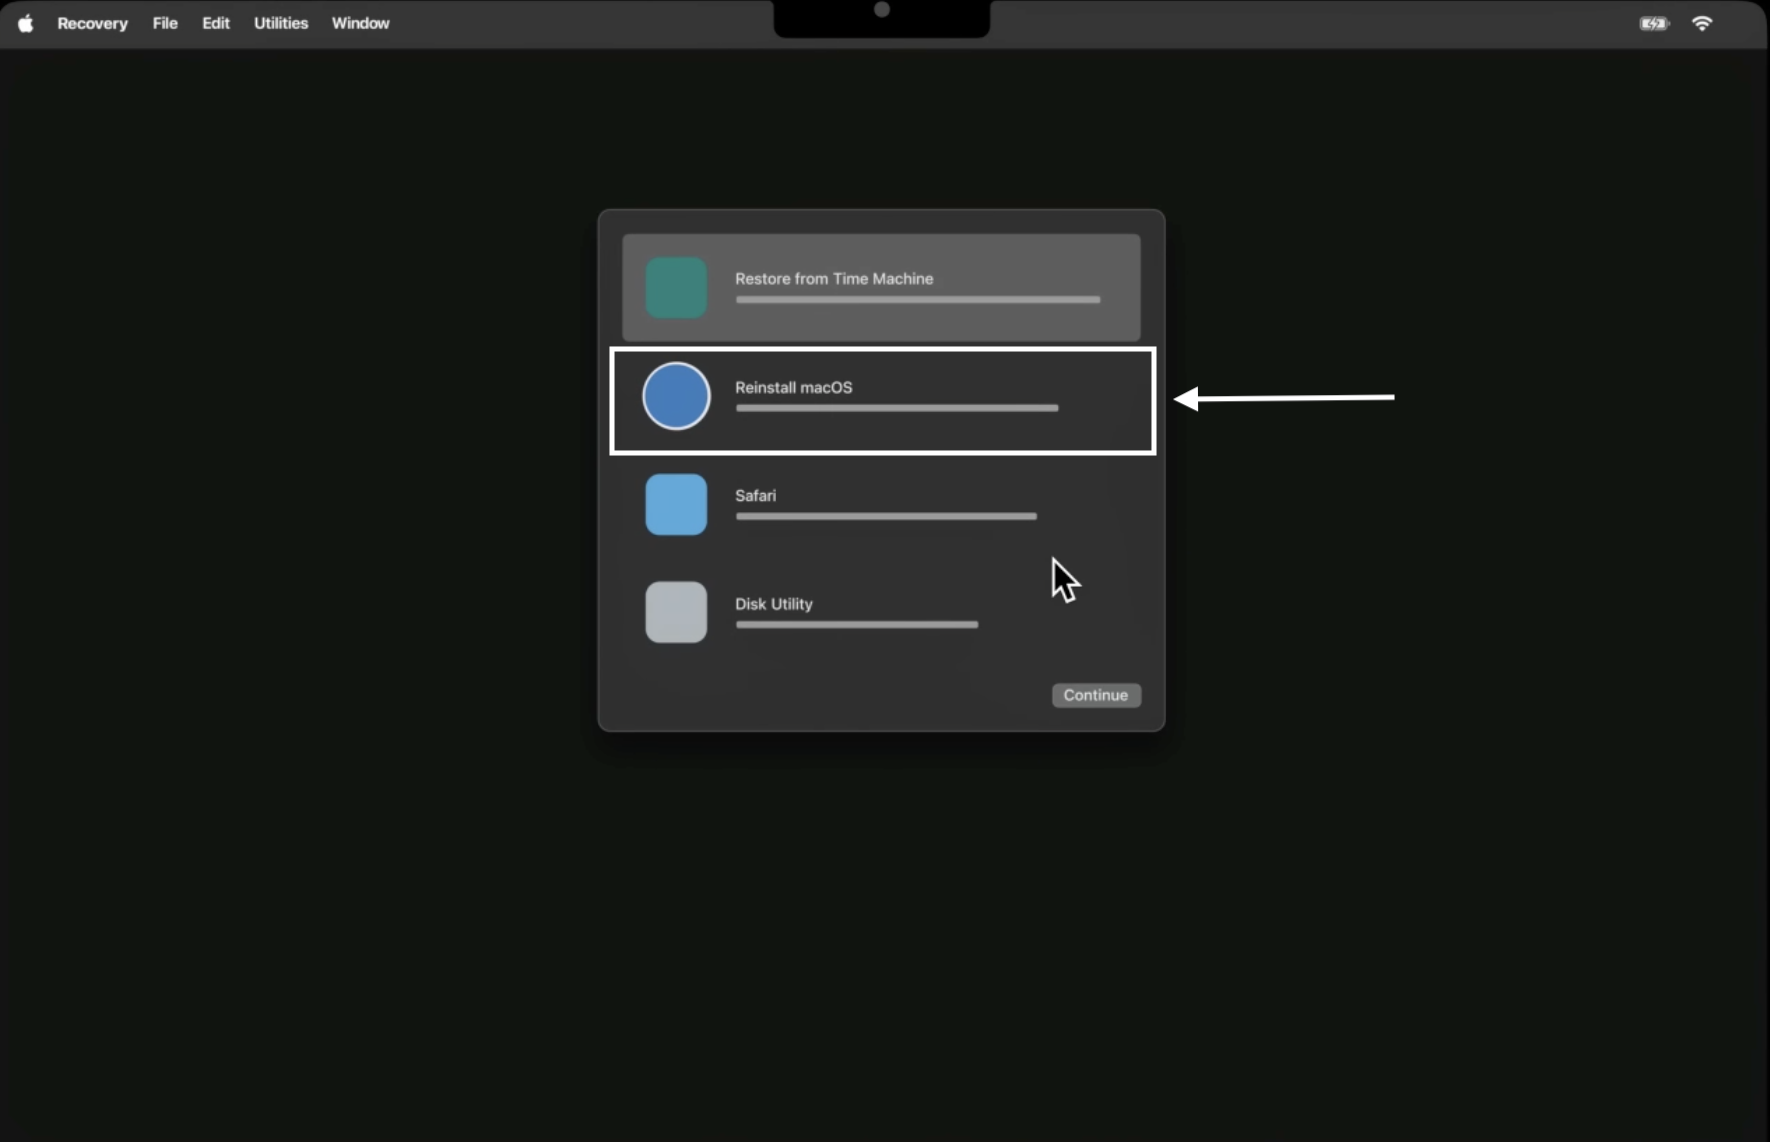
Using Recovery mode will reinstall your macOS and preserve your data at the same time as long as the disk is not erased. It’s actually a safe way to update or repair the OS without any requirement of a usual Software Update panel.
Even with careful updates, accidents can happen for sure… a power loss during update, a disk issue or just an errant click could lead to missing files. That’s why it’s always smart to have a backup plan. To Recover Data use Time Machine or clone your drive before major updates whenever possible. But if you don’t have a backup and this happens to you…, you’ll want a reliable recovery solution.
One such solution is Stellar Data Recovery for Mac, a professional Mac data recovery software. This tool has specifically been designed to recover lost or deleted files from your Mac drive or even any external SSD even after a full formatting or crash issue. So if an update stops suddenly or corrupts files or even makes those files disappear, this tool will scan your disk and restore your photos, documents, emails or other files (only if your macOS is not booting). .
Keeping your Mac’s software up to date is your key to good security and performance. The simplest way is actually through System Settings > Software Update as always recommended by Apple. You can just simply use the App Store to update apps, use Terminal to update through commands and even download installer packages for some macOS versions manually. If a normal update fails to go through or your Mac just won’t start at all, you can actually boot it to macOS Recovery and reinstall the OS from there. Just follow the tips and methods that we have compiled for you above and you are good to go.
Senior Content Writer
This article was written by Pallavi Das, a Content Writer at Stellar Data Recovery.
Curious about our content creation process? Take a look at our Editor Guidelines.
July 23, 2026| 10 min read
-1920.jpg)
July 22, 2026| 10 min read
July 22, 2026| 10 min read


 10 min read