Summary: Based on the Exchange Server version, there are a few different ways to export mailboxes to PSTs and import PST files to mailboxes. In this article, we have shared these methods and tools, such as Stellar Converter for EDB, to import/export mailboxes to PST and vice-versa with complete integrity and original folder structure.


Contents
Exporting and importing data from an Exchange Server is part of the normal routine and day to day job of any Exchange Server admin. Import and Export of Exchange Mailbox to PST can be for various reasons being a disaster or normal routine for the company. The easiest thing is importing an old PST archive into the main or a shared mailbox, or exporting a leaver or an unwanted mailbox to PST for keeping a copy of it.
To export a mailbox to a PST from Exchange Server 2007, there is a process. You should have a 32-bit operating system with 32-bit Microsoft Office 2003 SP2 installation along with Exchange Server 2007 with Management Tools installed. There is no graphical interface to export or import in Exchange 2007 and user will have to use PowerShell to do the job.
However, you may use an EDB to PST converter tool, such as Stellar Converter for EDB. It’s a GUI based tool that helps you extract mailboxes from Exchange database files and save them in PST format in a few clicks. Thus, you don’t need to run multiple PowerShell commands to export PST in different Exchange Server versions. The software makes it quick and easy to export Exchange mailbox to PST or Live Exchange server without any size limitation.
Reasons to Import or Export Mailboxes to PST
As an administrator and the company, one would need to import .pst files to mailboxes or export mailboxes to .pst files. Some common examples are as follows.
- With compliance and governance, you can export a mailbox to a .pst file for legal purposes. After the export is complete, you can import the .pst file to a mailbox that’s specifically used for compliance purposes.
- Creating a point in time snapshot of a mailbox in case you would like to keep an export of a mailbox or entire mailbox database, this way you can use the data quicker.
- With PST files, these can be used to import either user created PST files or from the server export to the user?s mailbox or archive mailbox. This is an easy method for transferring email from a user’s local computer to an Exchange server.
Steps to Import and Export Exchange Mailboxes to PST
let see how we can perform the manual way to perform the requirement, we will be going through the native ways on how to export from a live Exchange Server and also will take a look at the best alternatives. You can also follow the manual method from here: Procedures for mailbox exports to .pst files in Exchange Server
For newer Exchange Servers from 2010 to 2019 you do not have to install anything as the PowerShell cmdlets can be used natively just by opening the Exchange Management Console and running them.
For this task, we will be using the New-MailboxExportRequest and New-MailboxImportRequest to export and import data from our Exchange Server. For the sake of Exchange Server 2007, the commands are slightly different as these are Export-Mailbox and Import-Mailbox.
We must start off by having the right user and the right roles. We must start by creating the role and assign the user to the role. It is recommended to create a group example ExchangeExportAdmins and assign the role to that Active Directory group. If you export the mailbox and you get an error such as below it will be due to a permission issue.


Open the Exchange Management Console and type the following command to create the role.
New-RoleGroup "Mailbox Import-Export Management" -Roles "Mailbox Import Export"


The next step is to assign the newly created role to the user or group. In this case, I will be assigned to the Administrator user.
Add-RoleGroupMember "Mailbox Import-Export Management" -Member Administrator


This will give the user or group the rights to import and export.
Exporting mailboxes to PST
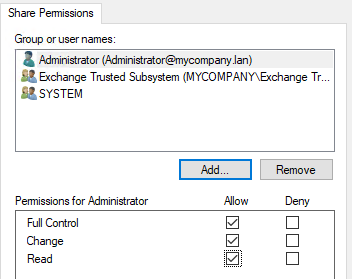
The first step to export a mailbox is to create a share where to store the PST files which are exported. Exchange will not be able to export to a file path example D:\PSTFiles but a network path example \\EX01\PSTFiles. When you share the folder, the Exchange Trusted Subsystem must have read and write permissions on it or else the export will fail.
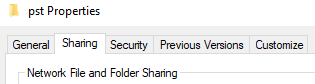
- Right-click on the folder and click on Properties.
- Click on the Sharing tab.

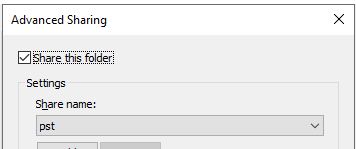
- Click on Advanced Sharing and tick Share this folder.

- Click on Permissions and add the Exchange Trusted Subsystem and System as Full Control.

When this is done we can start exporting the mailboxes by using the New-MailboxExportRequest PowerShell cmdlet as below.
New-MailboxExportRequest -Mailbox User1 -FilePath \EX01\PSTFiles\User1.pstIf you have spaces in the mailbox or file path you would need to enclose the entry in the inverted commas


This will start the export process. To see the status of the export you must use the Get-MailboxExportRequest PowerShell cmdlet where it will show failed, completed or in-progress.


This will export the whole mailbox including mail, journal, contacts, tasks and calendar. There are ways to filter out a bit the export by using the below criteria. These options include date limit or date range, folder inclusion and folder exclusion which we will go through below.
To export a mailbox but only exporting a folder or folders you can do this as below using the IncludeFolder parameter. If you are exporting multiple folders, these can be separated with a comma.
New-MailboxExportRequest -Mailbox User1 -FilePath \EX01\PSTFiles\User1.pst -IncludeFolder ?#Inbox#?, ?#Project#?To export all the mailbox but excluding a folder or folders such as Deleted Items or Spam folder, you must use the Exclude Folder parameter and separating multiple folders with a comma as below.
New-MailboxExportRequest -Mailbox User1 -FilePath \EX01\PSTFiles\User1.pst -ExcludeFolder ?#Inbox#?, ?#Project#?You cannot have both include and exclude options in the same export, only one parameter can be used. Another parameter is the date filtering which can be used as a date limit or a date range. For this we must use the ContentFilter parameter as below.
New-MailboxExportRequest -Mailbox User1 -FilePath \\EX01\PSTFiles\User1.pst ?Content Filter {(Received ?gt ?01/01/2019?)}This will export all content from the date 01/01/2019 till today using the GT (Greater Than) option. If you would like to export all data from 01/01/2019 backwards for archiving, you would need to change the GT option to the LT (Less Than) option as below.
New-MailboxExportRequest -Mailbox User1 -FilePath \EX01\PSTFiles\User1.pst ?Content Filter {(Received ?lt ?01/01/2019?)}To have a date range, for example, you would need to export all the emails from 2018 till 2019, you would need to use the below command which will set the date ranges using the GT and LT option.
New-MailboxExportRequest -Mailbox User1 -FilePath \\EX01\PSTFiles\User1.pst ?Content Filter {(Received ?lt ?01/01/2019?)} ?and (Received ?gt ?01/01/2019?)}There is a small inconvenience as when to export a lot of mailboxes at once as this would incur the setup of a script with a for-each loop in PowerShell which could hinder the performance of your Exchange Server and there is progress or continuity if the process stops.
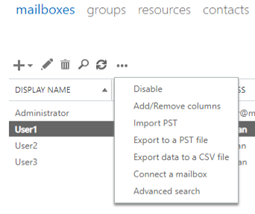
From the graphical interface in Exchange 2013 onwards, we can export to PST from the EAC itself. After login, click on Mailboxes and highlight the mailbox to export. Click on the ? menu button and click on Export to a PST file. The interface can allow you only to export one by one.


Then you need to choose to export the mailbox only or with the archive mailbox as well. Specify the destination which must be a share example \\ex01\PSTFiles. The last part is to select the recipient where the report will be sent after the mailbox has been exported and you will be alerted as well.


Of course the above are all valid if your database and Exchange Server are healthy as there is no native tool that lets you directly export to PST from an EDB.


Importing PST files into Mailboxes
After setting up the file share with the PST files and the correct permissions and role assignment we will need to use the PowerShell cmdlet New-MailboxImportRequest to import our data as below.
New-MailboxImportRequest -FilePath \\Ex01\PSTFiles\User1.pst -Mailbox "User1"


When the command has been executed, you can view the progress by using the PowerShell cmdlet Get-MailboxImportRequest as below by having completed, in-progress and failed.


You can import more than one or all the users in one go using a loop as with the export process but with the same repercussions. From the graphical interface in Exchange 2013 onwards, we can import from a PST using the EAC itself. After login, click on Mailboxes and highlight the mailbox to import to. Click on the ? menu button and click on Import PST. The interface can allow you only to import one by one.

Enter the network path where the PST resides and click Next. Select the destination and if you want to restore in the mailbox or the archive mailbox, and select the recipient to receive the report. You will also be notified in the alerts of EAC.


All of this is good thou a bit of an administrative effort and a bit annoying with regards to Importing and Exporting Exchange Mailbox to PST, but it will all be futile if your Exchange Server is decommissioned. Stellar Converter for EDB is the best third party EDB to PST Converter tool you can use to export multiple mailboxes from a EDB file to PST. The EDB file can be of any version of Exchange and can export to PST and other formats such as HTML, EML and PDF. The application can also import an EDB directly to a live Exchange Server or an Office 365 tenant making the application the best tool to assist any Exchange Server Admin.

Conclusion
In this blog we have seen the step and option we can use to import PST file and export mailboxes to PST into our Exchange Server. We have also seen the pros and cons of each method and the general decision would be the ease of the export/import as well as the data integrity and compatibility as well as the ease of portability. The best contender which as all the mention features is Stellar Converter for EDB. It can open multiple databases being online or orphaned and you can granularly export to PST, another Exchange Server and even Office 365.
FAQ
Q. New-MailboxExportRequest is not recognized in Exchange Server?
A. When this error is presented, there are two things that could be the problem. One would be permissions to run the command, the command is not executed in the Exchange Management Shell (EMS), typos in the command or if you are running Exchange 2010, it is not updated to SP1 or later. More info on New-MailboxExportRequest Is Not A Recognized Cmdlet blog.
Q. How to Fix When New-MailboxExportRequest is Failed?
A. There could be many reasons why this is not working, but the common culprits could be lack of permissions, disk space, permission on the destination, issues with the server or only on a specific mailbox. More information and resolutions can be found on New-MailboxExportRequest is Failed article.
Q. How to Export Mailboxes to PST in Exchange 2019?
A. Exporting a mailbox in Exchange Server 2019 is the same as the Exchange Server 2016, 2013 and 2010. We use the New-MailboxExportRequest command or through the Exchange Admin Center (EAC). The full guide can be found in Export Exchange 2019 Mailbox to PST.
Q. What is the recommended method for importing and exporting mailboxes in Exchange Server?
A. The recommended native method would but the PowerShell in the Exchange Management Shell (EMS) as it give you a more features than the Exchange Admin Center (EAC), but alternatively one can use Stellar Converter for EDB which will give greater flexibility, compatibility and performance.
Q. Can I import or export .pst files larger than 50 gigabytes (GB) in Exchange Server?
A. Directly no, one would need to clean up the PST files from unwanted items as well as splitting the data.
Q. How can I monitor the progress of mailbox import/export requests?
A. To monitor the status of the import or export we can use the PowerShell commands Get-MailboxImportRequest and Get-MailboxExportRequest respectively. One would get the status of Pending, In Progress, Failed and success.
Q. Is it possible to import .pst files into public folders in Exchange Server?
A. There is no direct import method from PST into a public folder. The only method, but it’s not recommended, is via Outlook. The process involves attaching the PST file and using the drag and drop, but it would take a long time, especially if the PST file is large and there is no continuity if Outlook crashes, or the process is stopped.
Q. Can third-party tools like Stellar Converter for EDB be used for mailbox import/export in Exchange Server?
A. Stellar Converter for EDB can be used for the job as the application can open offline and online databases and process mailboxes, user archives, shared mailboxes, disabled mailboxes and public folders while being able to use it as a migration tool to a new Exchange Server or Office 365.


