Summary: If you are reading this article, then you are about to install and try out the macOS Ventura beta. Before you start, make sure you have specific software like Stellar Data Recovery to restore your files if the process goes wrong.


Contents
Can?t wait to see what the latest macOS Ventura 13 update will look like? Then you can download and install the beta version of the update on your Mac, and we’ll show you how to do it.
macOS Ventura will not be publicly released until the fall, but its beta version is already available.
Make sure your Mac is on the list of supported devices, and remember that it is a beta version of macOS 13, so bugs and crashes of specific programs are possible.
macOS Ventura Release Date
On June 6, 2023, the initial developer version was released, and in July 2023, the public beta is expected to be given access. At the moment, it is not announced the exact release date of the full macOS Ventura is available for everyone. However, it can be available in October like macOS Monterey was.
Who can Install macOS Ventura Beta
Since macOS Ventura does not support many older Macs, including the 2017 MacBook Air and 2016 MacBook Pro, be sure to check if your device is compatible with macOS 13 before moving on.
Here is a complete list of macOS Ventura Beta compatible Macs:
- iMac (2017) and later
- iMac Pro
- MacBook (2017)
- MacBook Air (2018) and later
- MacBook Pro (2017) and later
- Mac Pro (2019)
- Mac Studio
- Mac Mini (2018) and later
How to Prepare Your Mac for Installing macOS Ventura Beta
First, you must to make sure that your data is safe before installing beta software on your device. Beta software is usually not perfect. It may be slow, buggy, and can cause problems such as overheating or even data loss. Hence, we recommend backing up your Mac before proceeding with the installation of the macOS beta.
The macOS backup will allow you to get your data back and revert to a previous macOS if something goes wrong.
Here is how to back up your Mac with Time Machine
1. Connect an external hard drive to your Mac.
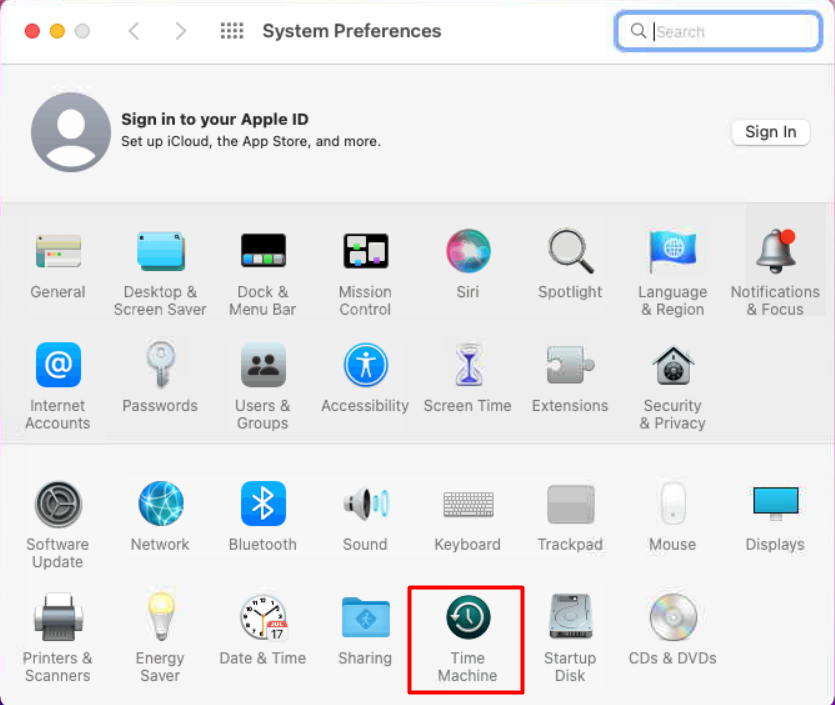
2. Open Time Machine. To do that click on Apple Menu in the top left corner of the screen. Go to System Preferences > Time Machine.

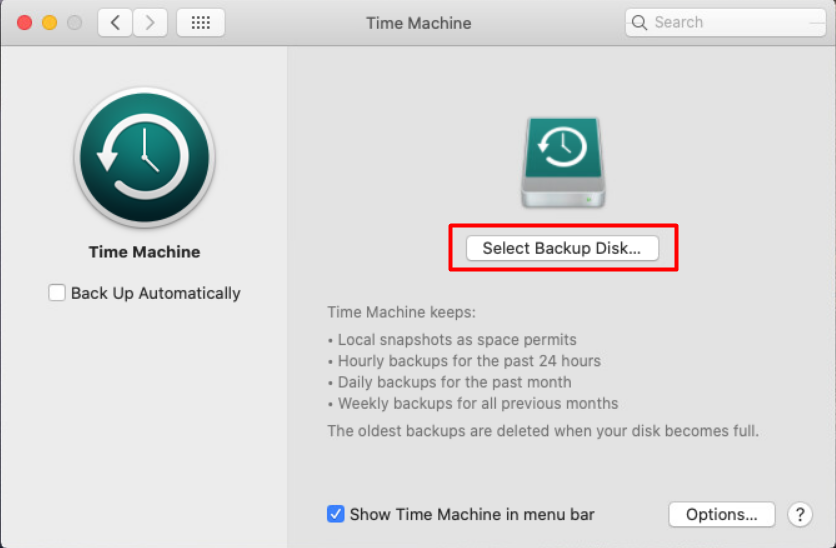
3. Then click on Select Backup Disk.

4. Then select the name of your disk and click the Use Disk button.

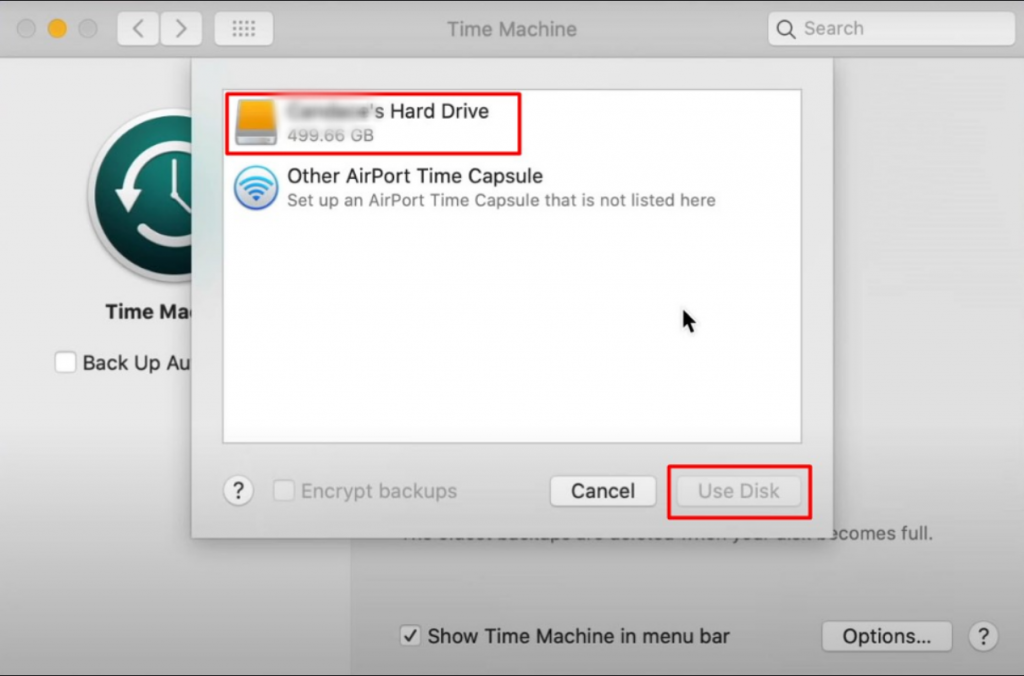
Done! Now Time Machine will have the latest backup of your system.
How to install macOS Ventura Beta
First things first you need to enter the macOS 13 Ventura Developer Beta Profile for Mac. Here is how:
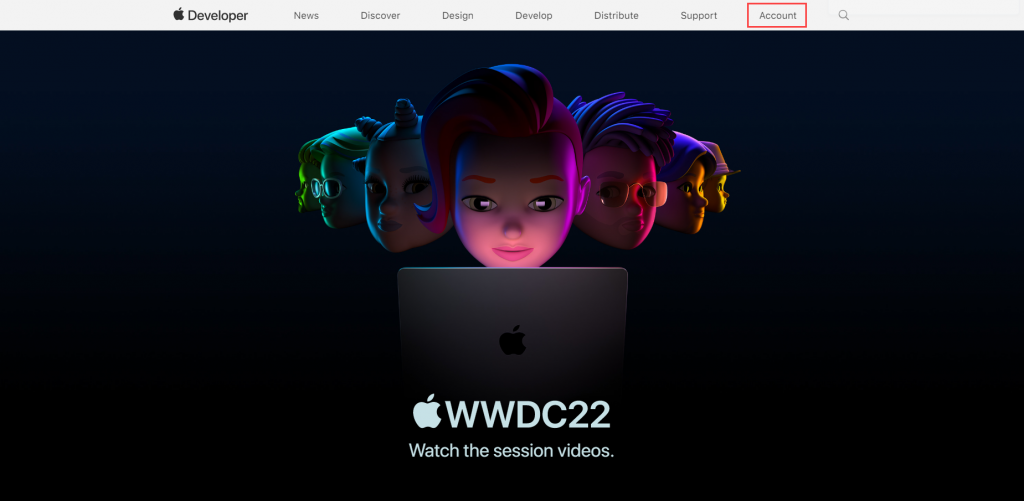
1. Open your web browser and go to here.
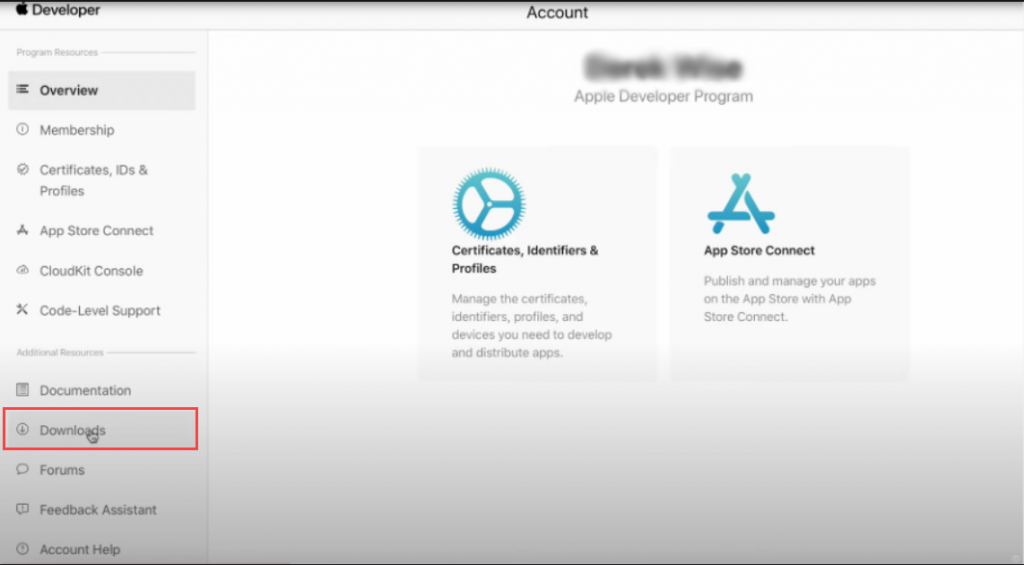
2. Go to the Account tab and sign in with your developer account.

3. Go to the Downloads section.

4. Scroll down and find the macOS 13 beta and click on Install Profile.

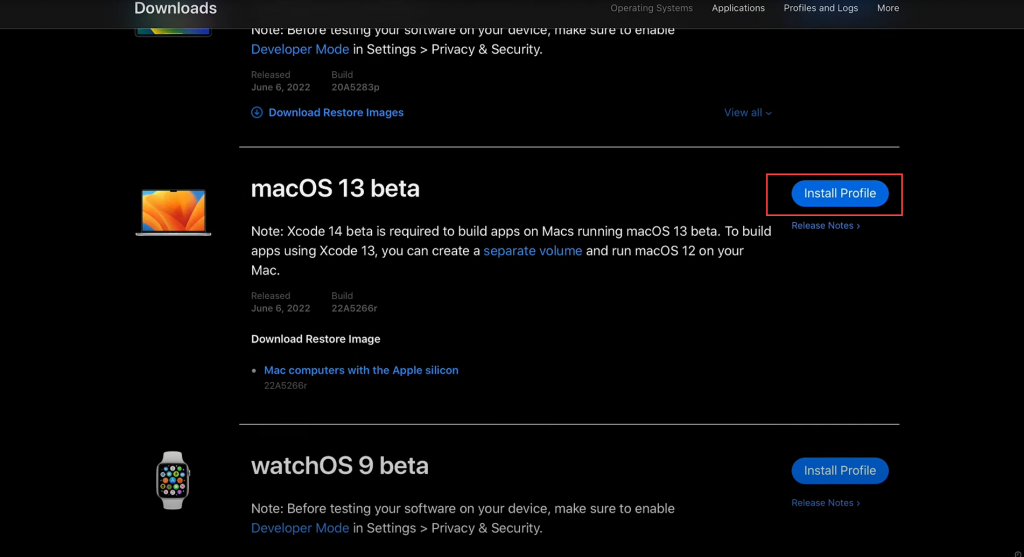
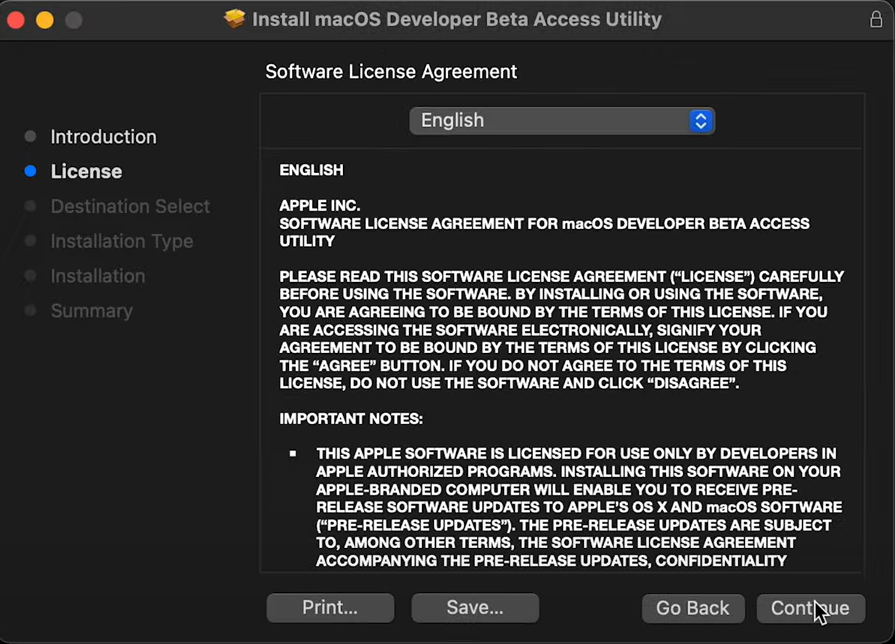
5. Open the downloaded file and follow the onscreen instructions to install the profile.

Note:
- After you?ve successfully downloaded the macOS beta installer, your Mac will automatically check for a macOS 13 update.
- If the macOS 13 Software Beta is not available in Software Updates try to restart your Mac. Then, open the AppStore and check the available macOS updates in the Updates tab.
Once the installation is done, you’ll see a notification to install the software automatically. Here’s how to do it:
1. Click on Upgrade Now in the Software Update menu.

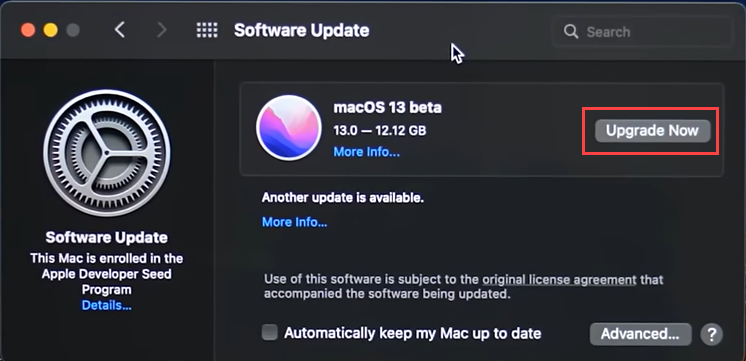
2. Follow the onscreen prompts to finish the installation.
3. After you restart your Mac, you will need to customize your macOS up to you.
Wrap Up
Now that you know how to install the latest macOS 13 beta, you may start the process and get started exploring the newest features without waiting for the public macOS Ventura release.
FAQ
How to Revert to macOS Monterey
If you feel like you don?t like using the macOS Ventura, you can always go back to macOS Monterey. You may completely restore your previous macOS using the recovery mode. All the applications and files will be retrieved as well.
Here is how to restore your macOS via Recovery Mode on an Intel-based Mac:
1. Plug in your Time Machine backup drive to your Mac.
2. Restart your computer.
3. Click and hold the Command + R keys to enter the recovery mode.
4. After the Apple Logo appears, release the keys.
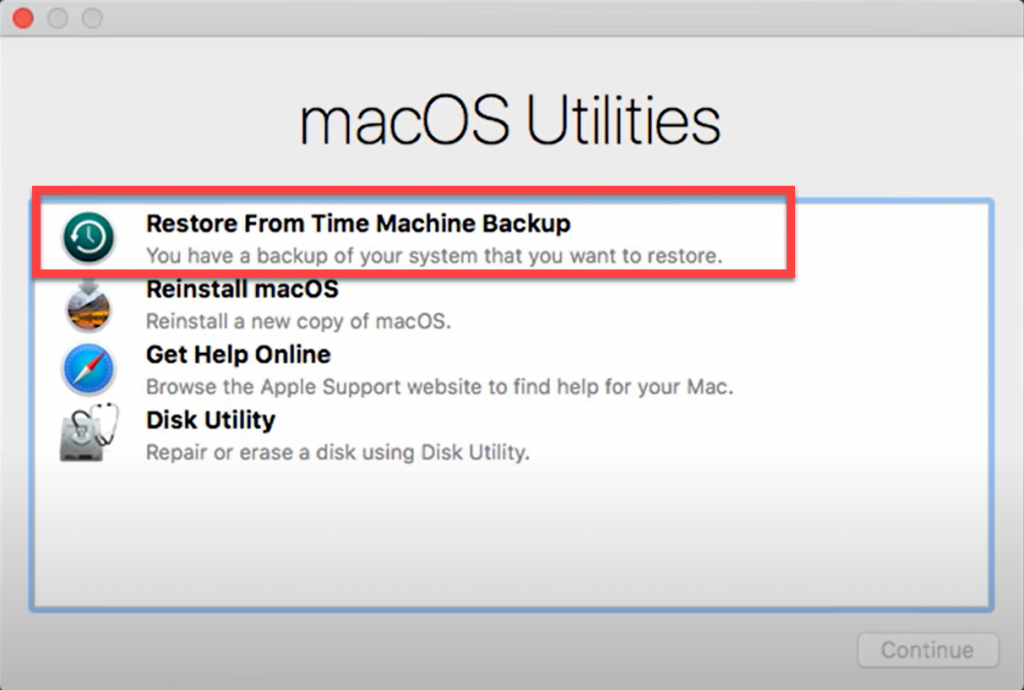
5. When you see the disk Utility menu choose Restore from Time Machine backup, and click Continue.

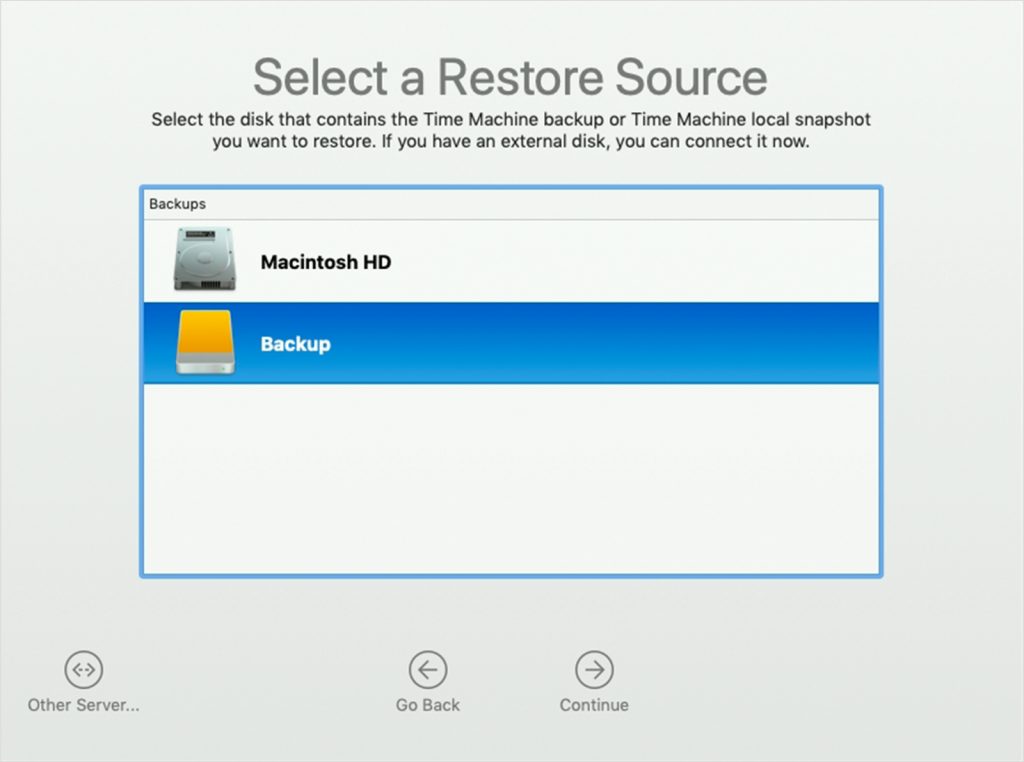
6. Select the Time Machine backup and click Continue. Enter the admin password when needed.

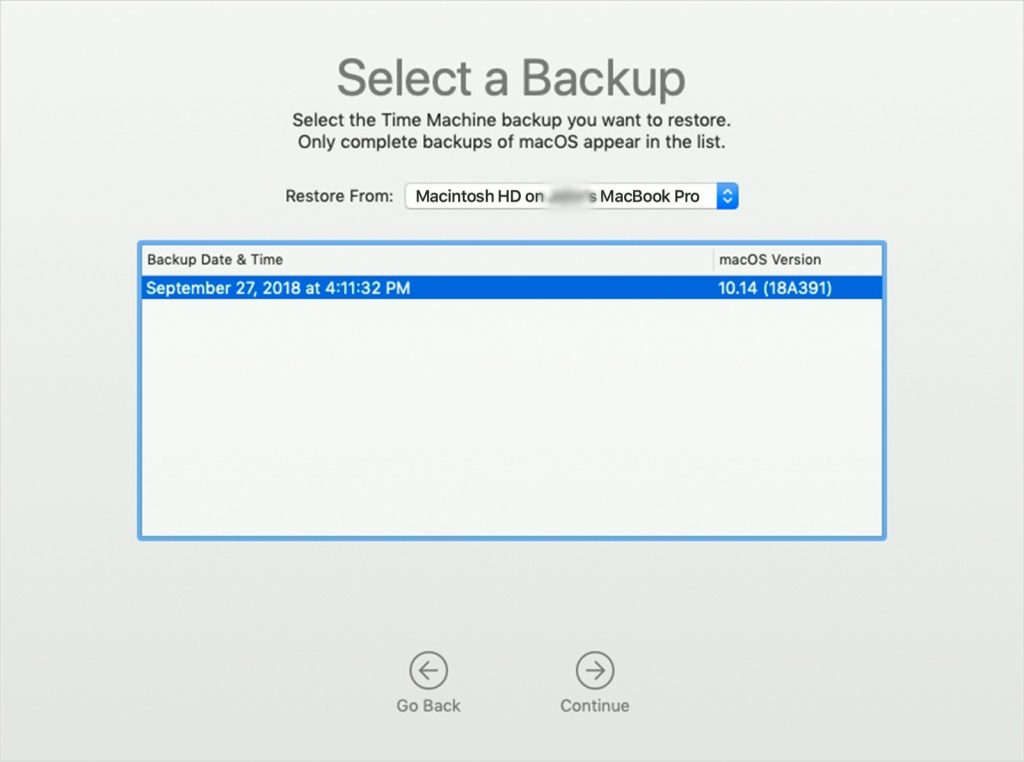
7. Select the needed backup date and click Continue.
8. Choose the destination for restoring on your Mac and click Restore.

9. Restart your Mac after all steps are done.
If you own a Mac with Apple silicon, follow the next steps:
1. Restart your Mac.
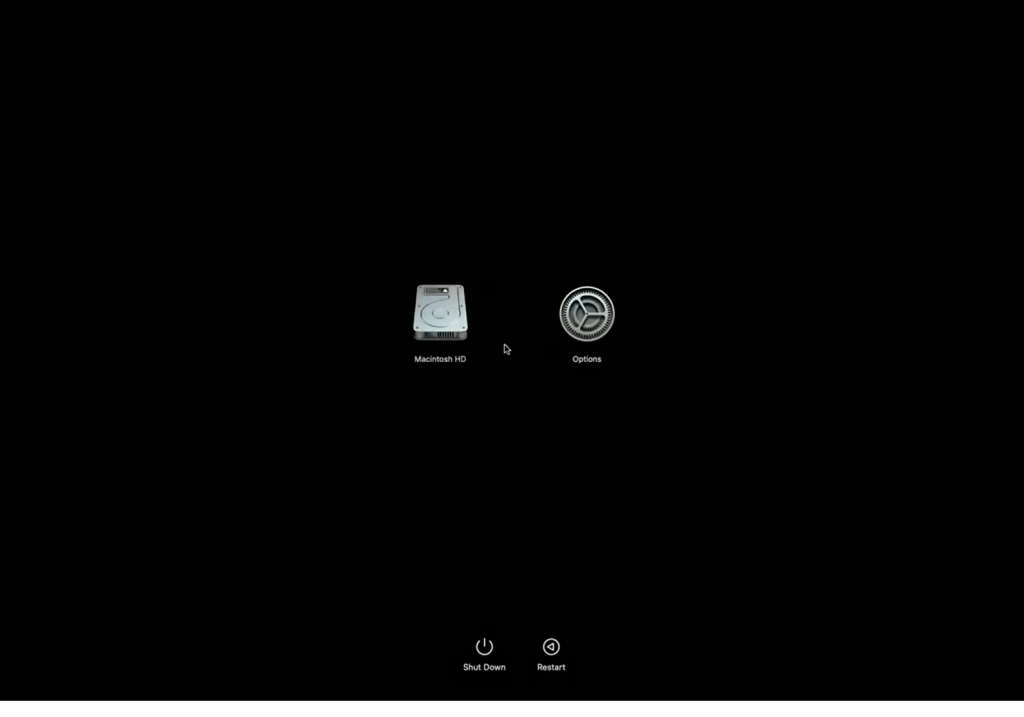
2. Press and hold the Power button, when the screen goes black.
3. When you see a hard disk and a gear icon, you will need to select the Gear icon.

4. Click on Restore from Time Machine button and follow the onscreen instructions.
How to Restore Possibly Deleted Files with the Stellar Data Recovery App
Another method to restore your missing files if they were lost is using the specific Mac data recovery software. You can recover lost files on your Mac by using handy data recovery software for mac such as Stellar Data Recovery. It’s an easy-to-use tool that will help you retrieve your files.
Follow the instruction below to recover lost data:
1. Go to the official website of Stellar Data Recovery and click on Free Download.


2. When you install the application, open it and choose the type of data you want to recover (photos, videos, documents, etc.). You can recover everything or customize the needed files.


3. After that, you?ll be prompted to choose where you want to recover the selected files from.
4. When the scan is done, you will see the files that can be recovered. Select which ones you need.
5. The last step is to choose the destination folder on your Mac and start the recovery process.
Read more:


