Summary: Have you accidentally deleted an important file from your SSD or are you facing difficulty in restoring your files after an SSD failure? These scenarios are pretty common. Read on to discover how to recover your lost files using default utilities on a Mac or specialized software such as Stellar Data Recovery Professional.


Contents
An increasing number of computer users opt for SSD drives (Solid State Drives) as their preferred storage solution, but data loss is a prevalent issue with such drives. When SSDs fail, users may lose access to their files and partitions, which can be deleted. Virus infections or improper handling of the SSD can also lead to data corruption and loss, causing concern for many SSD drive users. Fortunately, solutions for recovering deleted files from SSD drives are available and will be discussed in this article.
Data Loss Reasons on SSD
Various reasons can lead to data loss on SSDs (Solid State Drives). Some of the most common causes include
- Power failures or voltage spikes: Sudden power outages or voltage spikes can corrupt the data stored on SSDs, leading to data loss.
- Physical damage: Physical damage to an SSD can cause it to fail, resulting in data loss. This damage can be caused by dropping the drive, exposure to water or other liquids, or overheating.
- Virus or malware infections: Viruses and malware can infect an SSD and cause data loss by corrupting or deleting files.
- Human error: Accidental deletion of files or formatting of the drive can result in permanent data loss.
- Firmware bugs: Issues with the SSD firmware can cause data loss by corrupting or deleting files.
- Wear and tear: SSDs have a limited lifespan; over time, they can become less reliable and prone to data loss.
How to Recover Deleted Data From SSD?
Here are some of the most effective methods for recovering files from an SSD.
I. Recover Files with Stellar Data Recovery Professional
Stellar Data Recovery Professional for Mac efficiently retrieves access to files accidentally deleted or lost from the SSD. It can recover files that have been erased, formatted, hidden, corrupted, or damaged. The software can be used internally and externally with drives, SD cards, USBs, and other storage devices. It is possible to repair and recover the data promptly and efficiently despite its current state.
The following steps need to be taken to recover files using Stellar Data Recovery Professional:
1. Download and install Stellar Data Recovery Professional.


2. You can recover only the particular types or everything on the Select What To Recover screen.


4. After choosing the appropriate file types, proceed by clicking the Next button.
5. Select the disk to search for the missing data and click the Scan button.


6. After the scan, preview the files and click Recover.


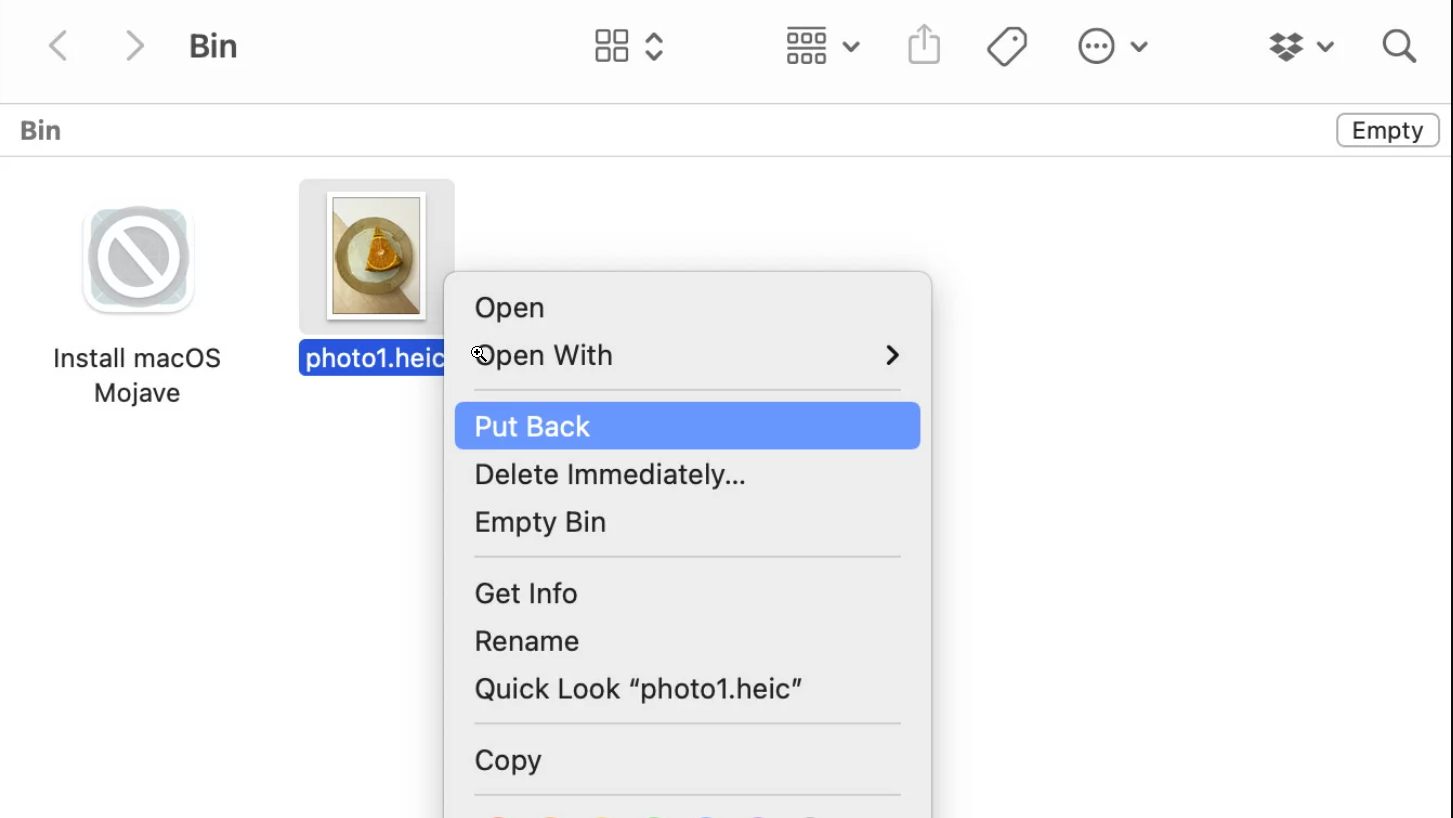
II. Data Recovery From Trash
Sometimes, the files from SSD may be stored in a Trash folder once you delete them.
Proceed with the following steps to restore previously deleted files from the Trash folder:
- On your Mac, open the Trash folder.
- Choose which folders or files you want to bring back to their previous location.
- Click on Put Back after you right-click on the needed files.

III. Recover Files using Time Machine
Time Machine is a default Mac utility responsible for making backups of essential data. These backups can be used to restore files that have been lost or deleted.
Maintaining a constant backup for Time Machine is important to restore backed-up files successfully.
To create backups in Time Machine, follow the next steps:
- Establish the connection between Mac and SSD
- To begin using Time Machine, select System Preferences from the Apple menu, then go to the General section and select Add Backup Disk.
- Click the Use Disk button after choosing the backup disk you want to employ in the process.
Now you have the backup of your SSD. Keep it updated once in a while to ensure you have the most recent copy of your disk.
Follow the next steps when you need to recover files from SSD using Time Machine:
- Enter the Recovery Mode.
- After you boot up in Recovery Mode, select Options (gear icon) > click on Continue.
- In the macOS Utilities window, select the Restore from a Previous Time Machine Backup option.
- Follow the on-screen instructions to retrieve files from the backup.
IV. Data Recovery from SSD with Enabled TRIM
Very often, users enable the TRIM function on their SSD devices, making files restoring almost impossible. However, following the guide below, you can still recover your lost data.
Note: You’ll need an additional Mac to accomplish this.
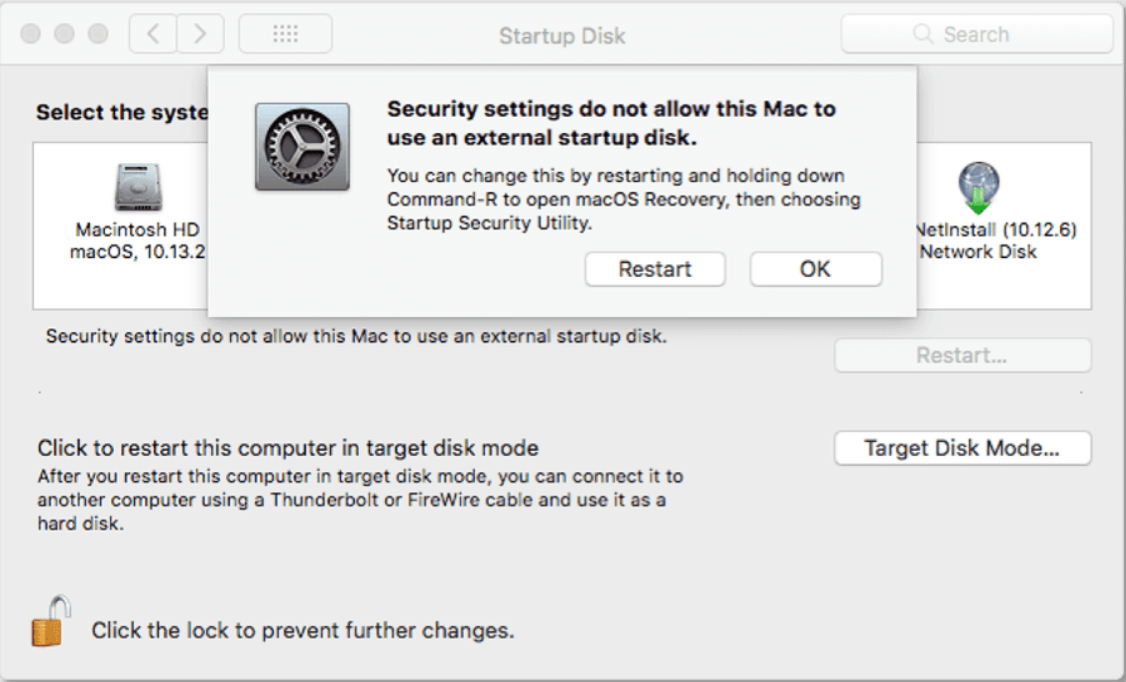
Here are the steps to restore SSD files using Target Disk Mode:
- Connect computers using a Thunderbolt cable.
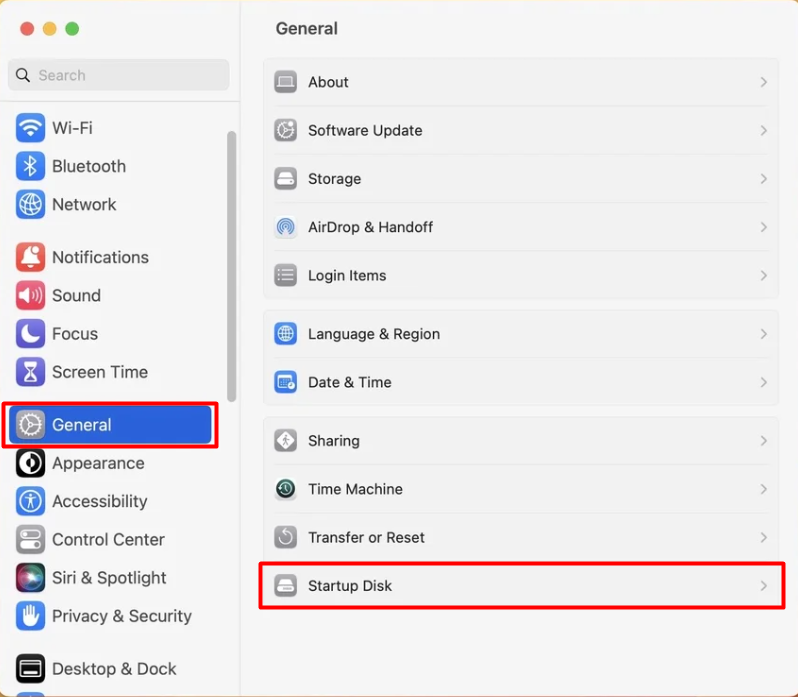
- Go to System Settings on a Mac with the SSD you need to recover files from.
- Go to General > Startup Disk.

- Then click Restart in Target Disk Mode.

- Once the computer boots up, a disk icon will appear on the desktop of the second computer.
- Then you may start restoring files from the disk by dragging files to the computer.
How to Prevent Data Loss on SSD
To prevent unnecessary file loss, it’s important to know how to protect files on an SSD.
Here are some tips to help safeguard SSD files and prevent further data loss:
- Create backups of your files on an external storage device.
- Regularly clean up any unknown viruses or malware using anti-virus software.
- Handle data and files with care.
- If you accidentally delete or lose files, use Stellar Data Recovery for assistance.
Wrapping Up
In conclusion, recovering deleted data from an SSD on a Mac can be challenging, but with the right tools and techniques, it is possible to retrieve your lost files. Remember to stop using your Mac and the SSD as soon as you realize that data has been deleted, and try using the above methods to recover your important files.
Read more:


