


In an increasingly digital world, our Android devices hold years of memories stored in hundreds of gigabytes. However, with one technical issue or damage to our Android device, everything can be gone forever. Regular backups help protect our sensitive data from accidental loss due to phone damage or theft.
Backups also come in handy during upgrades or resets to Android devices, reducing the risk of data loss and saving time and effort. But how do we do so? This article will explore five easy ways to back up an Android smartphone and tools to regain lost Android data without a backup.
As a bonus, we will also learn how to securely safeguard your data from being compromised by intruders.
How to Backup Your Android Device?
1. Manual Backup to a Computer
Manual backup involves creating a backup of your Android device to your computer or any external storage drive.
Here are the steps to back up your device manually:
-
Connect your Android phone to your Windows desktop with a USB cable.
-
Look for your smartphone in My computer options; you’ll see it as an external storage device connected with the computer. For e.g., - David’s Samsung Galaxy S24, John’s Nothing Phone 2.
-
Now open the detected external storage device to look for folders, such as Downloads, Pictures, Audio, App Data, Documents, Videos, etc.
-
Copy all the important folders you wish to backup and save them in a safe location.
How to secure backed-up data on your computer?
To secure your data on a computer, you can encrypt your files by following the below steps. This will password-protect your files and lock them against any unwanted intrusions.
-
Right-click the file you want to encrypt and go to Properties.
-
Under the General menu, click on Advanced to open the Advanced Attributes window.

-
Next, select “Encrypt contents to secure data” from the options and hit the OK button.

-
To add password encryption, click on the "Advanced" button next to the "Encrypt contents to secure data" option.
-
In the Advanced Attributes window, check the "Encrypt the file with a password" option and enter/set a password.
-
Now, click on the Apply button, select any one from the provided options, and then click OK.

-
Your file will be secured, hence, anybody without a password will not be able to delete, modify, or view the files or folders.
2. Back up to an SD card
Smartphone users can also back up their data directly to an external SD card inserted into their devices.
-
On your Android device, locate the folders with data you want to backup on your SD card, such as "DCIM" for internal camera photos.
-
Select and copy the folders.
-
Go to the SD card directory and paste the copied folders.
You can restore all the backed-up data to your device from the SD card. This works as offline backup storage without requiring a computer.
How to "Recover Lost or Deleted Android Data" without Backup?
Stellar Data Recovery for Android can help scan and restore data from Android devices even without backups. With its simple and intuitive interface, you can easily connect any damaged, corrupted, or non-booting Android device to a computer running the software and regain access to lost or accidentally deleted files.
Best of all, it offers a free trial to scan and preview files before purchasing a license for the paid version. So if you lost your Android data without backups, here is the step-by-step guide to using Stellar Data Recovery for Android and recovering lost Android data.
-
Download and install the latest version of Stellar Data Recovery for Android on your computer from the official website.
-
Connect your Android smartphone to your computer via a USB cable.
-
Launch the application, and on the “Select What To Recover” page, select the file types you want to recover, as shown in the below image.
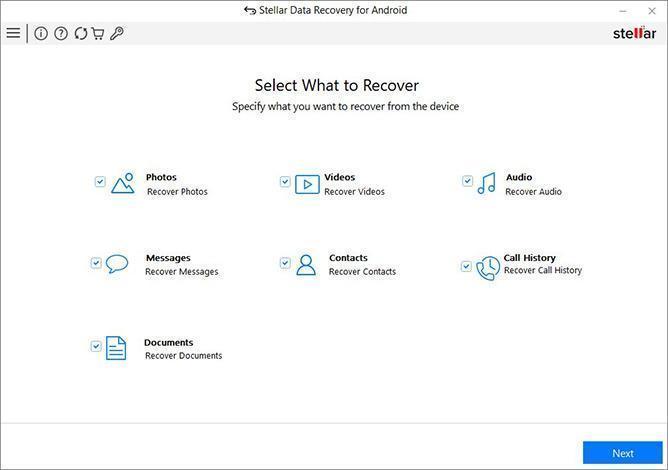
-
Now, follow the steps shown in the application to enable USB debugging on your Android smartphone.
-
In the next screen, choose the Android device from where you want to recover files and then click on “Scan”.

-
Wait for the application to scan your device and recover data.
-
Once the scan is complete, you can see all recoverable files listed by type - images, videos, audio, call history, etc. and preview them as well.
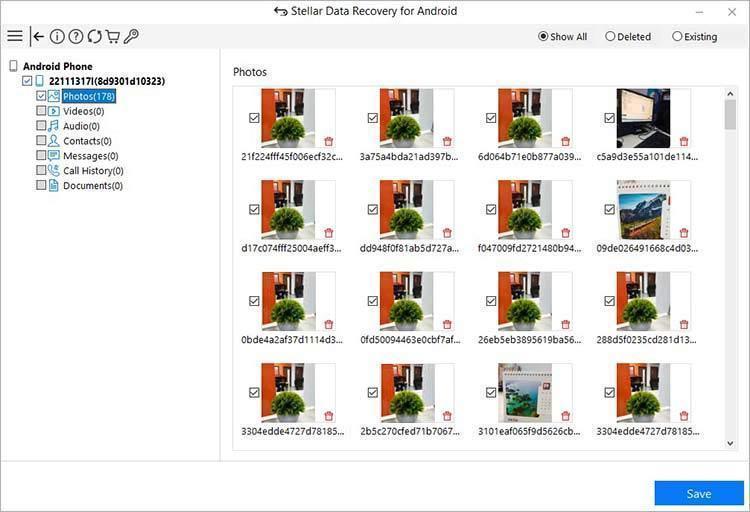
-
Click on Save and browse the location where you want to restore the recovered data.
3. Backup to Google OneDrive
Your Android phone uses Google Drive to automatically back up important data. You must be signed in to your Google account on the phone to use it.
-
Go to Settings > System > Backup and Restore and ensure your smartphone's backup setting is turned on.
-
Under the Google Drive account, choose which account to back up to.
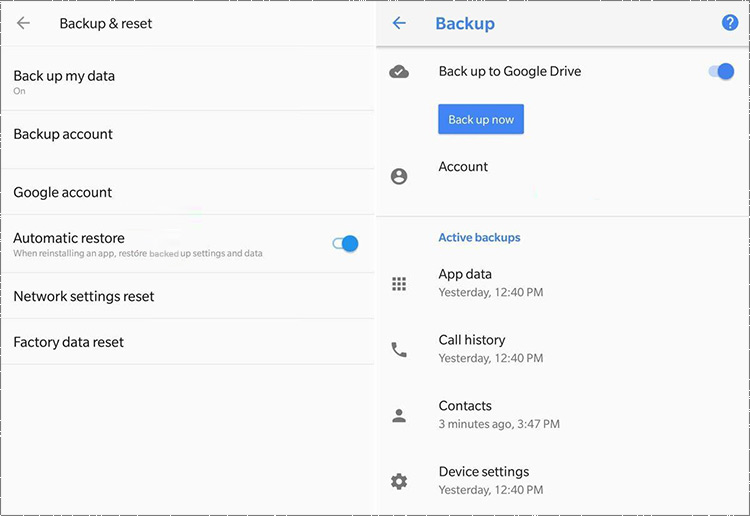
-
You can back up Call history, Device Settings, Contacts, Apps and app data, Messages, Photos, and videos.
-
Tap Backup now and wait for the backup process to complete.
-
You can check the backup progress by going to Settings > System > Backup and Restore.
However, Google’s one drive has a data limit, allowing backup of only up to 15GB of data in some regions.
4. Backup to Cloud
All major smartphone manufacturers offer free cloud storage services easily accessible from phone Settings. These Cloud backups provide ease of access, all-around accessibility, and data security.
Follow these steps to back up data to your Android smartphone cloud service.
-
You can select to back up Call history, Device Settings, Contacts, Apps and app data, Messages, Photos, and videos.
-
Tap Backup now and wait for the backup process to complete.
-
You can check the backup progress by going to Settings > System > Backup and Restore.
5. Backup to Dropbox
Dropbox is a file hosting service that offers cloud storage and file synchronization. It allows users to create a folder on their devices and with the drag and drop feature, it automatically syncs files placed there to Dropbox's servers and other computers and devices.
Here are the steps to use Dropbox:
-
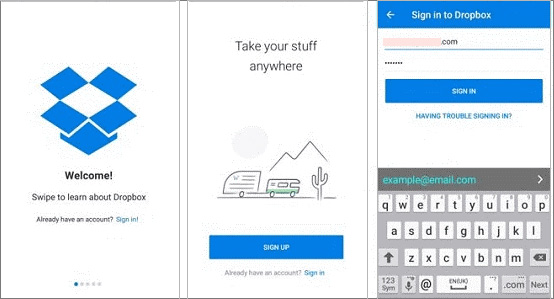
Sign up for a Dropbox account on the official website.
-
Install the Dropbox app from the Play Store and sign in using your account credentials.
-
This will automatically create a Dropbox folder, simply drag the files into this folder that you want to backup.
-
This will automatically backup the files to Dropbox cloud and sync data between your devices.
-
You can access the backed-up files from any device by simply logging in to the Dropbox website.
Conclusion:
While all these above data backup options are of great help, it is important to understand that relying on any one of the ways may be risky. While cloud backup options offer convenient access and regular automatic backups, manual backups offer increased control with secure data encryption and huge storage. However, if your data is lost accidentally without a backup, you can simply rely on Stellar Data Recovery for Android to regain your lost Android device data.


Totan has spent years figuring out how data is lost, and more importantly, how to get it back. He covers file recovery, corrupted media, and SD card fixes across every major platform, writing guides that actually work for real people in a panic.
 8 min read


