&media=https://www.stellarinfo.com/public/image/article/Avoid-These-5-Mistakes-After-iPhone-Data-Loss-(and-How-to-Recover-Data)-1847.jpg&url=https://www.stellarinfo.com/article/iphone-data-loss-mistakes.php)


“If you lose data on your iPhone, stop using your device immediately, don’t rely on iCloud sync as a backup, avoid random recovery apps. You can recover lost data using iCloud backups, Mac/Finder backups, Recently Deleted folders, iCloud.com recovery options, or trusted iPhone data recovery software if no backup exists.”
How Common Is It to Lose Data from an iPhone?
Losing your data on your iPhone can be terrifying – because the loss of your photos, your contacts, and your messages can leave you with no digital data. But, remarkably, few people take the right precautions.
A recent survey found only 36% of iPhone owners back up their data regularly. Even worse, most of us confuse syncing with an actual backup, 63% of users admit they can’t tell the difference. The problem with syncing our data is that if we erase a picture from our phone, it will be deleted from the iCloud as well as other devices that it has been synced to.
If data loss happens, panicking often leads to more harm. To help you avoid disaster, here are the top five mistakes people make after an iPhone data loss and how to fix them. Later, we’ll cover practical recovery methods so you can get your files back. For now, take a deep breath, and don’t make these mistakes that we list down for you below.
Common Mistakes That Make iPhone Data Loss Worse
- Skipping Backups (or Ignoring Their Reliability): Not having a recent backup is the worst trap. Apple itself warns: “To restore your iPhone, you must have a backup to restore from.” In other words, if you never backed up, there’s nothing to restore. (Ouch.)
Similarly, blindly trusting iCloud sync without a backup can be catastrophic sometimes as it is going to delete data from everywhere else if you delete it just on one device. So, always double-check those backups.
- Panicking and Trying Quick Fixes: After data loss, it’s human to want a “miracle cure.” But frantic fixes can ruin your recovery chances. For instance, don’t repeatedly restart or update your iPhone hoping it will magically fix itself; this can overwrite the missing data or complicate the problem.
- Continuing to Use the iPhone: As hard as it is, stop using your iPhone at once, once you realize data is gone. Every new photo you take or app you install writes to the device’s storage, potentially overwriting the very data you want back.
- Using Unreliable Recovery Methods: It might be tempting when someone randomly recommends some gadget repair shop or software for a quick fix. But unverified tools can do more harm than good. Many so-called “free” iPhone recovery apps are not updated on a regular basis, and is a chance, that one might contain malware. Always use a reputable solution.
- Ignoring the Clock (Procrastinating): The longer you wait after data loss, the more the iPhone will reuse storage for new stuff, making old data unrecoverable. Some people hope the problem will “fix itself,” but that’s wishful thinking. Don’t hold off until the weekend… act quickly (but calmly) with the steps below. The sooner you do something, the better the odds of recovery.
The earlier the treatment is carried out, the higher the chance of success.
These are all things to avoid to be well on your way to salvaging your files before you even lose them. Now, let's see what is involved in restoring your files after disaster has struck.
Proven Methods to Recover Lost iPhone Data
Here are the best ways to recover deleted data from an iPhone from Apple’s own tools to professional-level data recovery.
Method 1: Restore from an iCloud Backup
If you had backed up your data to iCloud, you can easily roll your iPhone back to an earlier state and it includes almost everything, right from apps and photos to settings.
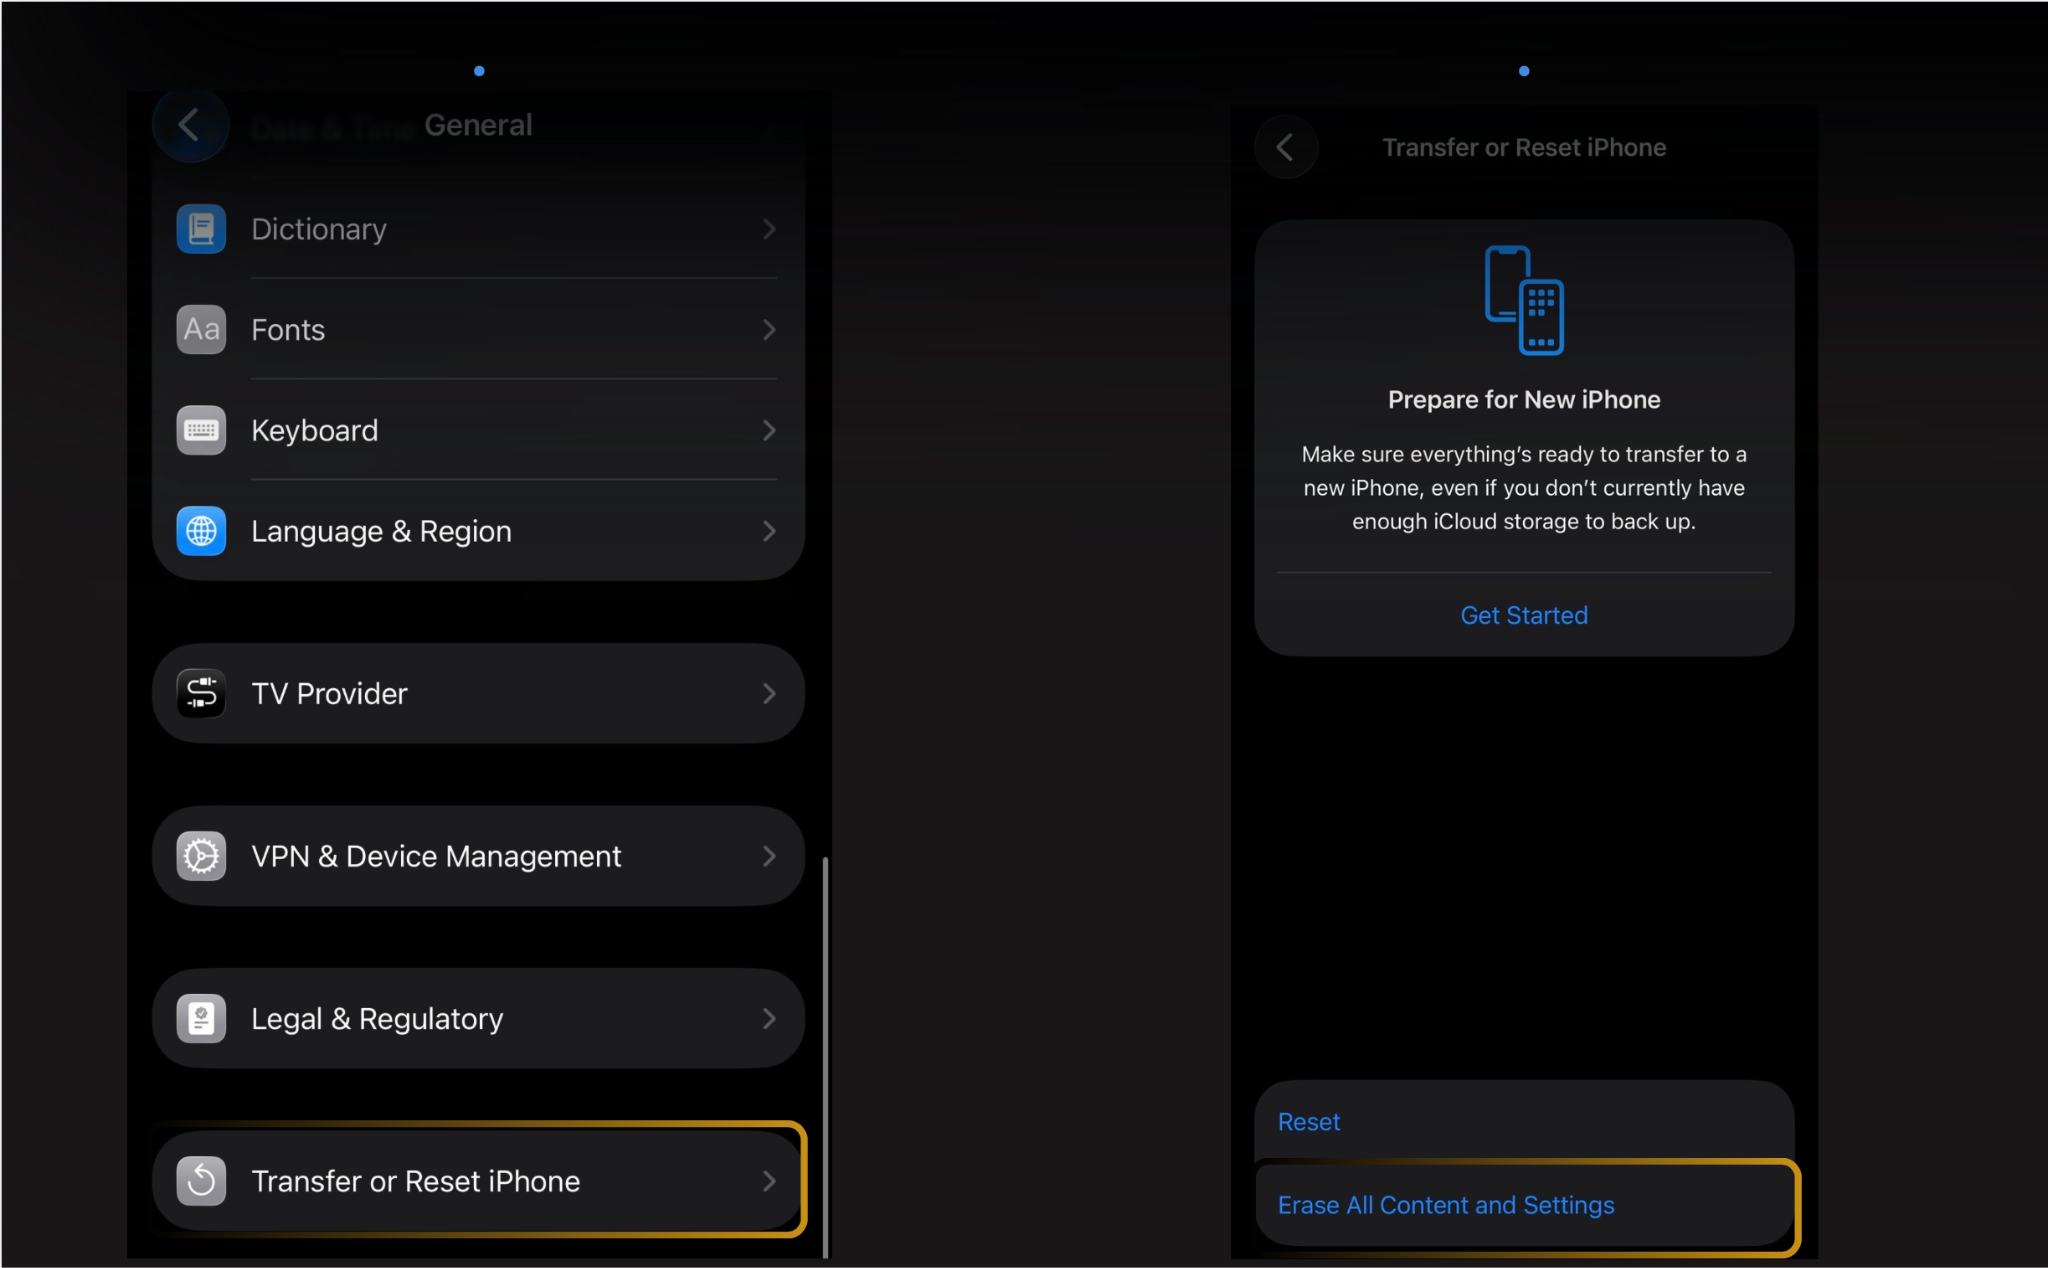
- Erase your iPhone: On your iPhone, navigate to Settings > General > Transfer or Reset iPhone > Erase All Content and Settings. Using this, the system will wipe the device so that you can go ahead and restore from backup.
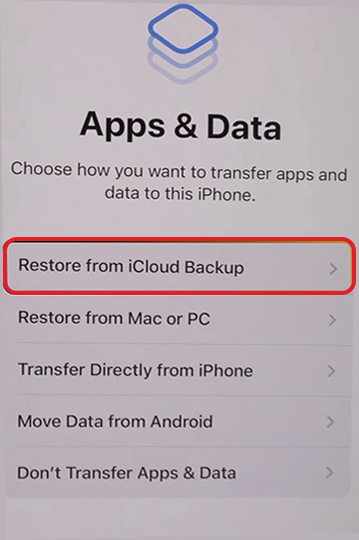
- Begin the Setup: Once you're done with that erase procedure and your iPhone reboots, you can simply start following the on-screen instructions. Select “Set Up Manually” and then “Restore from iCloud Backup.” Alternatively, you can have two iOS devices. In this case, you can transfer some of its settings using “Quick Start.”
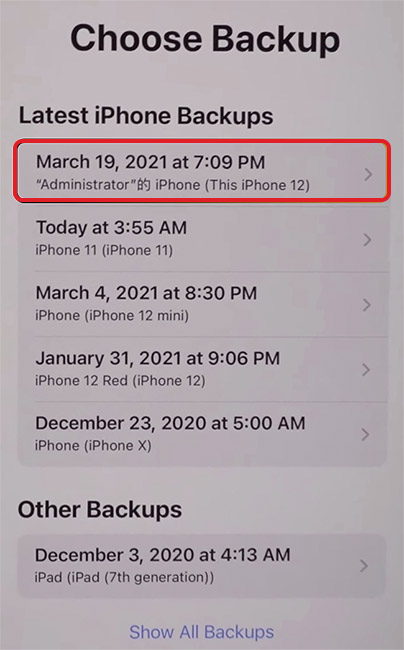
- Sign In and Choose Backup: Log in with your Apple ID. You’ll see a list of backups. Pick the most recent backup that contains your lost data (dates and sizes are shown).
- Wait for Restore: The iPhone will download this information over Wi-Fi. This may take some time, depending on how much data you have. It will then restart with this information.
When done, your iPhone should be just as it was at the backup date. Note that this process fully overwrites the current phone with the backup image – so any new data after that backup will be replaced.
Method 2: Restore from a Mac Backup (Finder)
If you used your Mac to back up your iPhone, you can restore from that instead of iCloud.
- Connect to your computer: Use a USB (or USB-C) cable to hook the iPhone to the Mac where your backup lives. Unlock the phone and trust the computer when you are prompted.

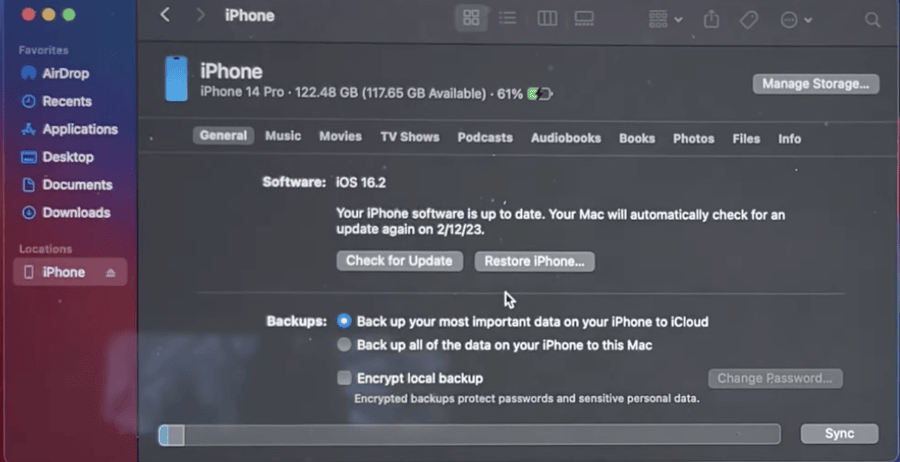
- Open Finder: On Mac, open Finder and select your iPhone in the sidebar.
- Choose Restore: In Finder or iTunes, click “Restore iPhone…” (in Finder, after selecting your device; in iTunes, on the Summary page). A dialog will pop up.
- Select Backup and Restore: Pick your desired backup from the list (look at the date/time) and click Restore. If the backup was encrypted, enter the password.
- Wait for Completion: Let the restore finish. Your iPhone will restart and sync with the backup’s contents.
This method replaces everything on the phone with what was in your backup file (similar to iCloud restore). It’s often faster than iCloud because it uses a wired connection.
Method 3: Recover Individual Items (Photos, Notes, etc.)
If you lost only some specific kind of files like let’s say photos or contacts, a full restore is not needed at all. These can be retrieved separately.
- On any computer, visit iCloud.com and sign in.
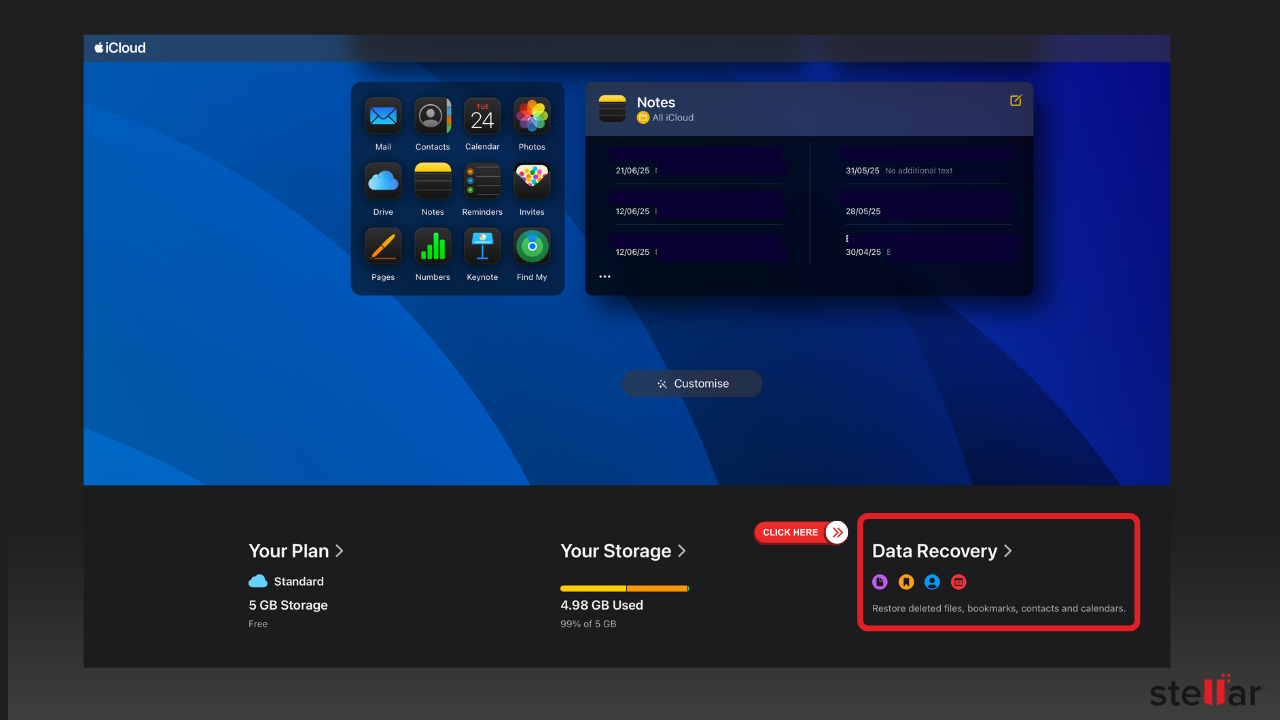
- Go to Data Recovery, which is located on the bottom-right corner of the page.
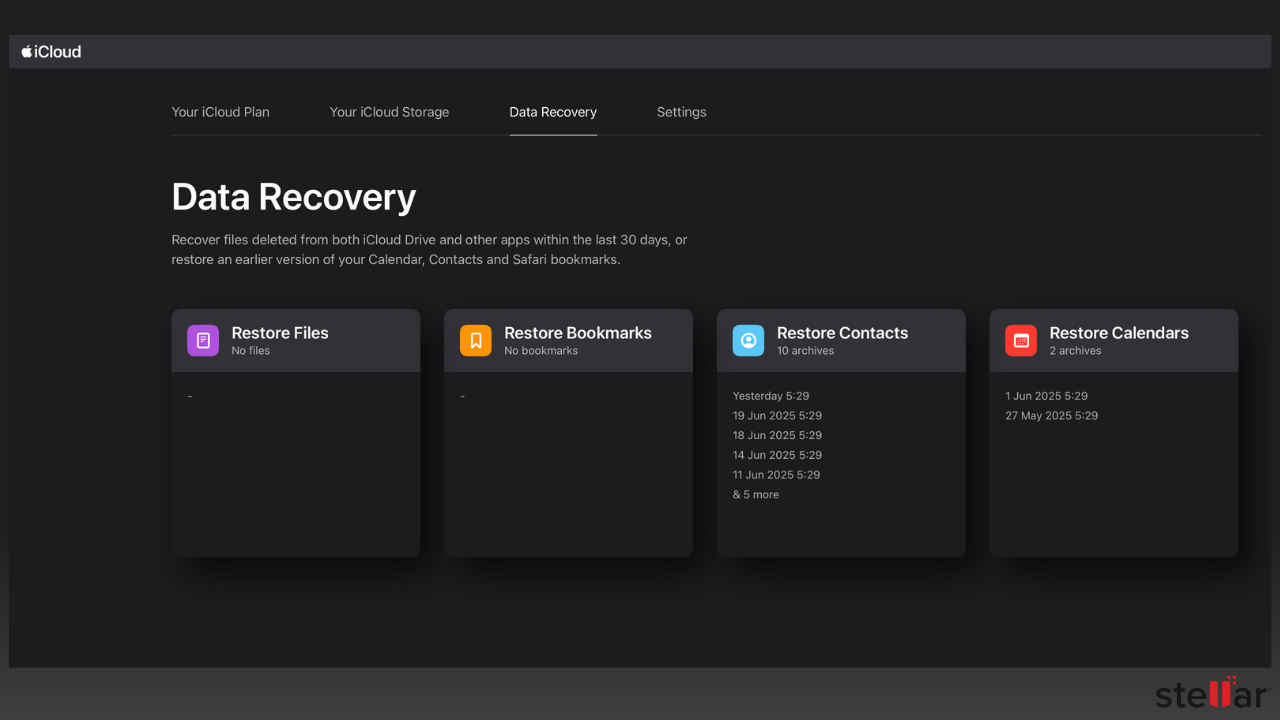
- Pick and Choose: From the screen, select the kind of items you have lost and need to restore now.
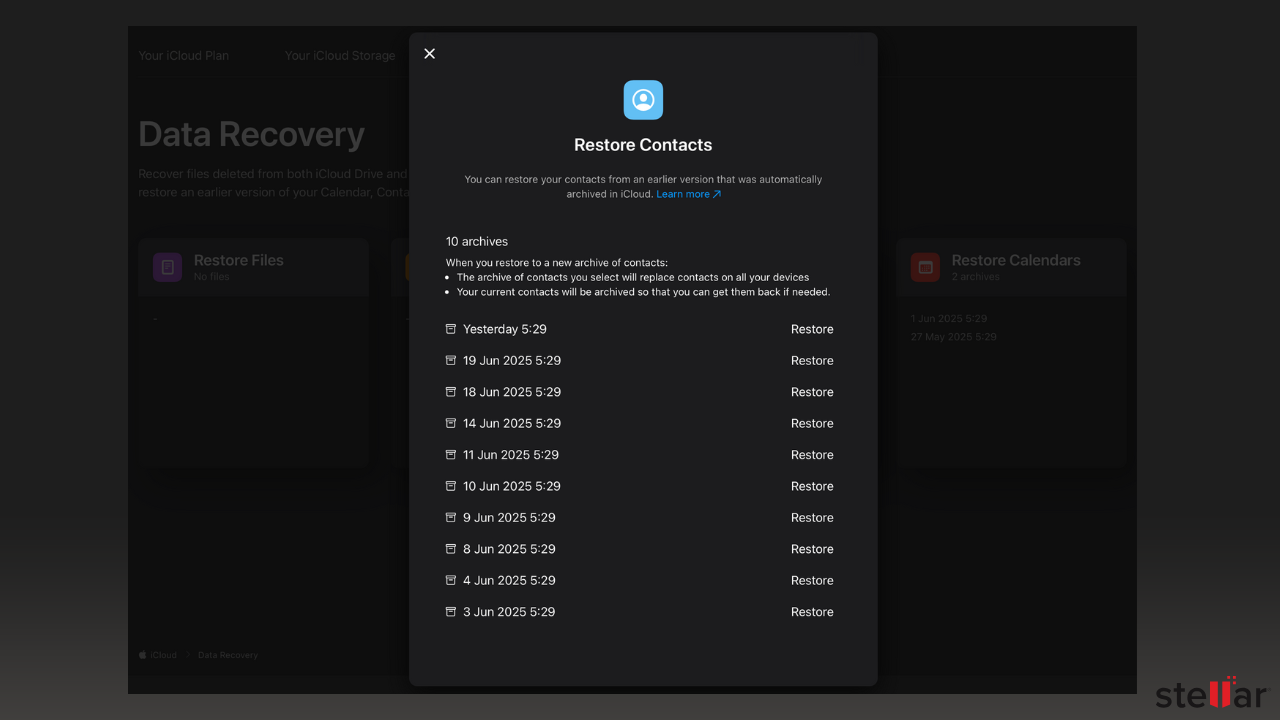
- Restore your data by clicking the Restore button that appears against all those files.
These quick fixes are handy if, say, you only lost a batch of photos. As one iPhone data guide notes, enabling the “Recently Deleted” feature in Photos keeps images for 30 days. Use it as a safety net.
Method 4: Use Specialized iPhone Recovery Software
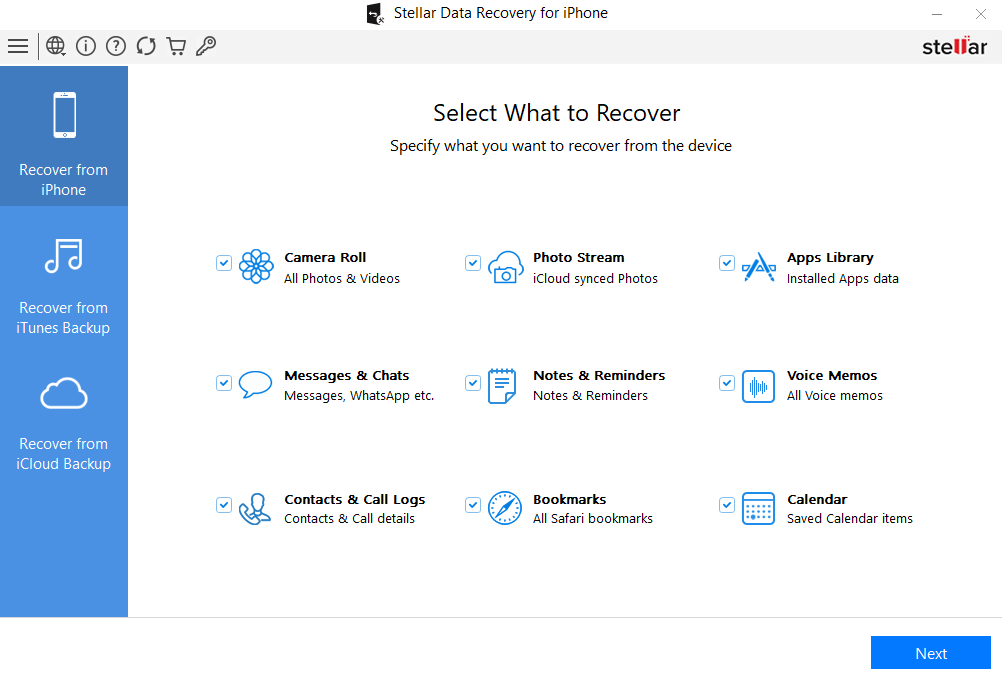
If the above Apple solutions don’t work… let’s say if you just have no backup or have a severely corrupted device, then a reliable iPhone data recovery software definitely can help and save your day. Such a program can scan the phone or maybe your backup files and retrieve data that is normally not accessible. Our best pick is Stellar Data Recovery for iPhone and here is how it can rescue those lost files:
- Install the Software: On a Mac or PC, go ahead and download Stellar Data Recovery for iPhone. Then, just install it like any other application.
- Launch and Connect: Open the tool and then plug in your iPhone to the computer with a data cable, lightening or USB-C per your phone. Now unlock the phone and tap Trust when the system asks you.
- Choose Recovery Mode: Select the Recover from iPhone option to scan the device you just connected or select backup option if you have got those local backup files.
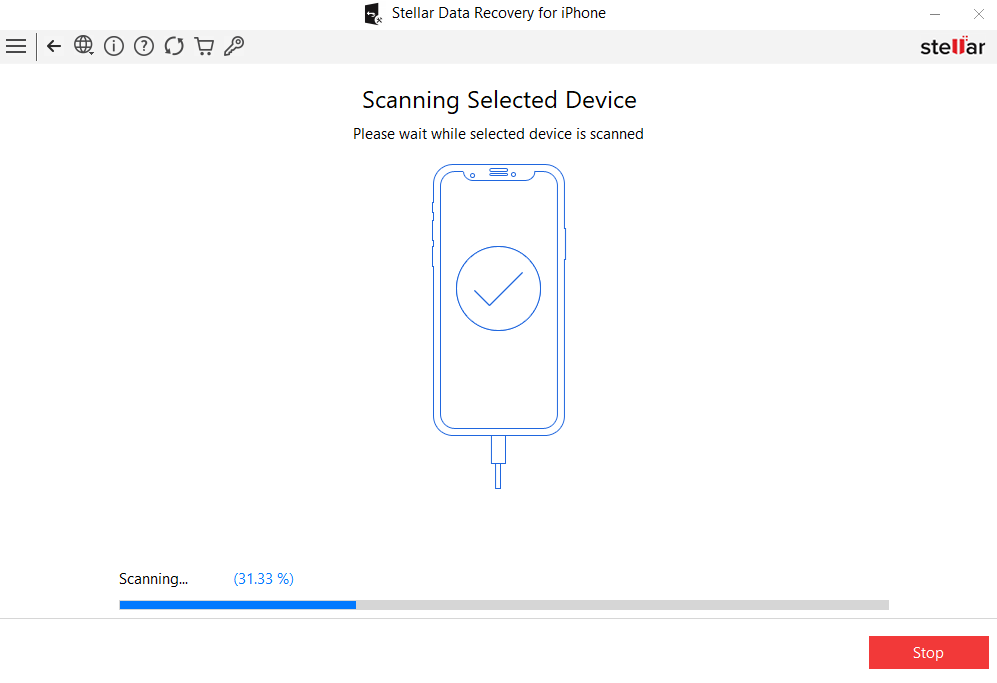
- Scan for Data: Click Scan. This way, the tool will analyze the phone or backup, as applicable, and look for recoverable files if there are any in your storage.
- Preview and Recover: When that scan ends, just preview the files it found for you. Go through the ones that you want to retrieve and click Save on the bottom-right to export them all to your computer.
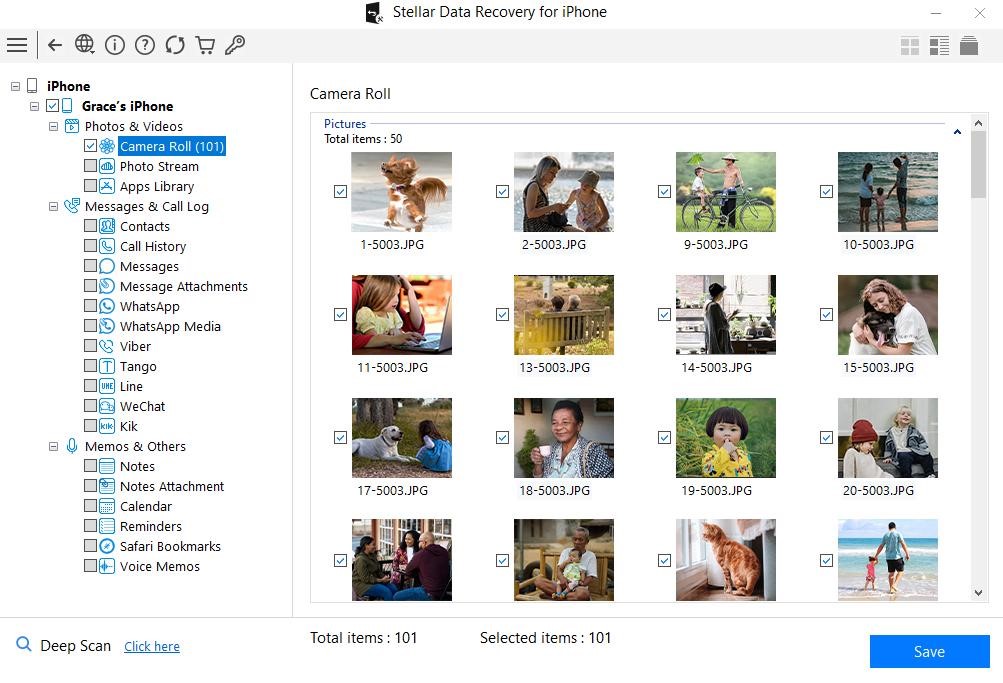
This method works like a data detective. It carefully reads what’s left on the iPhone’s storage without overwriting anything. According to Stellar’s guide, once your device is scanned “all iOS files will be listed” for recovery, so you can select exactly what you need.
Conclusion
Data loss on your iPhone is not supposed to be the end of the. By steering clear of the common recovery blunders above and of course acting quickly with a smart plan in your hands, you can often salvage those precious memories and files. But always keep backups current (the single best prevention).
If data just vanishes into thin air, try Apple’s restore features first (iCloud and iTunes), check that “Recently Deleted” folder and only then go towards bringing in a reliable recovery app.
A trusted and well recognized iPhone data recovery software can scan your device or backups and let you recover what you need even selectively too. Stay calm, follow the steps we showed you here, and you’ll maximize your chances of getting those lost files.


Pallavi is a literature graduate turned content strategist, specializing in data recovery. She creates insightful, user-friendly content to help people rescue their data from hard drives, SSDs, memory cards, and more. When she’s not decoding tech for everyday users, she’s curled up with a book - or secretly planning her next adventure.

 11 min read