A user recently reported facing sudden system freezes and BSoDs while running several programs in Android emulators or using Unity, the popular game engine. Analyzing the mini dump file, many users found that it was related to the amdppm.sys driver responsible for managing the performance and power consumption in AMD CPUs. Let’s understand some causes behind the error.
What Could Be Causing the amdppm.sys Blue Screen Error?
The occurrence of blue screen of death errors depends on various factors, such as hardware configurations, software updates, state of drivers, etc. Below are some of the reasons why you might be facing the amdppm.sys BSoD on your PC:
- Corrupted, outdated, or missing amdppm.sys driver file
- Overclocking your CPU to unstable settings
- Missing or corrupted system files
- Presence of a virus or malware on your system
- Issues like overheating or a failing hardware component
- Conflicting third-party software
Troubleshooting the amdppm.sys Blue Screen Error
We recommend that before attempting the actual troubleshooting methods, try some basic workarounds, such as updating your AMD drivers & Windows OS to the latest version, and scanning your PC for viruses or malware.
Method 1: Run SFC and DISM Scans
If the Windows system files get corrupted due to disk errors, improper shutdowns, or malware, etc., it can trigger a chain reaction that can affect the power management drivers. To fix this, run the SFC and DISM scans.
The System File Checker (SFC) and Deployment Imaging Service and Management Tool (DISM) are built-in utilities in Windows to repair damaged system files and fix any underlying errors.
SFC scans system files, including DLL files, and replaces corrupt files with a cached copy located in a compressed folder at: %WinDir%\System32\dllcache
The DISM tool repairs Windows image, including the Windows Component Store and fixes issues that the SFC can’t resolve by itself.
Here’s how to perform these scans:
Step 1: Search for Command Prompt in the taskbar and select Run as administrator.
Step 2: Now, execute the following command for SFC scan: sfc /scannow
Step 3: Next, execute the following command for DISM scan: DISM /Online /Cleanup-Image /RestoreHealth
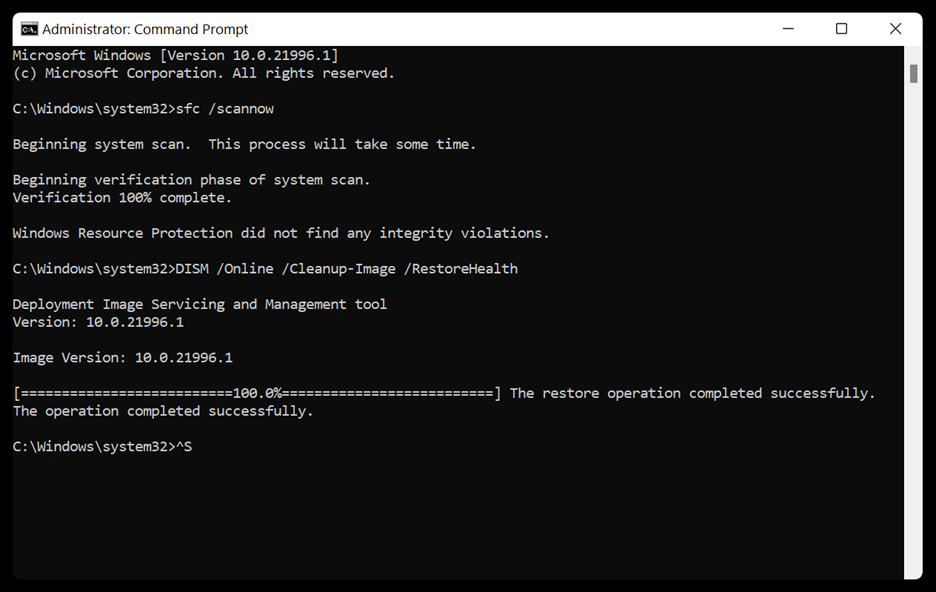
Finally, restart your computer and see if the issue is resolved.
Method 2: Modify the Registry
Editing the registry is another way of fixing the amdppm.sys blue screen error. However, making changes to the registry can be risky, so proceed carefully.
Step 1: Press Win + R to open the Run dialog box.
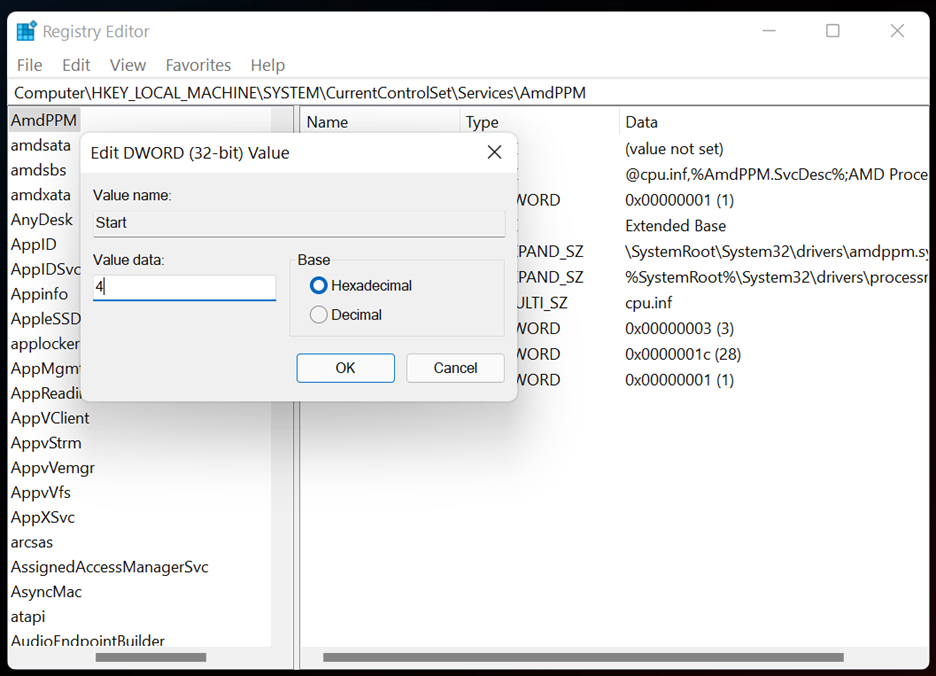
Step 2: Type in regedit and click OK to launch the Registry Editor.
Step 3: Now enter the following path in the Registry Editor window: HKEY_LOCAL_MACHINE\SYSTEM\CurrentControlSet\Services\amdppm
Step 4: Locate Start DWORD and double-click on it.
Step 5: A new window will be displayed. Set the Value data to 4 and click OK to confirm.
Step 6: Reboot your system and check if the error is resolved.
Method 3: Disable Overclocking
As stated earlier, overclocking your CPU for improved performance may trigger the amdppm.sys blue screen error on your computer. You should consider disabling the overclocking settings to effectively resolve this issue. Here’s the rundown:
Step 1: Go to Settings > Update & Security.
Step 2: Click Recovery from the left sidebar.
Step 3: Under Advanced startup, click Restart now, and wait till Windows boots into Advanced Startup Options.
Step 4: Now, click Troubleshoot and select Advanced options.
Step 5: Click UEFI Firmware Settings and hit Restart.
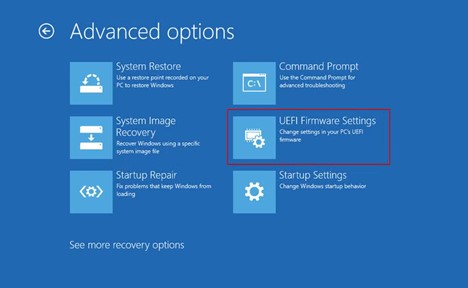
Step 6: Your computer will now boot into BIOS.
Step 7: Navigate to the Advanced tab, and select Performance.
Step 8: Now find the Overclocking option and disable it.
Step 9: Press the Esc key and choose Save and Exit.
Method 4: Enable Virtualization
Some Windows forum users have reported fixing the amdppm.sys blue screen error after enabling virtualization on their system. You should give it a try as well. Here’s how to do it:
Step 1: Press Win + S and search CMD.
Step 2: Click on Run as administrator.
Step 3: Now execute the following command: dism.exe /Online /Enable-Feature:Microsoft-Hyper-V /All
Step 4: Restart your computer and see if the error is resolved.
Method 5: Rename the amdppm.sys File
Several users have reported that renaming the intelppm.sys file resolved the blue screen error on their system. You might want to give this method a try and see if it works for you.
Step 1: Press Win + R to open the Run box.
Step 2: Enter the following path and press enter: C:\Windows\System32\Drivers\
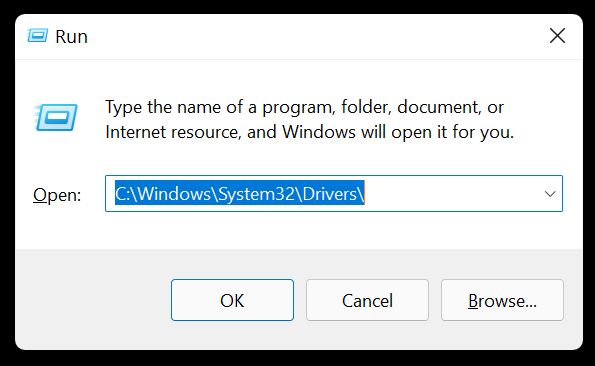
Step 3: Locate the amdppm.sys file, right-click on it, and select Rename.
Step 4: Now change the file from amdppm.sys to amdppm.sys.bak.
Step 5: Restart your computer and check if the issue is resolved.
Solution 6: Reset Windows
If the above methods fail to resolve the amdppm.sys blue screen error on your system, we recommend resetting your Windows as a last resort. But remember to back up your data before carrying out this procedure. Here’s how to reset your PC:
- Navigate to Start > Settings > Update & Security > Recovery
- Under Reset this PC, click Reset PC and follow the instructions to complete the process.
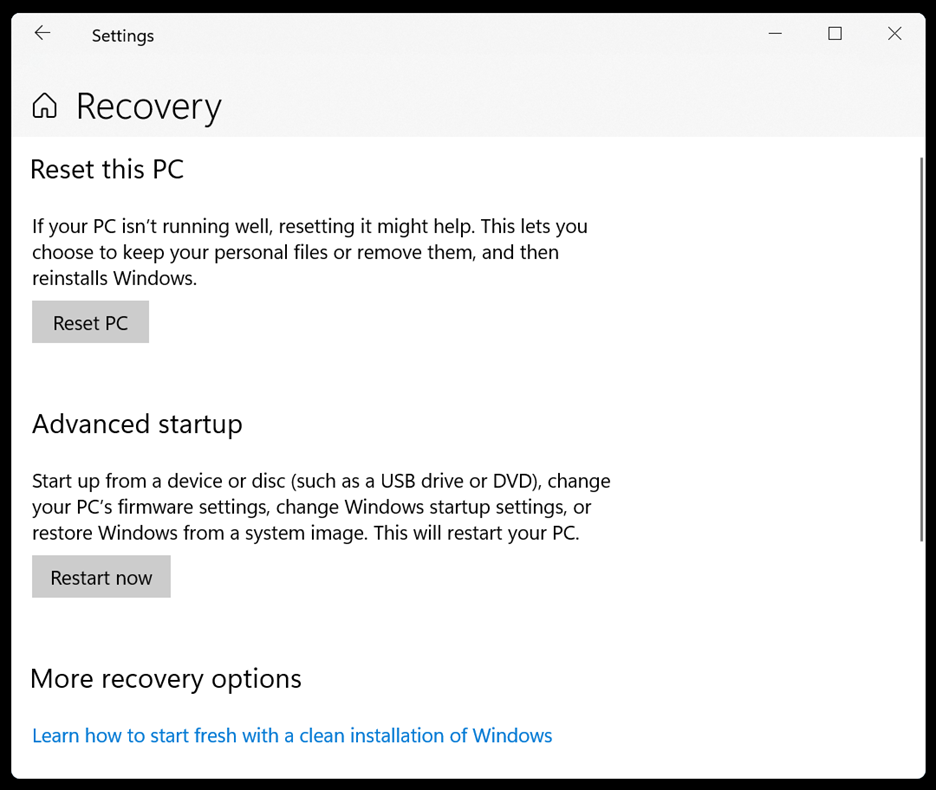
Note: Don’t forget to back up your important files and data before resetting your PC.
How to Recover Lost Data After Experiencing amdppm.sys on Windows?
The amdppm.sys blue screen error may result in permanent loss of any data currently stored in the RAM and not saved to the hard drive yet. In such cases, we recommend using a professional data recovery software to retrieve files lost due to BSoD errors, corrupted system files, file-system damage, etc.
Wrapping Up
To fix the amdppm.sys Blue Screen Error on your Windows PC, try running the SFC & DISM scans, modifying registry, disabling overclocking, or enabling virtualization. Do let us know which method worked for you! Did we miss out on anything? Please share in the comments below.