So your trusty external hard drive has suddenly turned into a blinking traffic signal and blocked access to your precious files? Don’t worry, there are concrete steps you can try before assuming the worst.
In this guide, we’ll walk through what might be causing your drive to blink and fail to be detected, and then cover a series of practical fixes, from simple cable swaps to system tweaks, that can often make it detectable. Grab a coffee, take a deep breath, and let’s tackle this issue step by step.
Possible Causes of External Drive Blinking and Not Detected Issue
Several different factors can make an external drive light blink and stay “invisible” to your PC. In many cases, a bad connection or software setting is to blame. Some common culprits are:
- Faulty USB port or cable: When you have a damaged or loose USB cable, it can result in intermittent power and blinking lights.
- Hidden or disabled devices: Windows can act up sometimes and make ghost entries for your drive, especially if you unplugged it improperly
- USB power-saving settings: Windows can also sometimes auto-suspend an unused USB port to save power, cutting an external drive unexpectedly.
- Partition or format problems: In some circumstances, when the drive’s file system is corrupt or missing, your Windows may not mount any partition.
- Outdated or corrupt drivers/firmware: A mismatched or stale USB/drive driver can prevent proper communication.
- Malware or virus infection: On rare occasions, a virus might interfere with USB drives and make them behave erratically.
Each of these issues can interrupt a normal connection between your PC and drive. In the following section, we’ll try one solution at a time.
Methods to Fix the Undetected Blinking External Drive Issue
Below are several methods to try, starting from the simplest (hardware checks) to more advanced (system fixes).
Method 1: Try Another USB Port and Cable
Sometimes, the simplest fix is the solution. A bad USB port or cable is a common cause of blinking lights and non-detection. By switching the port and cable, you can rule out a flaky connection:
- Unplug the drive and PC – Safely disconnect the external drive and shut down your computer.
- Use a different USB port – Plug the drive into a different USB socket on your PC. For desktops, use a back-panel port (they often have more power). Laptops: Try any other port available.
- Try a new cable – Swap the USB cable with a known-good one (if your drive has a detachable cable). Cables can wear out, especially USB 3.0 cables.
- Test on another computer – If possible, connect the drive to a second computer. If it works there, the issue is with your original PC’s port or software setup.
After trying this, turn your PC back on with the drive plugged in. If a port or cable was the problem, the drive should now be detected normally. If it still blinks and isn’t seen, move on to the next fix.
Suggested Read: Recover Files from a Corrupt or Unresponsive USB Drive
Method 2: Power Cycle Your Computer and Drive
A complete power reset of both the computer and the drive can clear glitches that might be blocking detection. Sometimes, the drive or PC is stuck in an odd state, and a full restart helps. To do this:
- Shut down your PC: Turn off the computer completely and unplug its power cord for about 30 seconds.
- Disconnect the drive’s power and USB: If the external drive has its own power adapter, unplug it. Also, unplug the USB cable from both the drive and the PC.
- Wait briefly: Leave everything off for about a minute. This lets any residual power drain out, resetting the drive’s electronics.
- Reconnect and restart: First, plug the drive’s power adapter back in (if any), then plug the USB cable into the drive and PC. Finally, power on the computer.
After the system boots up, watch the drive’s LED. It will likely light up normally. This “full reset” often clears weird glitches so Windows can recognize the drive properly. If the blinking issue persists, continue with more steps below.
Method 3: Disable USB Power Management
Windows can be too clever about saving power. It may put USB devices to sleep automatically, which can cause your drive to blink off and on. Disabling this power-saving feature for USB hubs can keep your drive powered:
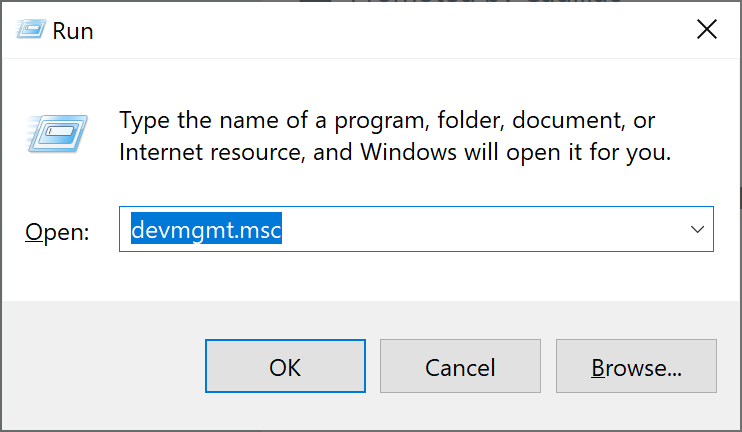
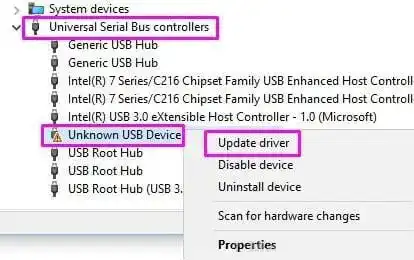
- Open Device Manager: Press Windows+R, type devmgmt.msc, and press Enter to open Device Manager.
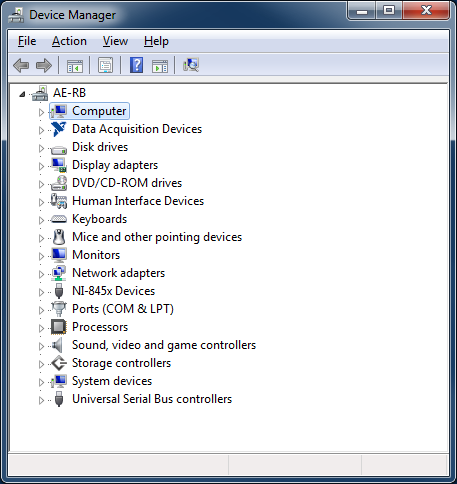
- Expand USB controllers – Scroll to Universal Serial Bus controllers and expand that section.
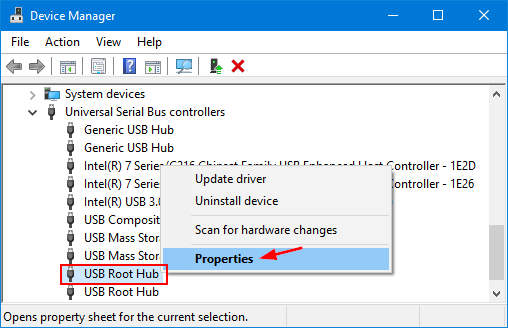
- Access each USB Root Hub: For each entry named “USB Root Hub” (or “Generic USB Hub”), right-click it and choose Properties.
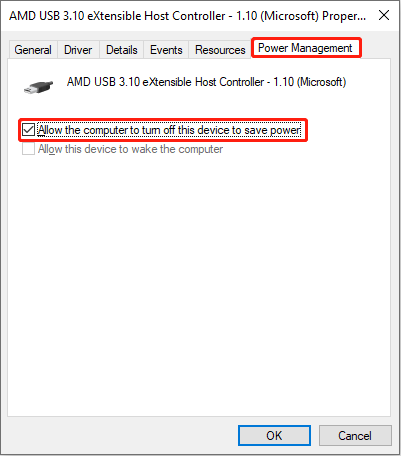
- Turn off power-saving: Go to the Power Management tab and uncheck “Allow the computer to turn off this device to save power.” Click OK.
- Repeat and restart: Do this for every USB Root Hub listed. Then restart your PC.
Disabling that setting prevents Windows from cutting power to your USB ports when idle. When your PC restarts, check if the drive is now detected. This alone can resolve blinking caused by power cycling of the USB port.
Method 4: Run an Antivirus/Malware Scan
Viruses or malware are a less common cause, but they’re worth checking given how valuable your data is. A quick scan ensures the problem isn’t malicious:
- Scan your PC: Run a full system antivirus scan on your computer, focusing on the USB and external drive areas.
- Scan the drive: If the drive shows up at all (even briefly), run your antivirus on it as well. If it doesn’t appear, you may skip this for now or use a bootable antivirus tool.
- Remove threats: If any threats or suspicious files are found on your PC or the drive, quarantine or delete them as your software recommends.
After cleaning up any malware, reboot your PC and reconnect the drive. A successful virus removal can sometimes restore normal drive detection. If nothing is found or the problem remains, move on to Device Manager fixes next.
Method 5: Remove Hidden Devices in Device Manager
Windows keeps track of devices even after they’re disconnected. Occasionally, “ghosted” entries in Device Manager can interfere with a drive’s detection. Removing these can clear conflicts:
- Open Device Manager (Shift+Ctrl+Delete key > Device Manager).
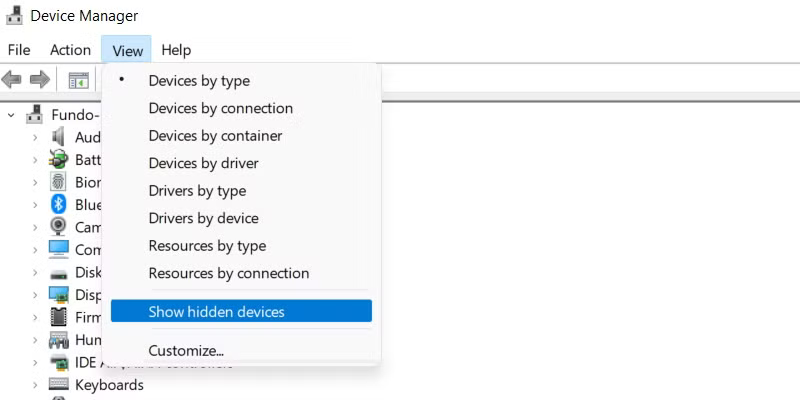
- Show hidden devices: In the Device Manager window, click View and select Show hidden devices.
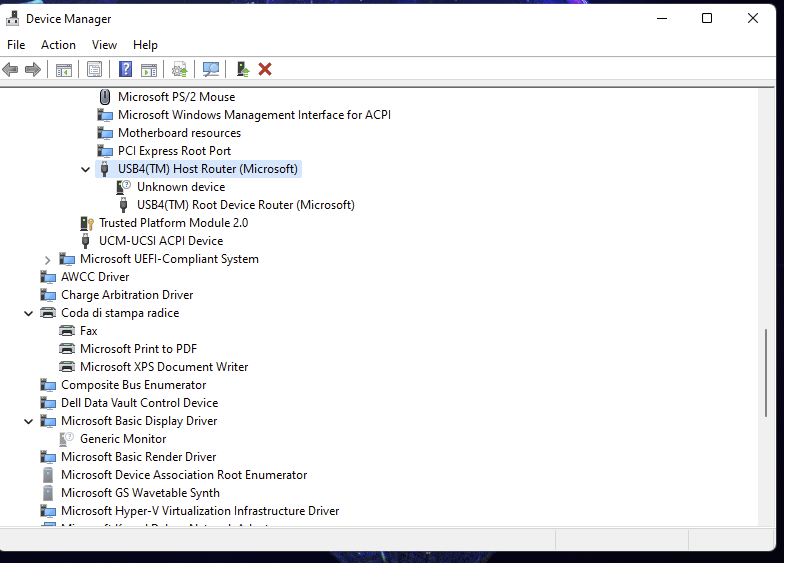
- Expand all categories: Go through the list. Pay special attention to Disk drives and Universal Serial Bus controllers. Also, expand Storage controllers, if present.
- Uninstall ghost entries: Any device names that appear greyed-out (often labeled “Unknown device” or the drive’s name but greyed) could be leftovers. Right-click each greyed device and choose Uninstall device.
- Reboot: After uninstalling all hidden/ghost entries, restart your computer.
This process forces Windows to rebuild its hardware list. On reboot, connect the drive again. Windows will reinstall fresh drivers for the drive, which often solves issues caused by conflicting ghost entries.
Method 6: Reinstall or Update USB and Drive Drivers
If software drivers for your USB ports or the drive itself are corrupted or outdated, reinstalling or updating them can help:
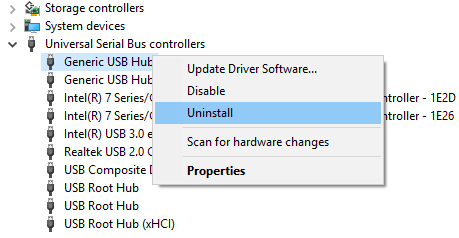
- Uninstall USB controllers: In Device Manager, under Universal Serial Bus controllers, right-click each USB Root Hub, Generic USB Hub, and Host Controller, then choose Uninstall device. (Don’t worry… you’re removing the drivers; they’ll reinstall on reboot.)
- Unplug and Reboot: Disconnect the external drive, then restart your PC. Windows will automatically reinstall the USB controllers.
- Update driver software: If you choose Update driver, select Search automatically for drivers. Allow Windows to find and install any available updates. If you only uninstalled it, just reboot again with the drive connected – Windows will add it back.
Updating or refreshing drivers ensures that the communication between your PC and the drive uses the correct software. Once done, open “This PC” (or “My Computer”) and see if the drive now appears. Often, reinstalling the USB and drive drivers fixes subtle compatibility problems.
Method 7: Assign a Drive Letter via Disk Management
Sometimes, the drive is actually detected by Windows but just not assigned a letter, so it won’t show up in File Explorer. Checking Disk Management can reveal this:
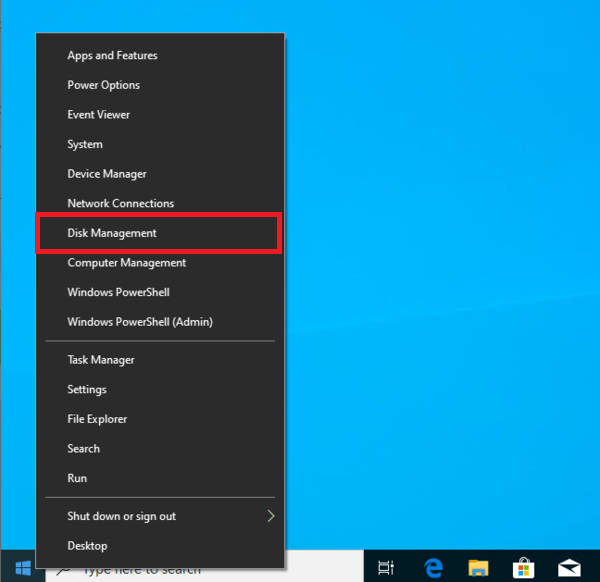
- Open Disk Management: Right-click the Start button and choose Disk Management.
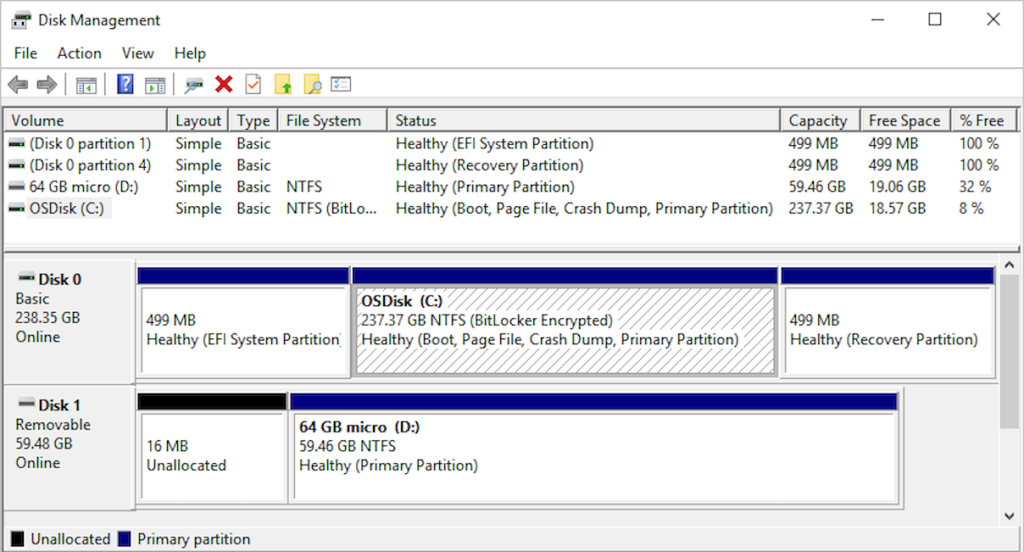
- Locate your drive: In the lower pane, look for your external drive. It might show as a bar labeled “Disk 1” (or higher) with a partition, or as “Unallocated” space if something’s wrong.
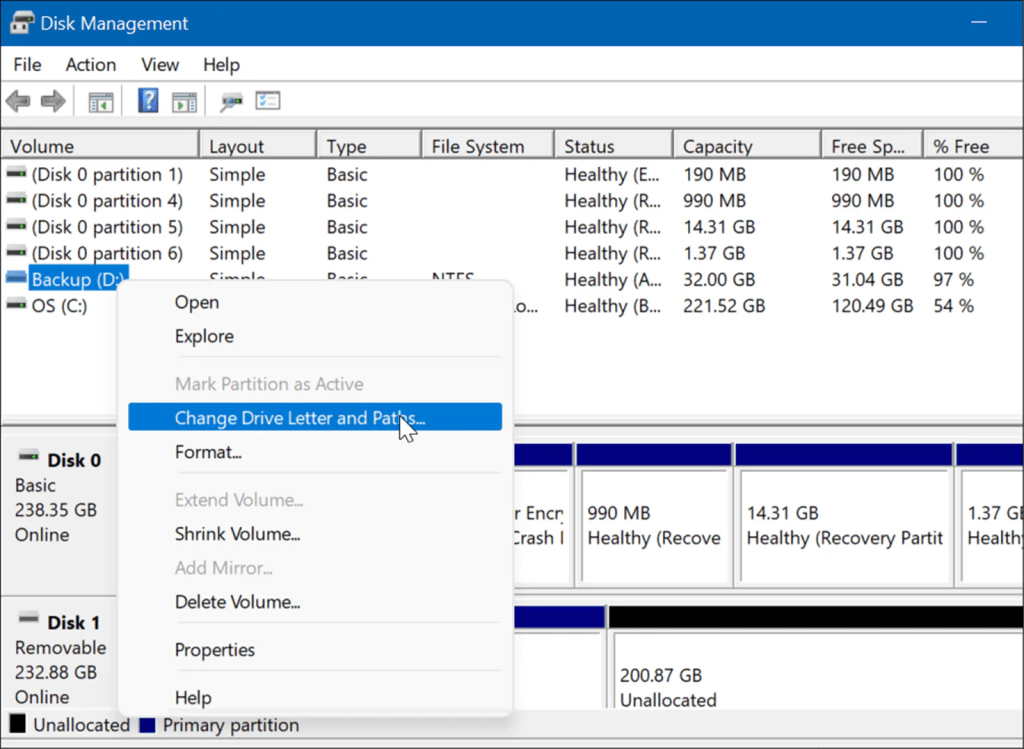
- Assign/Change drive letter: If you see your drive listed without a drive letter (just a volume label and size), right-click it and choose Change Drive Letter and Paths. Then click Add (if none) or Change (if one is listed) and pick an unused letter, then click OK.
- Finalize: Confirm any prompts. Close Disk Management.
After assigning a letter, Windows should make the drive visible in File Explorer. This method solves the case where the drive is healthy but simply not mounted with a letter.
Method 8: Modify Registry Filters
If none of the above works, there may be a deeper driver conflict involving UpperFilters or LowerFilters in the registry. Be cautious: Incorrect registry edits can cause problems. Create a system restore point or registry backup first. The fix is to remove any filter entries for USB or disk devices:
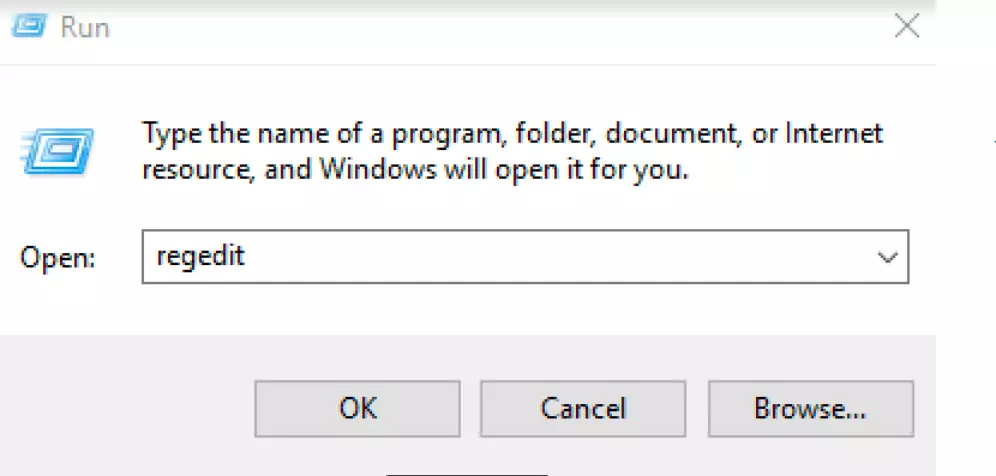
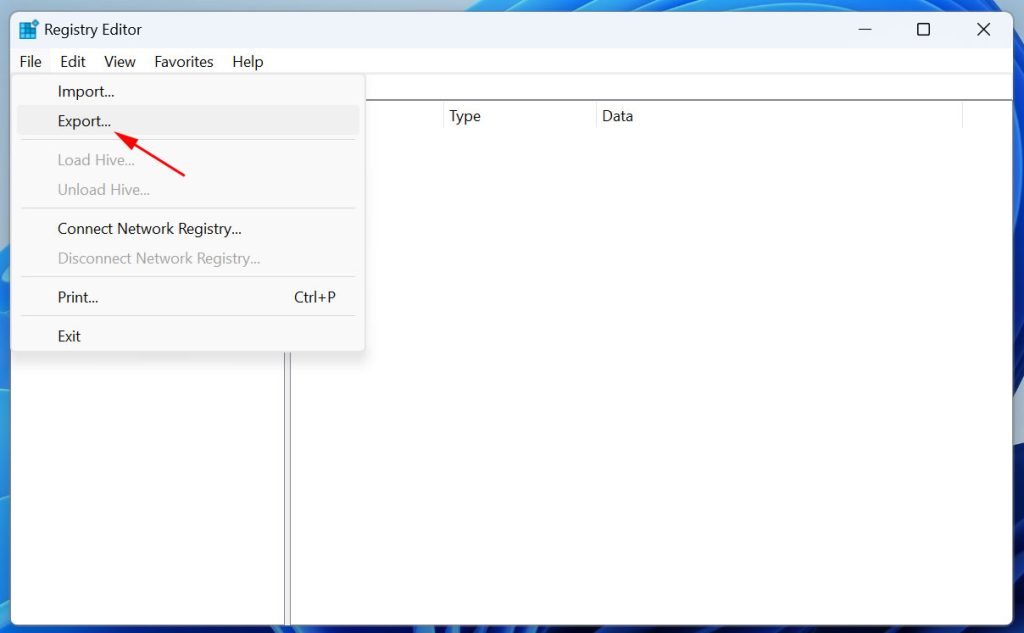
- Back up the Registry: Press Windows+R, type regedit, and hit Enter.
- In the Registry Editor, click File > Export and save a backup of the entire registry.
- Navigate to the filter key and go to
HKEY_LOCAL_MACHINE\SYSTEM\CurrentControlSet\Control\Class\{4D36E967-E325-11CE-BFC1-08002BE10318}
This key controls storage device drivers.
- Delete filters: In the right pane, look for entries named UpperFilters and LowerFilters. If either exists, right-click them and choose Delete.
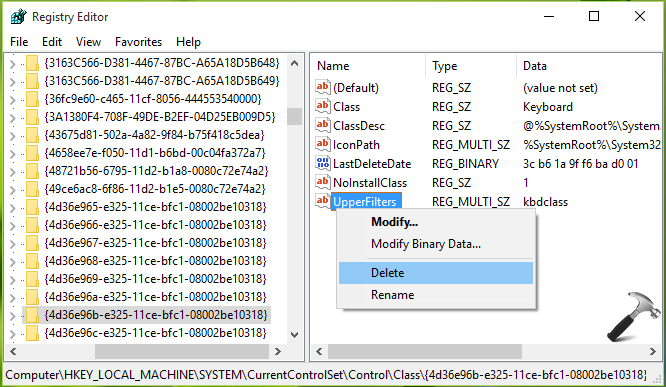
- Close and reboot: Exit Registry Editor and restart your PC.
Removing these filter drivers clears out any old or corrupt layering drivers that might block the device. After reboot, plug in the drive again. Often this “registry cleanup” allows the drive to be recognized anew.
Method 9: Use a Reliable Recovery Software
If you’ve gone through all the methods above and the drive still only blinks, we’re now touching on more serious issues. In that case, it’s time to consider Stellar Data Recovery, a professional data recovery software to restore your files. This tool can scan drives that Windows can’t open and recover your files safely. It’s user-friendly (you don’t need to be a tech expert), and it works without risking further damage to your data.
With just a few clicks, select the file types to recover, pick the problem drive, run the scan and Stellar will list recoverable files that you can preview and restore. Many users trust it to rescue lost documents, photos, and more when a drive isn’t cooperating, even if Windows sees it as missing.
Conclusion
Alright, to sum it up, we know how nerve-racking it can become when a beloved external drive starts blinking but it vanishes from your computer. The key to this is to methodically go through these troubleshooting steps like checking connector cables and system’s ports, resetting power, adjusting settings, and if needed using specialized software. Hopefully… one of these methods is going to coax your drive back to life and let you retrieve your files safely.
Remember that backing up your data regularly is pretty important to avoid future scares. But if the drive still refuses to appear in the sidebar for no reason or you can hear some erratic noises when you plug it in, you should go ahead and consider getting expert help for safer recovery of your data.