Office 365 (now Microsoft 365), being a cloud-based platform, facilitates easy access of email messages, contacts, calendars, and much more, from anywhere, at any time, and using any device. All it needs is a stable internet connection. Due to this flexibility and various other benefits of Office 365, many users move to this cloud-based service from email clients, like Outlook for Mac. If you’re one such user and want to migrate your Mac Outlook data (OLM file) to the cloud-based platform, then you’re at the right place. In this guide, we’ll explain how to do this easily.
Why Import OLM Files into Office 365?
Most of the users/admins migrate OLM to Office 365 to manage emails and other mailbox data more efficiently and to leverage the flexibility of accessing it from different devices. There are several other benefits offered by Office 365 that compel users to import OLM file into Office 365. Let’s take a look at some of them:
- It offers advanced security and data protection measures. This helps protect mailbox data from issues related to local storage and device failure or malfunction.
- Seamlessly integrates with other Microsoft applications or tools. This facilitates coordination and teamwork, and also improves workflow.
- To access Outlook for Mac mailbox data if an organization has transitioned from Mac to Windows environment.
Can you Directly Import an OLM File into Office 365?
No, There is no direct way to import the OLM file into Office 365. The reason is that this file format is not natively supported by the cloud-based platform. The only way is to take the help of Stellar Converter for OLM Technician – a specialized OLM to PST converter tool.
Why Use Stellar Converter for OLM Technician for Office 365 Migration?
As the .olm file format is not supported by O365, the only option is to use Stellar Converter for OLM Technician – specialized OLM to PST converter tool that lets you directly import mailbox data from a Mac Outlook archive (OLM) to the cloud platform, in a few simple steps.
This Windows-compatible tool ensures that there is no risk of data loss during the OLM file data transfer. It also ensures that the OLM file data imported into Office 365 has the same folder hierarchy as in the source file.
Stellar Converter for OLM Technician offers a preview feature that allows you to verify the converted OLM mailbox items, such as emails, attachments, contacts, calendars, and more. This tool also allows you to selectively import mailbox items from the OLM file into an Office 365 account. You can also use the tool to save OLM file mailbox items in file formats, such as PST, PDF, RTF, HTML, MSG, etc. This tool supports OLM files created in Outlook for Mac 2021, 2019, 2016, and earlier versions.
Highlights of Stellar Converter for OLM Technician:
- No OLM file size limit
- Direct Office 365 export, no intermediate ‘Save as PST’ step required
- Preserves original folder hierarchy after migrating OLM to Office 365
- Preview mailbox items before importing
- Selective data migration of some folders/items allowed
- Save data of the OLM file in PST, PDF, RTF, HTML, and MSG files
- Works with OLM files of all Mac Outlook versions (2011–2024)
Steps to Import OLM Files into Office 365
Follow the steps below to directly import your OLM file data into an Office 365 account using Stellar Converter for OLM Technician:
Note: Transfer the OLM file to the Windows PC where you’ve installed the tool.
- Launch Stellar Converter for OLM Technician on your PC.
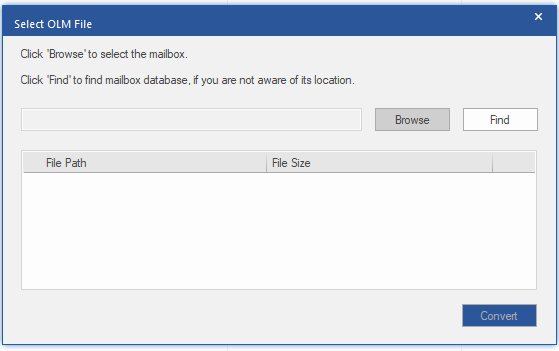
- You will see the Select OLM Mailbox window. Click on Browse to select the OLM file.
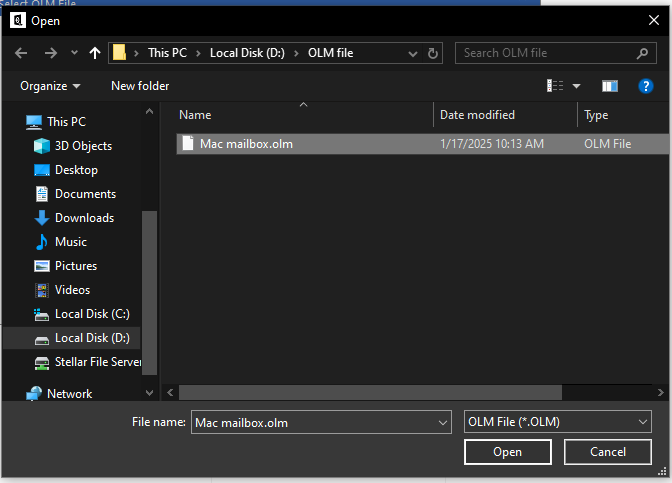
- Locate the OLM file on your PC. Select it and click on Open.
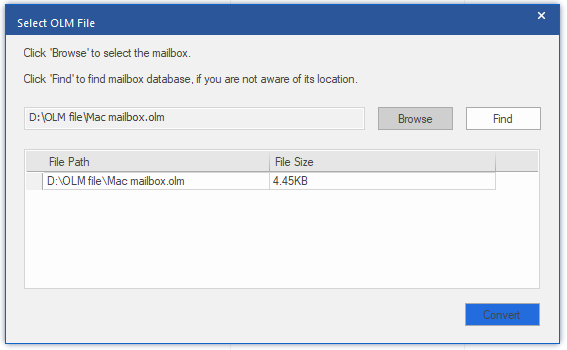
- Click on Convert. Let the scan to complete.
- Next, the software will list all the mailbox items in a tree view structure. Select any mailbox folder to see its contents in the middle pane, and its enhanced preview on the right side.
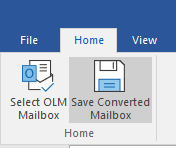
- After verifying the mailbox items, click on Save Converted Mailbox.
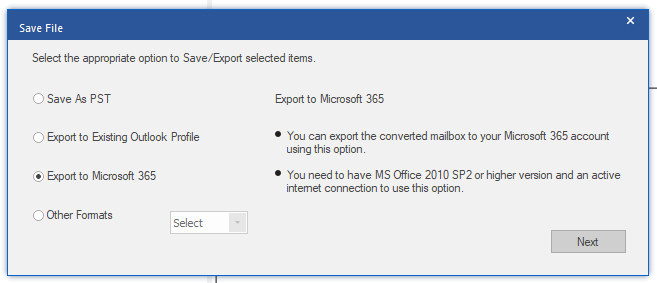
- The Save File window will open. Select the Export to Microsoft 365 option. Click Next.
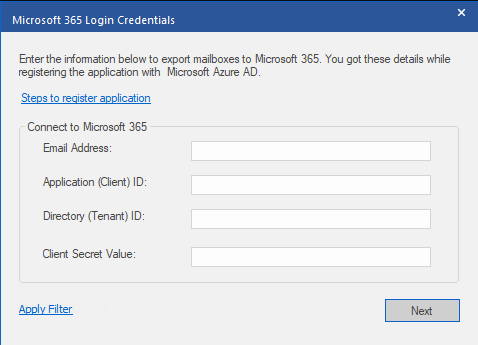
- The Microsoft 365 Login Credentials window will appear. Enter the following details: Email Address, Application (Client) ID, Directory (Tenant) ID, and Client Secret Value. After this, click on Next.
Note – In case you don’t have the details (required in this step), register the application in Azure AD.
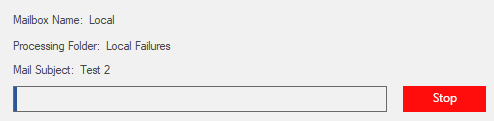
- The tool will begin the import process.
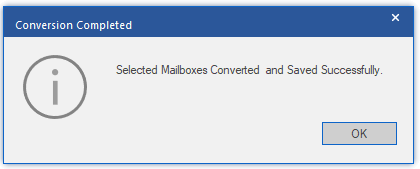
- Once it is complete, you will see a confirmation message saying, “Selected Mailbox Converted and Saved Successfully.”
- Click OK to finish.
You can also verify the migrated data by logging in to your Office 365 account.
Manual Method to Import OLM to Office 365
There is also a workaround to migrate OLM to Office 365. By configuring a Gmail account (IMAP-enabled) in both Mac Outlook app and Outlook on Windows, you can migrate only emails that are required in Office 465. Here’s how:
Step 1: To Enable IMAP in Gmail
You need first enable the IMAP settings in Gmail. To do this:
Note: If you don’t have a Gmail account, then create it.
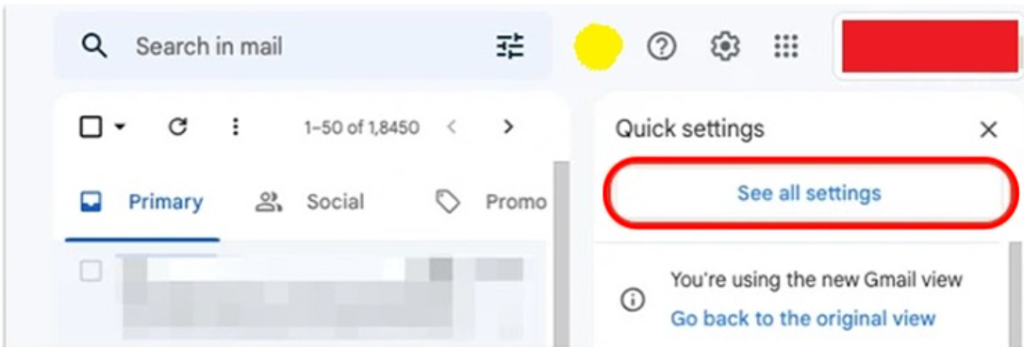
- Sign in to your Gmail account. Open Settings.
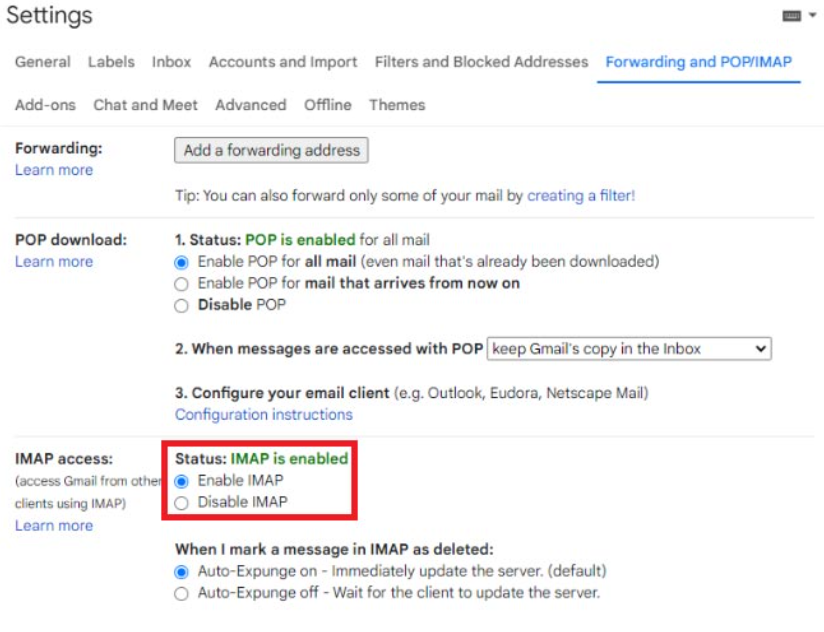
- Click on Forwarding and POP/IMAP and then click the Enable IMAP radio button under IMAP Access section.
- Click Save Changes.
Step 2: Configure Gmail Account in Outlook for Mac
The next step is to configure the Gmail account in Outlook for Mac. To do this:
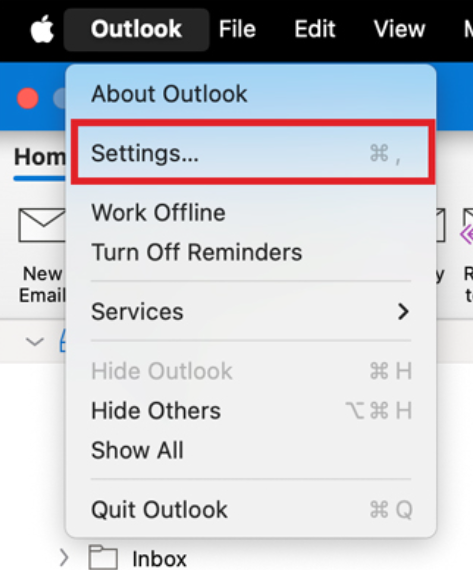
- Launch Outlook for Mac.
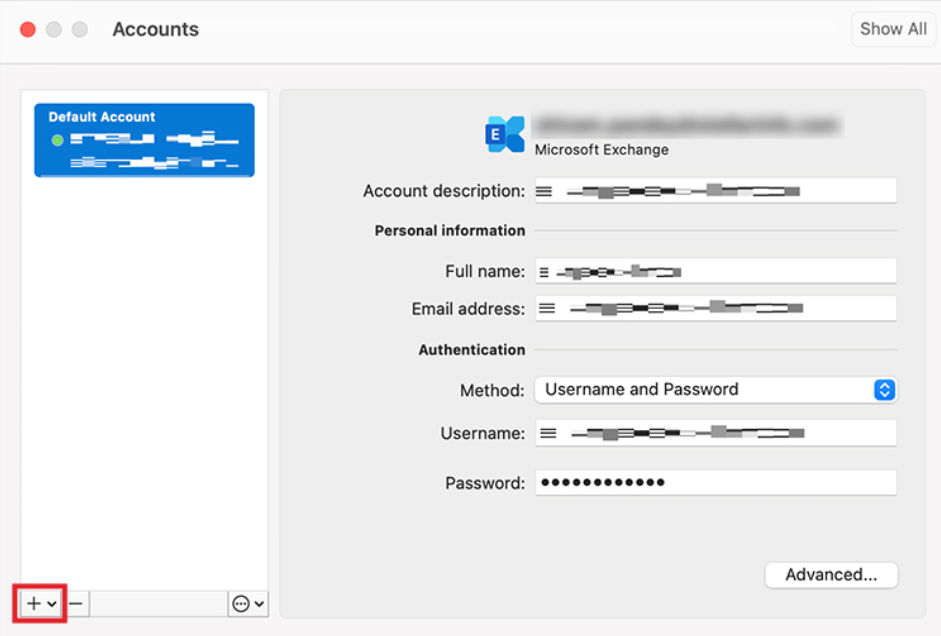
- Click on Outlook > Settings.
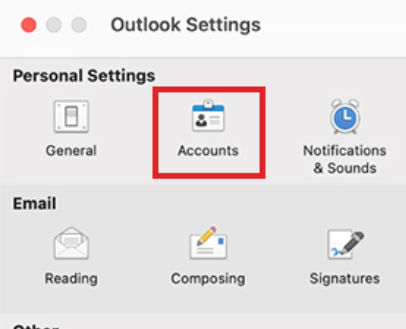
- Click on Accounts under Personal Settings.
- Click on the + icon in the lower left corner.
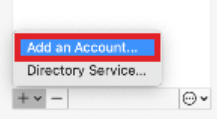
- It will show the Set Up Your Email wizard.
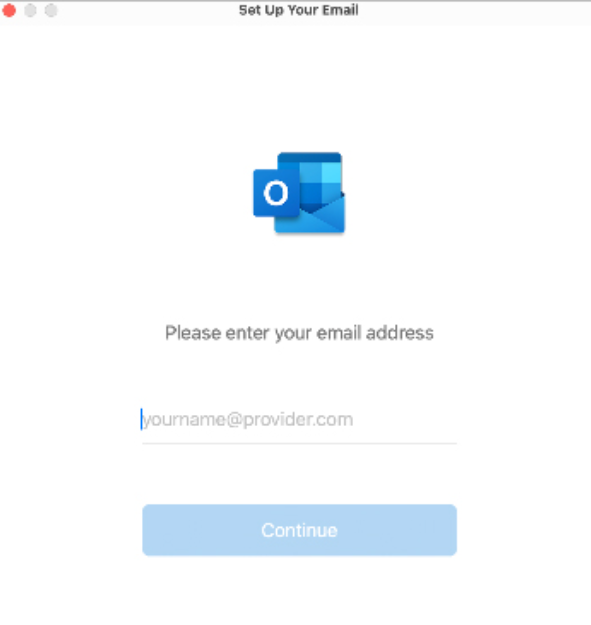
Follow the onscreen instructions to add your Gmail account to your Mac Outlook app.
Step 3: Import OLM into Mac Outlook
Now, locate the OLM file that you want to migrate to Office 365 and then follow the steps mentioned below:
Note: Outlook for Mac (New Version) doesn’t allow you to import OLM files. Make sure to switch to the Legacy Outlook before doing it.
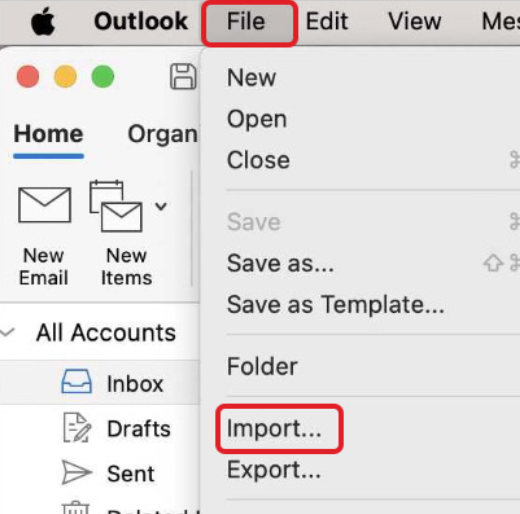
- The Import window will open.
- Choose Outlook for Mac archive file (.olm) and click Continue.
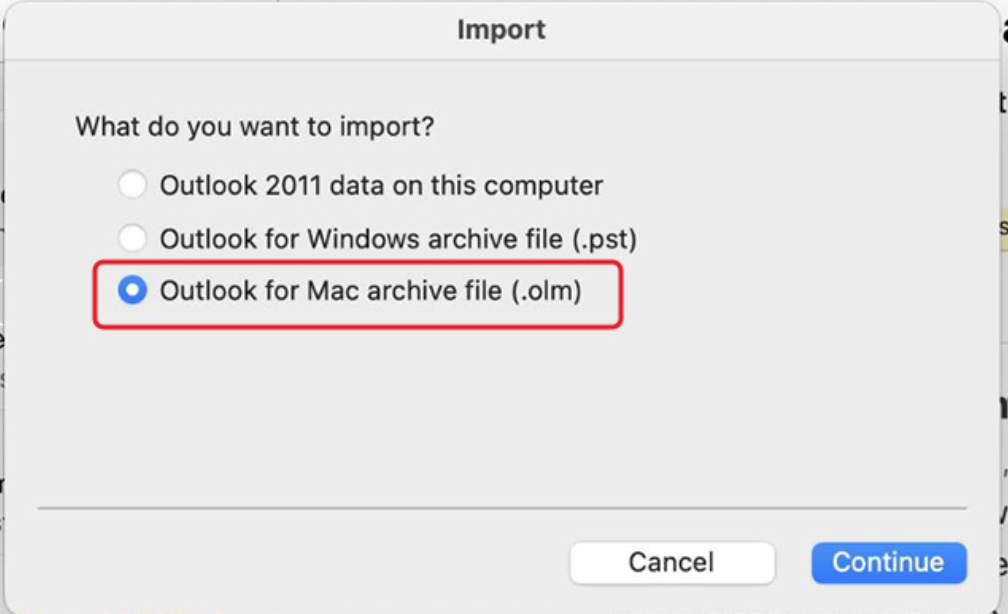
- Navigate to the OLM file location and select it. Click Import.

- It will begin importing the OLM file into Outlook.
- Click Finish to complete the process.

The imported OLM file will appear in the left pane. Select it and expand it to see various sub-folders in it.
Step 4: Copy Emails from OLM File to Gmail Account
Now, follow the steps below to transfer the OLM file data to the configured Gmail account:
- Relaunch Outlook for Mac. Press the Control key and click on the newly-added Gmail account. Select the New Folder option and name it.
- Now, select a mailbox folder and then select all the required items in it.
- Then, click on Move in the ribbon and then Copy to Folder.
- Search for the newly created folder (in the configured Gmail account).
- Click Copy.
Step 5: Configure the Gmail Account in Outlook for Windows
Now, you can configure the same Gmail account in Outlook for Windows (with Office 365 account already configured) to access the OLM data. Here are the steps:
- Launch MS Outlook.
- Configure the same Gmail account that you’ve configured in the Outlook for Mac application.
- Click on File > Info.
- Click on Add Account in the Account Information window.
- The Add Account window will open. Enter your Gmail account credentials.
- You will see the Outlook for Mac mailbox data in your Windows Outlook.
Once done, drag and drop the required emails from the folder in Gmail into Outlook – configured Office 365 account.
Drawbacks of the IMAP Workaround
Though it is free to use, it has certain limitations:
- It is a lengthy process as you have to perform multiple steps.
- An additional email account is required to be configured.
- Gmail has a free 15 GB mailbox limit. For moving data from OLM files larger than 15 GB, you need to purchase additional Gmail storage.
- It is a time-consuming process, which may take hours to migrate large amounts of mailbox data.
Stellar Converter for OLM Technician vs. Manual IMAP Method
Not sure which method to use? Here is a quick comparison between the two methods to help you choose:
| | Stellar Converter for OLM Technician | Manual IMAP Method |
| Transfers Emails | Yes | Yes |
| Transfer Contacts | Yes | No |
| Transfer Calendars | Yes | No |
| File Size Limit | None | 15 GB (Free Gmail account cap) |
| Data Integrity | 100% guaranteed | Risk of missing items |
| Technical skill needed | Low | High |
| Time Required | Minutes | Hours |
Conclusion
As mentioned, you cannot directly import the OLM file into the Office 365 account. You need to use Stellar Converter for OLM Technician. This specialized OLM converter tool can import the file into Office 365 account in just a few simple steps. It can also migrate OLM file data to Outlook profile or save it in PST, EML, PDF, RTF, and other file formats. Want to check how capable it is? Download the free trial today!