Dropped your iPhone and watched the screen go full spiderweb mode? Yeah, that moment of heart-sinking horror. We’ve all been there. It’s not just about a broken screen… it’s about everything inside the phone: photos, chats, contacts, notes… basically, your digital life. And if you’ve skipped the whole “regular backup” routine (not judging you at all!), things can feel extra stressful. But hey, relax and take a deep breath, you’re not out of luck just yet. If the other components of your iPhone still work or you’re planning to let go of this one and buy a new one, there’s still a lot of hope.
We’ve got several tricks up our sleeves that you can pull off at the comfort of your fireplace and bring your precious data back to safety. In the guide below, we’ll walk you through each method, no jargon-no panic, just simple steps to get your data back and keep your sanity intact.
Solutions to Recover Data after a Broken iPhone Screen
When your iPhone screen breaks, it’s not just the glass that shatters—your access to important data can suddenly disappear too. The good news? Whether you’ve backed up your device or not, there are several practical ways to recover your files and get everything back in place:
Method1: Use Finder /iTunes Backups
If you’ve been backing up your iPhone to your computer like the responsible tech-savvy human you are, nice job. That backup might just be your golden ticket out of data-loss doom. Time to restore!
For Mac users:
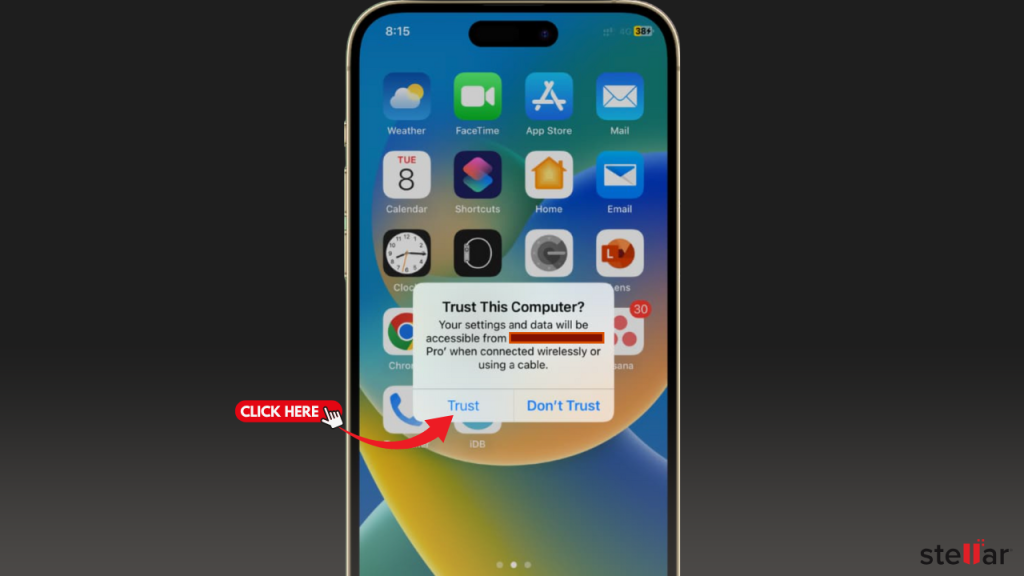
- Connect to your Mac. Plug your iPhone into the Mac you usually sync your iPhone with using a Type-C or a Lightning cable depending on your iPhone model. If prompted on the iPhone or computer to “Trust This Computer” or enter a passcode, do so.
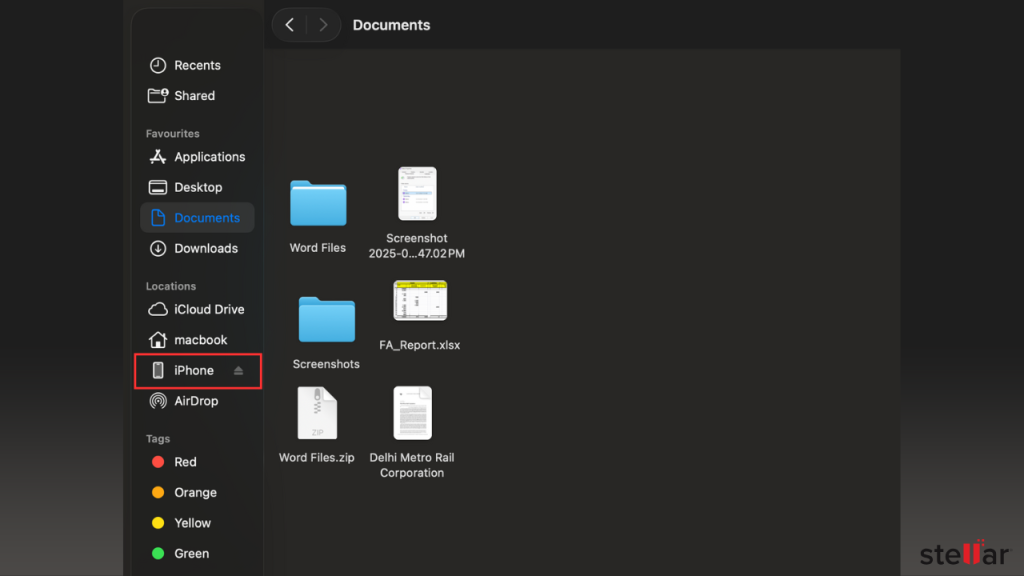
- Open Finder. Open Finder and click your iPhone in the sidebar.
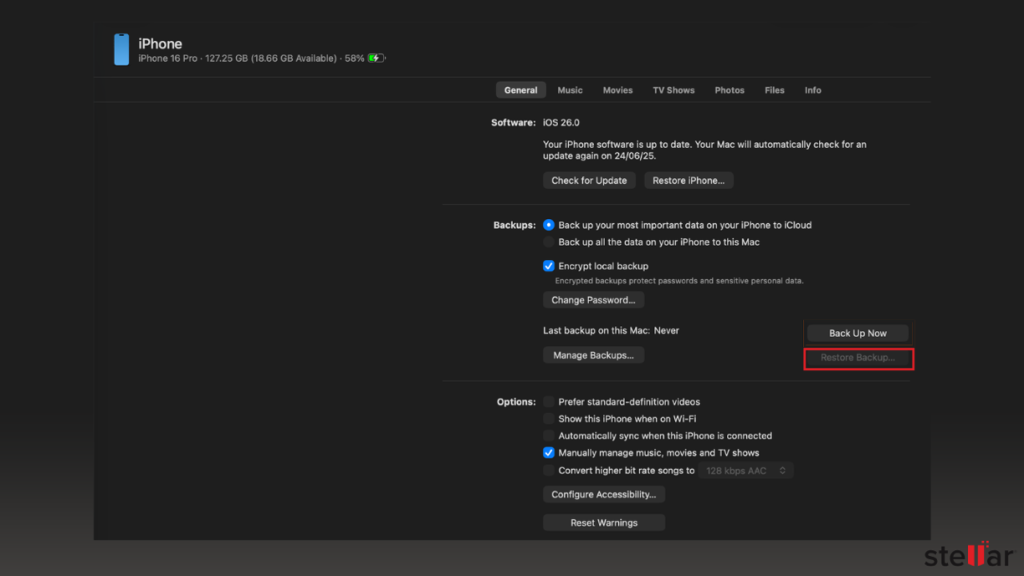
- Restore from backup. In iTunes/Finder, click Restore Backup. You’ll see a list of backups by date. Choose the most recent one (or any that has the data you want) and click Restore. It might be the case that you encrypted the backup while taking it. If that is the case, enter your password when asked. Remember, this is not your Apple account password but a file-specific password that you had set for the backup file.
- Wait and finish. Keep the phone connected and powered on. The restore may take several minutes. Once complete, your iPhone will restart. After it starts up, your apps, settings, photos, and messages from the backup will be loaded onto the phone.
For Windows Users:
- Download the latest version of iTunes per your system configuration (32-Bit or 64-Bit) from the official Apple website and install it by following the prompts.
- Connect your iPhone using an appropriate connector cable (Type-C or Lightning cable). If you get a password request or a “Trust this Computer” prompt, do it.
- Now, start the iTunes application and log in to it using your Apple ID and password.
- Look for your iPhone on the left bar and select it.
- Now, look for the Restore Backup option and click it. This should start restoring your files on to your iPhones through the backup.
This process puts all the backed-up data back on your iPhone. In other words, using a prior iTunes/Finder backup is one of the quickest ways to recover your files when the screen is broken.
Method 2: Restore from an iCloud Backup
If you had iCloud Backup enabled and you just got a brand new or have got your iPhone screen repaired, you can restore your data through this process. This requires that you have another iPhone ready (or one that’s been repaired and erased) and your Apple ID login.
- Turn on the iPhone that you want to restore. You will be greeted by a “Hello” screen when the phone starts.
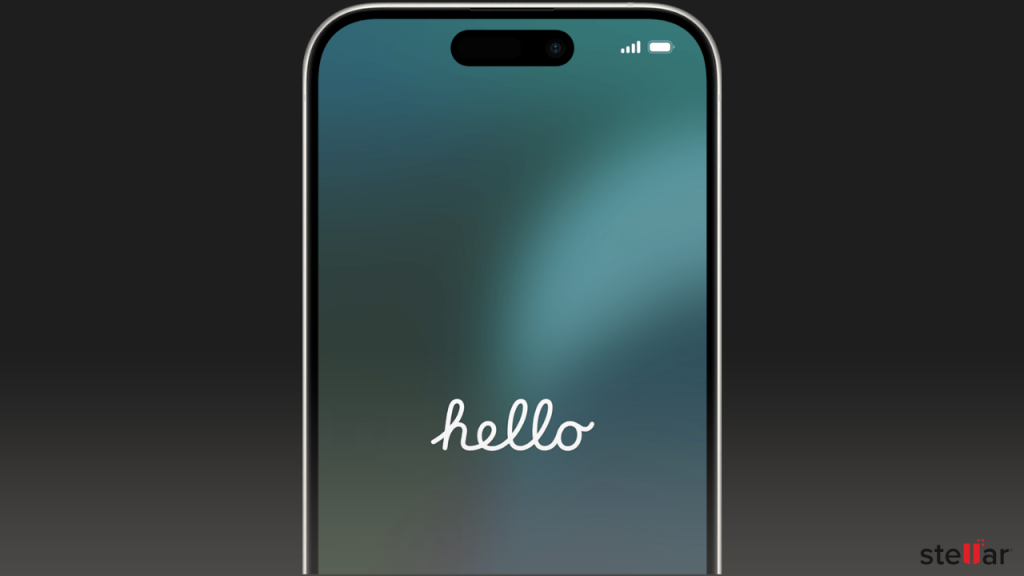
- Choose iCloud Restore: Follow the on-screen steps until you reach “Apps & Data.” Tap Restore from iCloud Backup.
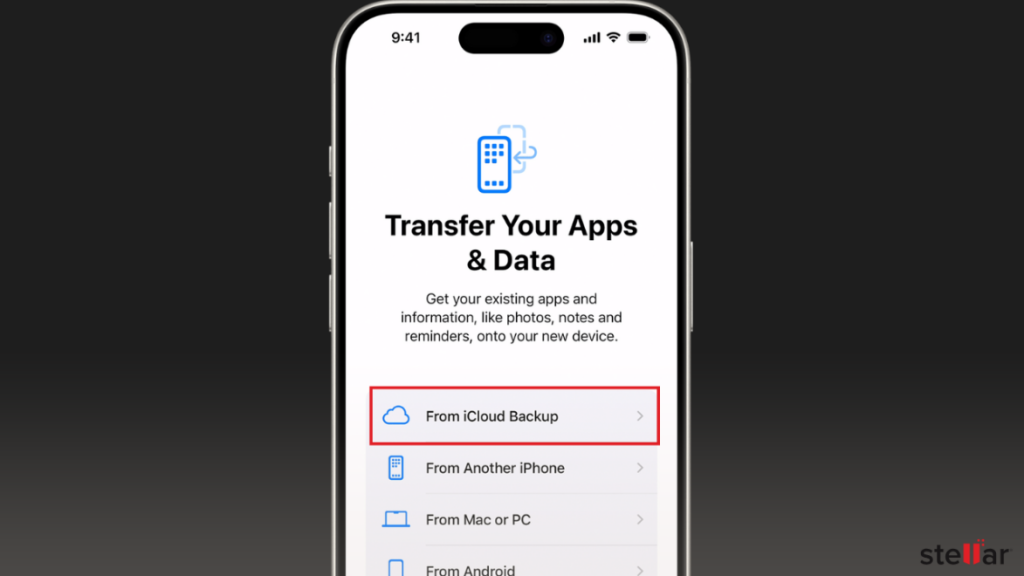
Option to restore iPhone data using iCloud Backup
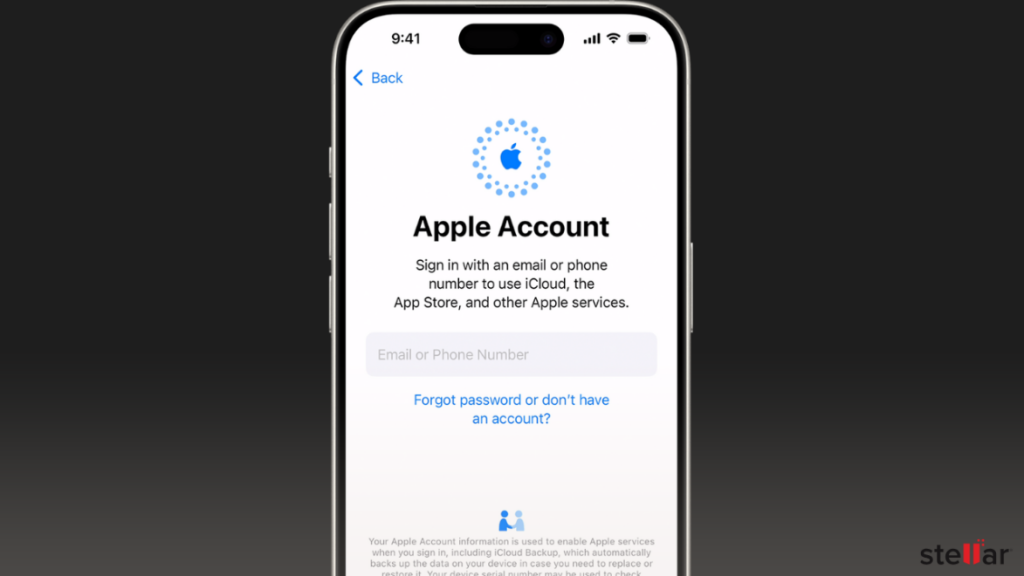
- Sign in and pick backup: Enter your Apple ID and password. You’ll see a list of available iCloud backups (with dates). Select the most relevant one.
- Stay connected and wait: Make sure you’re on Wi-Fi and plugged into power. The iPhone will download your data (apps, photos, messages, etc.) from iCloud. This can take some time, depending on the backup size and internet speed.
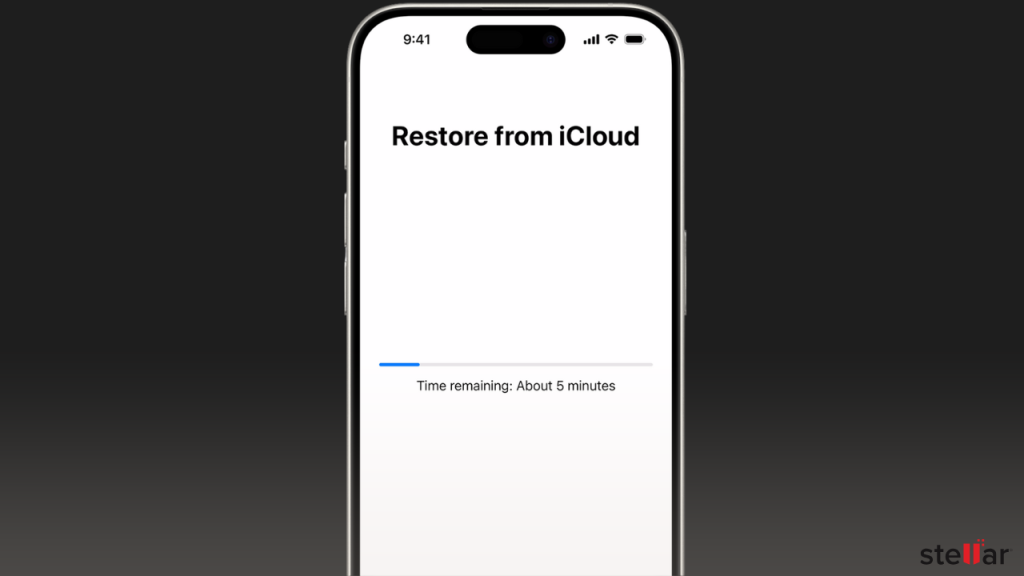
Once finished, your iPhone will have all the data that was there in that iCloud backup. In short, restoring data from iCloud works like magic if you have a backup: Apple’s guide confirms you simply pick your backup during setup.
Method 3: Access Your Data on iCloud.com
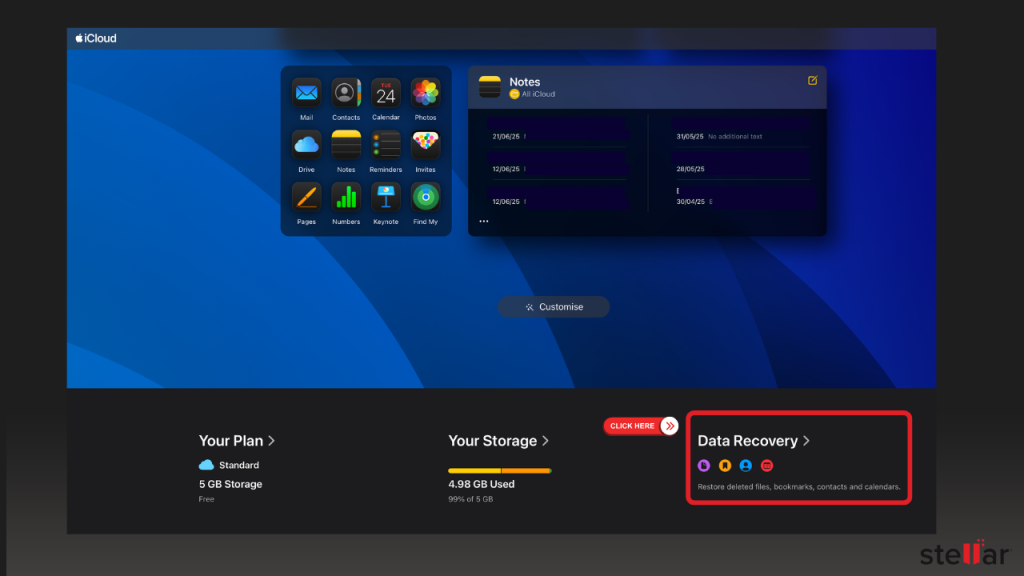
If you just want a quick way to grab photos, contacts, or notes without restoring a phone, try iCloud.com. Anything you’ve synced to iCloud (photos, contacts, calendars, Notes, etc.) can be downloaded on a computer.
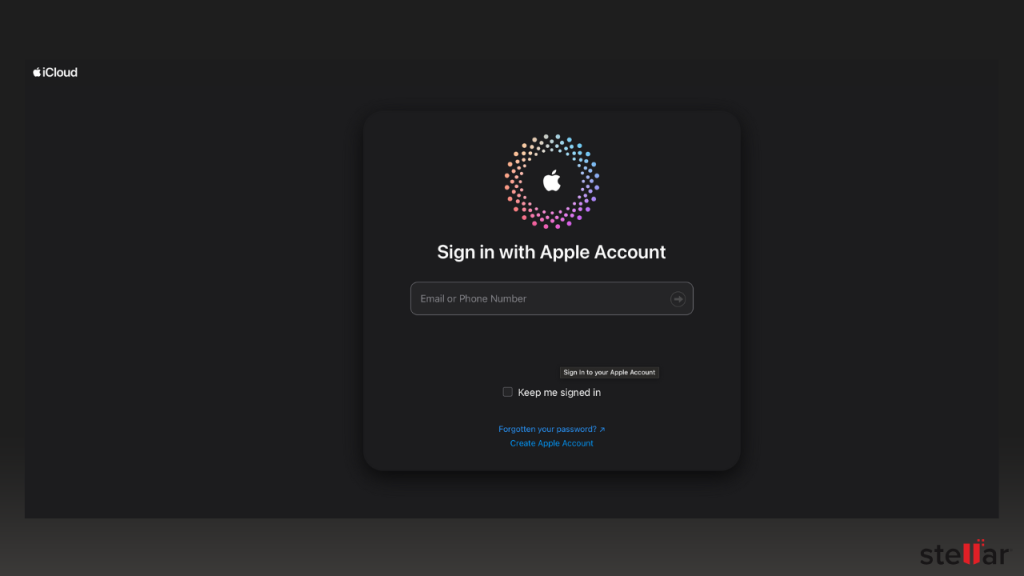
- Go to iCloud.com: On your computer system, open a web browser, visit to iCloud.com and log in with your official Apple ID credentials.
- Go to Data Recovery. At the bottom-right corner of the screen, you will find an option titled “Data Recovery.” Select that.
- Choose what you need: In each option inside the Data Recovery window, select the items (contacts , calendar entries etc.) that you want to restore. If you had created a backup file earlier, they will be listed under the Restore Files option.
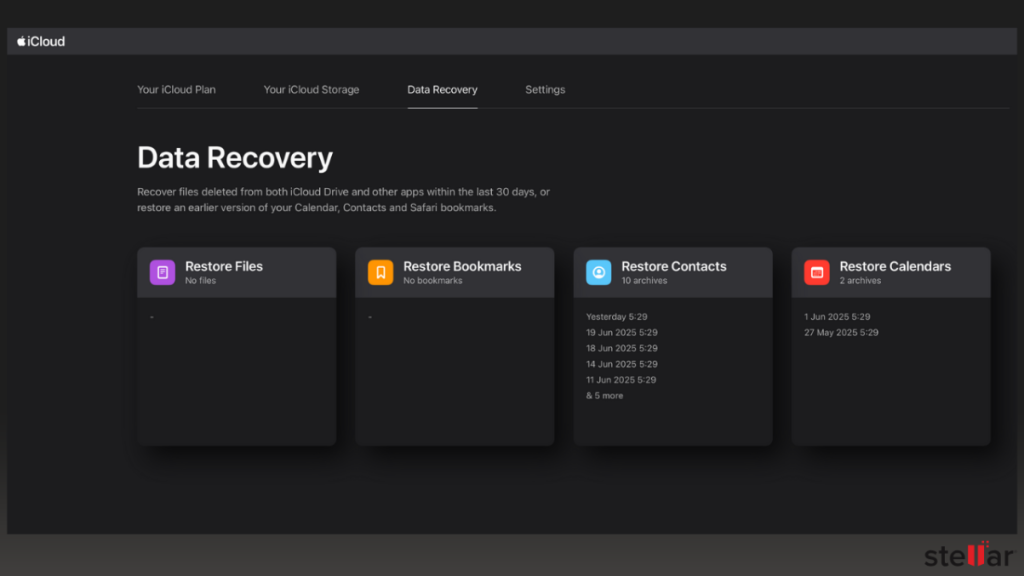
- Restore your data: Once selected, click the Restore button that appears against the name of the desired backup file.

Using iCloud.com lets you recover any data that was already in the cloud. For example, you can retrieve pictures from the Photos app or export your contacts. It’s a handy workaround if you don’t have the phone screen to restore from a backup.
Method 4: Use iPhone Mirroring on Mac
If your iPhone is still powered on but the screen’s completely busted, you might still be able to control it. One option is to mirror your phone’s screen to a Mac using the iPhone Mirroring feature. It basically lets you operate the phone as if the screen were fine. Sounds like Sorcery, right?
Note: This feature works only if you have use the same Apple ID to log in to your iPhone as well as the Mac and have used the feature in the past.
Here’s how you can do it:
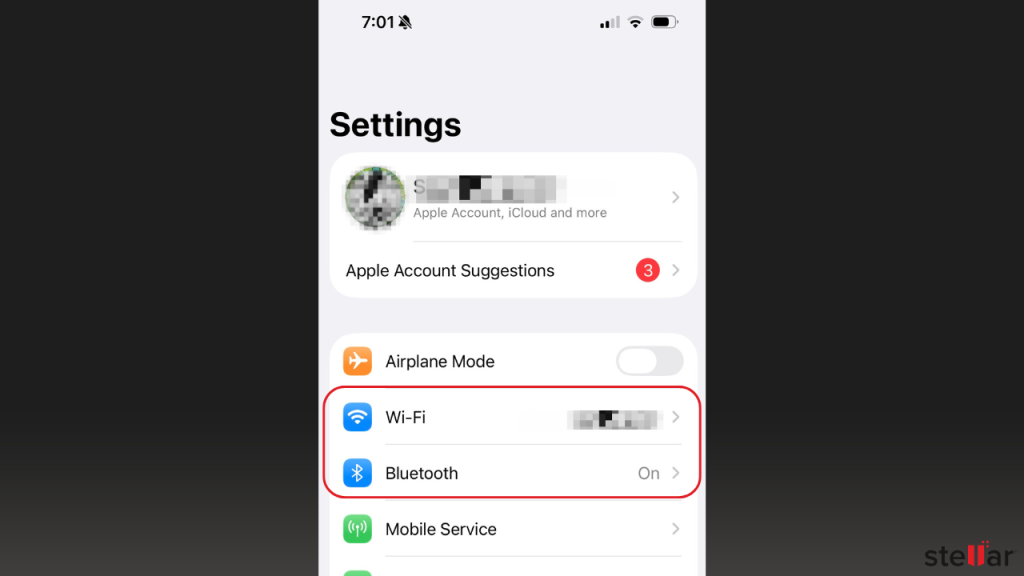
- Switch on the Wi-Fi and Bluetooth on your iPhone and make it discoverable. You can see these options in Settings.
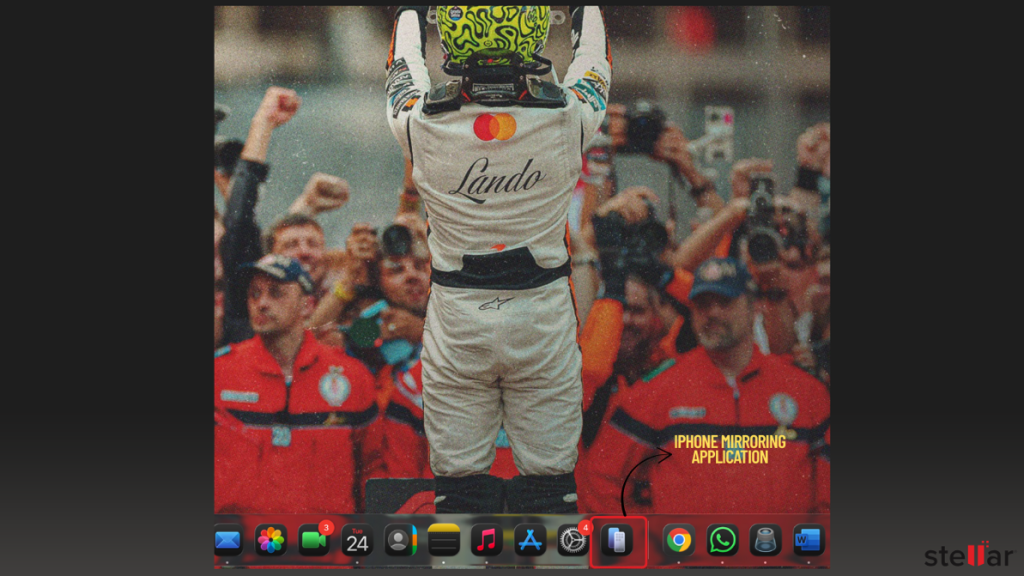
- Now bring the iPhone close to the Mac and open iPhone Mirroring application on your Mac.
- The application will ask you to unlock your iPhone once but since your screen is no longer working, you can press the power button and unlock the phone using the FaceID. You just have to face the front camera of your iPhone.
- Once your iPhone is connected to Mac, you’ll be prompted to lock back the phone. To do that, just press the power button and Voila! You’ll see your iPhone screen on your Mac. Now, you can transfer data, take backups or upload any important files or those hidden *secret files* to cloud.

iPhone Mirroring lets you see what’s happening and use your iPhone remotely, even if your built-in display is broken. This can be a bit tricky and involves luck when unlocking the iPhone but it’s a good option when the iPhone itself won’t show anything.
Method 5: Use Stellar® iPhone Data Recovery Software (Windows & Mac)
If the above methods aren’t an option (no backup, phone won’t back up, iPhone Mirroring fails to work etc.), consider using Stellar® Data Recovery for iPhone. This is a reliable iPhone data recovery software designed to extract data from a broken iPhone or its backup files. It has several key features:
- Recovers many file types: Photos, videos, messages (SMS/iMessage), contacts, call logs, notes, calendar entries, and more.
- Supports all iPhones and iOS versions: Works with every iPhone model (from older iPhones up through the latest iPhone 16 series) and iOS (up to iOS 18).
- Retrieves from iPhone or backups: Pulls data directly from the iPhone itself (if it’s at least recognized), or from iTunes/Finder backup files (even encrypted backups) and iCloud backups.
- Preview before recovery: You can scan first and preview what’s found. Then select only the files you really want to save.
- Windows & Mac compatible: The software runs on both Windows and macOS computers. (It is not a mobile app; you download it on your PC or Mac.)
Here are the steps to use your saviour, Stellar® Data Recovery for iPhone, to get your data extracted and saved:
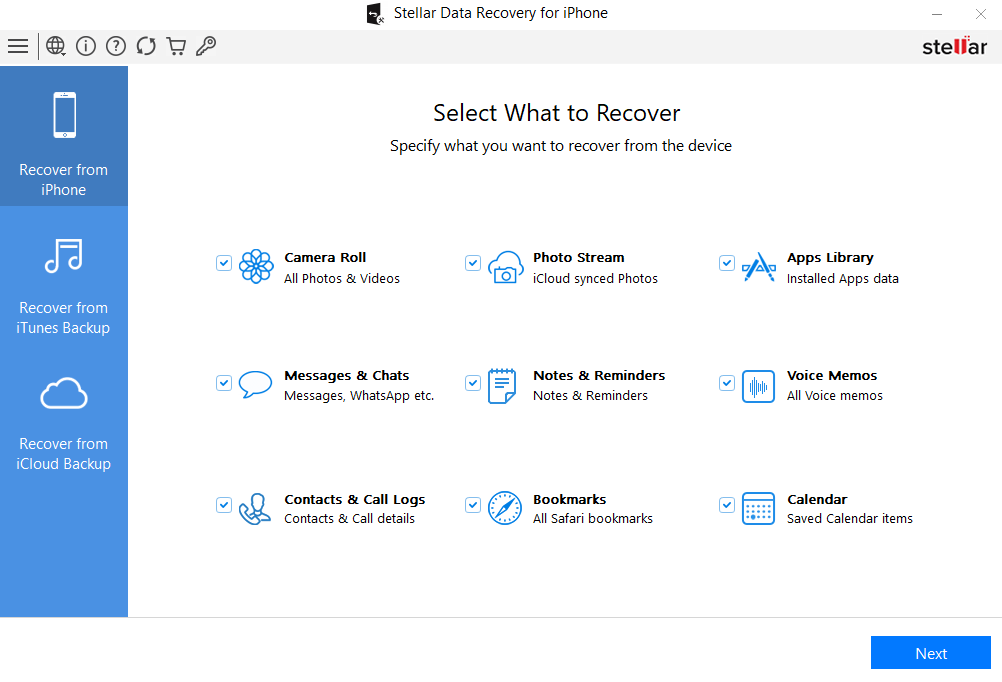
- Download and install Stellar Data Recovery for iPhone.
- Once installed, open the software and select the file types you want to recover, such as photos, messages contacts, etc. After selecting, choose Next.
- Connect your iPhone to your computer using USB-C or Lightning cable (per your iPhone model). The tool should discover your iPhone automatically.
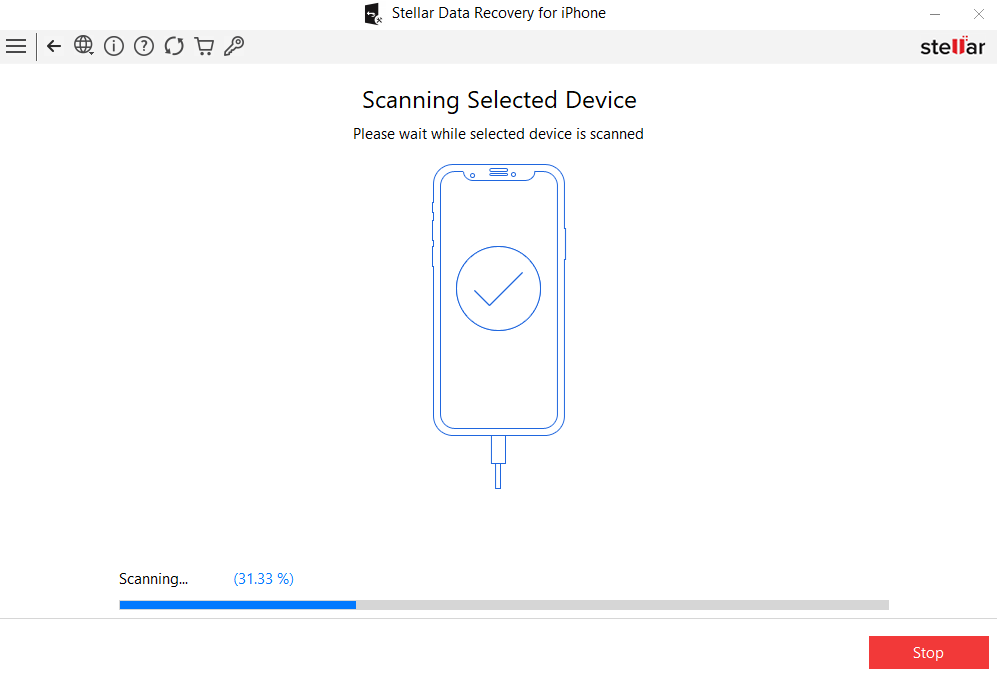
- After a successful connection, the software will start a scan of your device’s memory to extract lost data. It might take a few minutes for the scan to get completed.
- After completion of the scan, the tool’s intuitive GUI will show you the extracted files as well as the folders. The folders can be selected from the pane on the left side of the screen.
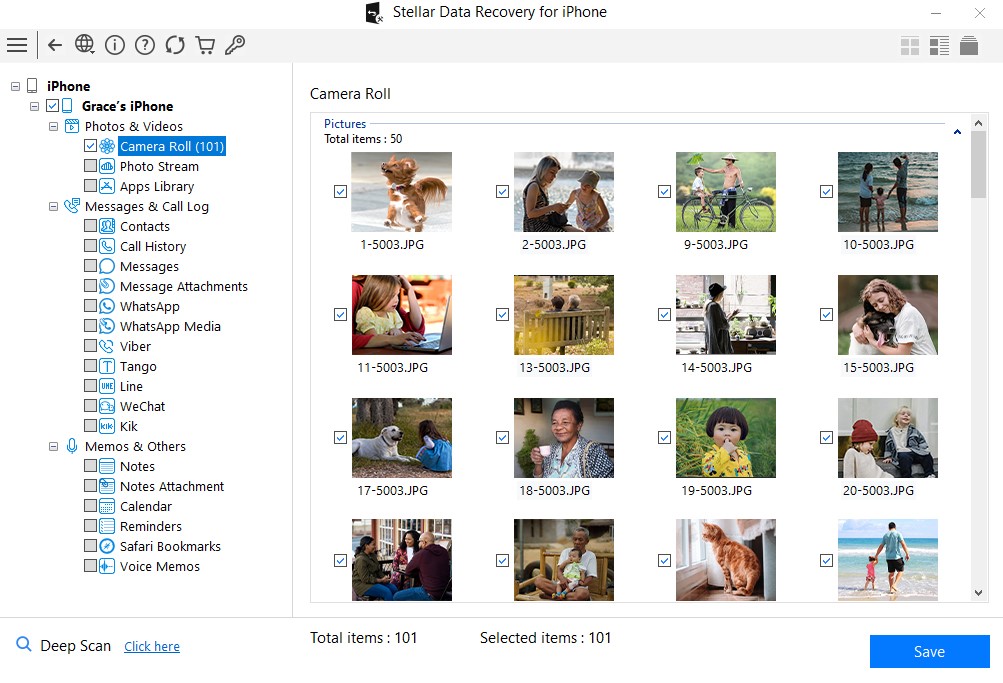
- Now, select the files you want to recover and select Save. The tool will ask you to choose the location where you want the recovered data to be downloaded and then save it.
This can be a lifesaver when you have no other way to get data off the phone. In short, Stellar’s iPhone Data Recovery Software is a powerful last resort that often succeeds in pulling data from a damaged or unresponsive device.
Conclusion
Having a broken iPhone screen feels stressful, but remember: your data can still be safe. If you have a recent backup in iTunes/Finder or iCloud, restoring from that backup will usually recover everything. Even if not, you can try mirroring your screen on another device or using voice commands to copy out critical files. And if all else fails, Stellar’s recovery software works on Windows and Mac to extract your files from the iPhone or its backup.
Once you recover your data, be sure to back up your iPhone regularly (iCloud or computer backup) to avoid future panic. If your efforts still don’t work, having the screen repaired by an Apple Store or a qualified repair shop is the next step – after that, you can access your data normally again. No matter what, your important contacts, photos, and messages aren’t gone for good. With a little patience and the methods above, you can get your data back even with a broken screen.