Windows errors related to its updates, like 0x80073712 error, can come up suddenly out of nowhere without a single warning and you might end up scratching your head looking for the perfect solution to get rid of it. In fact, this code typically means “a file needed by Windows Update is damaged or missing”, or that some system assembly files in the WinSxS folder are gone. In plain terms, your PC is trying to install an update but in reality, it lost some pieces along the way. This can happen if an update while getting downloaded was interrupted or if system files got corrupted. But don’t you panic. Hang in there… it’s fixable. This guide below explains what causes the error in the first place and walks you through step-by-step methods to resolve it. Consider it a friendly walkthrough to unclog your Windows update pipeline.
Possible Causes of Error 0x80073712
Before jumping into fixes right there and then, it really helps to know why the error occurs actually. Common causes include:
- Missing or corrupted system files. Error 0x80073712 means that some of those key Windows update components or assembly files are missing or damaged.
- Incomplete or failed update download. Sometimes Windows can’t properly download or unpack an update, leaving it stuck half-finished
- Glitches in Windows Update components. The Windows Update service or its folders (like SoftwareDistribution) can get into a bad state.
- Interference from security software. Third-party antivirus programs or VPNs occasionally block updates
- Disk or hardware issues. Disk or hardware issues can sometimes mess with updates even though it’s not the most common cause of them all. A failing drive or messed‑up registry entries can be one of those reasons which are triggering those errors. Running a quick disk check or a built‑in diagnostic scan can help spot trouble early.
In short, 0x80073712 is like Windows saying “I need a file, but I can’t find it.” Once we address the missing/corrupt files, the error should disappear.
Methods to Fix Error 0x80073712
If you’re seeing that 0x80073712 when you go ahead and get started on that important project of yours, try the following solutions one by one in the same pattern. We have curated the solutions so that you start with the easiest steps and work your way down. Often, when you are running Windows’ built-in repair tools or cleaning up old update files, it does the trick. Let’s get started!
Method 1: Use System File Checker (SFC) and DISM
Microsoft knows these problems very well so for WIndows users like themselves they have taken the initiative themselves and pre-armed Windows with two powerful built-in tools for such hiccups. One is SFC (System File Checker) and another is DISM (Deployment Image Servicing and Management), your guardian saviours. These applications are designed specifically to repair corrupted system files. Running these tools on your system will replace missing or broken update components. Let’s dive into the steps:
- Open the Command Prompt as an administrator: Press Win+R, type cmd, then press Ctrl+Shift+Enter (this opens it with admin rights).
- In the Command Prompt window, type:
sfc /scannow
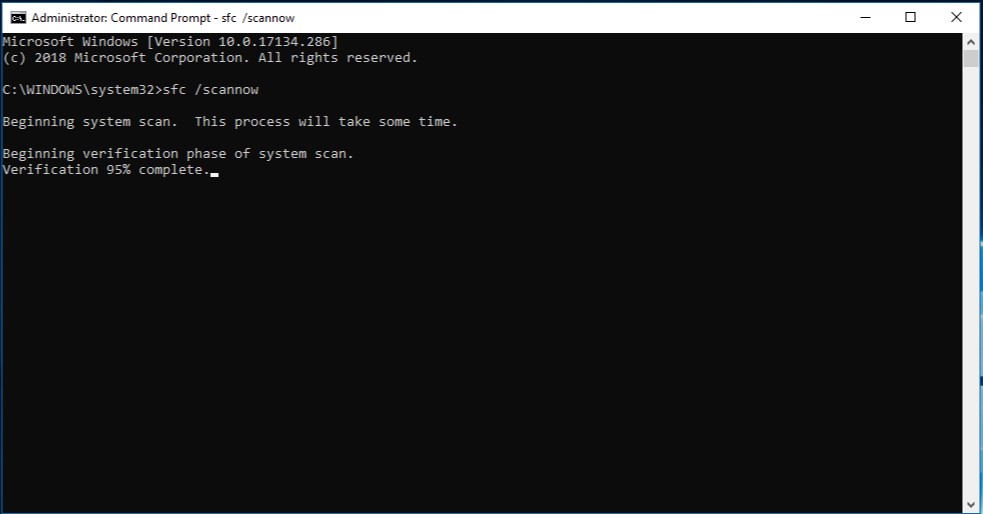
- Now, press Enter key and your system will start scanning and repairing protected system files. Wait for it to finish as it may take several minutes, which depends on the amount of damage.
- Next, while you are still in the admin Command Prompt, run these DISM commands one at a time, pressing Enter after each:
DISM /Online /Cleanup-Image /ScanHealth
DISM /Online /Cleanup-Image /RestoreHealth
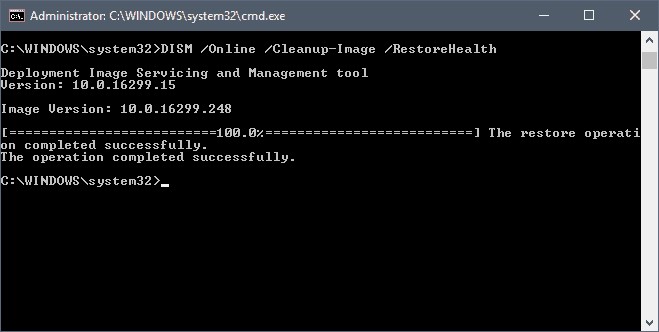
- The first checks for component store corruption, and the second repairs any issues it finds.
- When DISM finishes, restart your computer.
If SFC/DISM succeeds, try running Windows Update again. Often, this fixes the missing-files problem causing 0x80073712.
Suggested Read: How to Run System File Checker (SFC) Scan in Windows 10
Method 2: Run Disk Cleanup for Windows Update Files
Sometimes old or corrupt update files are clogging the system. The Disk Cleanup tool can remove outdated update files that might block new installations.
- Type Disk Cleanup in the Start menu search and open the Disk Cleanup app. Windows will scan for files to remove.
- Click Clean up system files (you may need to wait a moment). A list of system file categories appears.
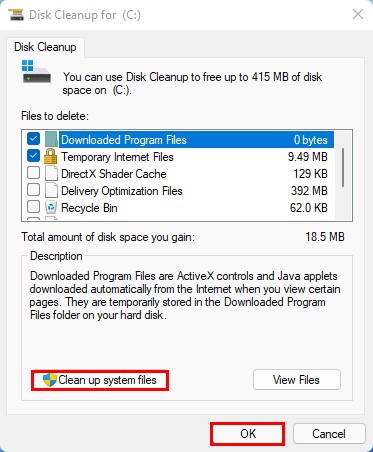
- Check Windows Update Cleanup in the list, then click OK to delete those files.
- Let it finish, then restart your PC.
After rebooting, try the Windows update or upgrade again. Cleaning out old update data often resolves conflicts that lead to error 0x80073712.
Suggested Read: How to Access Disk Clean-Up in Windows 11
Method 3: Use the Microsoft Update Assistant or Media Creation Tool
If you are of the view that you have to upgrade your system and want to install a newer version of Windows (like moving to Windows 10 or 11), this error can go away in the process and the tools officially provided by Microsoft itself can do this for you. The Windows Update Assistant or Media Creation Tool essentially downloads and installs the update from scratch.
- Go to the official Microsoft Windows download page (for Windows 10 or 11).
- Click Update now (this runs the Update Assistant) or Download tool now under “Create Windows [10/11] installation media”.
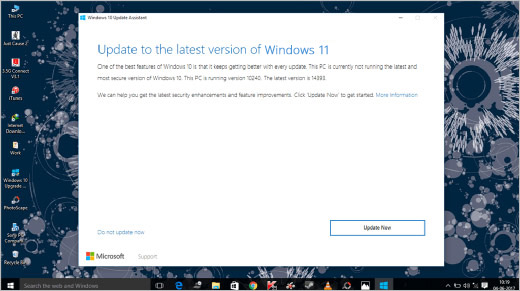
- Run the downloaded tool and follow its instructions. Choose the option to upgrade your PC. The tool will download the latest setup and install it.
- Let the process complete. Your system will restart a few times during this upgrade.
This method replaces the normal update process with a fresh install of the latest version, which often fixes update errors. Since it’s guided by Microsoft, it handles corrupt files more intelligently.
Method 4: Reset Windows Update Components
Sometimes Windows Update just won’t cooperate no matter what you do. This can be frustrating, right? Hang on… the trick is to reset its components. You stop the update services, clear out the folders where old update files pile up, and then restart the services. It’s basically giving Windows Update a fresh start so it can run smoothly again. The steps go like this:
- Open Command Prompt as administrator (as in Method 1).
Stop the update services by running each of these commands, pressing Enter after each:
net stop wuauserv
net stop cryptSvc
net stop bits
net stop msiserver
- Rename the software distribution folders, which store update downloads. Run:
ren C:\Windows\SoftwareDistribution SoftwareDistribution.old
ren C:\Windows\System32\catroot2 Catroot2.old
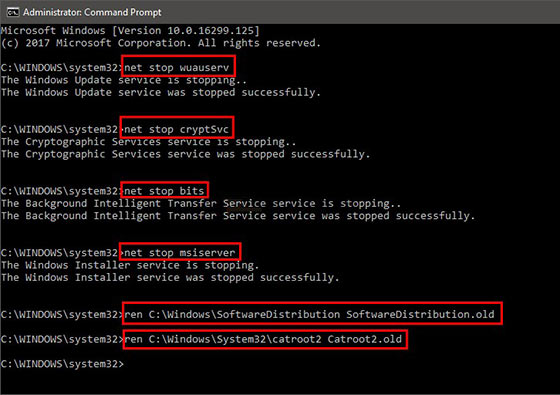
This effectively backs up those folders so Windows creates new, fresh ones.
- Now restart the services you stopped, by running:
net start wuauserv
net start cryptSvc
net start bits
net start msiserver
- Close the Command Prompt and reboot your PC.
Once rebooted, Windows will recreate the SoftwareDistribution and catroot2 folders. Try updating again. This reset often clears hidden glitches in the update mechanism.
Method 5: Download and Install Updates Manually
If a specific update is leading to all these problems and sweating, you can go the other way round and install it after downloading it yourself. Lets say, if you have the KB number of this update (the one that is causing the menace), you can do some searching in the Microsoft Update Catalog and get it from there. It’s fairly easy using these steps:
- Go to the Microsoft Update Catalog in your web browser.
- Search for the update code (e.g. “KB5035853” or whatever your update number is).
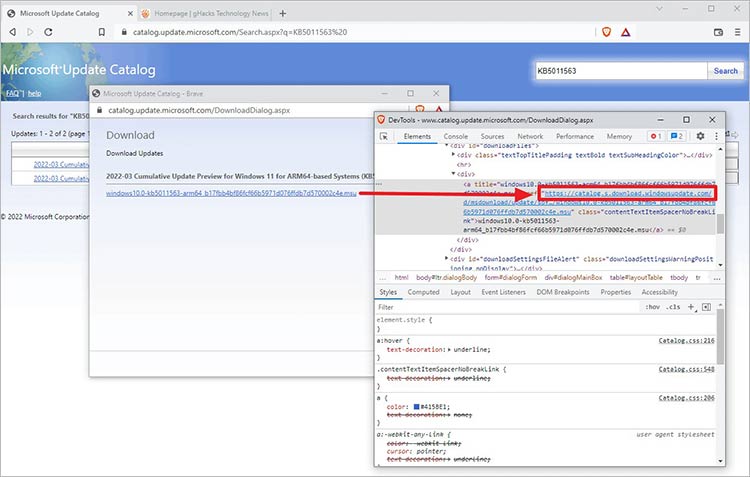
- Download the correct update file for your system (make sure x64 vs x86 matches).
- Run the downloaded installer to apply the update manually.
- After installing, it’s a good idea to rerun sfc /scannow and the DISM commands from Method 1 to fix any side issues.
Manually installing the update bypasses the Windows Update service. Many users find this solves stubborn errors.
Method 6: Temporarily Disable Antivirus or VPN Software
Odd as it sounds, security software can sometimes block Windows updates. To rule this out: disable any third-party antivirus or VPN, then try the update again.
- Open your antivirus or VPN app. Look for an option to disable protection temporarily (for example, turn off real-time scanning).
- If you have multiple security apps, disable them all.
- Run Windows Update or the installer again.
- Afterward, re-enable your antivirus/VPN.
If the update succeeds now without a hiccup, well, now you know that it was the security software that was interfering. In this position, you should think of adding Windows Update to one of those whitelists of your antivirus (that stop it from interfering), or try and update one component at a time.
Method 7: Use a System Restore Point (Last Resort)
If none of the above helps you out and by any chance you had set up a System Restore point before this whole fiasco even began, you can roll your system back. It’s kind of a bold move since it wipes out any recent changes, but honestly, it might just clear up the mess if some glitch or error has snuck in lately. Let’s have a look at the steps now:
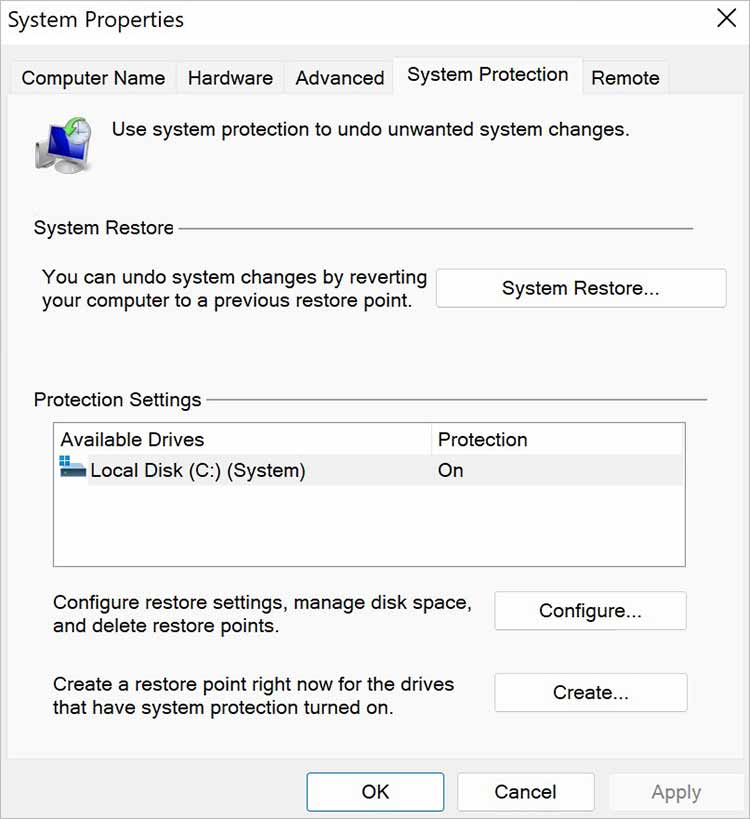
- In Start, search Create a Restore point, and click on it.
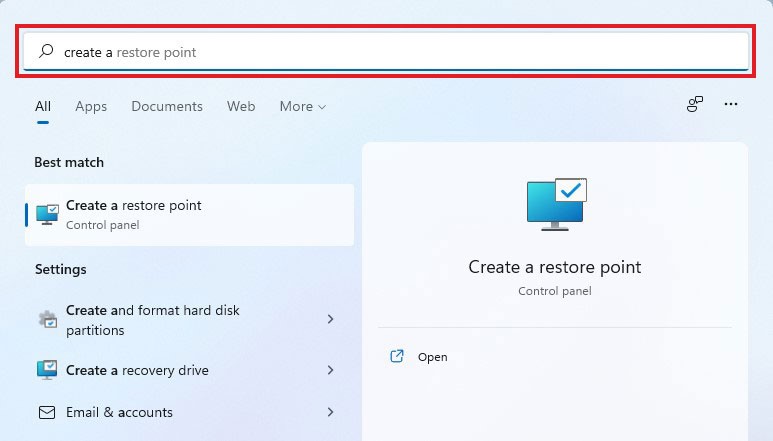
- Click System Restore. In the wizard, choose a restore point dated before the error started.
- Follow the prompts to restore your system. Your PC will restart during the process.
- After restoring, try Windows Update again.
System Restore can fix deep issues but note that your programs or files that you went on to add after the restore point will be lost. It’s a good and recommended idea to back up anything and everything important first.
If even your System Restore option fails, there is an ultimate fallback available to you. It is a repair install or clean reinstall of Windows operating system but keep in head that this option can delete programs and settings out of your system and what you’ll get will be an error-free clean slate. But before going that far, make sure you have copies of any important files.
Even with the best troubleshooting, fixing update errors can sometimes mean risking data. If you discover that crucial files or photos are missing after a repair or restore, don’t panic. You can use a reliable recovery solution to get them back. For example, consider a reliable Windows Data Recovery Software to recover lost data. It lets you scan any drive (internal HDD/SSD, USB stick, SD card, etc.) and preview lost or deleted files, photos, documents, videos, emails, and more. Its free trial shows you exactly what it can recover, and you only pay when you see the results. This way, you can be confident before buying the full version. The software supports hundreds of file types (docs, JPEGs, MP4s, PDF files, you name it), and even handles BitLocker-encrypted drives. Many users find this tool a lifesaver if a repair clears out important files. In short, it’s a simple safety net: scan, preview, then restore what you need, without costing extra unless you choose to unlock recovery.
Conclusion
Whenever you see the error 0x80073712, it is Windows’ way of saying that it has lost or is now unable to access some update files. But the good news here is that in most cases, you can fix it by repairing your system files or commissioning a clean up drive to update data. We recommend that you kick it off with the easier methods (SFC/DISM, Disk Cleanup) and if they fail to help, only then move to more advanced steps. Keep it in your mind that you have to run Command Prompt as administrator for those fixes. In a number of cases, one of the above listed solutions will get rid of the error and allow your Windows updates to proceed normally.
If you do need to resort to a restore or reinstallation, always keep in mind that backing up of your data is crucial or else keep that data recovery software we mentioned above before you reset anything anywhere. Staying patient and following each of our steps carefully is the key here. By the end of this checklist kind of a guide, you should either have fixed 0x80073712 or at least recovered any files that you lost on the way here.