The Windows 11 Disk Clean-up tool assists you in getting rid of unwanted and redundant files on your PC.
There are multiple file erasure tools available in the market. Some of them are comprehensive enough to erase the files on your PC beyond the scope of recovery.
Some of these file erasure tools are more effective than Disk Clean-up. But being a native utility of Windows 11, it is free and is suitable for carrying out basic clean-up activities.
In this article, we will discuss different methods to use Disk Cleanup. You will also get an advanced erasure option if you wish to securely erase your important files after use.
1. Launch Disk Clean-up from Windows Search
The easiest way to access Windows 11 Disk Clean-up is by searching it with the Windows Search tool. Here's how you can launch Disk Cleanup from search.
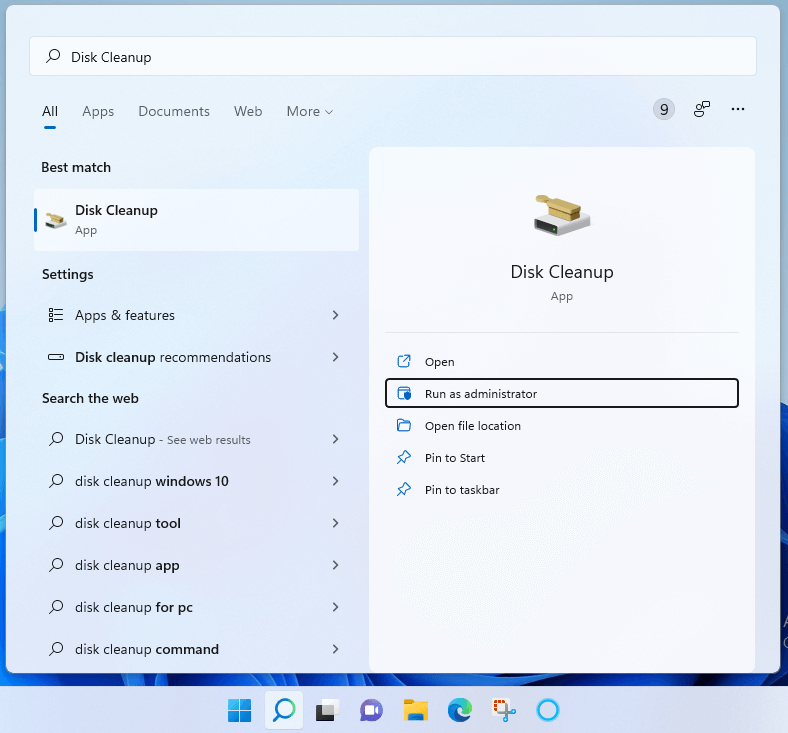
Step 1: Press Windows + S. Alternatively, click the looking glass icon on the taskbar.
Step 2: Type Disk Clean-up in the search bar.
Step 3: Choose the first option to launch Disk Cleanup. If you want to clean up system files, click the Run as administrator option.
2. Open Disk Cleanup through Windows Run
Run is another built-in utility of Windows OS. If you know the text command of the program you're looking for, you can use the Run utility to access it. To access Disk Clean-up tool using Run, follow the steps below.
Step 1: Press Windows + R or type Run in the search bar and select the first option.
Step 2: In the Run tab, type cleanmgr and hit Enter.
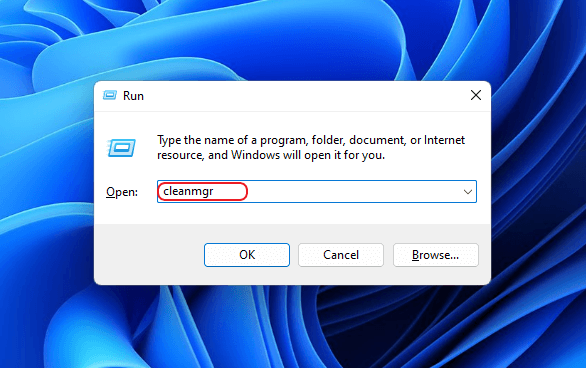
The Windows Disk Clean-up app will open on your Desktop.
3. Launch Disk Cleanup on Windows 11 from Control Panel
Control Panel is where you can find all the system apps installed on your Windows 11 PC. You can open any app by accessing the Control Panel's Windows Tools option. Here's how to open Disk Cleanup from the Control panel.
Step 1: You can open Control Panel by searching for it in the Windows Search app or typing Control Panel in the Run tab.
Step 2: In the search results, click the first option to open Control Panel.
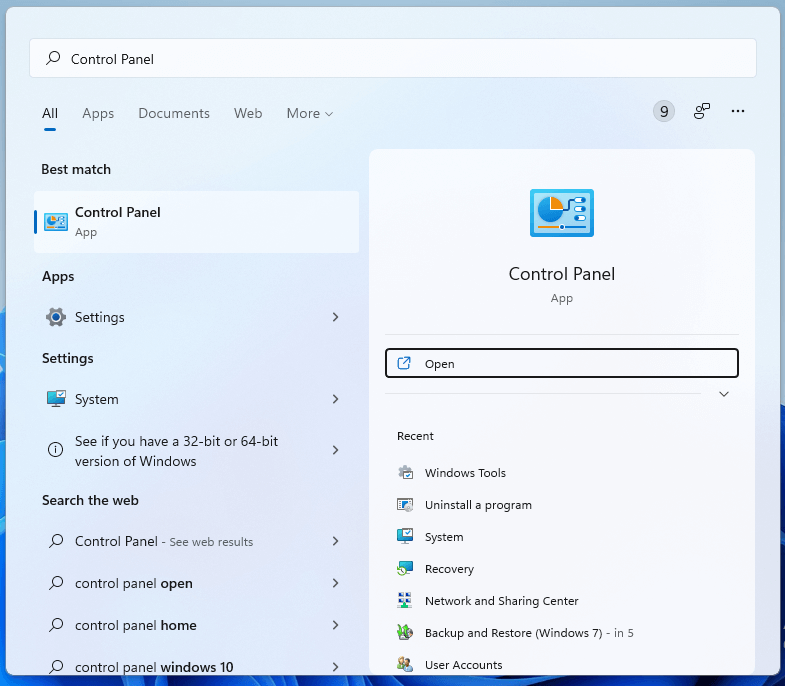
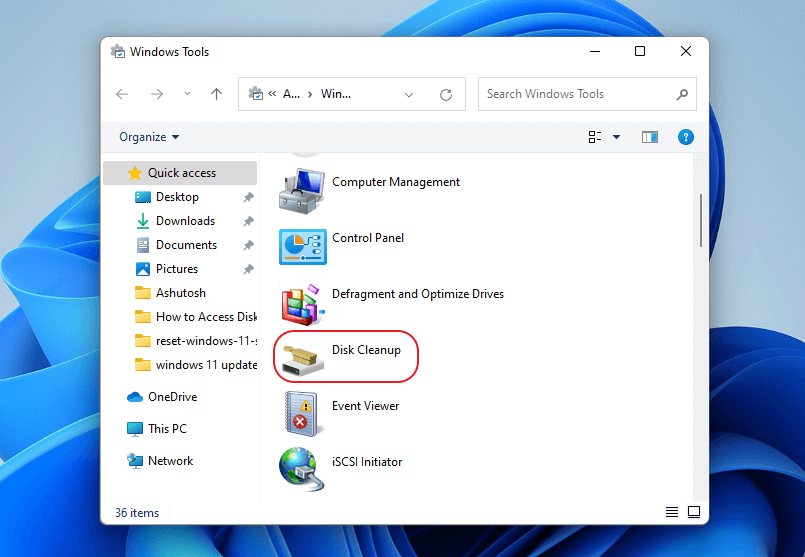
Step 3: Click the Windows Tools option at the bottom of the Control panel Window.

Step 4: Double-click on Disk Clean-up to launch it.
4. Open Disk Clean-up from Start Menu
If you don't want to scroll through the multiple apps listed in the Control Panel, you can access the Windows Tools from the Start menu on Windows 11. To do so, check out the steps below.
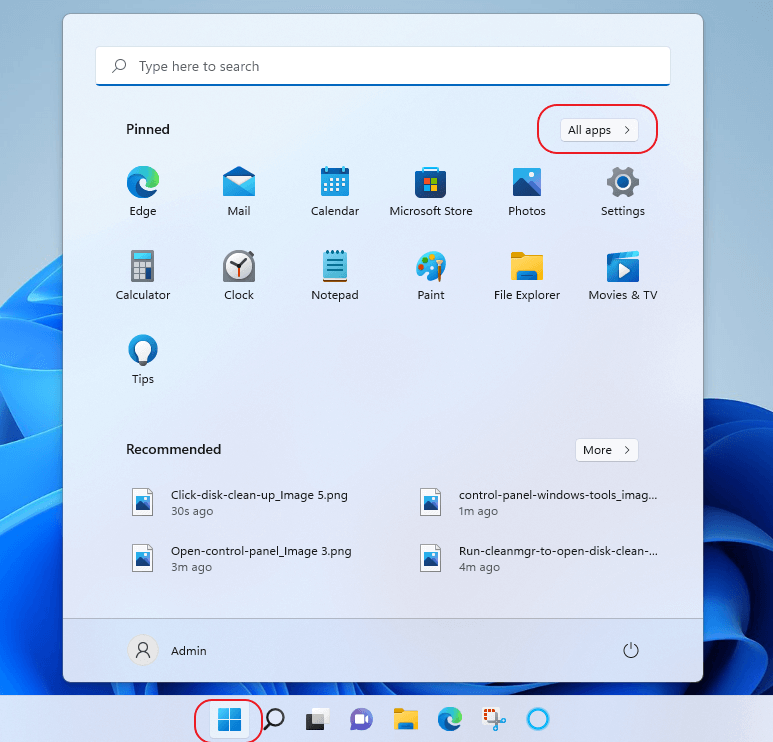
Step 1: Click the Windows 11 Start button.
Step 2: Click All Apps.
Step 3: Scroll down the list to locate Windows Tools option and click it to open.
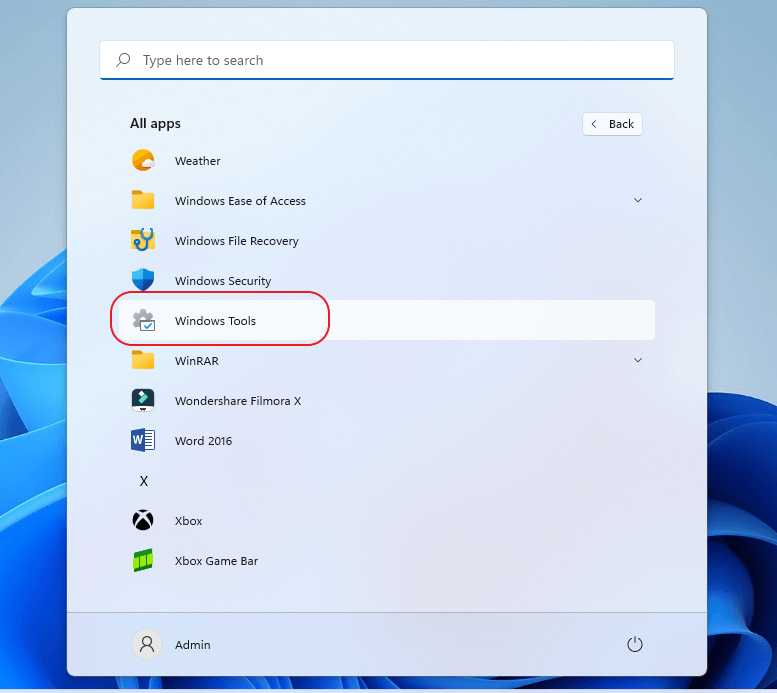
Step 4: Locate Disk Clean-up and click it to launch.
5. Use Task Manager to open Disk Cleanup
Task Manager allows you to access any system tool present on your Windows PC. It is quite similar to Run, and you can easily access Disk Cleanup from Task Manager.
Step 1: Press Ctrl + Alt + Del keys on your PC and select Task Manager.
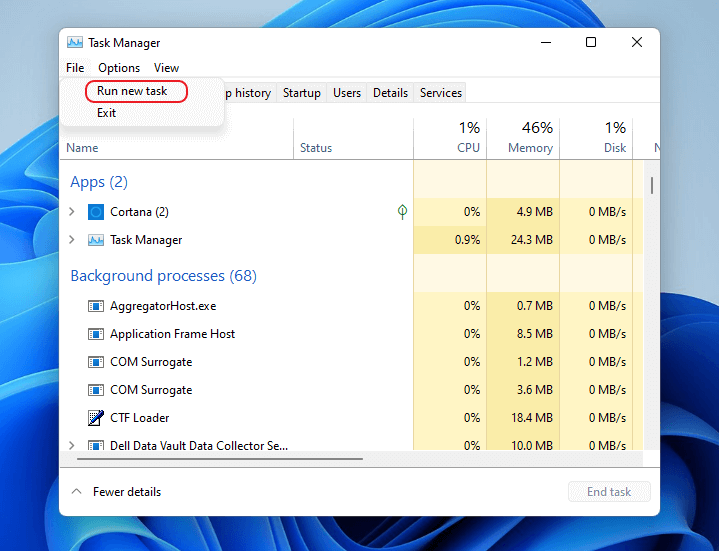
Step 2: Click the File tab on the top left of the Task Manager window.
Step 3: Select Run new task from the drop-down menu.
Step 4: In the Create new task window, type cleanmgr and press Enter.

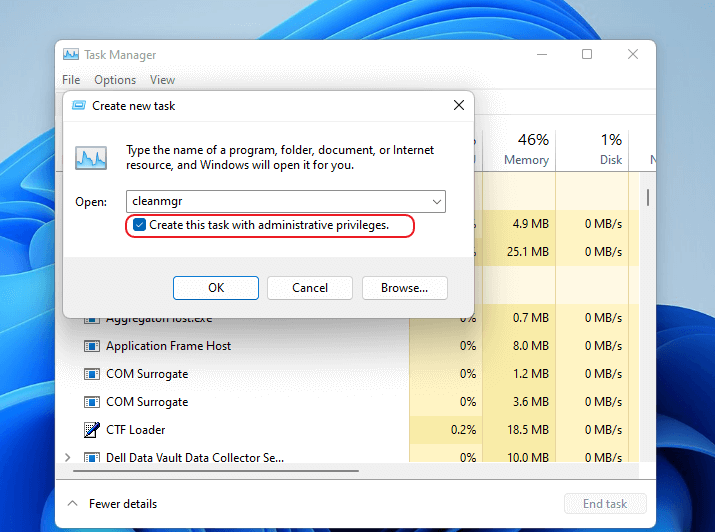
Step 5: Click OK to open the utility.
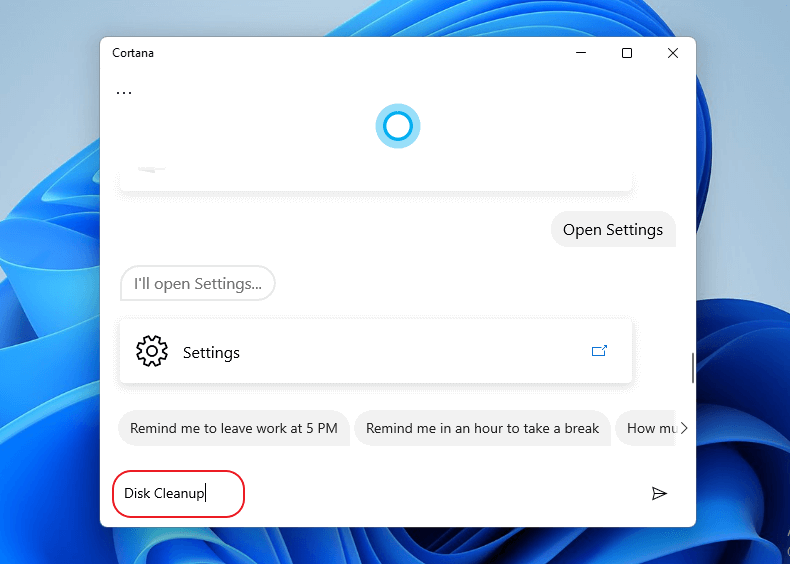
6. Open Disk Cleanup using Windows 11 Virtual Assistant (Cortana)
Windows 11 Virtual Assistant or Cortana is similar to Alexa or Google Assistant app that you might have used on your phone or home devices. It opens any system utility present on your PC based on text or voice commands. To launch Disk Clean-up with the help of Cortana, follow the steps described here.
Step 1: Click the blue circle icon on your taskbar to open Cortana.

Step 2: Type Disk Clean-up in the Cortanatext barand hit Enter.
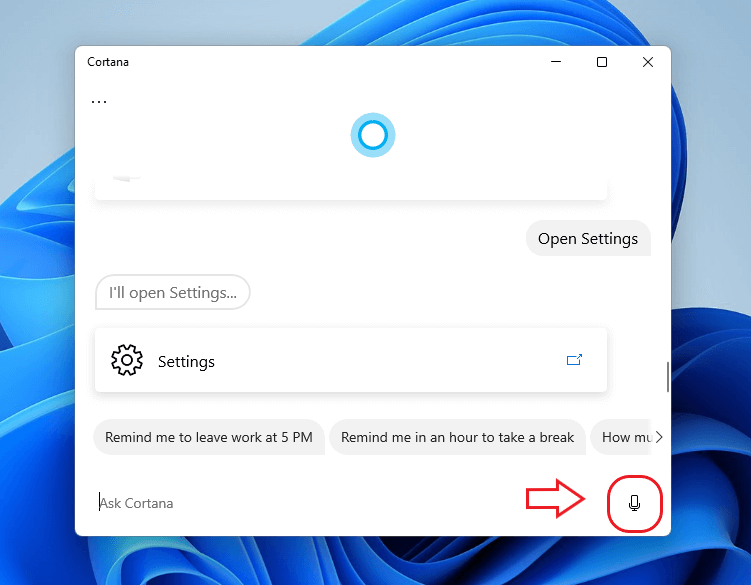
Step 3: Alternatively, click the mic icon at the bottom right of the window and speak Open Disk Clean-up to open the utility.
7. Create a Desktop shortcut to open Disk Clean-up
If you plan to use the Disk Cleanup app frequently, it is better to keep it handy and easily accessible. A simple way to do it is creating the app's shortcut on your PC's Desktop. Here is how to do it.
Step 1: Right-click anywhere in the empty area of your Desktop.
Step 2: Select New > Shortcut in the right-click menu.
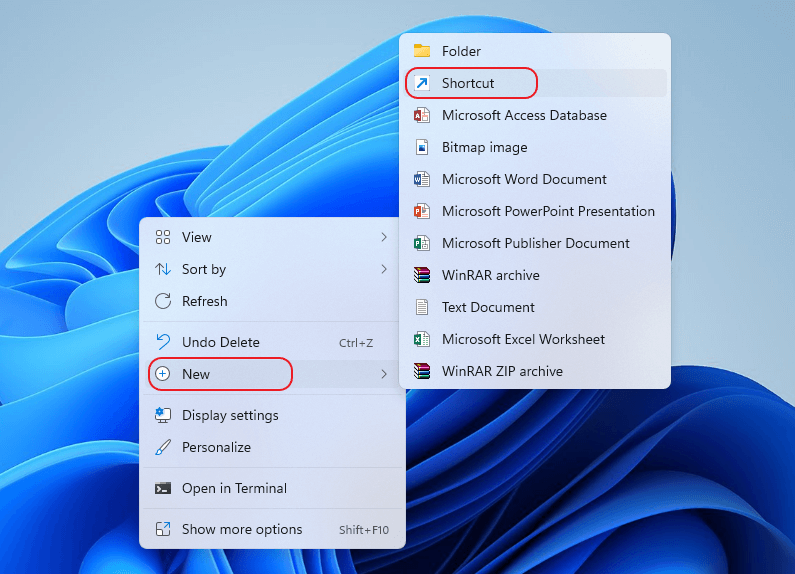
Step 3: Type %windir%\system32\cleanmgr.exe in the tab under Type the location of the item section.
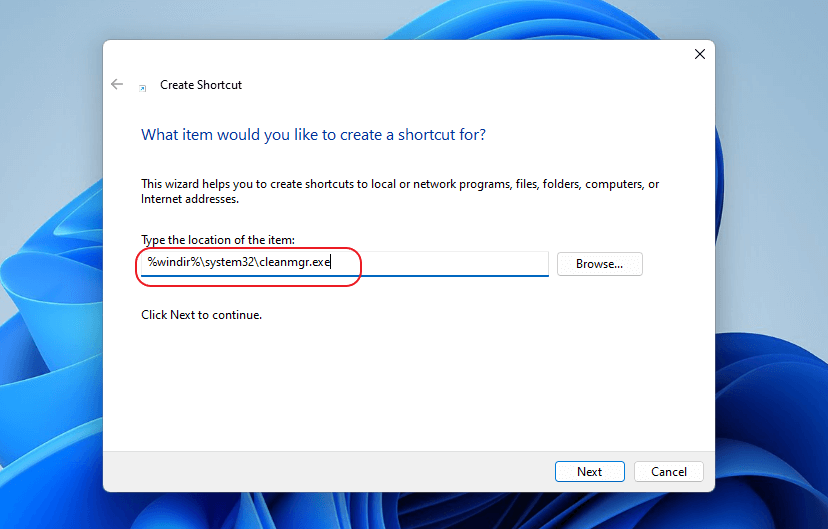
Step 4: Click Next to proceed.
Step 5: Type Disk Clean-up as the shortcut's name in the text box and press Finish.
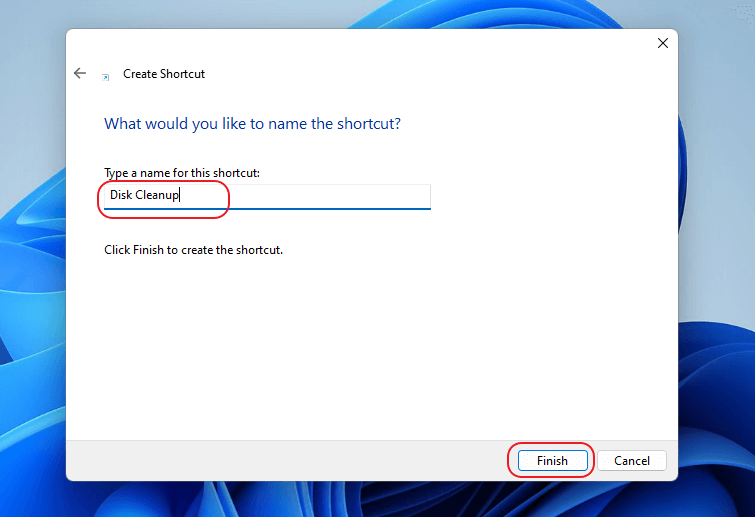
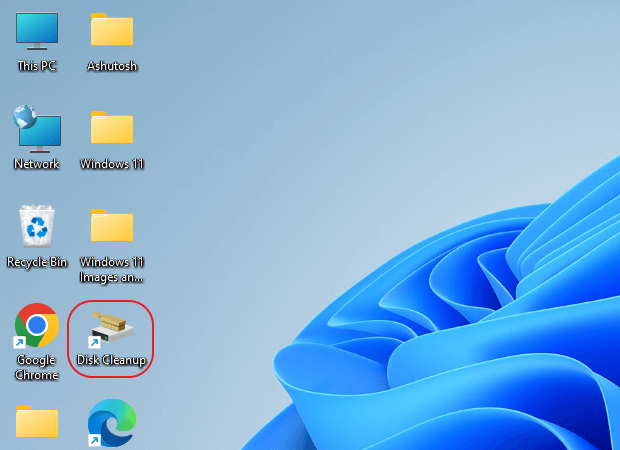
The shortcut is created on your Desktop, and you can launch the app using this shortcut whenever you like.
8. Assign a hotkey to launch Disk Cleanup
You can also assign a keyboard hotkey to easily access Disk Clean-up. To set a hotkey to Disk Cleanup, use the steps mentioned here.
Step 1: Right-click on Disk Clean-up shortcut created in the previous method and select Properties.
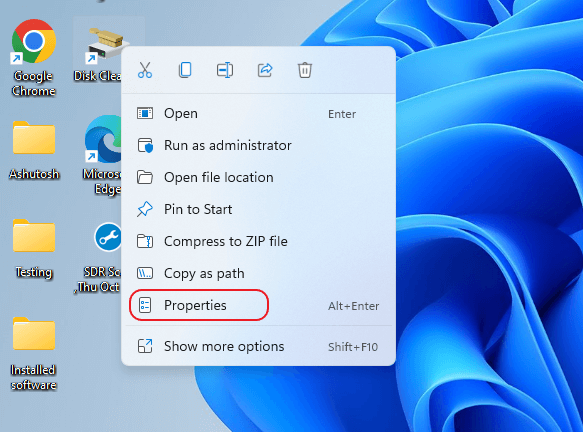
Step 2: Click the Shortcut tab in the Disk Cleanup Properties window.
Step 3: Select the Shortcut Key tab and press any key to set it as a hotkey for Disk Cleanup. For example, if you press the C key, your hotkey will be set up as Ctrl + Alt + C.

Step 4: Click Apply > OK and close the properties window.
Step 5: Press Ctrl + Alt + C (or the key you selected) to open the Disk Clean-up app.
9. Open Disk Clean-up using Terminal on Windows 11
Windows Terminal is the command-line utility available on Windows 11. It can be used as either Powershell or Command Prompt.
You can use the following steps on either of the two to open Disk Cleanup.
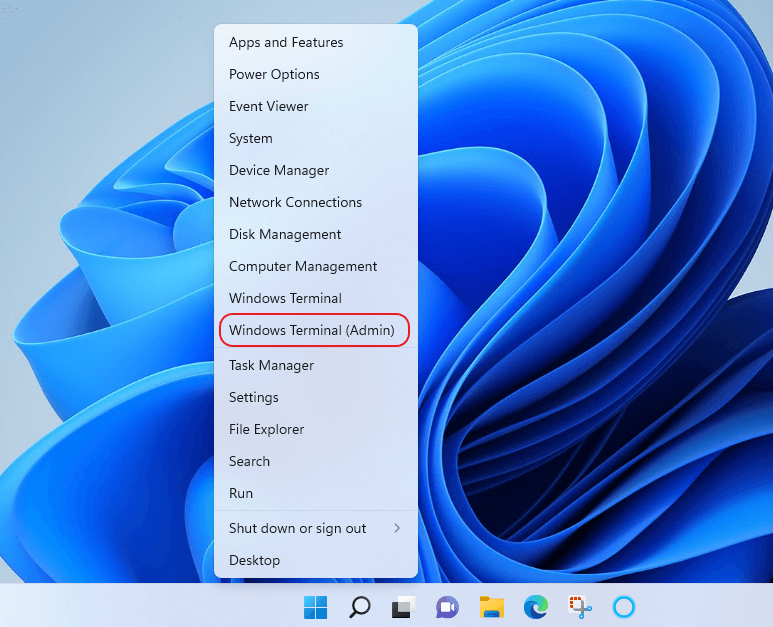
Step 1: Right-click the Windows Start button and select Windows Terminal (Admin).
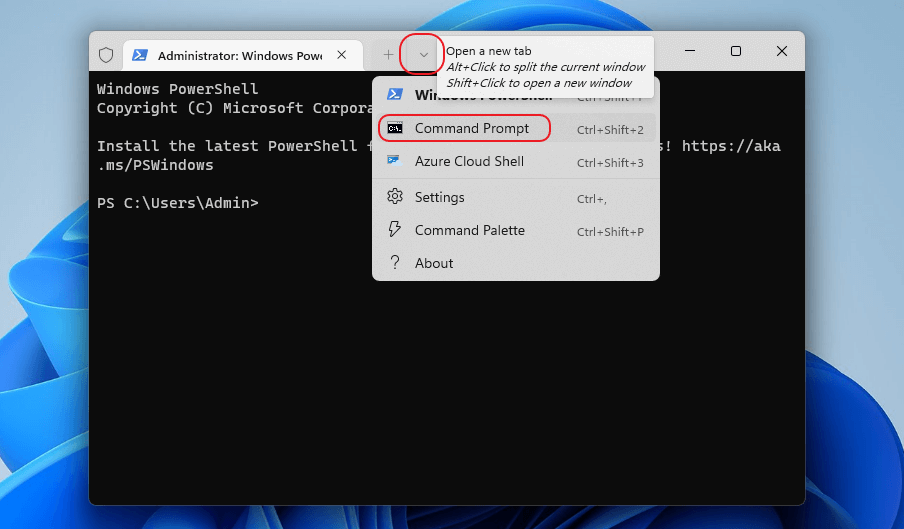
Step 2: In the Windows Terminal window, click the Down Arrow adjacent to the New Tab (+) icon and select Command Prompt.
Step 3: Insert cleanmgr in the command line and press Enter.
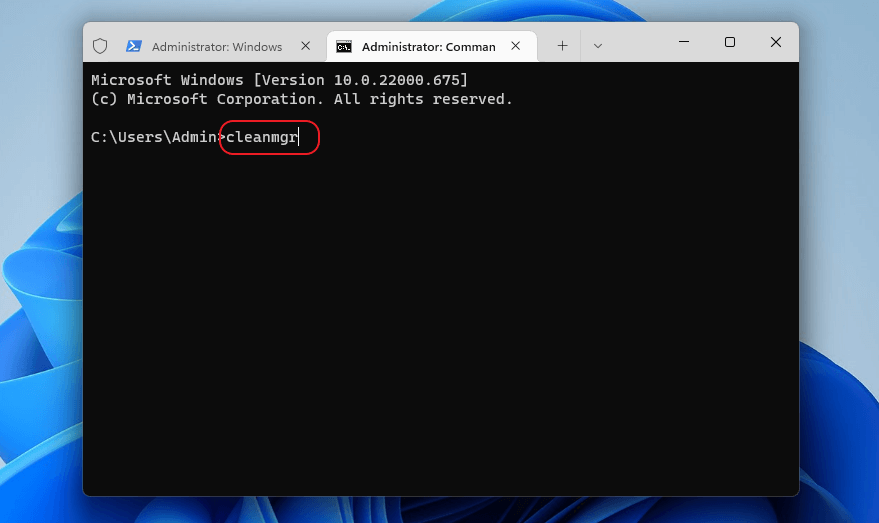
The Disk Clean-up app will open.
How to use Disk Cleanup on Windows 11?
It is easy to use, and you can clean up your files in a few easy steps. Here is how to use Windows 11 Disk Clean-up app.
Step 1: Open Disk Cleanup using any of the above methods.
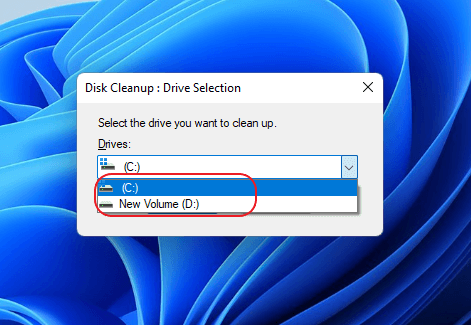
Step 2: Select the Disk you want to clean from the drop-down menu in the Disk Clean-up tab and click OK.
Step 3: Select the file types under the Files to delete section in the Disk Cleanup tab.
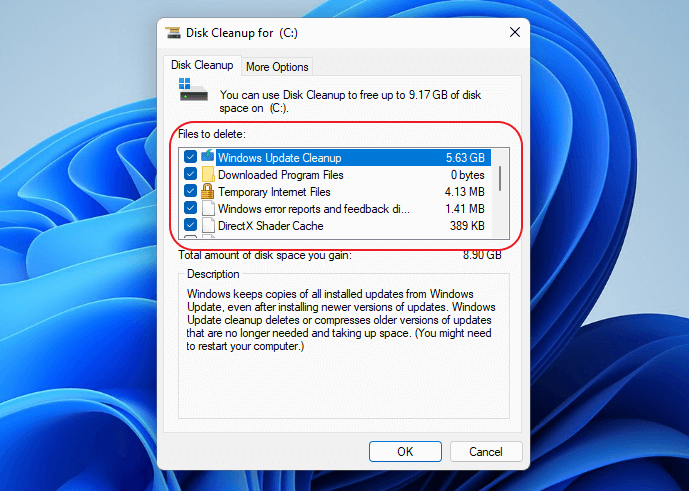
Step 4: Click OK.
If you want to free up more space, you can opt to delete system files. Although, tread with caution as deleting the wrong system file may render your PC unusable. If you don't know which files to delete, avoid this method altogether.
Step 1: In the tool window, select Clean-up system files.
Step 2: Select the file types to be deleted. To view the details of a file, click it.
Step 3: Click OK.
Is there a more secure alternative to Disk Cleanup?
If you're looking for a more foolproof and secure way to erase your files on Windows 11, we've got a simple yet powerful solution.
Today, various sophisticated data recovery software can retrieve data from even the most complex cases of data loss.
Only deleting the data won't suffice if you wish to be fully assured that your data is gone for good. Therefore, you need to erase data.
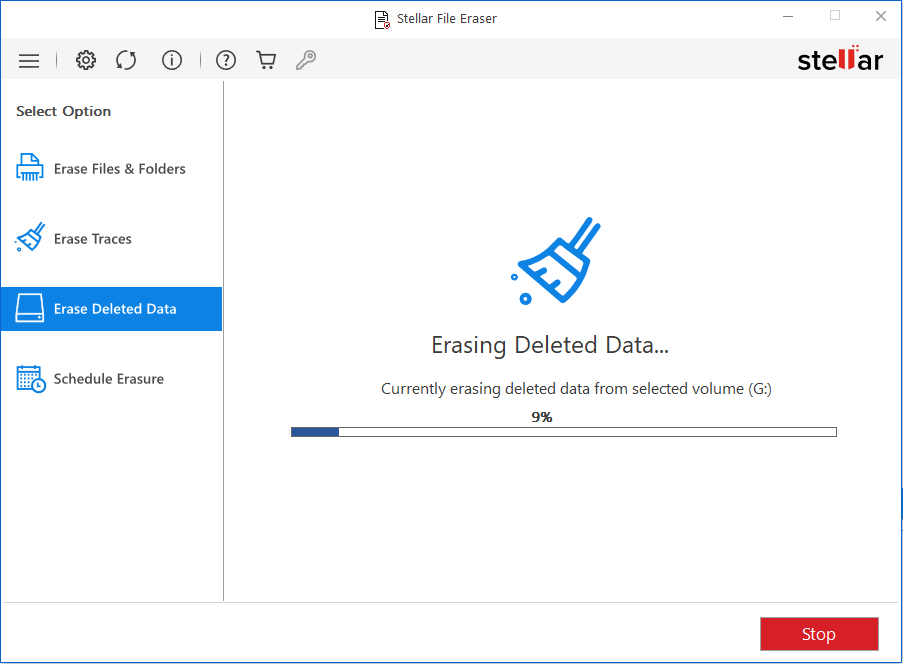
One of the most powerful solutions for file erasure is Stellar File Eraser, developed by professional data recovery experts at Stellar.
The tool is equipped with the world's most advanced erasure algorithms such as DoD 5220.22-M. These algorithms work by overwriting data multiple times and rendering it beyond the scope of recovery.
If you are wondering how to use Stellar File Eraser on Windows 11 PC, rest assured as the tool has a simple UI to facilitate DIY data erasure.
Conclusion
Regular use of Disk Clean-up will help you free up space, manage files and improve the performance of your PC .
What was the last time you took the pain to remove all those unnecessary files accumulated during your work? Can't remember?
That's why regular cleaning of the system is necessary for optimum productivity. We hope you can access and use the Disk Cleanup app on Windows 11. Don't hesitate to share your thoughts in the comments below.


Tech Enthusiast and Senior Writer at Stellar®

 4 min read