If your Outlook is displaying the “OST has reached the maximum size” error, it is clear that you have to reduce the OST file size. In this detailed guide, you will find various methods for reducing the OST file size and fix this error. Alternatively, you’ll also find a way to increase the OST file size limit that can also help resolve this issue.
What does the “OST has Reached the Maximum Size” Error Mean?
The error itself indicates that your OST has reached the predefined/set size limit. Once it reaches its size limit, it can’t write data or sync new emails and other items. As a result, you may face performance and synchronization issues, and even crashing of Outlook.
What is the Maximum Size of OST File in Outlook?
The maximum size an OST file can reach depends on the version of Outlook you are using. Here is a quick overview:
| Outlook Version | Default OST Limit | Max Registry Limit |
| Outlook 2007 | 20 GB | 20 GB |
| Outlook 2010 | 20 GB | 50 GB |
| Outlook 2013, 2016, 2019, 2021 | 50 GB | 4096 GB |
| Outlook for Microsoft 365 (latest builds) | 50 GB (default) | 4096 GB |
Source: Microsoft Support – Outlook data file size limits
How to Check your Current OST File Size?
You can quickly check your current OST file size by using Run Utility or via Outlook Account Settings.Below,we have mentionedthestep-by-step process to check the current size of your OST file.
Method 1 – Check OST File Size by Run Utility
Follow these simple steps for checking the size of your data file by using the Run utility:
- Press Windows + R keys together.
- Type: %LOCALAPPDATA%\Microsoft\Outlook.

- Hit Enter or click on OK.
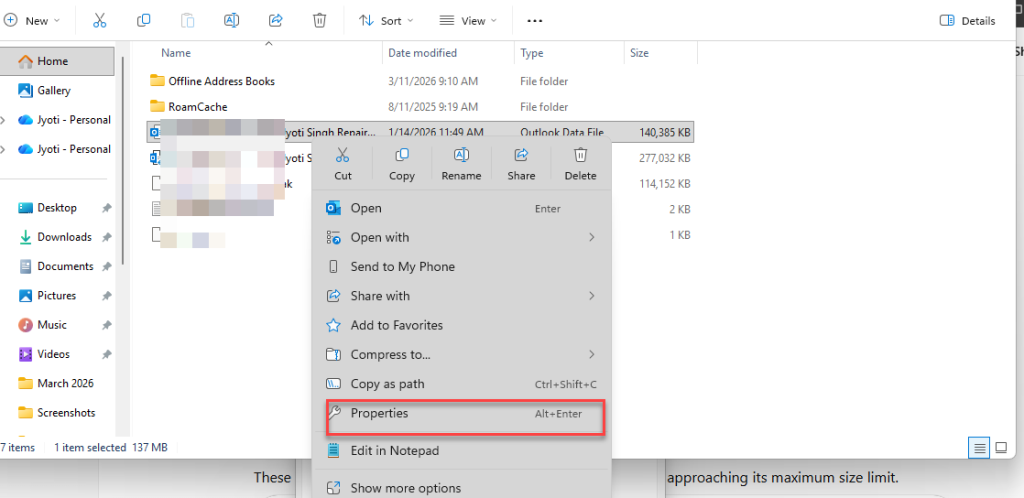
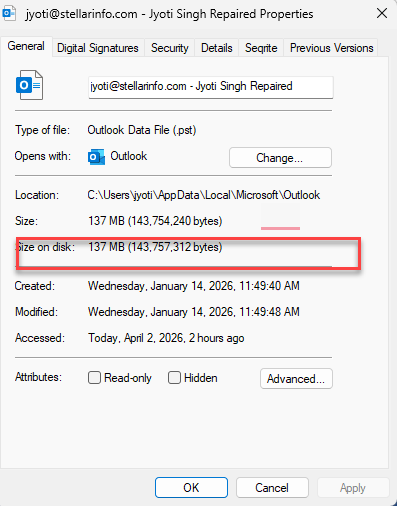
- Find your OST file and right-click on it.
- Now, select Properties.

- Check the “Size on disk” value.

You can also check your OST file size via Account Settings in Outlook. Let’s see how:
Method 2 – Check the File Size through Outlook Account Settings
- Open Outlook application.
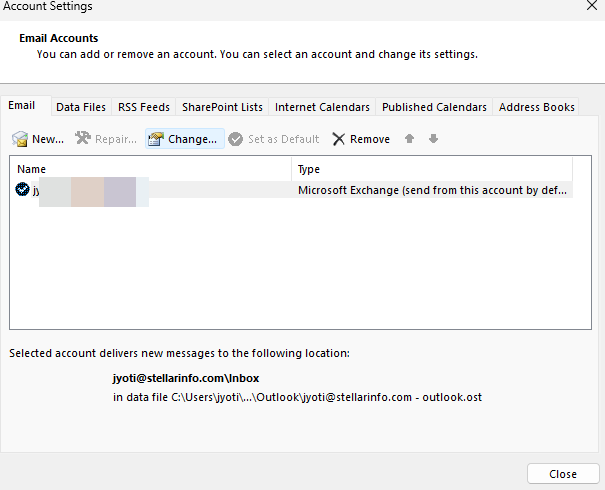
- Go to File > Account Settings.
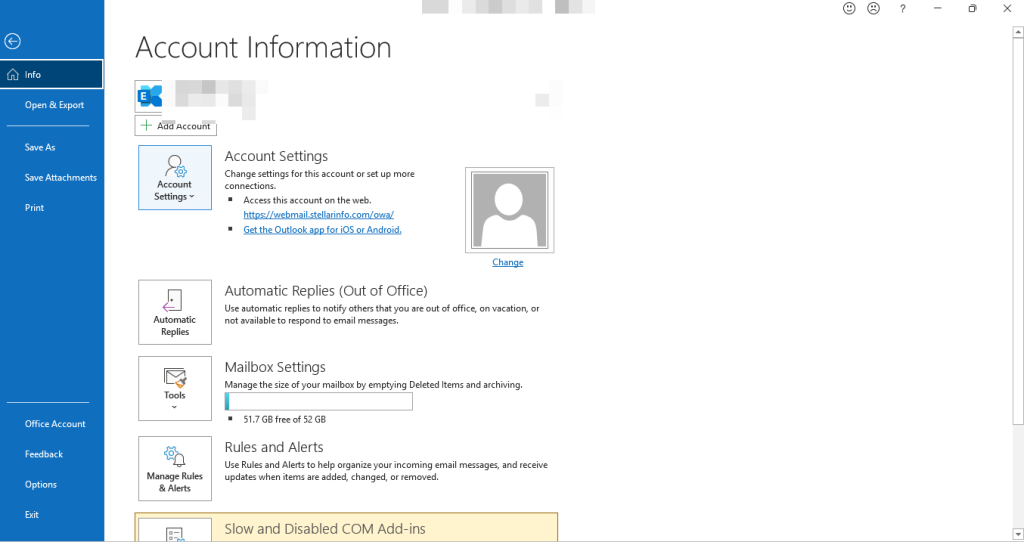
- In this tab, you can view the location of your OST file.
- Now click on Open File Location.
- Right-click on your OST file and select Properties.
- Check the “Size on disk” value.
Methods to Resolve the “OST File has Reached the Maximum Size” Error
You can either reduce the OST file size or increase its size limit to fix the OST maximum size error. Let’s look at the ways to perform these operations.
How to Reduce the Size of OST File?
Below, we have mentioned the most effective ways to reduce the size of OST file:
1. Use the Mailbox Cleanup Tool
The mailbox cleanup tool helps you find and delete oversized emails, empty deleted items, archive old data, and identify items consuming the most space in Outlook. You can use this tool manage the size of your OST file size. Here’s how to use it:
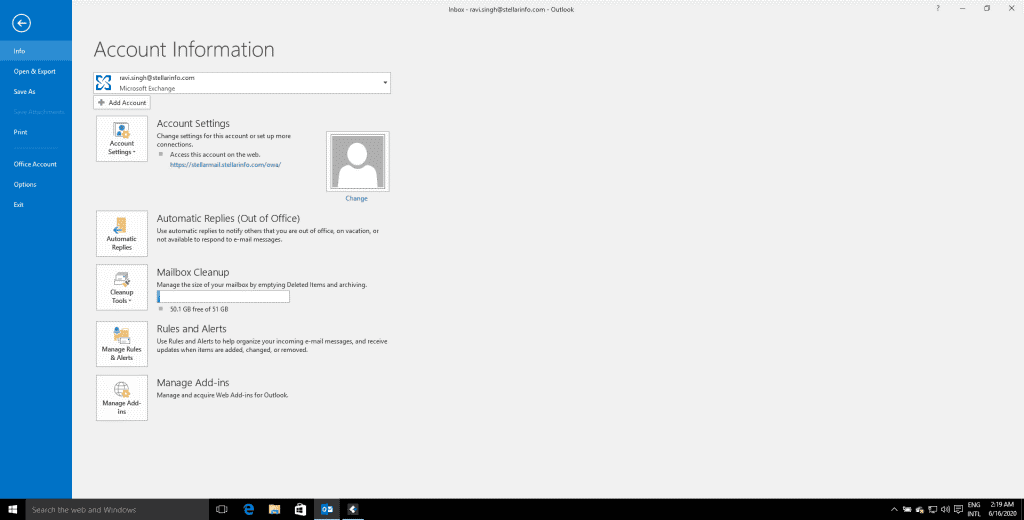
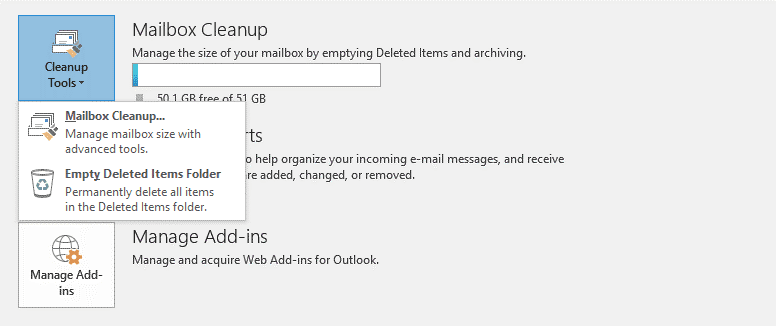
- Launch Outlook. Click File > Info and then click on Cleanup Tools, beside Mailbox Cleanup.
- Click on the Mailbox Cleanup option.
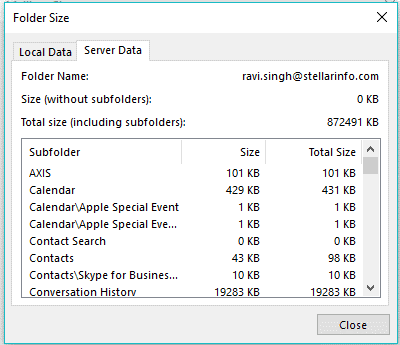
- You can view your current mailbox size by clicking on the ‘View Mailbox Size’ button.
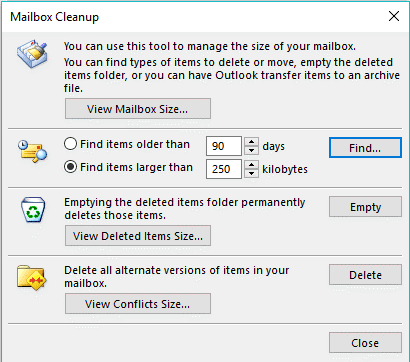
- Enter the number of days to find the older emails and delete them. You can Find items larger than and delete them. You can also Empty the Deleted Items folder and Empty Conflicts to reduce the OST file size.
Note: Take a backup of all your emails before deleting them.
Further, you can look for large emails, download all the attachments, and then remove the attachments from emails to reduce the OST file size.
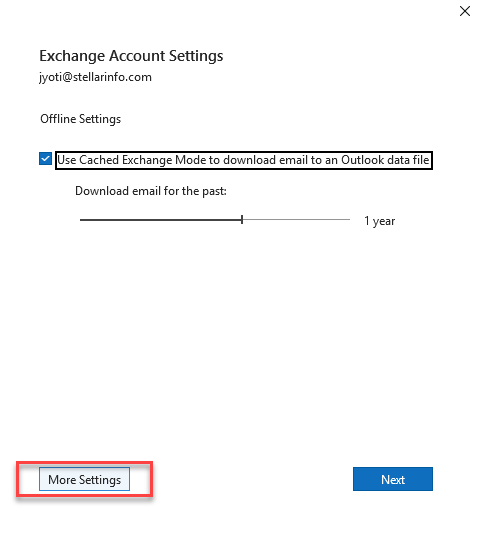
2. Adjust the ‘Mail to Keep Offline’ Setting
Outlook provides an option to limit the download of mail items into the local OST file based on time duration. The setting is called Mail to keep offline. You can adjust the Mail to keep offline setting to change how much data you want to keep offline. This can help you significantly reduce the OST file size.
Note: This setting is only available for Exchange and Microsoft 365 accounts running in Cached Exchange Mode. It will not appear for IMAP or POP3 accounts. To learn more about this feature, see this blog.
The steps are as follows:
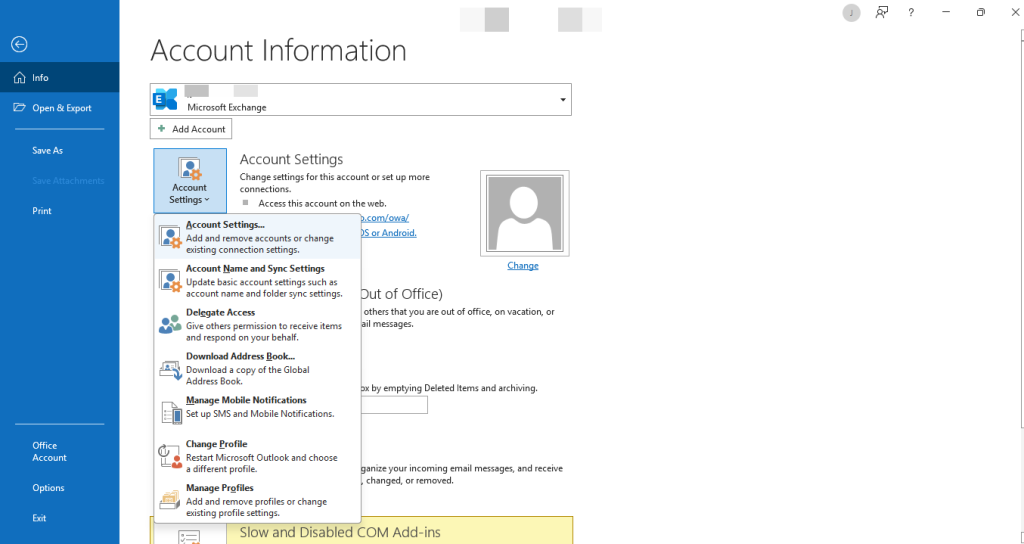
- In your Outlook, go to File > Info.
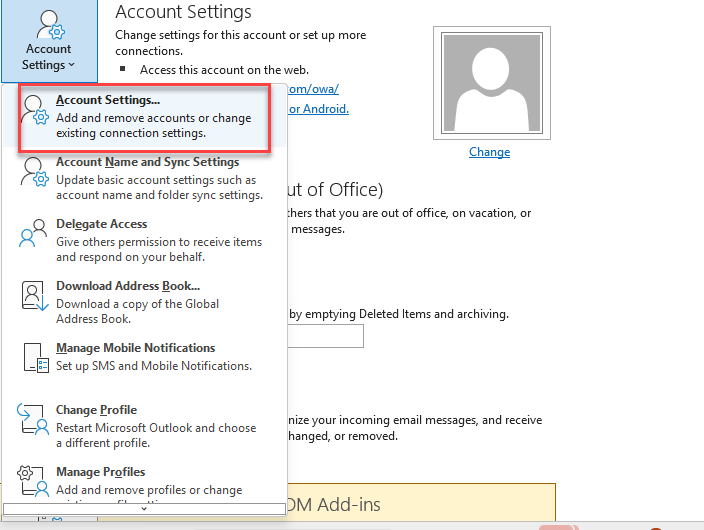
- Click on Account Settings > Account Settings.
- Click on your email account/profile.
- Then click Change.
- Adjust the Mail to keep offline slider.
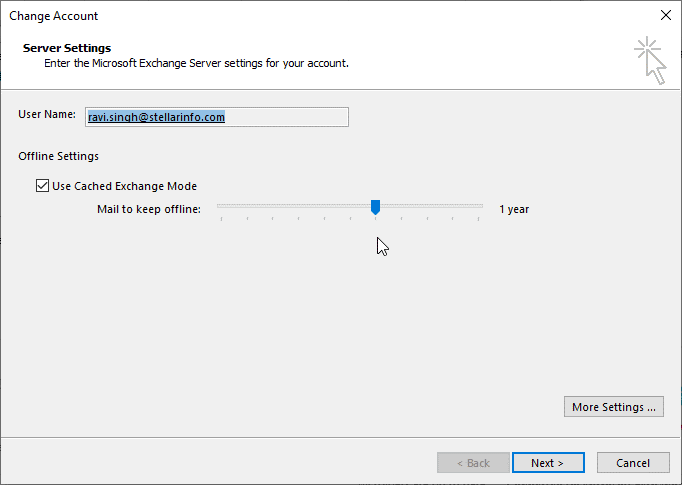
If your sync slider is set 2 years or more, then adjust it to 1 year or 6 months. After a while check your OST file size. You will notice that the OST file size has reduced significantly.
Note: Once you adjust the sync period, emails older than the selected timeframe will no longer be visible in Outlook. They are not deleted from the server – you can access those emails by logging in to OWA.
3. Compact the OST File
Outlook has the option to compact the data files. This option basically compresses the file by removing empty data blocks created by deleted emails or other items. If you often delete emails, this can help reduce the OST file size significantly.
For detailed step-by-step Instructions, see our blog: How to compact the OST file
4. Move Old/Unwanted Emails to PST
You can move your older or unwanted mail items to a local PST. This will help you reduce the size of your OST file. Here’s how:
- Launch Outlook application.
- Go to File.
- Click on Account Settings > Account Settings.
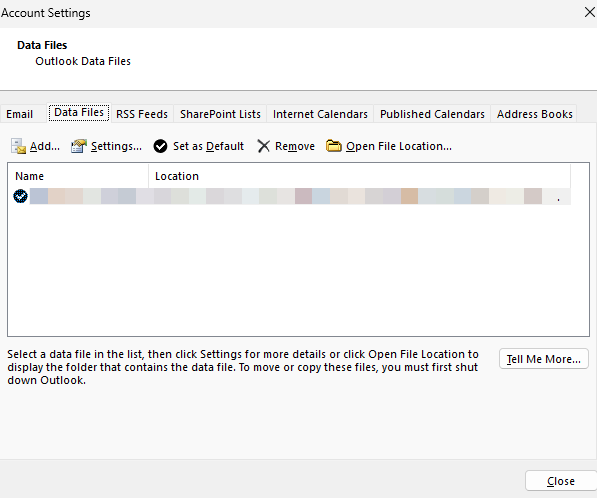
- Select Data Files tab.
- Then click Add.
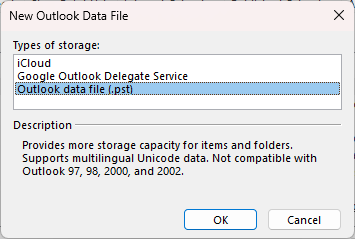
- Choose Outlook data file (.pst) and click OK.
- Choose a location where you would like to save the PST file, give it a name, click OK, and then click Close.

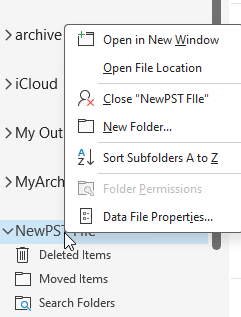
- This PST file will appear in your Outlook’s left side bar.
- Right-click on it and create a mail folder.
- Then, expand your main mailbox in Outlook.
- Select the mail folders or mail items you would like to move to this local PST file.
- Right-click on the selected item.
- Choose Move.
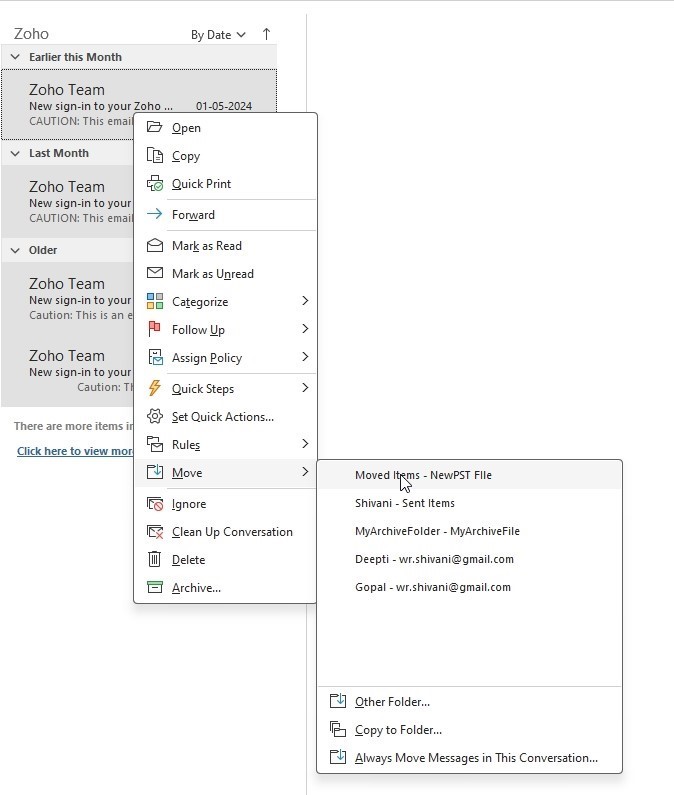
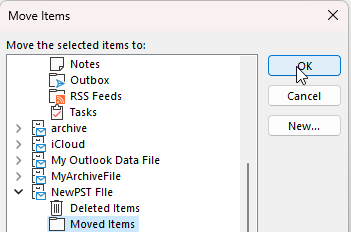
- Click on Other Folder.
- Then, select the folder you’ve created in the PST file and click OK.
This will move the selected mail item to the PST file. You can create more local PSTs, name them properly, and then move mail items from the OST file to PST.
5. Disable Shared Folder Synchronization
If your shared folder synchronization is enabled, Outlook automatically synchronizes this data to your local OST file. This can increase the OST file size. You can disable the shared folder synchronization to reduce the OST file size. Here’s how:
- Launch Outlook application.
- Go to File.
- Click on Account Settings > Account Settings.
- Choose your Exchange account and click Change.
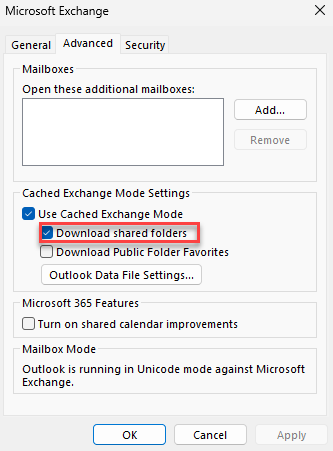
- Uncheck Download shared folders.
- Click OK, then Next, and finally Finish.
- Restart Outlook to apply the changes.
Quick Comparison: Best Ways to Fix OST File Has Reached Maximum Size
Below are the Comparison table of the most effective methods to fix the OST file size limit issue:
| Fix Method | Difficulty | Safe? | Best For |
| Mailbox Cleanup | Easy | Yes | General users needing quick space cleanup |
| Compact OST | Easy | Yes | Removing deleted or unused mailbox data |
| Sync Slider | Easy | Yes | Large Microsoft 365 mailboxes |
| Increase Limit | Medium | Moderate | IT Admins or advanced users |
| Recreate OST | Medium | Yes | Sync errors or OST corruption |
How to Increase the OST File Size Limit?
If you are managing large mailbox data with years of crucial communications and don’t want to delete your emails, then you can increase your mailbox size by using the registry editor or GPO. This approach is useful for organizations that retain years of emails, attachments, and calendar items for operational or compliance purposes.
For complete step-by-step instructions you can see our blog: How to Increase OST file size in Outlook.
Note: Increasing the OST file size limit should be done carefully, as very large OST files can impact Outlook performance and increase the risk of file corruption. It is generally recommended to consider mailbox cleanup or archiving before increasing the size limit.
Recreate the OST file
If your OST file has become large, damaged, or refuses to shrink even after trying all the cleanup methods then the most straightforward fix is to recreate it. All you need to do is delete or rename the existing OST file — Outlook will automatically generate a new OST file when you reopen the application and synchronize your mailbox data from the server.
The new OST file will be created based on the Cached ExcAhange Mode sync settings configured for your mailbox.
Source: Microsoft Support – Turn Cached Exchange Mode on
This approach works especially well when Outlook is running slowly, emails are not loading properly, or you are encountering sync errors.
Refer to this blog to know how to recreate the OST file.
Expert Tip for IT Admins According to Expert on Reddit , enabling Online Archive for large mailboxes and archiving items older than two years can reduce OST size significantly. The archive appears as a separate mailbox and does not create an OST file, often reducing mailbox size by 50–80% and improving Outlook performance. For OST file you can set the limit for 6 months or 1 year according to your organization need. Source Reddit
Convert the OST File to PST
In case your OST file becomes inaccessible due to large size, then converting it to PST format is a reliable solution.
Stellar Converter for OST – an advanced OST to PST converter tool – allows you to convert and recover all your mailbox data without any limitations. It converts large or inaccessible OST files into PST and recover all mailbox items, including emails, contacts, calendar, tasks, and attachments.
Why is my OST File Larger than my Mailbox?
Although OST file is a cached copy of the user’s mailbox which resides on the server, the file size does not really represent the mailbox size. There are also many other things contained in this file which occupy more space than the mailbox size, which can result in an OST file size larger than the mailbox:
- Mailbox Items such as email, calendar, tasks, journal folders, contacts, notes, etc.
- Hidden Items and other overheads are found in the PST file.
- Public folders that are added by the user as favourites.
- Shared folders of additional mailboxes, which have been connected to the Exchange server account.
- In Outlook 2016, when you connect to Exchange Server, there are two connectivity modes – Cached Exchange Mode and Online Mode. With the Cached Exchange Mode (a default setting for users), Outlook 2016 doesn’t depend on constant network connectivity for accessing the users’ information. However, Outlook needs to directly contact the Exchange server to perform certain operations, even when it is configured in Cached Exchange Mode. These operations are working with shared folders that were not made available offline, setting/changing/cancelling Out-of-Office messages, accessing public folders that were not made available offline, editing rules, and recovering rights to a rights-protected message, and recovering Policy Tips, Mail Tips & Free/Busy information. If you’re using Outlook 2016 with Cached Exchange Mode, it is to be noted that users’ OST files, stored locally, might be 50-80 per cent larger than the mailbox size. With the Cached Exchange Mode, the format that Outlook 2016 uses to save data locally is less space-efficient than the server data file format.
Problems with Outlook due to Oversized OST
Due to an oversized OST file, you may face the following issues with your Outlook:
- The outlook may fail to open or load the OST file document
- The problem in adding data to existing OST file
- Outlook Application may pause or stop abruptly
- Error messages may appear during the synchronizing process
- Failure to fix synchronization problem
You can resolve these issues by reducing the size of your OST file by following the methods mentioned above.
Conclusion
If your OST file has reached its maximum size, you may start facing various issues such as failure to send and receive emails, performance degradation, Outlook hangs or freeze, etc. To fix or prevent such issues, you can reduce or increase the OST file size. In this guide, we have explained different ways to reduce and increase the OST file size. In case your OST file gets inaccessible, then you can utilize Stellar Converter for OST – a professional OST converter tool – convert it into smaller PST files. It maintains complete data integrity while converting the OST file.