QuickBooks by Intuit is one of the most brilliant accounting software for small businesses and individuals that has gained immense popularity over the past couple of years. It lets you perform various accounting related activities such as creating invoices, monitoring and tracking receivables, sending payment receipts online, and a lot more. Naturally, an application that deals with finances in such a manner would have to be trustworthy as well as robust.
However, at the end of the day, QuickBooks is a software application. It is thus prone to the same hazards as any other software, including crashes, technical faults, virus / malware infections, and corruptions. But considering that it deals with money matters, an organization cannot possibly afford to risk such situations. Thus, staying aware of QuickBooks error fixes is quite essential for its users.
 Figure: Error Message
QuickBooks Rebuild Not Responding Error
Intuit offers an inbuilt rebuild utility to mend errors within QuickBooks software. Here is the list of DO’s and DON’T’s for QuickBooks Rebuild process:
- Do make a backup copy of your QuickBooks data file. It will save you from the permanent data loss.
- Do not run this command over the network. Launch QuickBooks on the computer on which the company file is located. If the file is present on the shared network then, you need to switch to single user mode. To do so, go to File->Switch to Single-user mode.
- Do not cancel or abort the rebuild data process.
- Do not run the rebuild command when encrypted data is corrupted.
Note: These are the important points to remember.
- Verify Data:
- Click File -> Utilities -> Verify Data.
 Image Credit: Intuit
If you see:
“QuickBooks detected no problems with your data” – You don’t need to perform any further action.
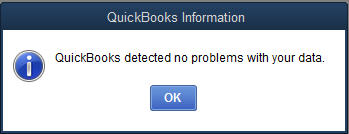 Image Credit: Intuit
“Your data has lost integrity” – This indicates possible data damage in the file. To rectify, proceed to rebuild your data.
- Rebuild Data:
- Click File -> Utilities -> Rebuild Data
- Click ‘Ok’ if you receive a warning message to backup your company file. Your computer may display the message ‘QuickBooks rebuild not responding’. As long as you can move your mouse indicator, wait for it to complete.
- Click ‘Ok’ when you get the message ‘Rebuild has completed.’
 Image Credit: Intuit
- Repeat Step 6 to check for remaining data damage. If verify fails this time, proceed to next step.
- Find QBWin.log files and check the entries to see if the damage has been rectified.
What to do when QuickBooks Repair fails?
Sometimes, QuickBooks rebuild command might fail before completion and leave QBW files in the inconsistent and damaged state. Alternatively, the rebuild command might hang and display the message ‘QuickBooks rebuild not responding’ endlessly prompting you to terminate the process abruptly. In such a condition, you might not be able to launch QuickBooks at all thus preventing you from accessing your critical financial data.
To repair QuickBooks file, use Stellar Repair for QuickBooks Software. This efficient utility can expertly handle QuickBooks damage / corruption and recover all information related to Customers, Services, Vendors, Employees, etc. The tool recovers payroll transactions and paychecks and also supports the recovery of multiple currencies. Before recovering data, it allows you to preview all recoverable items in QuickBooks data file (QBW file) and be assured of their recovery.
- Download, install and launch Stellar Repair for QuickBooks® Software
- On the software’s home screen, you’ll find two options:
- Browse QBW file (if you know its exact location on the system)
- Find QBW file (if you’re unaware of its location)
- Click on ‘Scan’ to initiate the scanning process
- As items are discovered, different options become available for preview. Select the one whose information you wish to preview:
- Company
- Customers
- Vendors
- Employees
- Click the ‘Save‘ button to proceed with the repair process. This opens a ‘Save File’ window with option to create and select a new company file to save the repaired data. Alternatively, you can select a backup file (QBB) to extract the data.
- A ‘Repair Process Complete’ message box will appear on completion of the QBW file repair process. Click on ‘OK’ to exit the procedure.
Conclusion
So there you have it, the easiest way to repair QBW file if QuickBooks rebuild command fails to work. Use our helpful tips and Stellar Repair for QuickBooks Software to safely mend the erroneous file and recover all your critical financial information.