In Exchange Server, virtual directories are used to connect client applications to the server. These are published via the Internet Information Services (IIS) web server. Virtual directories are used for accessing web applications, such as Outlook Web App (OWA), Exchange Control Panel (ECP), Exchange ActiveSync, Offline Address Book (OAB), etc. If these virtual directories are damaged, misconfigured, or missing, you can encounter issues when accessing the Exchange services. In such a situation, you can reset or recreate the IIS virtual directories to resolve the issues. Below, we will see how to recreate the IIS virtual directories in Exchange Server.
Why do you need to Recreate the Virtual Directories?
You need to recreate the virtual directories in Exchange Server, if you’re experiencing the following:
- Server error messages
- Blank screen after login
- Web page errors, like HTTP 404, 500 and runtime errors
- Connectivity issues
- Permission issues
- Missing files
Process for Recreating ECP and OWA Virtual Directories
You can follow the below procedure to recreate the ECP and OWA Virtual Directories in Exchange Server:
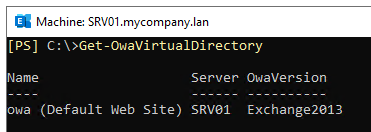
First, you need to get information on the Outlook Web App (OWA) virtual directory. To do so, run the following command in Exchange Management Shell (EMS).
Get-OwaVirtualDirectory
Next, you need to get the URL settings, such as internal URL, external URL, and authentication settings. For this, use the below command:
Get-OwaVirtualDirectory "<server name>\<owa virtual directory>"|select-object InternalUrl, ExternalUrl, BasicAuthentication,WindowsAuthentication,DigestAuthentication, FormsAuthentication
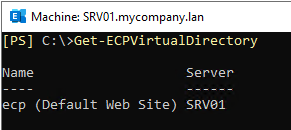
Now, you need to get the same information for the Exchange Control Panel (ECP) virtual directory. Run the following command:
Get-ECPVirtualDirectory

You can use the below command to get all the information about ECP virtual directory.
Get-ECPVirtualDirectory "<server name>\<ecp virtual directory>"|select-object InternalUrl, ExternalUrl, BasicAuthentication,WindowsAuthentication,DigestAuthentication, FormsAuthentication
After taking note of all the virtual directory information (for both the ECP and OWA), you can proceed to delete the virtual directories. To do so, run the following commands:
Remove-OwaVirtualDirectory "<server name>\<owa virtual directory>"
Remove-ECPVirtualDirectory "<server name>\<ecp virtual directory>"
Once the sites are removed, you need to recreate them as per the information noted above. To create the Outlook Web App (OWA) site, run the below command:
New-OwaVirtualDirectory -InternalUrl "URL" -ExternalUrl "URL"

Make a note of the message in yellow (in the above image). You will need to create the ECP virtual directory in the same website. You cannot create the ECP in another website in the Exchange Server IIS setup.
In some cases, it is recommended to recreate the Outlook Web App (OWA) for the Exchange back end.
Run the below command to remove the OWA virtual directory:
Remove-OwaVirtualDirectory "<server name>\owa (Exchange back end)”
Then, use the below command to recreate it:
New-OwaVirtualDirectory -InternalUrl "<URL>" -ExternalUrl "<URL>"
Now, you can recreate the Exchange Control Panel (ECP) virtual directory by using the command below:
New-EcpVirtualDirectory -InternalUrl "<URL>" -ExternalUrl "<URL>"

After the process is complete, you can verify that the directories have been created. You can use the following commands.
Get-OwaVirtualDirectory

Get-ECPVirtualDirectory
It is also suggested to restart the services or server.
Some Best Practices
Since the above process will impact several services, you need to follow some best practices for a successful procedure. These are:
- Ensure that a temporary full backup of the server is done before the procedure.
- Confirm that the documentation is updated.
- Take a written confirmation from the management to accept the downtime.
- Perform the procedure in the maintenance window or outside business hours.
- Have a full checklist and test plan in hand, which is accepted by the management.
- Pause any Antivirus scans or backup jobs.
Conclusion
If you’re facing any issues with Exchange services or the virtual directories get corrupted or damaged, then you need to recreate the virtual directories. Above, we have discussed the stepwise process of recreating the ECP and OWA virtual directories in the Exchange Server.
In case, a server has failed due to issues during troubleshooting or recreation of the virtual directories or rebuilding the server, you need to recover all the data. When it comes to corrupted transaction logs or databases, there is little you can do with the native EseUtil commands. So, you can look for alternative tools to recover the data, if the database is corrupt. One such tool is Stellar Repair for Exchange. The tool can open corrupt EDB files, with or without a working Exchange Server and with no size limit. You can then granularly export the EDB data to PST and various other files formats. You can also export the EDB data, including user archives, shared mailboxes, disabled mailboxes, and public folders, directly to a live Exchange Server database or Office 365 with automatic mailbox matching from source to destination.