Few things can worsen your day faster than clicking on a drive in Windows and facing an error instead of your files. It could be that a partition has disappeared from File Explorer, or it’s appearing as RAW, or maybe Windows is telling you that you don’t have permission to open it. Whatever be the specific error message, the result in often the same: your data has become inaccessible.
Here’s the catch with inaccessible partitions: they can go bad for all sorts of reasons. Maybe it’s file system corruption, or even a change to a setting or two. Or perhaps you reformatted something by mistake, or a drive letter disappeared, or there was some malware that chose to destroy your system.
The silver lining is that “inaccessible” does not always mean lost forever the data saved on that specific partition. With the proper method, you can usually regain access without sacrificing what’s contained within. In this blog, we shall address such problems in depth and provide some real-world solutions to repair them.
Disk Partition in Windows: The Basics
Have you ever wished you could just split your hard disk drive into separate sections? Maybe you’d want to keep an encrypted area for private files, or perhaps, set up a second OS so you can run Windows 10 alongside Windows 11. Well, it’s not all that difficult and Windows already includes all the necessary tools to make that happen.
This process, called disk partitioning, is a standard practice for most drives when you first get them, with the bulk of the disk space taken up by the C: partition, also known as the primary partition. But most PCs also contain a smaller Recovery partition whose purpose is to restore your system in an SOS situation.
If the C: drive still has some free space available, it’s possible to split it into several other partitions using the inbuilt Disk Management utility of Windows.
Below we will present the typical situations where a partition goes missing, discuss the reasons for these, and provide the steps to resolve them.
Case 1: Partition has Turned RAW
A partition in Windows appears as RAW when the operating system is not able to recognize its file system. RAW partitions are actually those disk partitions that are not formatted using a Windows NT file system like FAT or NTFS. In such a scenario, error messages might pop-up on your PC, like, “before you can use it, you need to format the disk in drive M” or “this volume does not contain a recognized file system”.
Why the Partition has Turned RAW
- Sudden shutdown, power cuts, etc., have caused the file system to go corrupt.
- Extensive wear, manufacturing defects, or overheating has led to creation of bad sectors on the drive.
- Partitioning or formatting got interrupted or was left incomplete
- The format you are using to partition the drive is not supported by your OS
- Data corruption during read/write operations
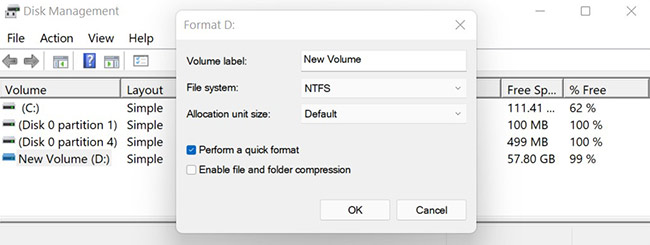
Steps to Recover and Reformat
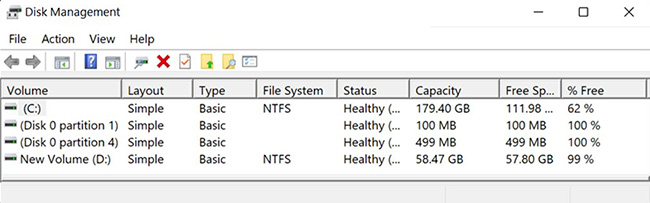
- First of all, confirm if the partition has actually turned RAW. Press Win + X and launch Disk Management.
- Check the File System column and see if its formatted using the right file system.
- Use a professional data recovery software – Stellar Data Recovery Professional to scan the RAW partition and save the recovered files to a different drive.
- Lastly, format the disk.
Case 2: Partition is Shown as Unallocated
A partition table is like an index that tells Windows how to access and organize the available storage space on a disk. An error occurs when storage space is not linked to any partition in the partition table, although it is physically available on the disk drive.
If the free space used to be an active partition before, it usually means that the partition entry is damaged. This will not allow you to see your data but it will remain there until you overwrite it.
Causes Behind Unallocated Partition
- The partition table entry is removed due to accidental deletion or other reasons
- The partition table is corrupted due to malware, power loss, etc.
- The OS or update installation failed, deleting or overwriting the partition entries
- File system corruption due to the presence of bad sectors
- Physical damage to the disk sectors storing partition metadata
- OS doesn’t recognize the partition type and shows it as unallocated
Steps to Recreate and Restore Unallocated Space
- First of all, confirm if the partition has become unallocated.
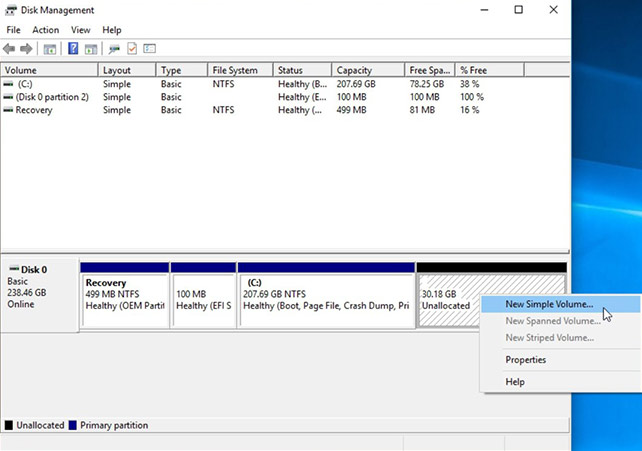
- Press Win + X and launch Disk Management. You can find the block of Unallocated space at the end of the drive.
- Use Stellar Data Recovery Professional to scan this unallocated partition and save the retrieved files on a different drive.
- Right-click on the Unallocated space in disk Management and select New Simple Volume to create a new partition.
Case 3: The File or Directory is Corrupted and Unreadable
When the OS is not able to read the file system metadata for certain files or folders, it displays the error message, “file or directory is corrupted and unreadable.” Note that the error does not have to do with a file’s content being damaged, but the indexing structure (Master File Table) or the storage sector containing that data which has become unreadable.
Factors Leading to File System Corruption
- Abrupt power cut, forced shutdown, or OS crash leading to file system corruption
- Physically damaged sectors containing MFT, FAT, or directory entries
- Improper drive ejection
- Presence of boot sector virus
- System crash during file transfer
- Physical disk failure
Procedure to Repair File System Corruption and Recover Data
- Try restarting your system because many times the issue occurs due to a temporary lock or cache-related problem.
- To fix logical errors, run CHKDSK.
- Press Win + R, type cmd and press Enter.
- Execute the following command: chkdsk L: /f /r (replace L with the name of the drive letter).
- To scan the inaccessible partition and save the recovered files to a different drive, use a Partition recovery software.
Case 4: Data Error (Cyclic Redundancy Check)
There is a data validation method known as the Cyclic Redundancy Check implemented by storage devices. The method is applied to check for a match between the data read from the disk and what was initially written onto the disk. When a data error occurs, the verification fails, meaning the data has become unreadable or corrupted.
What Causes Cyclic Redundancy Check Failure
- Data is written partially or incorrectly
- Presence of bad sectors on the disk
- File system corruption
- Outdated firmware or a failing controller board
Steps to Repair and Recover
- Recover your data firstusing a partition recovery software – Stellar Data Recovery Professional. Then you need to scan the inaccessible partition and save the recovered files to a different drive as some of the fixes may overwrite data.
- Run CHKDSK to repair logical errors. Press Win + R, type cmd and press Enter. Now execute the following command: chkdsk X: /f /r (replace X with the name of the drive letter).
- Use System File Checker. Press Win + R, type cmd and press Enter. Now execute the following command: sfc /scannow
Case 5: Drive Letter is Missing
Windows assigns each drive and partition a drive letter (C:, D:, F:, etc.) in order to make it easier for the OS and apps to access drives and partitions. In case one of these drive letters is missing, it likely means that the partition is probably still there but the OS lacks any assigned identifier to attach it in the File Explorer.
Root Causes Behind Missing Drive Letter
- Drive letter got removed in Disk Management
- OS update or upgrade caused the drive letter to get lost
- A different USB device took the original letter
- Driver or controller issues
- Windows failed to reassign the previous letter hot-swapping drives
How to Reassign Drive Letter and Restore Access
- First check you have to check if the drive letter is hidden. Press Win + X and go to File Explorer > View > Options > Change folder and search options > View tab > Make sure Show drive letters are checked.
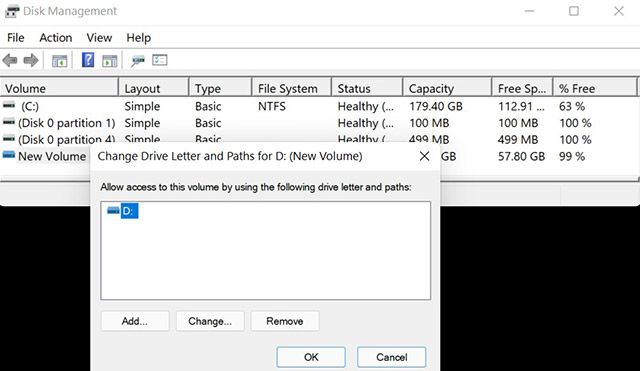
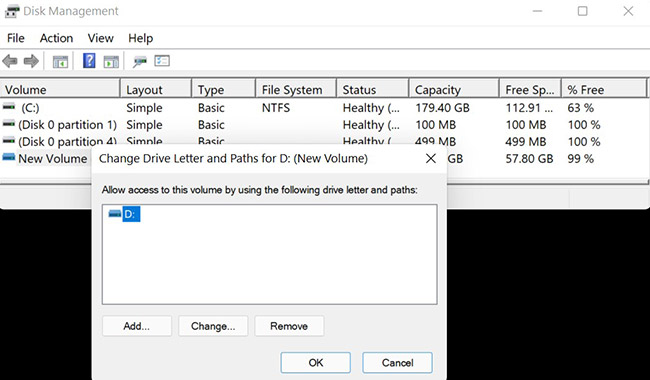
- Assign a drive letter. Press Win + X and click Disk Management. Find the volume without a drive letter and right-click on it. Select Change Drive Letter and Paths > Add > Choose a letter > OK
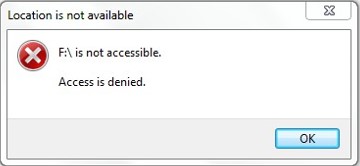
Case 6: “Access is Denied” Error
Upon opening a partition or drive, if you get the error message, “Drive is not accessible. Access is denied,” it means that windows is blocking your access at the encryption or permission level. It is different from a RAW or Unallocated space-related issue as the partition may be healthy and file system is still intact, but you lack the rights to read it.
Causes Behind “Access is Denied” Error
- The user account does not have read/write permissions for the drive
- There is an ownership mismatch where the drive’s files are owned by a different SID (Security Identifier)
- The drive is locked or encrypted
- The file system is corrupted
- Drive is configured as read-only
Steps to Reclaim Ownership and Permissions
- Take ownership. Press Win + X and click Disk Management. Right-click on the affected drive and go to Properties > Security > Advanced.
- Click Change next to the Owner option. Enter your username or select Administrators group.
- Check Replace owner on sub-containers and objects. Click OK to apply changes.
Additional Step to Reclaim Ownership and Permissions
- Remove write protection. Press Win + R, type cmd and press Enter.
- Then execute the following commands one-by-one:
diskpart
list disk
select disk X (replace X with your disk number)
attributes disk clear readonly
Case 7: Partition is Hidden
You sometimes want to hide a partition containing sensitive data, as you don’t want others to access these files. However, the thing to take note of here is that once a partition is hidden, you will be unable to see it in File Explorer or access it.
Reasons a Partition Gets Hidden
- The drive letter is removed
- Presence of a malicious software
- Unsupported file system
Steps to Unhide and Mount the Partition
- Assign a drive letter. Press Win + X and click Disk Management.
- Find the volume without a drive letter and right-click on it.
- Select Change Drive Letter and Paths > Add > Choose a letter > OK
Case 8: Shared Partitions Are Not Accessible from Other PCs
A shared partition is that drive or folder on one PC that can also be accessed by other PCs over a shared network. Sometimes, however, an error message might pop-up: “Partition is not accessible,” meaning you might not have permission to use this network resource. You can contact the administrator of this server to find out if you have access permissions.
Network and Permission Blockers
- Incorrect share/NTFS permissions
- NTFS file permissions are blocking remote access
- Network discovery or file sharing is disabled
- A firewall is blocking access
Steps to Enable and Configure Settings
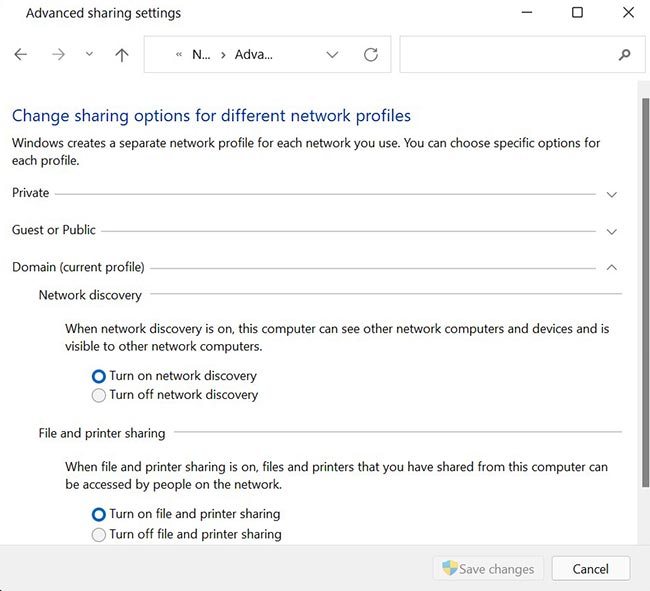
- Check network discovery & sharing. Press Win + S and launch Control Panel.
- Go to Network and Internet > Network and Sharing Center > Change advanced sharing settings
- Turn on Network Discovery and File and Printer Sharing.
Case 9: Device Not Recognized
There are many instances where when you connect a USB device, such as an HDD, SSD, or a flash drive and Windows displays an error message, “USB device not Recognized.” This means that a physical connection was detected by the OS but still no proper connection was made.
Root Causes of USB Recognition Failures
- Faulty or damaged USB port or connectors
- Missing or corrupted drivers
- USB ports are disabled to save power
- Cable/adaptor-related issues
- The device firmware is incompatible with the current OS
Troubleshooting Device Detection
- Do some basic checks first like trying to unplug and reconnect the device. Then try a different USB port, cable or test the device on another PC.
- Press Win + X and open Device Manager. Scroll down to Universal Serial Bus controllers. Look for a device with yellow exclamation mark and right-click on it. Choose Uninstall device, then reinstall the drivers.
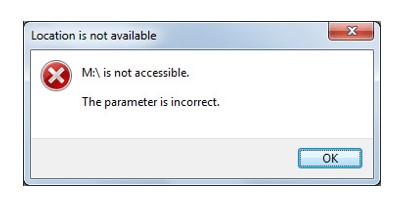
Case 10: Parameter is Incorrect
“The parameter is incorrect,” this error pop-up means that the operating system could not find one or more critical values (parameters). They were either unreadable, missing, or invalid. This indicates problems with the metadata, file system corruption, or other hardware-level read issues.
Underlying Causes Behind “Parameter is Incorrect” Errors
- The drive or partition has become RAW
- There are bad sectors on the drive
- Outdated or corrupted drivers
- Permission or ownership related issues
Steps to Validate and Repair Parameters
- Firstly, use Stellar Data Recovery Professional to scan the partition and save the recovered files to a different drive.
- Run CHKDSK to repair logical errors. Press Win + R, type cmd and press Enter. Now execute the following command: chkdsk X: /f /r (replace X with the name of the drive letter).
- Repair System Files. Press Win + R, type cmd and press Enter. Now execute the following commands:
sfc /scannow
DISM /Online /Cleanup-Image /RestoreHealth
Bottom Line
This blog outlines the most common types of errors related to inaccessible partitions along with the methods to fix them. But you might be wondering if there’s a single tool that can handle them all without having to handle other technical requisites.
In that case, we recommend using a professional data recovery software – Stellar Data Recovery Professional. It does away with the need for complex manual steps, it’s designed to be used by anyone with no technical background needed, and reduces the risk of further data loss.