All Mac users know how important it is to keep your macOS up-to-date. Installing recent updates brings various benefits: new features, optimized performance, and improved security. Unfortunately, sometimes the update process may get interrupted, and you will receive a message “Unable to verify macOS.” We offer you 9 basic steps even an inexperienced Mac user can take to resolve the unable-to-verify macOS issue.
If you lose important data stored on your computer while updating your macOS, there is no need to panic. The good news is nowadays, there are many data restore options available. One is the Stellar Data Recovery tool which can help you restore lost data, including photos and videos from any Mac device.
9 Ways to Fix Unable to Verify macOS Issue
I. Check Compatibility First
Let’s start with the most obvious step. Before installing the newest macOS version, ensure your Mac is compatible. Since Apple releases new macOS versions every year, it may seem very appealing to upgrade your Mac and enjoy recent innovations and optimizations. However, there are some limitations when it comes to macOS updates on certain machines. You can look for your computer model in macOS compatibility checklists to make sure the version you would like to install can run on your Mac. If it is not compatible, consider installing the previous version of macOS.
II. Verify Your Date and Time Settings
The next thing to check is your date and time settings. An incorrect date and time can halt the update process. Follow these steps to fix it:
- Open System Preferences and go to Date&Time.
- Click on the Lock icon in the bottom left corner and insert your password.
- Ensure there is a checkmark next to the “Set date and time automatically” option.
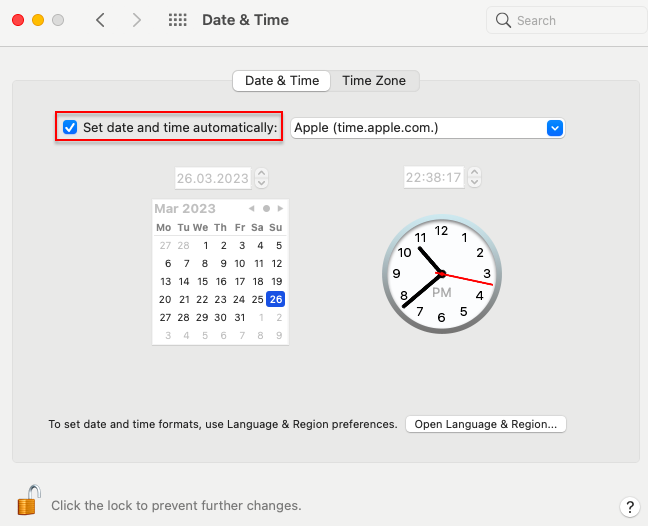 System Preferences > Date & Time
- Switch to Time Zone and make sure the correct time zone is set automatically using your current location.
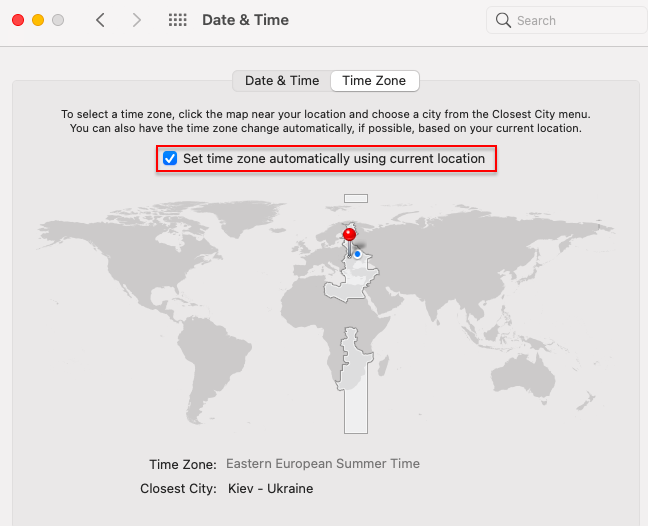 System Preferences > Date & Time > Time Zone
- Restart your Mac and try installing a desired macOS version again.
III. Check the Internet Connection
An unstable or poor Internet connection is one of the reasons why you may encounter the “Unable to Verify macOS” error message. You can run a speed test to check how good your Internet connection is. If the test identifies some issues, try using the tips below to fix the problem:
- Restart the modem or router.
- Plug in the Ethernet Cable.
- Disconnect other devices from Wi-Fi.
- Connect to another Wi-Fi if possible.
- Turn off your VPN.
After completing those steps, retry installing the updates. If the problem persists, proceed with the next fix.
IV. Adjust your Security Settings
One more reason for the unable to verify the macOS issue is the type of security settings selected on your Mac. If they are too high, it can interfere with system updates. To adjust your security settings, proceed with the following steps:
- Go to System Preferences and choose Security & Privacy.
- Select the General tab.
- Click on the Lock icon in the bottom left corner and enter your administrator password.
- Under the Allows Apps Download from, select App Store and Identified Developers.
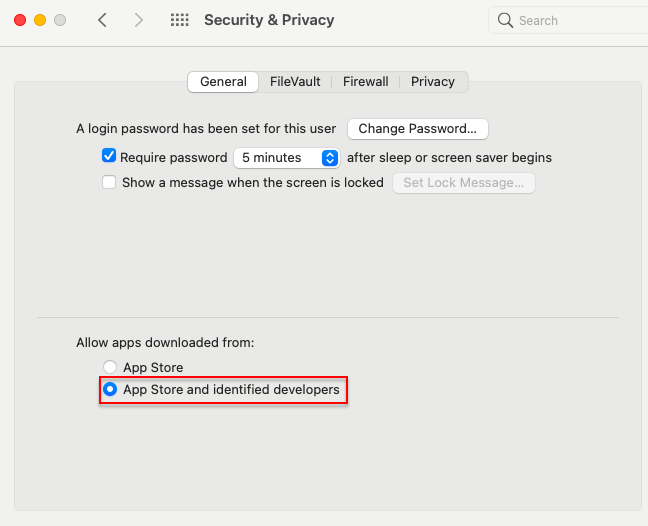 System Preferences > Security & Privacy > General
V. Modify the Firewall Settings
Some users experience problems with macOS updates because their Firewall is set up to block incoming connections. It makes it impossible to run the installer correctly.
To customize the Firewall settings:
- Go to System Preferences and then to Security&Privacy.
- Select the Firewall tab.
- Click on the Lock icon and enter the administrator password to make changes.
- Choose Firewall Options and ensure the Block all incoming connections box is empty.
- On the same tab, enable Automatically allow built-in software to receive incoming connections and Automatically allowed downloaded signed software to receive incoming connections features.
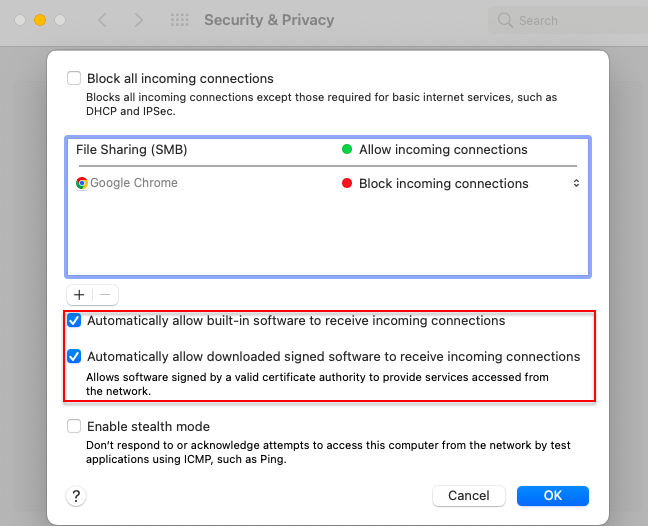 System Preferences > Security & Privacy > Firewall > Firewall Options
Alternatively, you can turn off the Firewall altogether.
VI. Fix Startup Disk Errors
The inability to install a newer macOS can also appear due to startup disk errors. For example, macOS can be unable to verify the startup disc on your Mac. To identify and fix possible startup disk problems, use Disk Utility in Recovery Mode:
- Open Disk Utility.
- Find the list of internal volumes to the left of the menu.
- Click on the last volume on the list and hit the First Aid button.
- Wait until the scan is completed and work your way up the list until you scan all the volumes you can see.
- Fix the errors, if any.
After finishing the scan and fixing the errors, restart your computer and retry installing the desired updates.
VII. Download macOS from the App Store
One more solution to the “Unable to verify macOS” error is installing a Mac update directly from App Store:
- Open the App Store and type the name of the macOS version you want to install in the search bar to the left.
- Choose the version offered and click Get to download the installer.
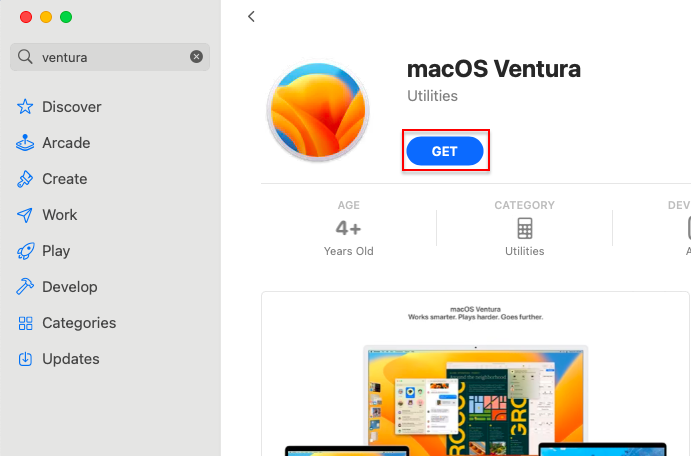 Launchpad > App Store
The installer will run automatically and install a new macOS upgrade to your system. If you can’t find the needed macOS version in App Store, you can download it manually from the Apple Support web page.
VIII. Free Up System Storage
In some cases, a new macOS upgrade can’t be installed because you don’t have enough space on your Mac. You need at least 5GB of storage to download and run the newest software update. To check how much storage you have:
- Click on the Apple logo in the top left corner of your screen
- Go to About This Mac.
- Select the General tab.
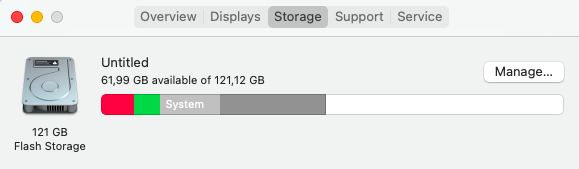 Apple Logo > About This Mac > Storage
Alternatively, you can use Disk Utility.
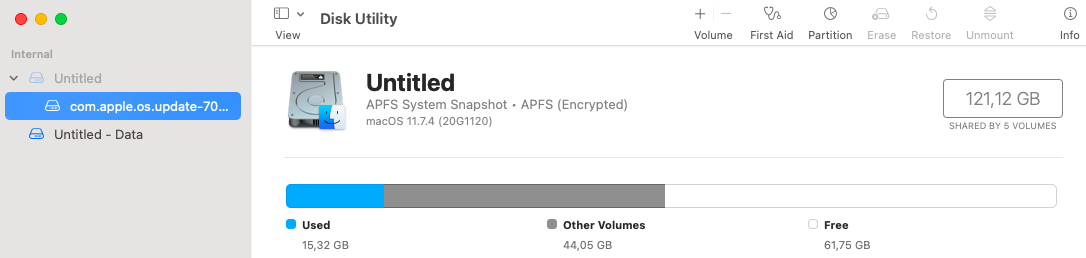 Launchpad > Disk Utility
Delete the files you don’t need or use frequently to free up space.
Consider using reliable data recovery software such as Stellar Data Recovery if you accidentally delete important data.
IX. Try Later
Sometimes, the glitches you experience with installing the latest macOS version are temporary. If you tried all the fixes described above and the issue is still not resolved, It may be a good idea to step back and retry after some time. The problem will likely resolve itself in a while.
It’s a Wrap
Being unable to update your macOS is frustrating to any user. As you can see, there are many reasons why you may stumble upon the “Unable to verify macOS” issue, and many solutions are available for each situation. Though some may seem time-consuming and tiring, it is worth the effort. Updating your macOS will take your user experience to another level.
Read more: