Upgrading to macOS Tahoe only to find your external HDD or SSD missing can be extremely frustrating. The first thought after this is, “Where did my drive go?!” Don’t panic… there are clear steps you can take. In this guide, we’ll explain why your Mac might be ignoring the drive and walk you through practical fixes. By the end, you’ll know how to get your storage device recognized (or at least recover your files safely).
Here’s some queries that Mac users have posted lately on popular Mac forums after they updated to MacOS Tahoe:

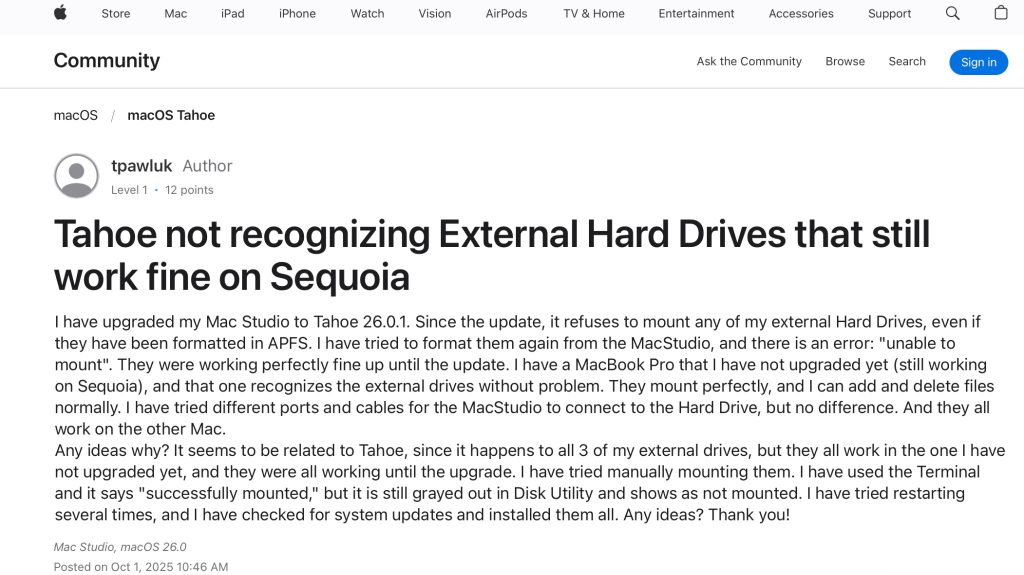
User Query on Missing External Drive on MacOS Tahoe (Source: Sandisk)
User Query on Unrecognized External Drive on MacOS Tahoe (Source: Apple Community)
Why macOS Tahoe Might Not Detect Your External Hard Drive
Your Mac may not see the drive for several reasons. Some common causes include:
- Compatibility bugs in macOS Tahoe. New updates sometimes introduce glitches or require new kernel extensions or framework compatibility. Tahoe in particular has had reports of bugs affecting external drives.
- Loose or faulty connections. A bad USB/Thunderbolt cable or an unpowered hub or bad port can prevent the drive from getting seen by your system.
- Finder or Desktop settings. If Finder’s settings are hiding external disks, a recognized drive won’t appear on the desktop or in Finder. (By default, macOS may not show drives if the boxes aren’t checked.)
- Incompatible file system. macOS cannot mount certain formats (for example, Linux EXT or XFS). Even NTFS (Windows) drives may be read-only since macOS can only read but not directly write NTFS-formatted drives (by default). If the drive is missing completely, the issue lies somewhere else but if it is showing up, proceed with the next step.
- Security/software blocks. Antivirus or security tools (like ESET) can block USB devices after an upgrade.
- Disk corruption or hardware failure. If the drive is full of errors itself or is failing miserably, the Mac can also refuse to mount it.
Each of these issues can cause a drive to stay hidden or “greyed out.” In the next section, we’ll go through several methods (built into macOS) to resolve these problems one by one.
Methods to Make Your External Drive Detectable on macOS Tahoe
We start with the easiest method and move to more advanced steps.
Method 1: Verify Cable, Port, and Power
A lot of drive detection problems come down to a bad connection. Follow these checks:
- Swap a worn or damaged USB/Thunderbolt cable can prevent communication with a good cable.
- If your Mac has several other USB/Thunderbolt ports, plug this bad drive of yours into a different one. If it’s possible for you, test the drive on another Mac too.
- Sometimes, USB hubs or third-party docks interfere too so connect the drive to the Mac’s own port only.
- For bus-powered drives, plug in any required power cable. Larger drives or enclosures often need their own AC adapter so ensure its plugged.
These steps help rule out hardware issues. In many cases, simply using a new cable or port will let macOS finally see the drive. If the drive still doesn’t show up at all, move on.
Method 2: Enable External Disks in Finder Preferences
macOS may have detected the drive but is simply set not to display it. Adjusting Finder settings can help:
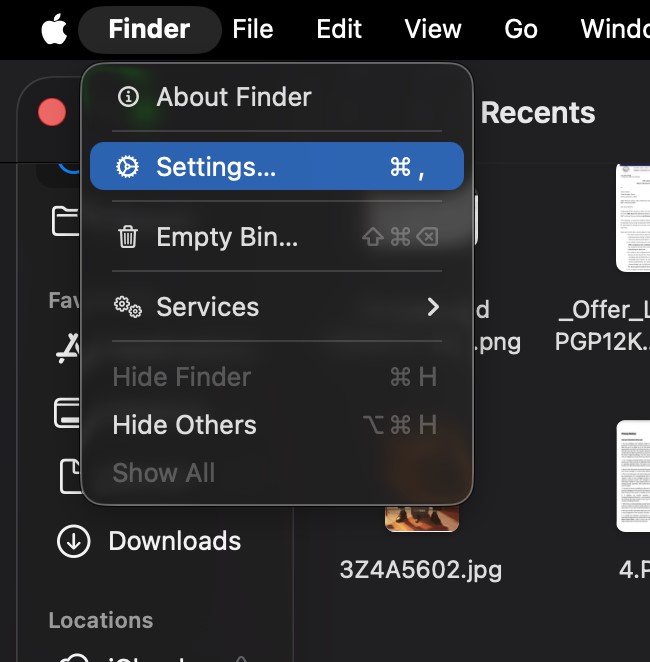
- Click on the Finder icon in the Dock, then from the menu bar choose Finder > Settings (or Finder > Preferences).
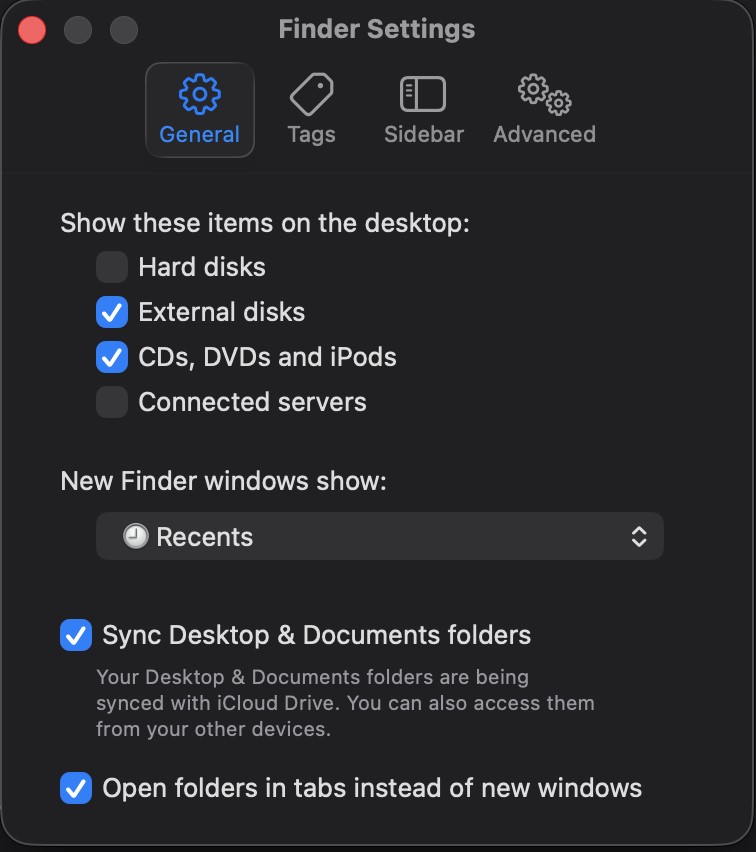
- In the General tab, ensure “External disks” (and “Hard disks”) are checked under “Show these items on the desktop.”
- Show external disks in Finder sidebar by switching to the Sidebar tab. Under Locations, make sure “External disks”is ticked (as well as “Hard disks”).
After checking these boxes, any connected drive that macOS recognizes should appear on your desktop or in the Finder sidebar. If it does, great… the rest of the guide isn’t needed (you can skip to accessing your files). If not, proceed to the next step.
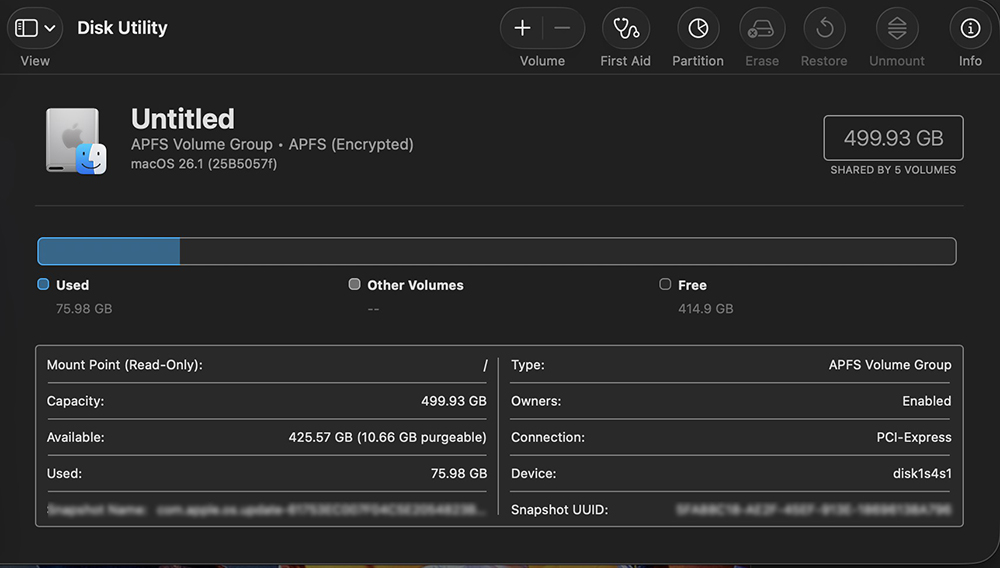
Method 3: Use Disk Utility to Mount or Repair the Drive
macOS’s in-built tool called Disk Utility is very useful for disk issues. It can show the drive even if the Finder application can’t find it, and then it can attempt repairs. Do the following for this one:
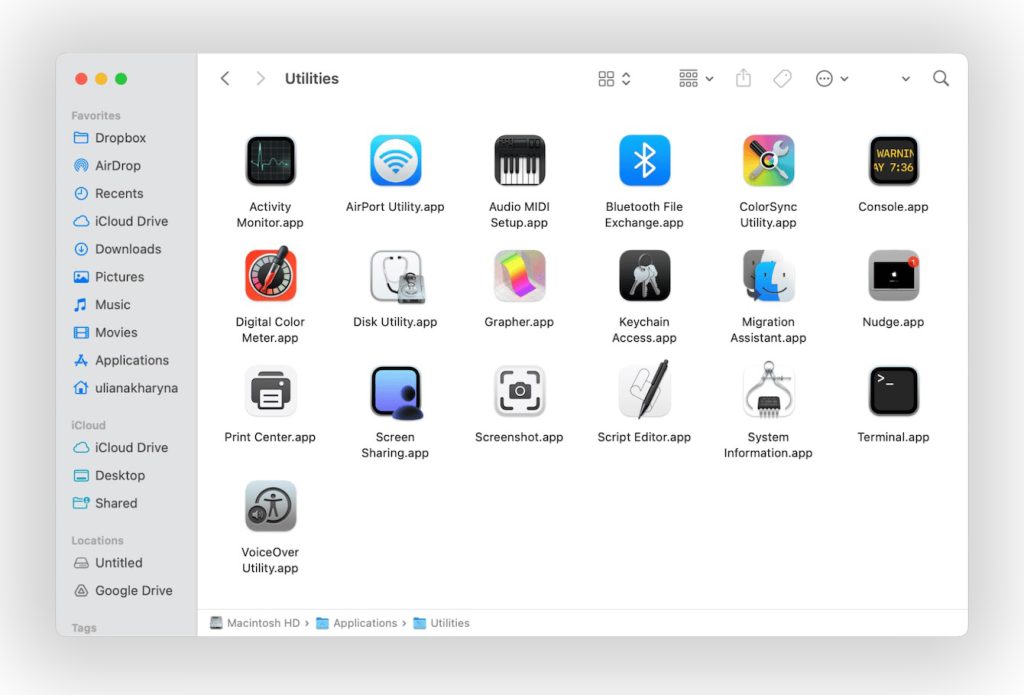
- Go ahead and navigate to Finder > Applications > Utilities > Disk Utility.
- In Disk Utility’s menu, navigate View > Show All Devices. This will ensure that you see the drive and its volumes in that sidebar.
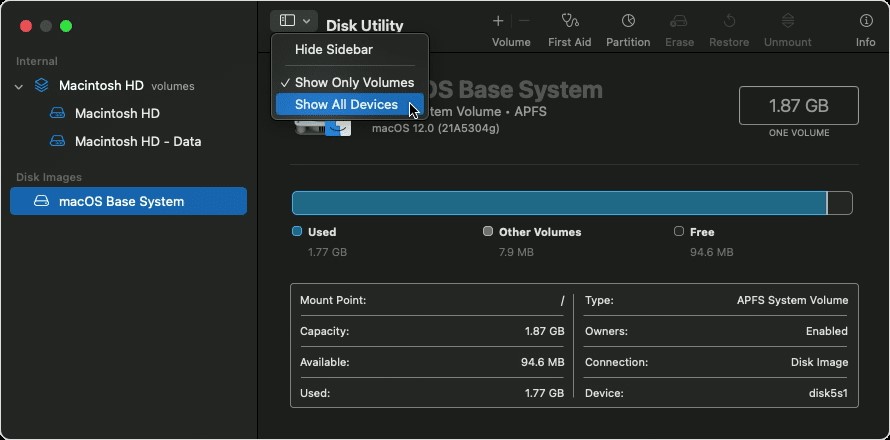
- In the sidebar of Disk Utility, select that external drive of yours which might be appearing as a greyed-out device or under “External.”
- If the drive is listed but greyed-out, select its top-level entry and click Mount button.
- Whether the drive is mounted or not, select its volume(s) and containers one by one and click First Aid at the top. First Aid is going to check the file system of that spoiled disk for errors and attempt to fix them.
If First Aid completes successfully, Disk Utility will most probably auto-mount that painful drive of yours and it is going to appear in Finder. You can also try to mount it manually again if it doesn’t appear. If it fails with an error, note if it flashes any messages. Often, repairing with First Aid can restore a drive that wasn’t mounting.
Method 4: Use Terminal to Manually Mount the Drive
If Disk Utility is still not mounting:
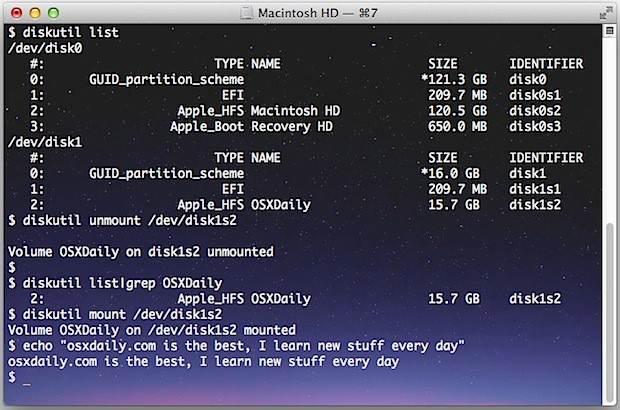
- Open Terminal by going to Finder > Applications > Utilities > Terminal.
- Type in diskutil list and press Enter. A list of all connected disks will show up. Look for your external drive’s name or size in the list and identify it… for example, /dev/disk2).
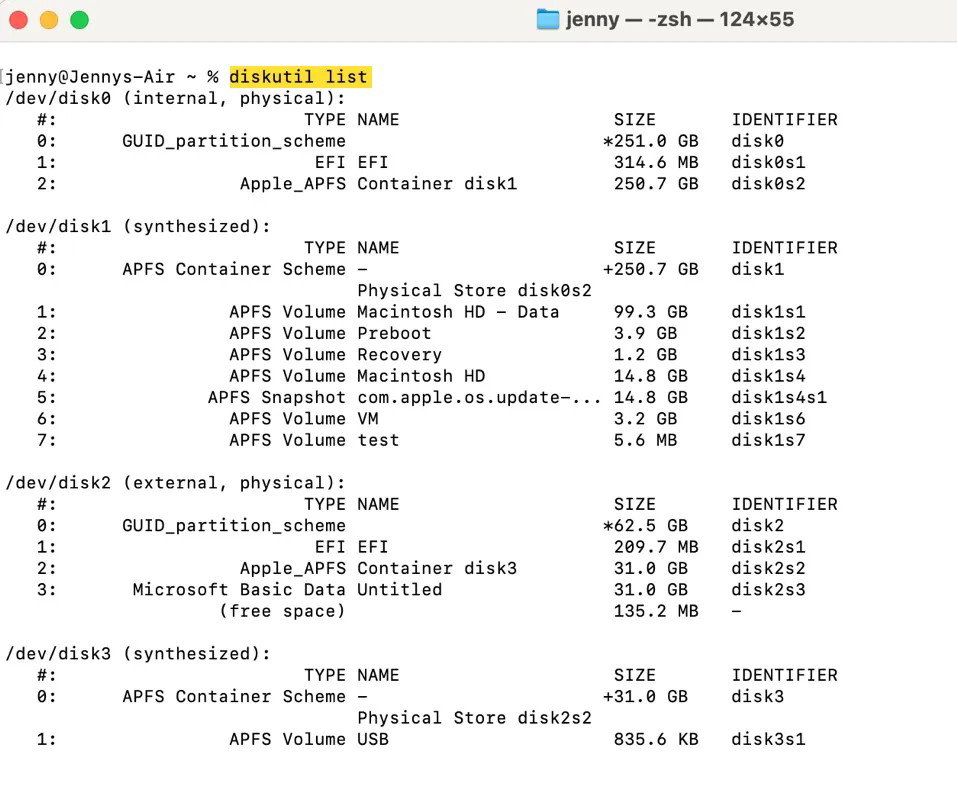
- Once you know the disk’s identifier, type the command diskutil mountDisk /dev/disk2 (replace /dev/disk2 with the actual identifier of your drive). If mounting the whole disk fails, try diskutil mount /dev/diskXsY (replace with your volume identifier) to mount specific partitions.
- If it reports success, the drive will be mounted and will be visible. If it reports an error, take note of it… it may indicate corruption or an unsupported format.
Manually mounting via Terminal bypasses the Finder interface. If this succeeds, your files should be accessible immediately. If it still fails, it suggests a deeper issue.
Method 5: Reset NVRAM and SMC (Intel Macs)
Sometimes low-level settings related to hardware communication can cause detection issues. Resetting the Mac’s NVRAM and SMC (on Intel Macs) can help:
Note: Since the steps for resetting SMC and NVRAM/PRAM on Mac differ for different models, it is advisable to check the official Apple Support page just to be sure.
- Reset the SMC. Shut down your Mac, unplug the power cord, wait 15 seconds, plug it back in, wait 5 seconds, then turn on the Mac. This resets the System Management Controller which can help with USB/Thunderbolt hardware recognition.
- Reset the NVRAM/PRAM. For Intel Macs, restart the Mac and immediately hold Option + Command + P + R for about 20 seconds. Release the keys and let the Mac boot normally and on Apple Silicon Macs, just reboot. This resets low-level settings and can clear device conflicts.
- Reconnect the drive. After resetting, try plugging in the external drive again.
Resetting these settings often fixes odd hardware glitches. If it doesn’t, proceed to the next step.
Method 6: Disable Security/Antivirus Software
If you use any antivirus or “security suite” on your Mac, it might be blocking new external devices. A known example: after updating, ESET Cyber Security on macOS defaults to blocking USB devices. To check this:
- Temporarily disable or adjust the security software by opening your antivirus/security app and look for any “Device Control” or “Block removable devices” feature. Turn that off or set it to allow your drive.
- With the security software disabled or set to allow external drives, plug in your drive and check Finder or Disk Utility.
Users have found that turning off ESET’s device blocking immediately allowed drives to mount. If you have any such security setting, disabling it could instantly solve the issue. Remember to re-enable protection after testing the drive.
Note: This example is applicable to certain users using a specific type of antivirus tool but the takeaway here is that you have to disable the specific feature of anti-virus that might be preventing the external device from showing up.
Method 7: Recover Data with a Mac Data Recovery Software
If none of the above steps helps, the final option that is left for yourself is to recover that data of yours and reformat the stubborn drive. For this, you will have to use Stellar Data Recovery Professional for Mac, aspecialized Mac data recovery tool. To use it:
- Download and install Stellar Data Recovery for Mac by going to Stellar’s official website and get their trial or full version. (It fully supports macOS Tahoe.)
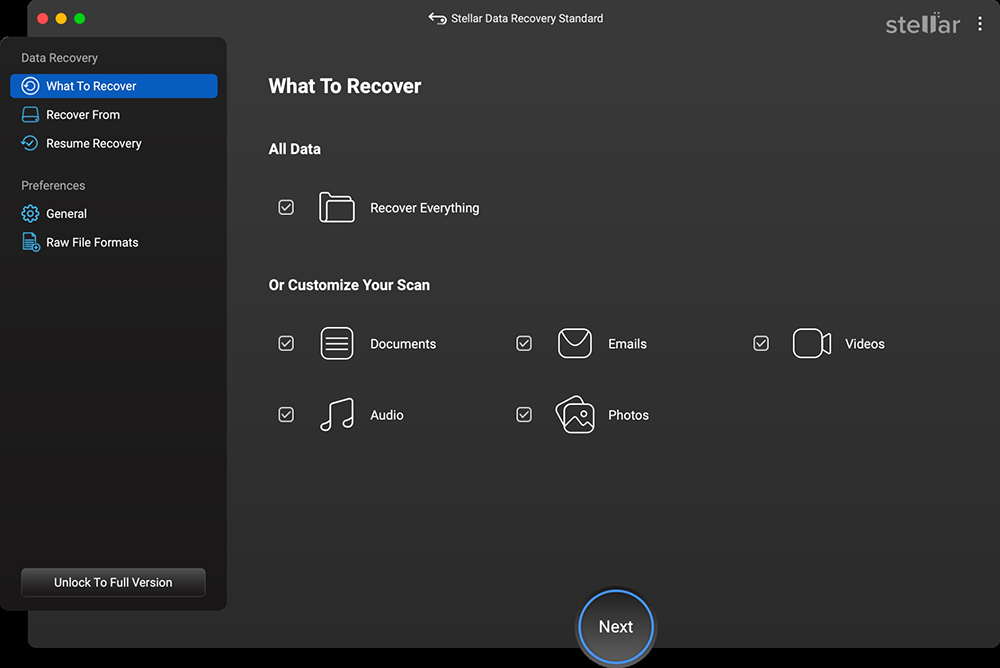
- Run the software. Launch Stellar Data Recovery. In the app, choose the option for recovering from external drives and choose the kind of files to be recovered.
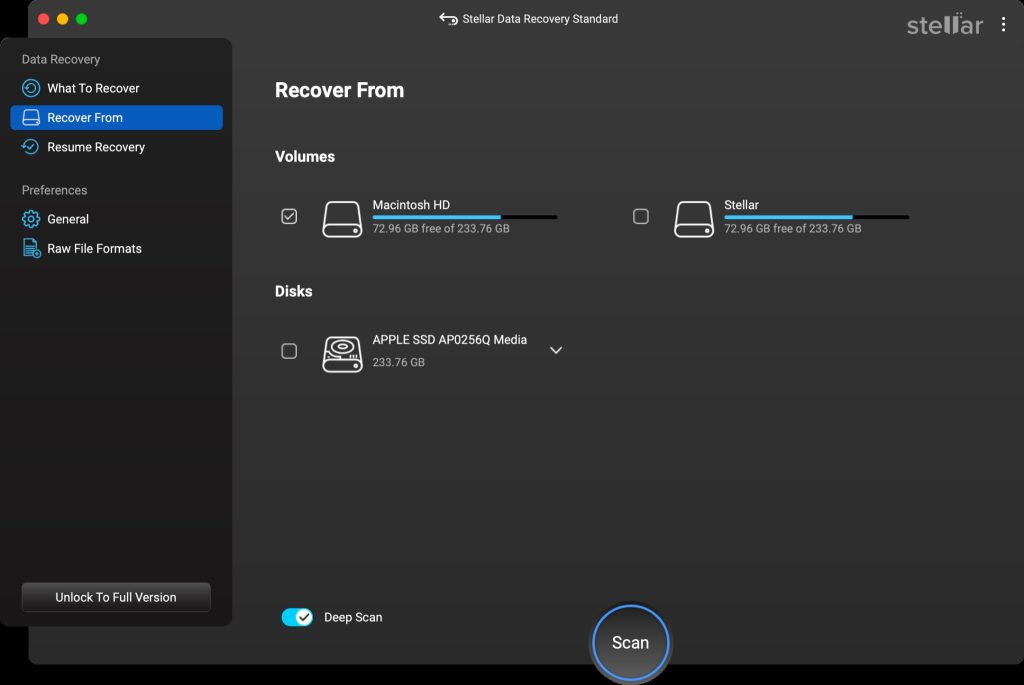
- Scan the external drive by selecting the external drive facing the problem from the list and start a “Deep Scan.” Stellar will deeply scan the drive’s sectors, even if the disk won’t mount.
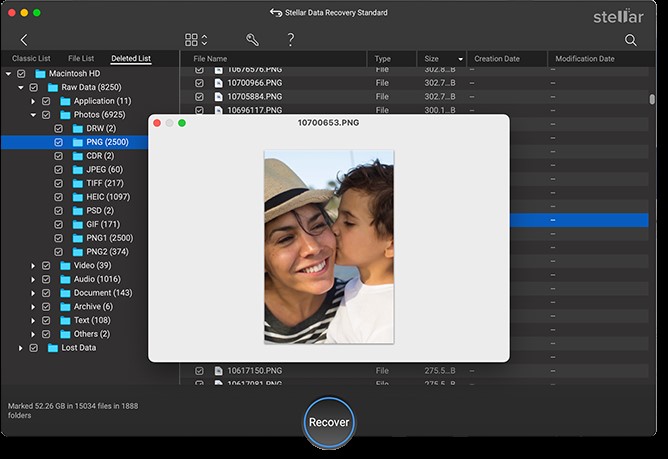
- When the scan finishes, the tool will preview files that are recoverable. Select the files you need and click Recover.
After saving your data you can safely erase/reformat the external drive (e.g. to APFS or exFAT) and then go ahead to restore your files.
In stubborn cases, a reliable recovery app makes all the difference. Stellar Data Recovery for Mac, a reliable Mac Data Recovery Software, works on macOS Tahoe and is designed for unmounted or unreadable drives. It recognizes dozens of file system formats, so it can scan drives that macOS can’t mount. Stellar can deep-scan an external SSD or HDD and recover your documents, photos, and videos. Even if Disk Utility shows “hardware issue,” the software can often rescue data from a logically damaged disk. However, it is to be noted that the tool only works if the drive is recognised by DiskUtility and the specific volume is not. If the entire disk is unrecognised, it is advisable to opt for data recovery lab services to get the disk fixed.
Conclusion
Facing an external drive that just won’t show in macOS Tahoe can be frustrating but through this blog, you now have several clear paths to try. The ideal start is with those quick fixes above like making sure Finder can see external disks, checking cables/ports and power, etc. Then we can try to use Disk Utility and Terminal to mount or repair the disk. If those also fail, disabling any blocking security software might do the trick. Finally, if the disk still can’t mount, you have a safe backup plan for sure. With these steps that are listed above, you are going to have a full toolbox for dealing with undetected drives. If your drive still won’t mount, recovery software can often retrieve files as long as the drive is still detected. But if it doesn’t appear even in Disk Utility, it likely requires professional evaluation or maybe try mounting it on another system and if shows take complete backup and format the drive and then connect to the initial system again.