A greyed-out Restore button in Time Machine indicates that the macOS cannot use the backup you’re viewing to restore files or the system. It usually happens when you view the current timeline, or when the the backup is incomplete or corrupted. It may also happen due to missing permissions, or when the backup drive uses incompatible file system.
Time Machine is built to protect the data on your Mac. When enabled, it automatically creates incremental backups – hourly snapshots for the past 24 hours, daily backups for the last month, and weekly archives for everything before that. You can rely on time Machine if you:
- Accidentally erase your Mac’s startup disk
- Delete important files by mistake
- Need to roll your Mac back to a stable, working state after an issue/error occurs
When the “Restore” button in Time Machine is greyed out (disabled), it can mean a multitude of things: you’re not in the right mode for full restore, your backup drive is not connected properly, there are permission issues, or the backup format is incompatible. This is a red flag you shouldn’t ignore as it effectively locks you out of restoring your Mac or recovering files from the backup version you need.
Because Time Machine uses a layered, system-managed structure that’s more intricate than a standard external drive, fixing the issue isn’t something you want to rush or guess your way through. It takes a careful approach to avoid compounding the damage.
We’ve put together a clear, current, and dependable walkthrough based on how Time Machine works today. Keep reading to get it right.
| Cause | What’s happening & how to fix it |
| You’re viewing the present timeline | If you’ve just opened Time Machine and notice the Restore button is disabled, you may still be looking at your Mac’s current state. Time Machine only allows restores from older snapshots. Click the upward arrow on the right to move back in time and select a previous backup. |
| Your Time Machine drive uses an incompatible file system | For Time Machine to work properly, both your Mac and the backup drive need to use compatible file systems. If they don’t match, restore options may be unavailable. Fix: Format Your Time Machine Drive. |
| The backup is incomplete | Sometimes, Time Machine fails to finish a backup due to interruptions or errors. In such cases, that backup can’t be used for restoration. You’ll need to delete it and create a fresh one. If you still need data from the incomplete backup, refer to the relevant recovery section. |
| Ax The backup is corrupted | Logical issues like virus infections, forced shutdowns, or disk errors can corrupt the Time Machine backup. macOS may still detect the drive, but the backup itself won’t work correctly. Fix: Run First Aid on Your Time Machine Drive. |
| Local Time Machine snapshots are damaged or improperly indexed | Disk errors, bugs, low storage space, or file system changes can break local snapshots, leading to restore failures. Fix: Delete Corrupted Time Machine Snapshots. |
| You don’t have the required permissions | Some backed-up files may belong to a different user account with restricted access. Try logging in as the original file owner. In other cases, permissions themselves may be damaged. Alternative fix: Run First Aid on Your Time Machine. |
| Time Machine isn’t configured properly or its settings are corrupted | If Time Machine is disabled or its settings are damaged by disk errors, restore options may appear grayed out. Fix: Reset Time Machine Preferences. |
Is Your Data at Risk?
The short answer is yes, problems with Time Machine backups directly impact your data. And while resolving backup-related issues there’s a chance (especially when using method like deleting local Time Machine snapshots, resetting Time Machine preferences, or formatting the Time Machine drive), that your data may get lost in the repair process. Before proceeding, we recommend you use Mac data recovery software to reclaim your lost files as soon as possible.
Stellar Data Recovery Professional for Mac is an excellent choice for scanning APFS file systems that supports recovery for a huge number of file signatures. You can also use the software to create an image of your backup drive in case you suspect failure.
There are different methods to fix a greyed-out Restore button in time Machine. Each method applies to a specific cause so make sure to conduct a thorough analysis first.
1. Enter Time Machine from the Menu Bar
It is possible that the “Restore” button appears grayed-out because you didn’t access the backup in the right way. To properly view and restore backed-up files – enter the Time Machine via the menu bar – this way the macOS loads correct backup snapshots and enables restore options.
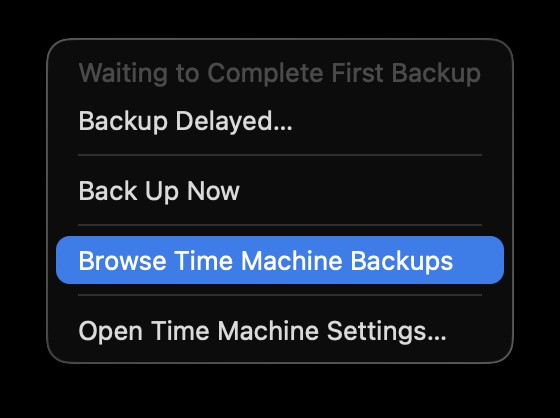
- Click the Time Machine icon in the menu bar.
- Select Browse Time Machine Backups.
- Select the backup files/folders you want and click Restore.
2. Access Time Machine Via Recovery Mode
Another way to access the Time Machine is through macOS Recovery that allows you to restore the entire OS, including your files & folders. Recovery Mode helps bypass the grayed-out button issue and allows you to successfully restore your data.
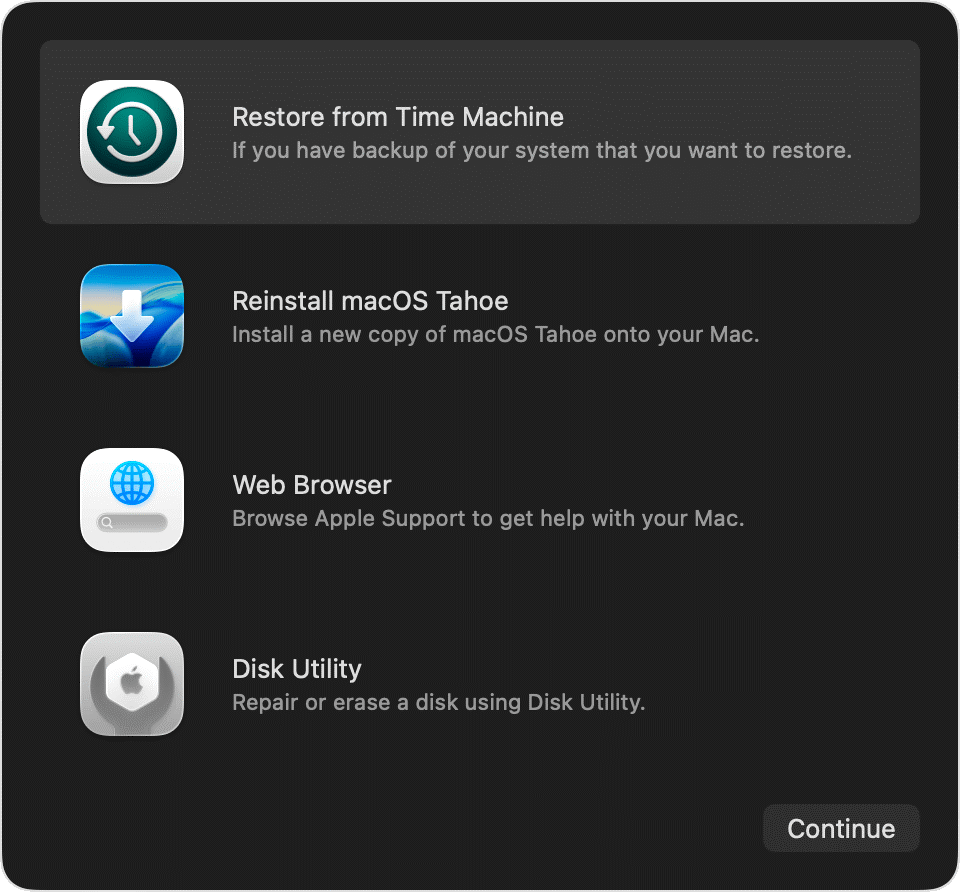
- Choose your Backup disk and follow the prompts to complete the process.
3. Run First Aid on Your Time Machine
A Time Machine backup drive isn’t immune to corruption and things like improper ejection, unexpected power loss, or similar interruptions can damage the drive or a specific backup version. Run First Aid in Disk Utility to automatically detect and repair disk errors.
- Connect your backup drive to the Mac.
- Open Disk Utility.
- Select your Time Machine drive and click First Aid.
- Click Run to confirm.
4. Format Your Time Machine Drive
macOS works with Time Machine drives that use a compatible file system, and by default, Time Machine formats the drive accordingly during setup. But there can be instances when a backup was created while the Mac was using a different file system and that format got changed later.
In such cases, the drive may no longer work as expected. To fix this, reformat the Time Machine using the correct file system. And while Time Machine can handle this automatically, we recommend you use Disk Utility’s Erase option, especially when you’re setting up the backup again from scratch.
Note: Proceed with caution as this may erase your existing backups.
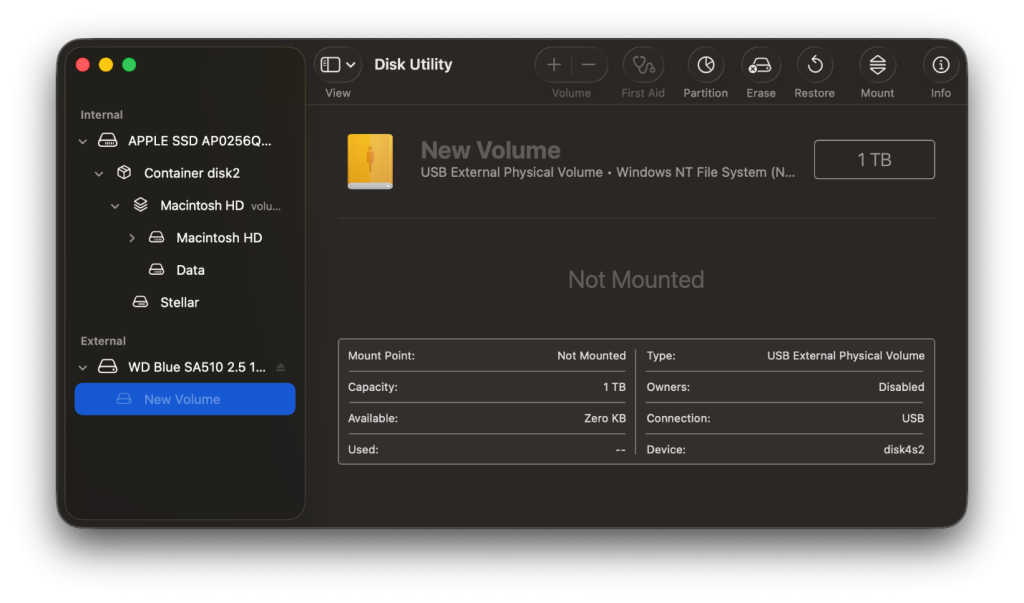
- Connect your backup drive to the Mac.
- Open Disk Utility.
- Click Macintosh HD from the left sidebar and check the file system.
- Select your Time Machine drive from the left sidebar and click Erase.
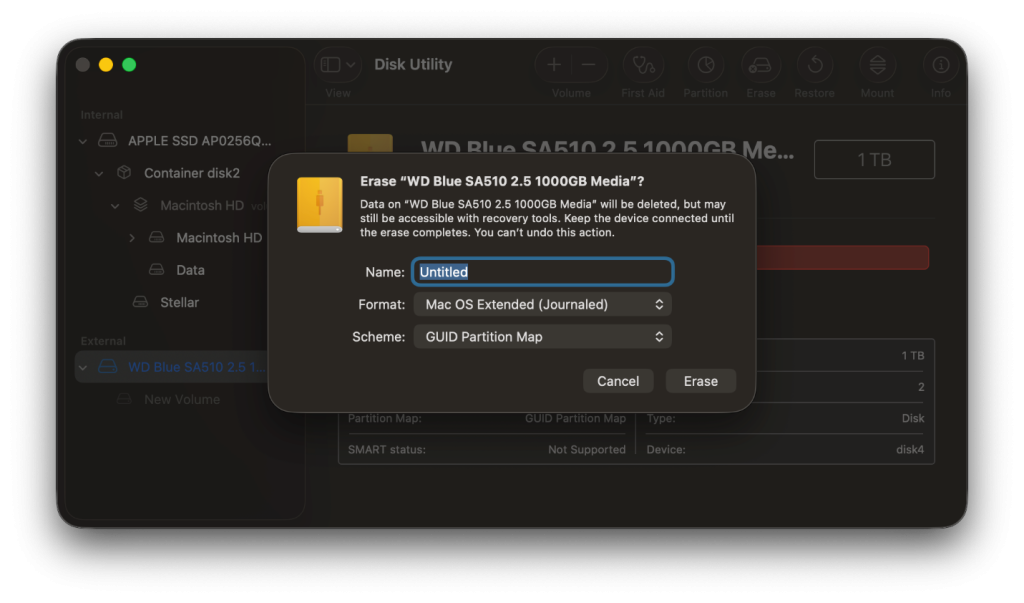
- Name your drive. Set its Format to Macintosh HD and Scheme to GUID Partition Map.
- Click Erase to confirm.
5. Delete Corrupted Time Machine Snapshots
macOS keeps creating local snapshots (with Time Machine enabled) even if your backup drive isn’t connected. They can sometimes become corrupted or incorrectly indexed, interfering with how Time Machine works. Remove the affected local snapshots to resolve the conflict.
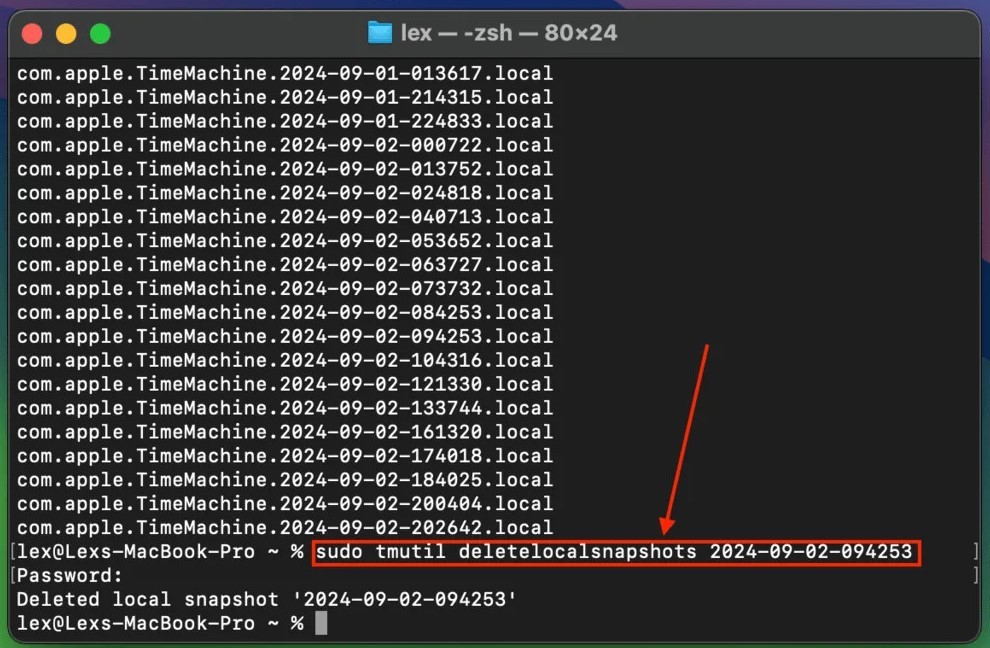
- Open the Terminal app.
- Enter the following command to list all the local Time Machine snapshots: tmutil listlocalsnapshots /
- Execute the following command to delete a local snapshot: sudo tmutil deletelocalsnapshots yyyy-mm-dd-126422 (Replace the last part of the command with your snapshot’s date and code)
- Keep deleting the snapshots one by one until you find the one that’s causing the issue.
6. Reset Time Machine Preferences
Time Machine’s settings are saved in system preference files within your Mac’s Library, and like any file, they can become corrupted. Resetting Time Machine to resolve this. Delete the com.apple.TimeMachine.plist file from both the ~/Library/Preferences/ and /Library/Preferences/ folders, then restart Time Machine.
Summing Up
A greyed-out Restore button in Time Machine signals underlying issues but in most cases it’s easily fixable. Whether this is because of how you’re accessing backups, disk corruption, file system mismatches, or problems with your snapshots, a methodical approach can bring Time Machine back to normal. That said, if the above fixes fail to resolve the issue, the problem may be beyond what manual troubleshooting can handle. In that case, it’s best to move on to data recovery.