If not managed properly, Android devices can quickly become cluttered with digital trash. Digital trash refers to files that are no longer needed. However, they are stored in our storage “trash bin/ recycle bin” and take up a large amount of space on our Android devices, hampering the device’s performance. Hence, learning how to empty trash on Android devices is important.
What is an Android Trash folder?
The trash or recently deleted folder on your Android device is like a temporary home for your deleted files. Files deleted from your Android device are not permanently removed from the device; instead, they are stored in this recycle bin for 30 days before being removed permanently.
How to delete Trash in Android?
You don’t need an instruction manual to empty the trash or junk files on your Android. Device. However, what’s crucial is to approach it with caution.
If you want to empty the trash folder in your Android device, then carefully scan through your recently deleted/trash folder. After assessing every file, you need to select the files that are no longer, and then delete them. Once the files are removed from the trash, they are gone forever and cannot be recovered with normal methods. Hence, you must always double-check that you’re deleting only unwanted files.
Methods to empty the Trash in your Android device
We all want to keep our Android devices clean and organized, as it’s crucial for smooth performance. Hence, it is important to empty the trash or recycle bin on your device properly. Let’s explore all the effective ways to do this:
1. Using Files by Google
The “Files by Google” app is a powerful tool to help you manage your device’s storage, including the trash folder. Here’s how you can use it to empty the trash:
- Open the Files by Google app on your Android device.
- Tap on the Browse tab at the bottom.
- Locate the Trash section and tap on it.
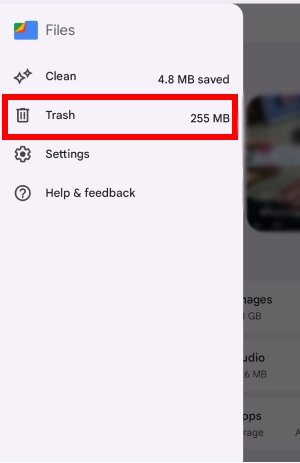
- Select the files you want to permanently delete by tapping on the three-dot menu next to each file.
- Below, there will be two options, Restore and Delete.
- If you want to restore the file, then click on the same.
- Otherwise, tap on Delete to confirm the removal of the selected files.
2. Using the storage settings
Another way to empty the trash on your Android device is through the Storage settings. If you don’t have the Files by Google application on your device, you can simply follow these steps to empty your recycle bin:
- Open the Settings app on your Android device.
- Go to Battery and device care or RAM and Storage.
- Tap on the Trash section to view the files stored on it.
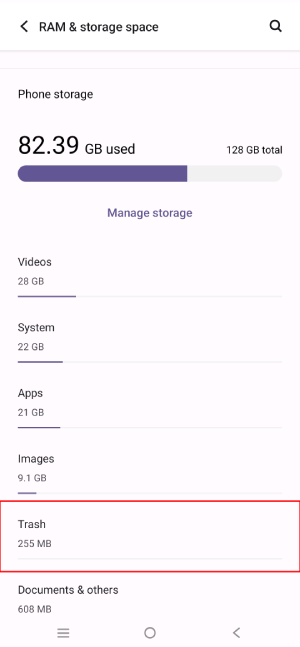
- Select the files that you want to permanently delete from this folder.
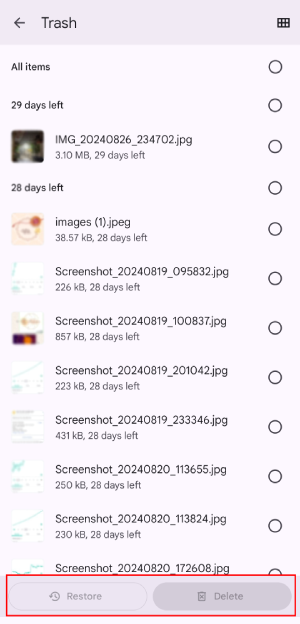
- Choose Delete for deleting the selected files.
Note – Steps may vary depending on your device manufacturer or Android version. In case you want to restore a file you can tap on the Restore option.
3. Recently deleted folder
All Android devices have a “Recently Deleted” folder within the Gallery app, which stores your recently deleted photos and videos. If you only want to delete video or image files, then you can empty this folder:
- Open the Gallery/ Album app on your Android device.
- Scroll to the bottom to find the “Recently Deleted” section and tap on it.
- You will be able to view all the recently deleted images and video files.
- Select the files you want to delete permanently.
- Tap on the “Delete” button to remove them permanently.
By following the above methods, you can keep your Android device’s storage clean and ensure that your important data remains safe.
How to delete Trash on Samsung devices?
If you own a Samsung device, you may not find a Trash Folder/Bin, but it has a Recycle Bin with the same functions. You can easily empty the recycle bin on your Samsung device to free up storage space. Here’s a simple method to do it:
- Go to Settings > Storage, or Settings > Battery and Device Care > Storage; this may vary depending on your phone’s UI version.
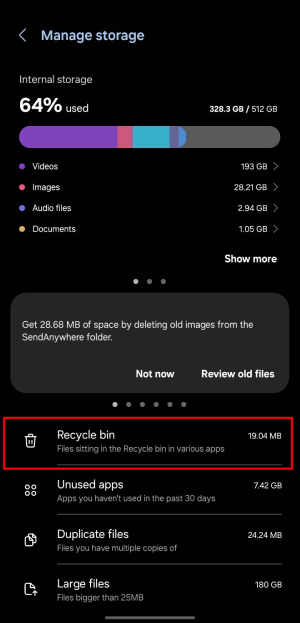
- Now, you will be able to view the folders menu.
- From the menu, select Recycle Bin.
- Go to the Recycle Bin folder, and you’ll see all the files you’ve recently deleted.
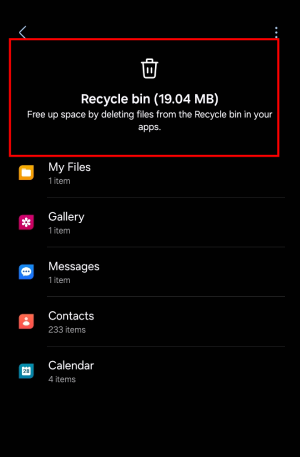
- Now go to My Files, tap in the three-dots menu, and permanently delete these files by clicking on Empty.
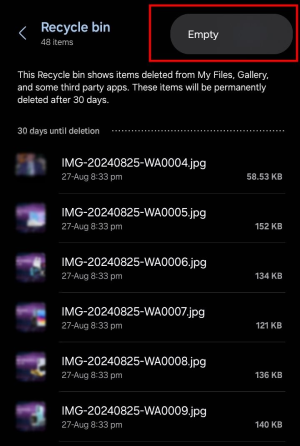
This will clear out your Samsung device’s Trash or Recycle Bin freeing up valuable storage space.
How to recover files mistakenly deleted from Android Trash?
Data deleted from our device is stored in the trash folder before being removed permanently after 30 days. But, if you delete any files from your trash folder or recycle bin or empty them, you may only be able to recover them if you have created a backup somewhere. However, it is still recoverable with the help of tools and Android data recovery software.
In this section, we will show you how to recover deleted files from a recycle bin and learn how to recover lost or deleted files from your device.
Stellar Data Recovery for Android can help you recover deleted files from your Android device’s recycle bin or trash folder. This software simply scans your device and retrieves lost data. This user-friendly software can help you recover a wide range of deleted data, including photos, videos, contacts, messages, and even WhatsApp chats.
Note: Remember, you need to stop using your device after you have deleted any data from it. If you continue using your Android device after accidentally deleting any data, the deleted data will get overwritten, making it difficult to recover.
- Download and install the Stellar Data Recovery for Android software on your computer.
- Connect your Android device to the computer using a USB cable.
- Select the type of data you want to recover, such as photos, videos, or messages, and then click Next.
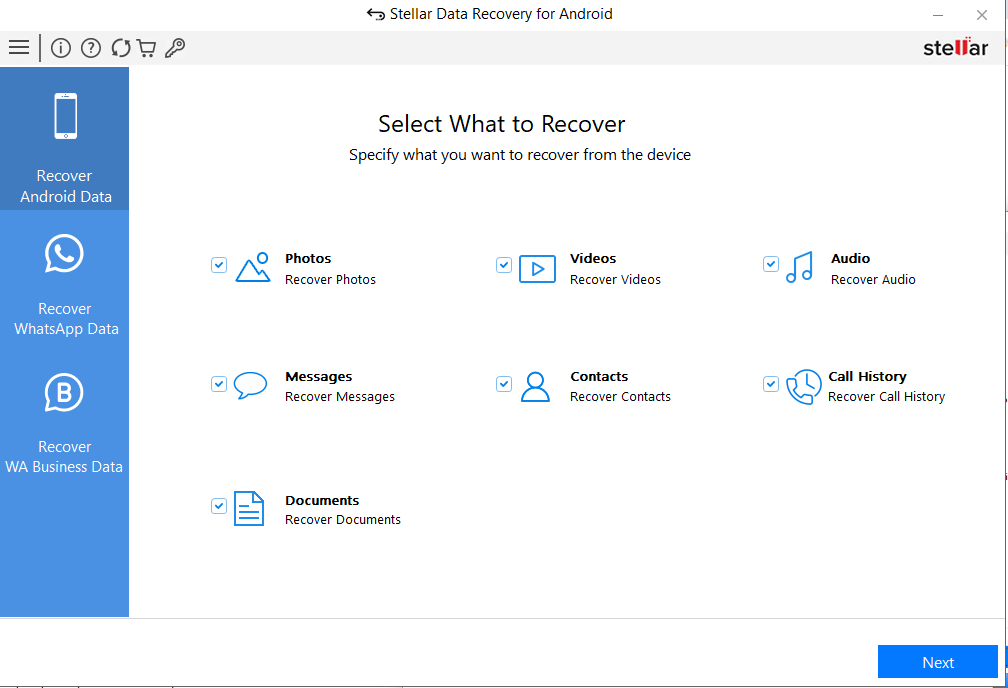
- Click the Scan button, and the software will search for recoverable files on your Android device.
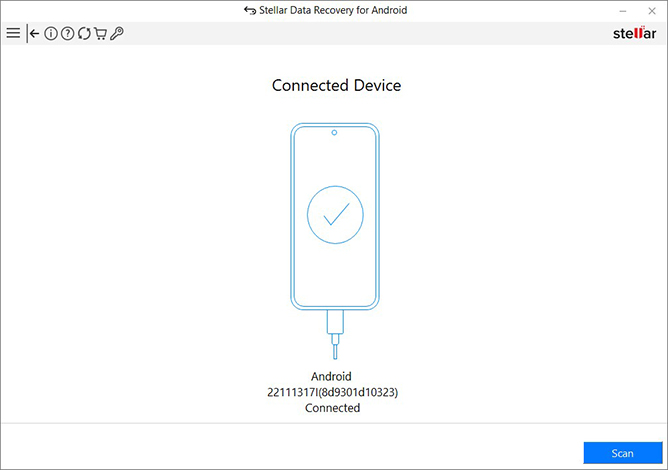
- Once the scan is complete, you’ll see a list of the files that can be recovered.
- You can Preview the files one by one before saving.
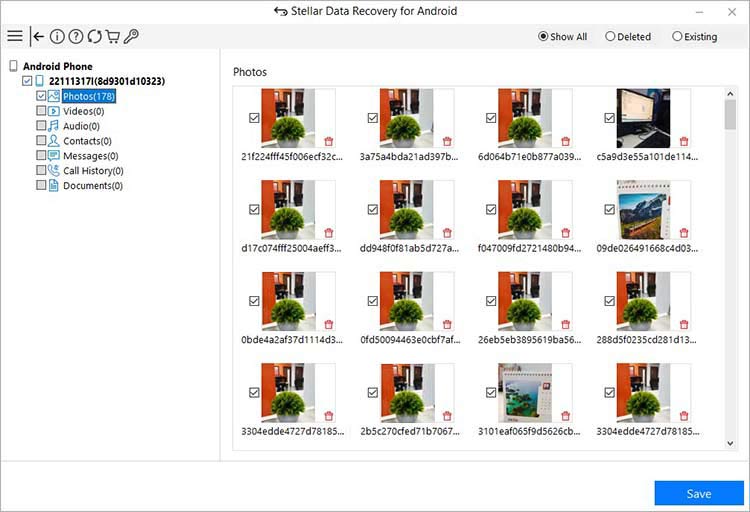
- Select the files you want to recover and click the Save button to restore them to your computer.
Conclusion
To ensure our Android devices run smoothly, we must manage our trash and junk files properly and regularly empty our trash but in a safer way. You can use the methods outlined in this blog to empty the trash on your Android device. However, if your important or relevant files get mistakenly deleted from your trash or recycle bin, you can recover hidden files from Android with the help of Stellar Data Recovery for Android. Just remember to stop using the device when you delete any data mistakenly to improve your chances of recovery.