Even Macs, reliable as they are, can encounter critical system issues. Whether it’s a failed update, a corrupted drive, or plain old human error (which causes roughly 20–25% of Mac data losses), every Mac has a built-in fail-safe: macOS Recovery Mode. This special environment is like a rescue toolbox hidden on your Mac. It lets you run Disk Utility to repair drives, reinstall macOS (without wiping your personal files!), restore from backups, and more.
In this guide, we’ll explore how to enter and use Recovery Mode on the latest Macs (focusing first on Apple’s Silicon models), what you can do there, and what to try if you still need those missing files after Recovery Mode.
macOS updates every year, but Recovery Mode works similarly across recent versions (Ventura, Sonoma, and newer). Since Apple’s switch to M-series chips in 2020, the startup procedure changed – so we’ll cover Silicon Macs first, then older Intel-based models. And we’ll show why, sometimes, you might want a dedicated Mac Data Recovery Software as a last resort.
What is macOS Recovery Mode?
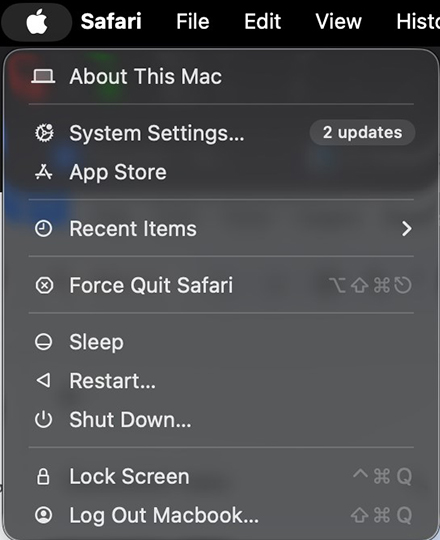
macOS Recovery runs as an independent, bootable environment on every Apple device to help diagnose startup failures, repair disks, or reinstall macOS when needed. It is like your Mac’s own first-aid kit. When you boot into this Recovery Mode, you’re dropped into a simplified macOS environment, often called “macOS Utilities,” which includes many tools to fix common problems.

Just for example, you can:
- Reinstall macOS: This option inside the recovery mode will download and reinstall the operating system when you need it. This is more like a refresh than a factory reset. But, of course, it requires internet access to download the OS.
- Restore from Time Machine Backup: If you were wise and you backed up those files of yours to your Mac’s Time Machine, you can go ahead and recover individual files or your entire system from the latest backup.
- Disk Utility: Here, you have the option to run the renowned First Aid feature on your internal disk or volumes, and it will repair those file-system errors right away. This can fix startup problems too, like if there is a corrupted macOS volume… all of it without losing your data.
Using Recovery Mode on Apple Silicon (M1/M2/M3) Macs
Entering Recovery Mode is straightforward:
- Shut down your Mac completely (Apple menu > Shut Down).
- Long press the power button on Mac. Keep holding until you see the startup options. After this screen, it should show a gear icon labeled “Options” and one or more drive icons.

- Click the Options gear, then click Continue.

- You may be asked to select a volume and enter an admin password. Do that, and you’ll boot into macOS Recovery.
At this point, you’re in the familiar Recovery utility window. You can run Disk Utility, reinstall macOS, restore backups, etc.
On an Apple Silicon Mac, the latest machines we mean, you can boot Safe Mode from this interface. For this, keep doing the same till step 2, till the volume icons appear, then select your startup volume, press and hold the Shift key, and click Continue in Safe Mode. This is going to run diagnostics on your volume and shall start the Mac with minimum extensions, which is quite useful if that third-party software you installed is blocking booting.
Using Recovery Mode on Intel-based Macs
For older Macs with Intel processors:
- Command (⌘) + R: Boot into Recovery Mode from the internal drive. Use this to reinstall the latest macOS that was on your Mac, or to use the other utilities (Disk Utility, etc.).

- Option (⌥) + Command (⌘) + R: Boot into Internet Recovery and install the latest compatible macOS available. This uses Apple’s servers (so Wi-Fi or ethernet required).
- Option (⌥) + Shift + Command (⌘) + R: Boot into Internet Recovery and install the original macOS version that shipped with your Mac (or the closest still-available version).
To do this, restart the Mac ( > Restart) and immediately hold one of the above key combinations until you see a spinning globe (for Internet Recovery) or an Apple logo. If you have a firmware password enabled, you’ll be prompted for it. Once the Recovery apps window appears (usually listing “Restore from Time Machine”, “Reinstall macOS”, etc.), you’re in Recovery Mode on Intel just like on Silicon.
From here, the interface and options are the same as Apple Silicon’s Recovery. You can use Disk Utility, reinstall macOS, restore from Time Machine, etc. The main difference was simply the startup method. (Intel Macs with a T2 security chip can also boot Safe Mode by holding Shift at startup before the login window appears, but that’s outside Recovery Mode.)
Key Recovery Tasks and Tips
Once in macOS Recovery (on either Mac type), you’ll see similar tools and menus. A quick summary of what you can do:
- Reinstall macOS: Choose “Reinstall macOS” (or similar). This will download and reinstall the operating system. As noted, this process does not erase your data by default. It’s a good first step if your Mac has become unstable or corrupted (it essentially refreshes system files).
- Restore from Backup: Choose “Restore from Time Machine Backup” if you have a backup drive attached. This walks you through restoring your system or files from a Time Machine snapshot.
- Disk Utility: Launch Disk Utility, then select your internal drive. You can run First Aid on each volume or the container to repair errors. You can also erase disks here if you’re preparing to reinstall or sell the Mac. (For example, an APFS-formatted volume can be erased and reformatted if you’re doing a full clean install.)
- Security Settings: On T2 or Apple Silicon Macs, the Startup Security Utility allows you to set a firmware password or adjust secure-boot options. This is mainly for advanced users managing very secure setups.
- Share Disk (Target Disk Mode): Under Utilities, you might see a “Share Disk” (or Target Disk Mode in Intel Macs) option to connect your Mac to another Mac via cable and mount its drive as external. This is useful to copy data off a Mac that won’t boot normally.
- Terminal: A built-in Terminal app lets you run command-line fixes if needed (like resetting passwords, re-running fsck, etc.).
If your Mac automatically boots to a Recovery Assistant (a little circle slash icon), it means Recovery detected a problem on startup. In such cases, try running First Aid on the disk, then reinstalling macOS, if needed.
When Recovery Mode Isn’t Enough
macOS Recovery is great for system issues, but it won’t retrieve files you’ve deleted (especially after emptying the Trash). In fact, on modern Macs with APFS (the default file system), deleted data can disappear quickly… APFS removes the directory pointers and makes space available for future writes. Once you empty the Trash, the system essentially expects that the data is gone. In that scenario, even Recovery Mode won’t see your missing documents or photos.
In cases where Recovery Mode and backups can’t fix the problem, consider a reputable professional Mac data recovery software. For example, Stellar Data Recovery Professional for Mac is one such tool (our recommended utility). It’s designed for macOS and understands APFS/HFS+ volumes. It can scan your Mac’s internal SSD and list recoverable files (photos, documents, emails, etc.). The software also offers a free demo that shows what it can recover – often up to 1 GB of data – so you can verify it sees your missing files. If it finds what you need, you can then upgrade to a full license to actually save the files.
This Mac file recovery tool is like a rescue engine for deleted data: it scans through the drive’s contents and snapshots to dig out lost files. In short, if standard Recovery Mode hasn’t restored your files, a dedicated Mac recovery program is your next best shot.
Conclusion
Of course, the best scenario is to prevent data loss in the first place, always. Also, don’t forget to keep your Mac’s software current. You already know that security & stability updates prevent crashes more than anything else. And if you do encounter any trouble, tackling it early while minimizing drive writes will definitely maximize the chance of recovery.
But even if the worst thing happens to you, just remember that macOS can revive an unbootable Mac by repairing or reinstalling the OS. And if that isn’t enough, and you have lost your precious close-to-heart data on the way, a professional data recovery software for Mac can usually find and recover it. With these tools always at hand, your Mac’s misfortunes, no matter what they are, need not turn into permanent data losses.