Imagine the moment you power on your Mac and nothing happens… no chime sound, no desktop, just plain silence. All your precious files still live on that stubborn drive of yours and are unreachable behind a black screen. Don’t panic or rush for a sledgehammer just yet. Macs have a secret “backdoor” called Target Disk Mode (TDM) that can turn even a broken Mac into an external drive.
In other words, your Mac’s hard drive can be treated like a USB stick when you boot it in TDM. This means another computer (Mac) can peek inside and copy your data as if the dead Mac were an external disk. As one Mac troubleshooting guide puts it, “Target Disk Mode can make the source Mac work like an external hard drive on another Mac”. Think of it as your Mac’s own file-transfer superhero costume, swooping in to save your day (and your files).
When You Need Target Disk Mode
If your Mac acts like a vault with a jammed door, TDM might be the key. Common scenarios include:
- Unbootable Mac: The system won’t start due to OS corruption, a botched update, or strange error screens. All your files become inaccessible – a data-loss nightmare.
- File Transfer: For moving terabytes of data like 4K videos, photo libraries, and so on from one Mac to another using direct Thunderbolt or USB-C links.
- Migrating to a New Mac: You want to copy everything from your old Mac to a new one. Using TDM is often quicker than Migration Assistant.
- Mac with No Display: Your iMac or Mac mini works but the screen is broken or missing. With TDM, you don’t need a monitor – just treat the Mac’s drive as external.
- Pre-upgrade Backup: Before a risky macOS upgrade or downgrade, you need a fresh backup of your drivestellarinfo.com.
- Cloning Your Disk: You plan to clone the entire drive to an external disk (works best for unencrypted or user-unlocked drives). Target Disk Mode lets you do this directly without removing.
In all these cases, Target Disk Mode can turn your Mac into a simple external hard drive, giving you back your data without hardware surgery.
Methods to Use Target Disk Mode
Target Disk Mode works on two connected Macs (or on an Apple Silicon Mac via its Share Disk feature). Here are some common methods and how to do each one step by step:
Method 1: Transfer Files Using Target Disk Mode
The idea behind this particular method is to take the easy way to copy files between Macs as if one of them is an external drive. If you just need to rescue some files of yours or move them here and there, TDM is your perfect fix. It will let you drag files straight from the problem Mac to the working one.
What you need
- Two Macs: the Primary Mac (the one with the data) and a host Mac (the one you’ll use to browse/copy files).
- A USB-C or Thunderbolt cable. Thunderbolt is most reliable.
Here’s how to Transfer Files Using Target Disk Mode:
Steps on the Primary Mac (the one with your files)
- Shut it down.
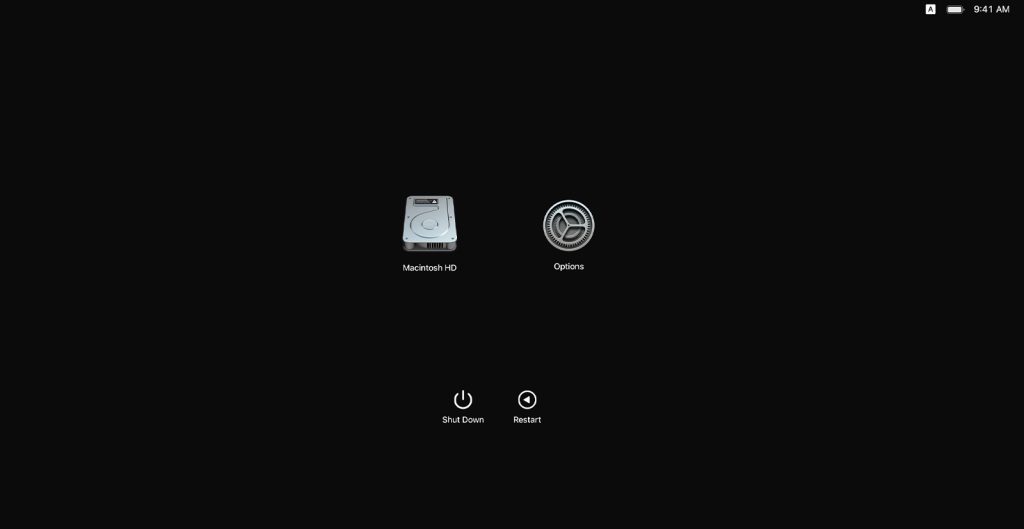
- Press and hold the power button until you see “Loading startup options.”
- Click Options < Continue to enter Recovery.
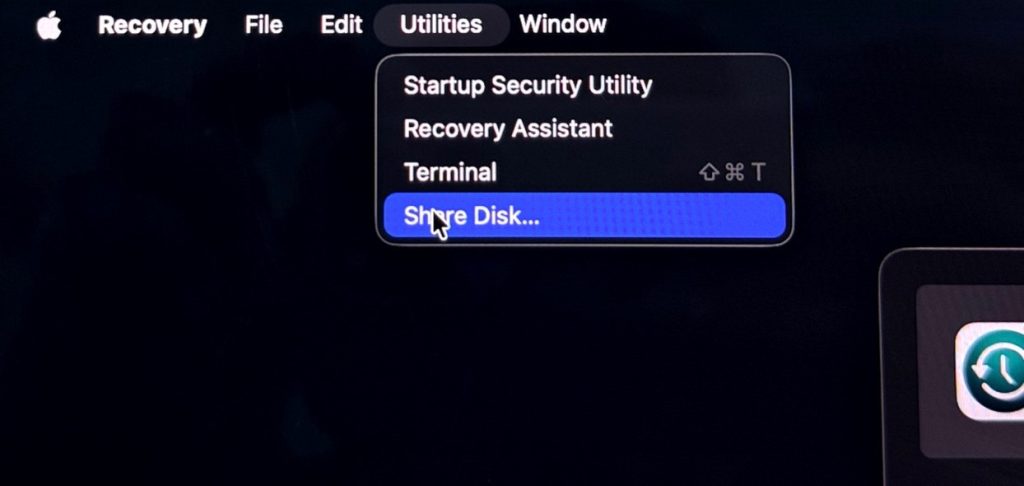
- In the menu bar (Top left corner), open Utilities < Share Disk.
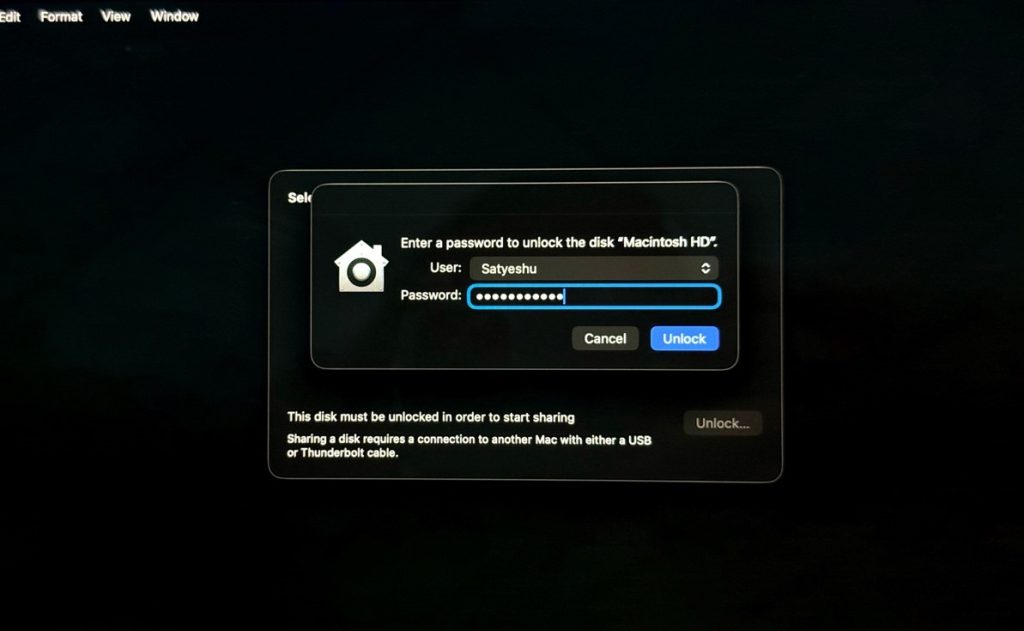
- Select your internal volume (unlock it if FileVault is on).
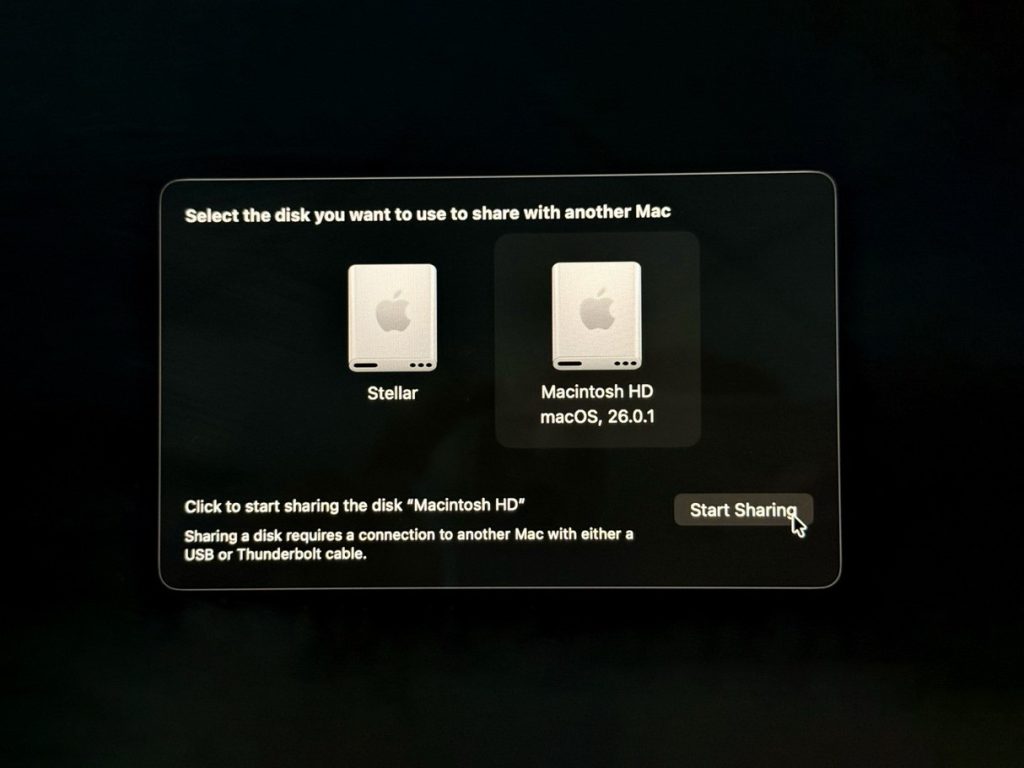
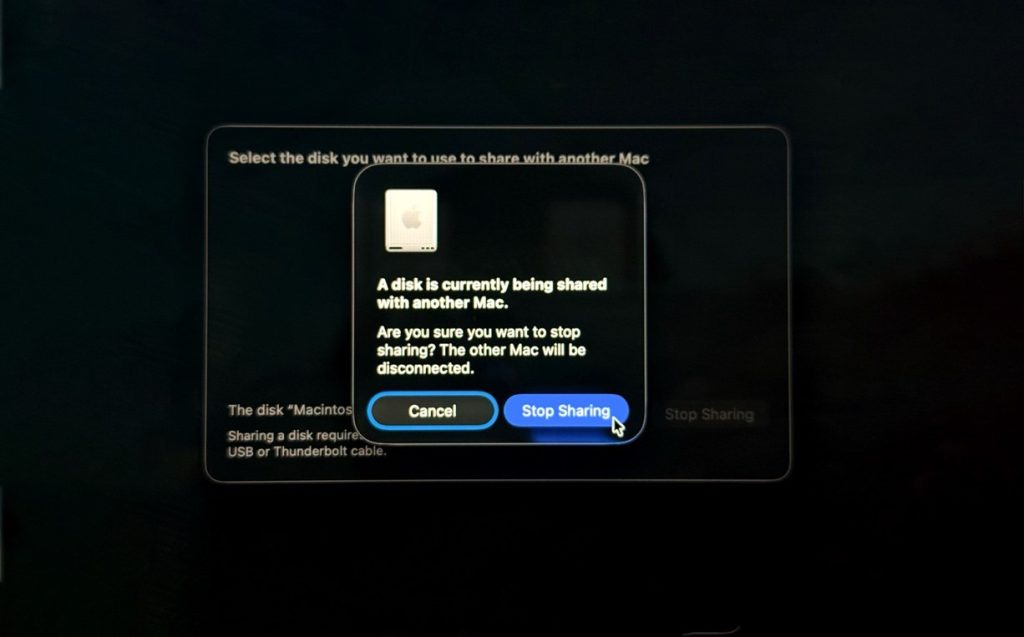
- Then click Start Sharing.
- And at the end you can click on stop sharing once the sharing is completed.
Connect from the host Mac
- Plug the cable between the two Macs.
- Click on “Allow” the Accessory in the host mac, when prompted.

- On the host Mac, open Finder < Go < Connect to Server…
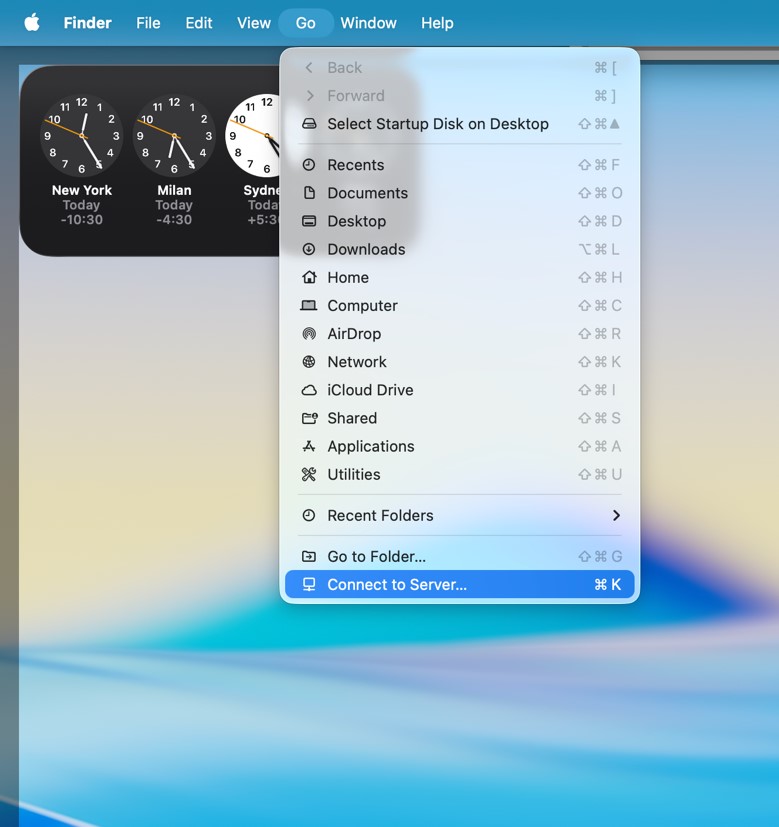
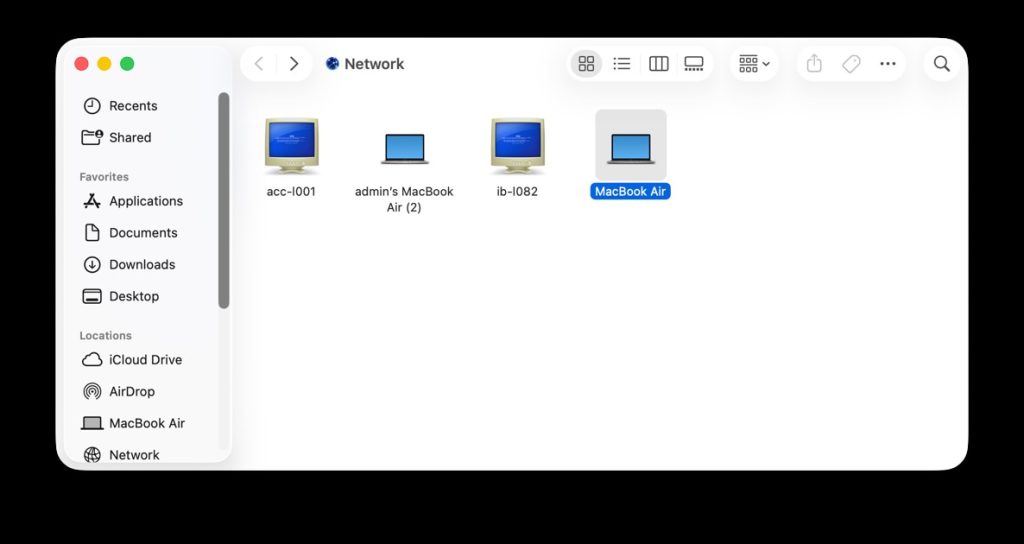
- enter the address shown in Share Disk (often something like smb://MacName.local or an IP). Or look under Finder < Network for the shared Mac.
- When prompted, sign in with an admin account from the Apple-silicon Mac. You’ll see the shared disk and can copy files normally.
- Drag & drop your files from the target Mac’s drive to your host Mac (or another external drive).

- Eject and disconnect. When the transfer is done, choose to Eject the target Mac by right-clicking on it. Then press the target Mac’s power button to shut it down. You can now unplug the cable.
With this method, you effectively bypass the dead Mac’s OS and grab your data directly like any external drive.
Method 2: Boot One Mac from Another’s Drive
Using this one, you can troubleshoot or run a non-booting Mac by starting it from the other Mac’s system. If the host Mac itself won’t start up properly, you can try booting it from the target Mac’s drive. This can help diagnose software issues. Before you begin, ensure the target Mac’s hardware is compatible (for example, Intel Mac boots only from Intel system, not from an Apple Silicon system) and that its macOS version is the same or newer than the host’s.
Note: This method applies only to Intel-based Macs. Apple Silicon models cannot boot from another Mac’s internal drive due to hardware security and SSV protection.
- Connect and start TDM on the target Mac. Hook up the two Macs with cable and enter Target Disk Mode on the target Mac as described above.
- Start the host Mac in Startup Manager. Turn on the host Mac and immediately hold the Option (⌥) key. This opens the Startup Manager.
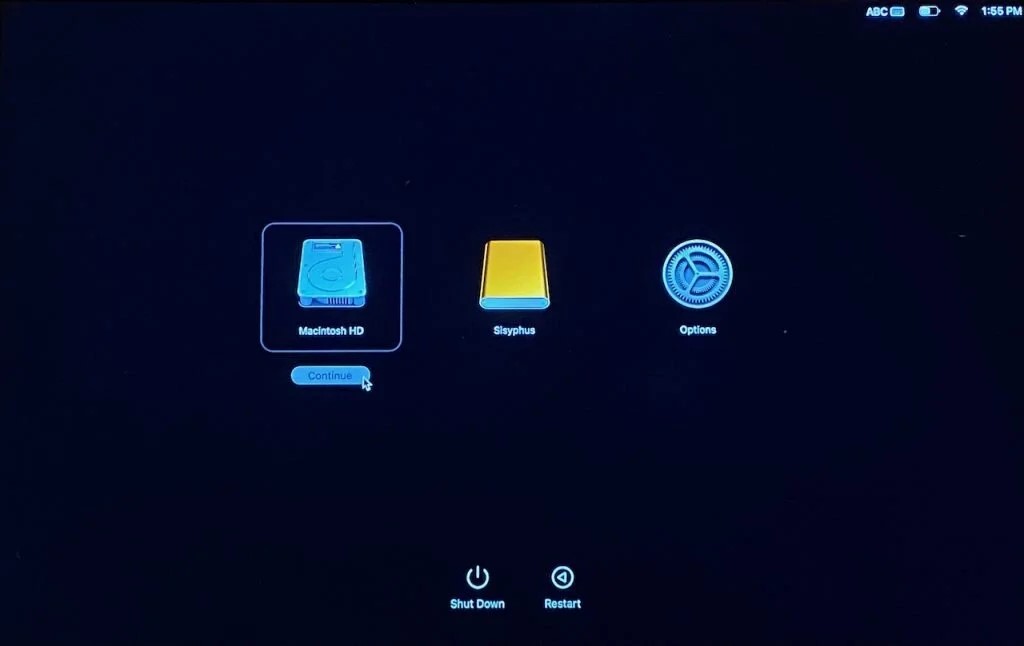
- Select the target Mac’s drive. In the Startup Manager, you’ll see all available boot disks, including the target Mac’s drive (it appears as an external volume). Click the icon for the target Mac’s disk.
- Boot from the target drive. The host Mac will now start up using the target Mac’s operating system. (Essentially, your host Mac is now “borrowing” the target Mac’s macOS.)
- Finish up. After booting, you can work or troubleshoot as needed. When you’re done, shut down the host Mac and exit Target Disk Mode on the target Mac.
This method is like giving your host Mac a healthy new heart. By holding Option at startup, you can pick any connected bootable volume, including the target Mac’s drive.
Method 3: Using Target Disk Mode with Migration Assistant
Target Disk Mode can be combined with Migration Assistant for a smoother data recovery.
- After booting the broken Mac into TDM and connecting it to a working Mac, the broken Mac’s drive will appear as an external disk.
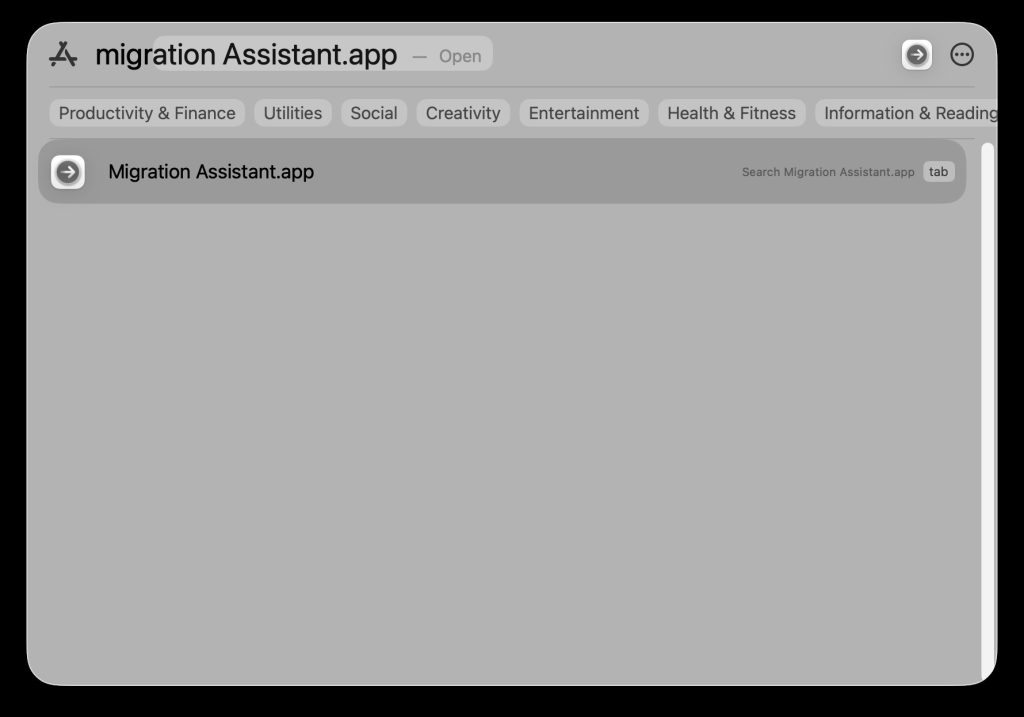
- At this point, launch Migration Assistant on the working Mac (Spotlight > Migration Assistance).
- After you authenticate, choose the option to transfer “From a Mac, Time Machine backup, or startup disk”. The assistant will detect the old Mac’s volume (showing the old Mac’s name) and list all user accounts and data on it.
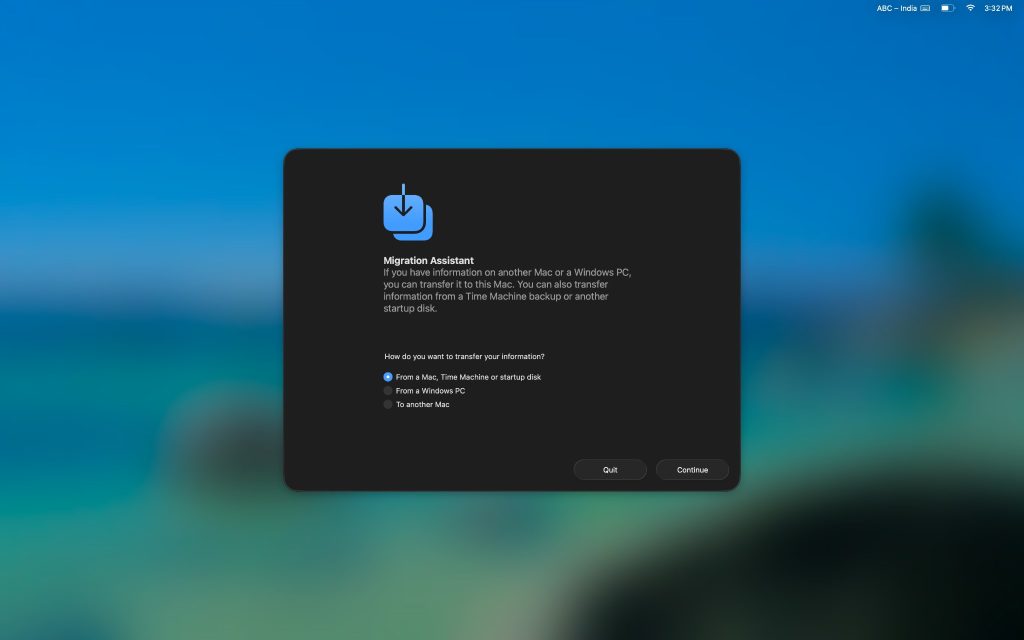
- Then select which accounts, apps, and files to import (or choose all) and continue the migration.
This automatically copies apps, settings, and user files from the old Mac’s disk to the host Mac, making data recovery straightforward.
Method 4: Recover Data from Target Mac with Data Recovery Software
Using this method, you can scan and retrieve files from an unbootable or corrupted drive. It involves using an advanced Mac data recovery software.
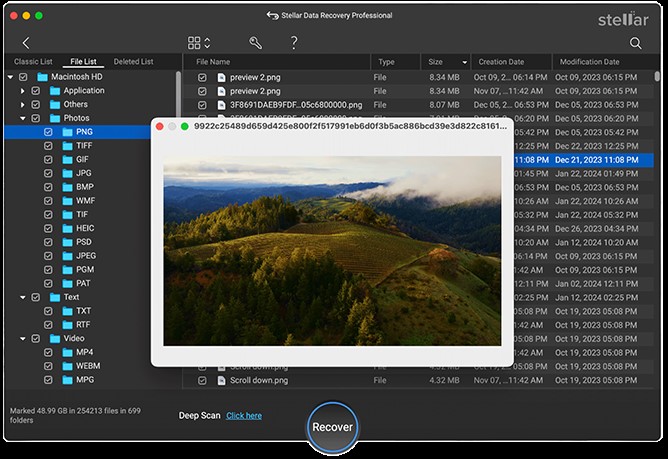
If the target Mac’s drive would not even mount or show up or if you are suspecting file corruption, simply use a data recovery tool to recover data using the Target Disk Mode. One such tool to accomplish this is Stellar Data Recovery Professional for Mac. Here’s how to use it:
- Prepare the host Mac. Download and install Stellar Data Recovery Professional for Mac on the host Mac (you can also use a trial to test).
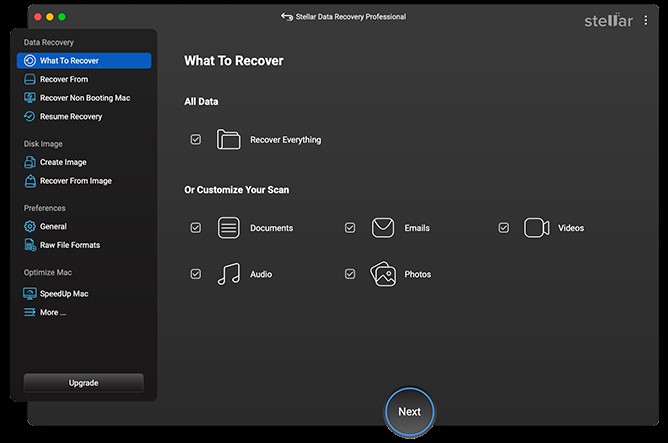
- Choose what to recover. Open the software and select the types of files you want (documents, photos, videos, etc.).
- Select the target Mac’s disk. In Stellar’s interface, choose the connected drive that corresponds to the target Mac’s internal disk. It should appear just like any external volume.
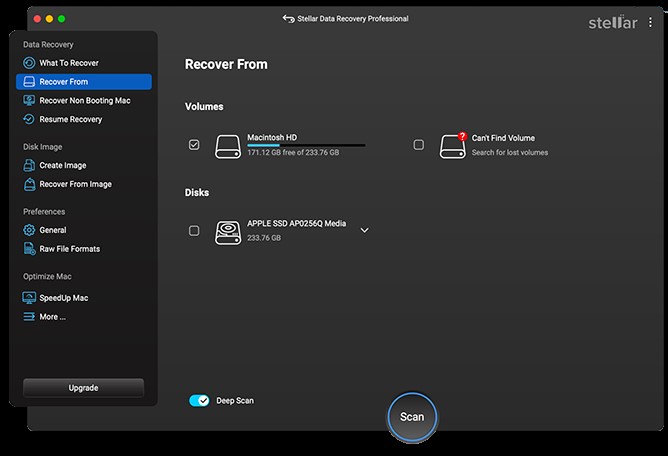
- Scan the drive. Click Scan. The software will begin a deep search of the disk, looking for recoverable files.
- Review and save. When the scan finishes, preview the found files. Select the ones you need and click Recover to save them onto the host Mac’s own drive.
In short, you treat the target Mac’s drive as an external disk and let the recovery software do the rest. As advertised, Stellar’s Mac recovery tool “supports deep scanning of formatted APFS and HFS+ volumes” to restore your data. It can even handle drives from a crashed or non-booting Mac. By using TDM plus Stellar, you’ll have your files back on your working Mac in no time.
Stellar Data Recovery for Mac can scan an unmounted Mac drive and pull your files out. It’s designed for cases just like this – even encrypted APFS or Time Machine volumes are no problem. In fact, Stellar’s Mac solution “recovers from emptied Trash, encrypted APFS, Time Machine, and 4K drives”. Best of all, the free trial lets you see what’s recoverable, so you know you’re getting your data back before you buy.
Scenario-Based TDM Solutions
- Encryption (T2/Secure Enclave & FileVault): Newer Macs with a T2 security chip or Apple Silicon encrypt the drive by default.
- When you enable Target Disk Mode (or “Share Disk” on Apple Silicon), the Mac will prompt for the administrator password before sharing the disk.
- If FileVault is enabled, go ahead and unlock it. Without you entering the correct password or Apple ID for it, the disk remains locked and unreadable.
- Once authenticated, the hardware handles decryption automatically.
- APFS & Disk Utility: Sometimes the connected disk doesn’t mount automatically. In that case:
- Open Disk Utility on the host Mac. You will find it in the Apps.
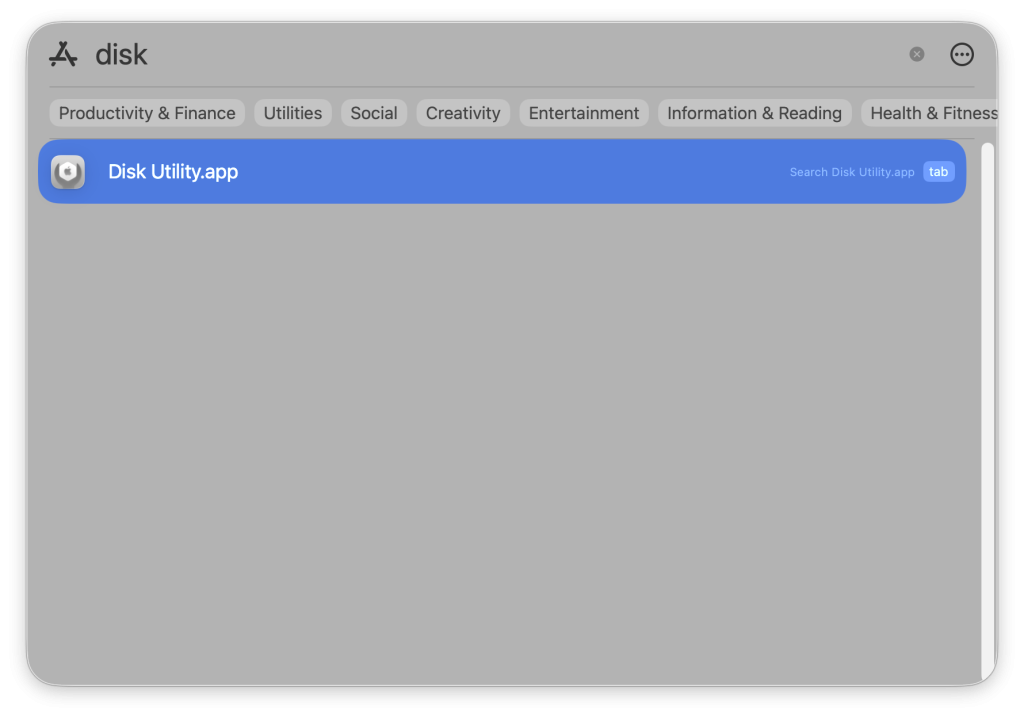
- choose View > Show All Devices. This reveals the full disk container structure.
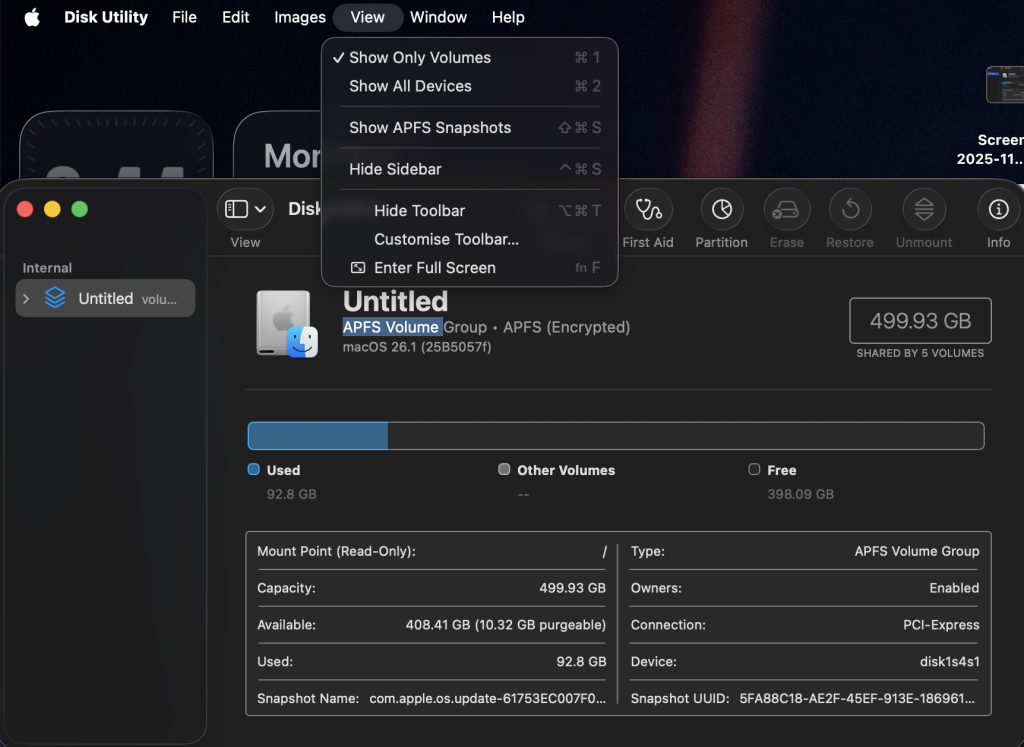
- If the target Mac’s volume appears but is greyed out, select it and click Mount. Also, ensure Finder is set to show external drives: in Finder Preferences (Sidebar tab), check “Hard disks” and “External disks” so the shared drive appears.
- Using these steps often makes an APFS volume visible when it didn’t show up at first.
- Cable Compatibility: The correct cable is essential. Apple notes that for macOS 11 (Big Sur) and later, a Thunderbolt cable must be used. In general, Target Disk Mode supports Thunderbolt 3 (USB-C), Thunderbolt 2, or FireWire connection.
| Source Mac Port | Host Mac Port | Cable/Adapter Needed |
| Thunderbolt 3 (USB-C) | Thunderbolt 3 (USB-C) | Thunderbolt 3 (USB-C) cable |
| Thunderbolt 3 (USB-C) | Thunderbolt 2 | Thunderbolt 3‑to‑2 adapter + Thunderbolt 2 cable |
| Thunderbolt 2 | Thunderbolt 2 | Thunderbolt 2 cable |
| USB-C (USB 3.0) | USB-A (USB 3.0) | USB-C to USB-A (USB 3.0) cable |
| FireWire 800/400 | FireWire 800/400 | FireWire cable |
- Troubleshooting if Target Drive Disappears: If the target disk still doesn’t appear, try these fixes.
- Restart both Macs and attempt TDM again.
- If it still fails, reset the host Mac’s SMC and NVRAM (this can clear hardware/boot glitches).
- Verify Finder Preferences as above (so external disks are shown).
- If the disk is visible in Disk Utility but not mounting, use the Mount button there.
- Finally, try connecting to a different Mac (to rule out a bad host port) or use an external enclosure for the drive if possible.
These steps cover the most common error cases when TDM doesn’t show the disk.
Conclusion
Target Disk Mode is a powerful tool in your Mac arsenal. It literally turns your Mac into an external drive, letting you access its hard disk from another machine. Whether you’re copying massive files, booting one Mac from another’s drive, or digging out data with recovery software, TDM can save the day without cracking open the case. In many ways it’s faster than those network transfers (as it uses Thunderbolt or USB-C ports) and safer than other methods (like clunky backups or removing the drive).
It is important that you remember that on Apple silicon Macs (M1/M2/M3/M4), you are going to access this feature via macOS Recovery and it is called Share Disk but the result is the same. If the target Mac’s disk appears in Disk Utility but you are unable to mount it, your way to go forward is that you try repairing or reformatting it there. If that also fails, then software like Stellar Data Recovery for Mac is the only option you are left with to find your files on the drive. If you have a Windows PC, then you should definitely know that those systems don’t read Mac-formatted drives natively. For that, you will need some additional tools like Stellar’s on Windows to access an APFS/HFS+ drive.