After a long weekend, when I resumed office, I found myself in a difficult situation. There is a SQL database named BusinessOperation which went into the Suspect mode, halting all the operations. It contains some business critical information. As the first basic step, I restarted the SQL Server. Then, checked the status of database by running this command:
SELECT DATABASEPROPERTYEX (N'DemoSuspect', N'STATUS') AS Status;
GO
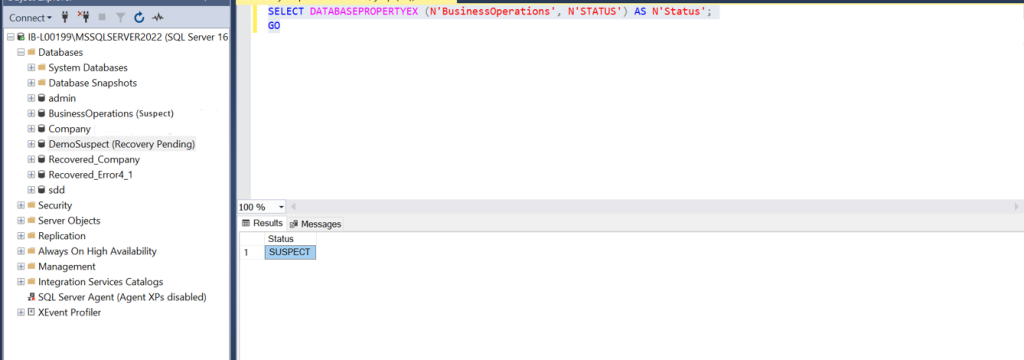
Unfortunately, it was still in Suspect mode. I was not able to find out how to come out of this situation. So, I consulted other DBAs on the issue and they suggested some troubleshooting steps. I was able to recover my database from suspect mode by following those steps. Based on this experience, I have prepared this guide on how to recover MS SQL database from Suspect mode. Let’s start from the basic.
What is Suspect Mode in SQL Server?
Suspect mode is one of the states of MS SQL Server database. The SQL database goes into suspect mode when the database recovery fails or the primary data files are either missing or corrupted. In suspect mode, the database becomes inaccessible. This means you can neither connect to the database nor recover it during server startup. The database will remain in the suspect mode until it is restored to the normal state.
Why SQL Database goes into Suspect Mode?
The database may go into suspect mode due to one or more of the following reasons:
- The system’s hard disk where database is stored is out of space.
- The MDF database file is corrupted or damaged.
- The primary file group of the database is corrupted or missing.
- The transaction log file is inaccessible or corrupted.
- MS SQL Server shuts down or crashes in the middle of a transaction.
- The database is terminated unexpectedly.
- SQL is unable to complete a rollback or roll-forward operation.
Solutions to Recover SQL Database from Suspect Mode
You can first check the database status. For this, open the SQL Server Management Studio (SSMS), go to the Object Explorer, and check the database. If the database is in suspect mode, check the SQL Server error log in SQL Server Management Studio (SSMS). This log contains all user-defined events and system events that will help you find the exact cause behind the database is in suspect mode issue. If corruption is the reason behind the database in the suspect mode issue, then follow the given methods.
Method 1: Restore Database from Backup
If the database is corrupted or damaged, the easiest solution is to restore SQL database from backup. If you have an updated database backup file, then you can restore the backup file. To restore the database backup file, follow these steps:
- Open SQL Server Management Studio (SSMS) and connect to your server instance.
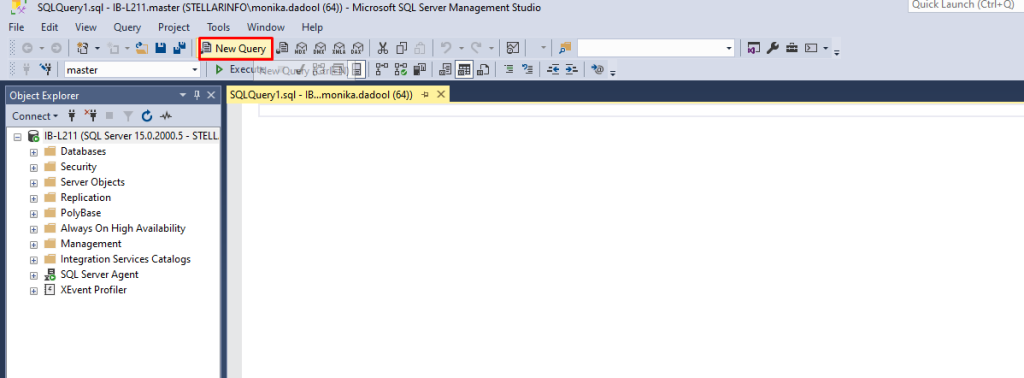
- From the standard bar, click ‘New Query’.
- In the ‘Query Editor’ window, type the below command:
RESTORE DATABASE BusinessOperation
FROM DISK = 'Z:\SQLServerBackups\ BusinessOperation .bak' ;
- Next, try connecting to the database.
If your backup file is not updated or available, then follow the next method.
Method 2: Turn Off the Suspect Tag
You can also try to turn off the suspect tag by using the EXEC sp_resetstatus ‘dbNSFP’ command when your database enters suspect mode due to corruption or missing files. It is a stored procedure in the SQL Server system. This will reset the status of database from suspect to online. However, it does not resolve the corruption issue in database. Run this command to turn off the suspect tag:
EXEC sp_resetstatus ‘BusinessOperations’;
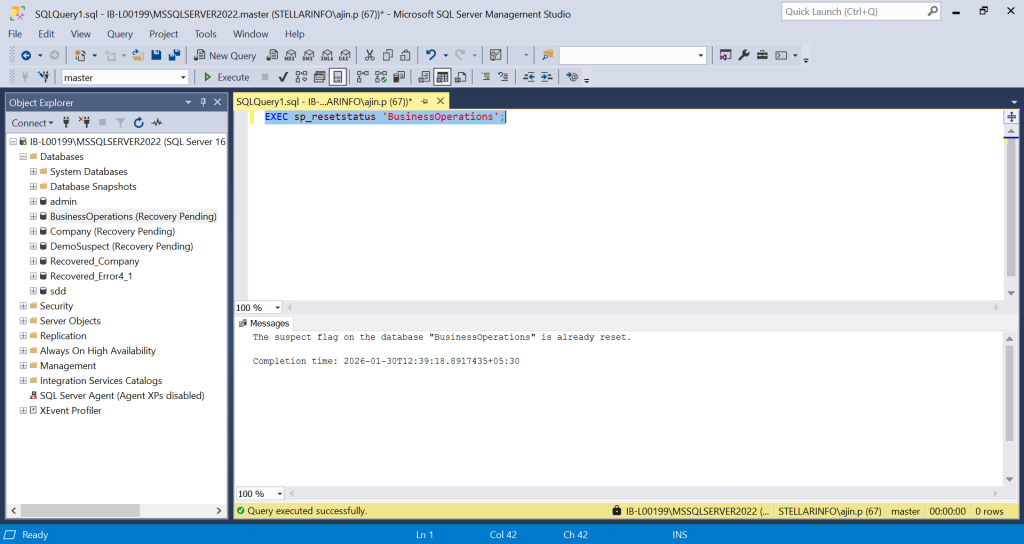
It returns 0 if the command completes successfully and shows the message “The suspect flag in the database “businessOperations” is already reset.” If the database still fails to come online, then you can try the next method.
Method 3: Use DBCC CHECKDB Command to Repair the Database
You can use the DBCC CHECKDB command to repair the damaged SQL database and restore it from suspect mode to online mode. Following are the steps to repair the database using the DBCC CHECKDB command:
Note: It is suggested to create a backup of the SQL database before running this command.
Step 1: Open SSMS and connect to the server instance.
Step 2: Select the New Query option.
Step 3: In the Query Editor window, enter the following code to set the database to EMERGENCY mode:
ALTER DATABASE db_name SET EMERGENCY
For example:
ALTER DATABASE BusinessOperations SET EMERGENCY

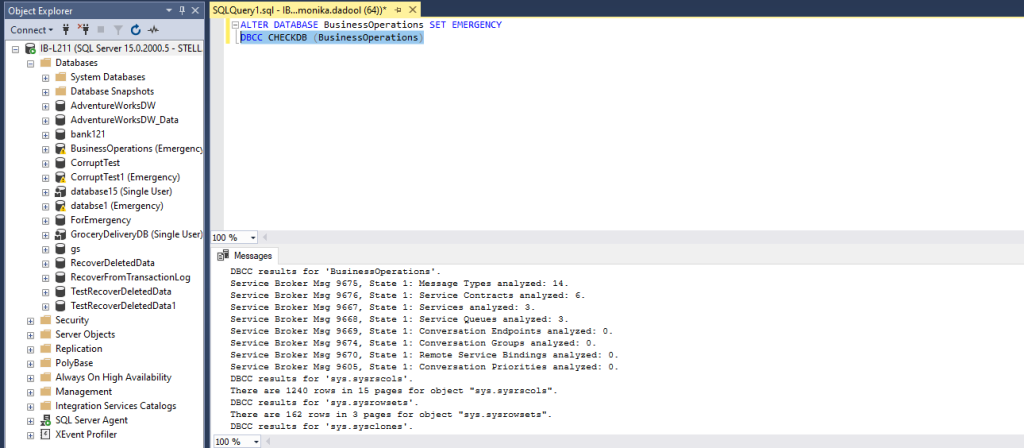
Step 4: Now, run the following DBCC CHECKDB command. This command will check the integrity/consistency of the database. It will also report the consistency errors (if found) in the database and recommend the repair option.
DBCC CHECKDB (BusinessOperations)
Step 5: Next, set the database to Single User mode to prevent other users from making any changes to the database during the repair process. To set the database to Single User mode and roll back the previous transactions, execute the below command:
ALTER DATABASE BusinessOperations SET SINGLE_USER WITH ROLLBACK IMMEDIATE
Step 6: After putting the database in SINGLE USER mode, run the DBCC CHECKDB command with the suggested repair option. If the REPAIR_REBUILD option is suggested, then run DBCC CHECKDB command as given below. This option can quickly repair missing rows in non-clustered indexes.
DBCC CHECKDB (‘BusinessOperations’, REPAIR_REBUILD)
If the REPAIR_ALLOW_DATA_LOSS is suggested as a minimum level of repair, then run the command as given below:
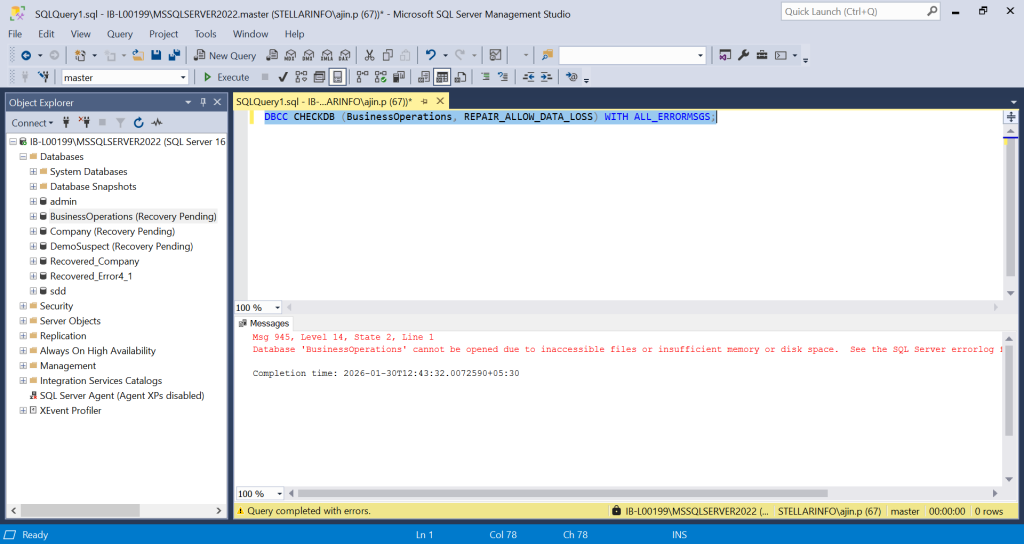
DBCC CHECKDB (BusinessOperations, REPAIR_ALLOW_DATA_LOSS) WITH ALL_ERRORMSGS;
Note: The DBCC CHECKDB command with REPAIR_ALLOW_DATA_LOSS option usually helps to bring the database to a consistent state. But, this command results in data loss.
Step 7: When the database is repaired, bring it back to Multi-User mode. To do so, execute the below command:
ALTER DATABASE BusinessOperations SET MULTI_USER
Now, you should be able to connect to the database.
Sometimes, DBCC CHECKDB fails to repair the database and displays an error like:
Msg 945, Level 14, State 2, Line 1
Database 'BusinessOperations' cannot be opened due to inaccessible files or insufficient memory or disk space. See the SQL Server errorlog for details.
To fix this error, read our guide on How to Fix SQL Error 945 – Database cannot be Opened due to Inaccessible Files.
Method 3: Use a Professional MS SQL Repair Tool
The DBCC CHECKDB command can repair the database and helps you recover the database from suspect mode. However, it does not guarantee the accuracy of repaired data in the database or may fails in certain scenarios. To avoid data loss and quickly repair the corrupt SQL database, you can use Stellar Repair for MS SQL – a professional SQL database repair tool. The tool can repair the database (MDF/NDF) file and recover all the objects, including tables, triggers, stored procedures, and indexes with complete precision and integrity. It can help fix common SQL database corruption errors. The software is compatible with SQL 2022, 2019, 2017, and earlier versions.
Let’s see how to repair SQL database with Stellar Repair for MS SQL and recover it from suspect mode.
Note: Close the server instance before running the software.
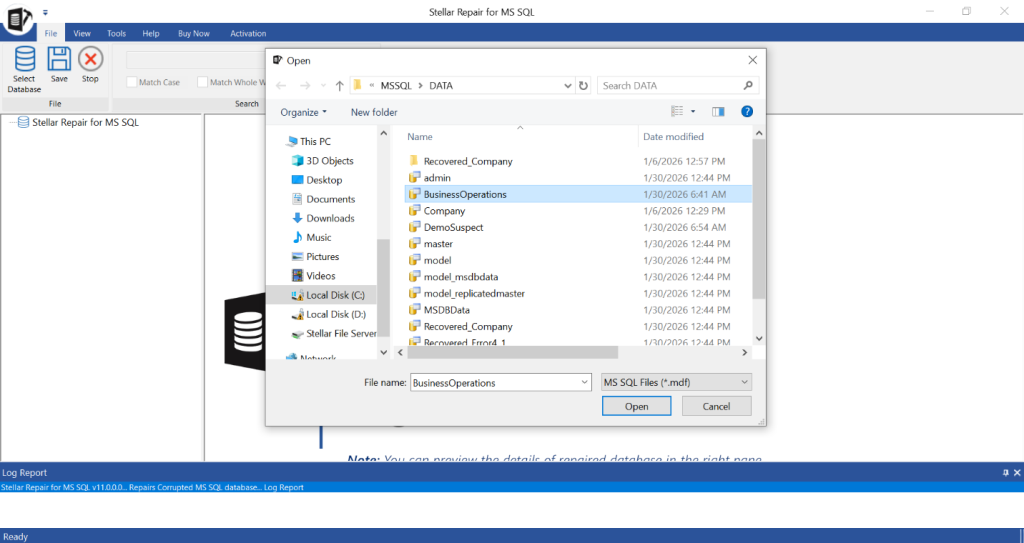
Step 1: Download, install, and run Stellar Repair for MS SQL software.
Step 2: From the Select Database window, choose Browse or Search to select the SQL database file (.mdf).
Step 3: Once the file is selected, click Repair.

Note: Uncheck the ‘Include Deleted Records’ checkbox if you don’t want the deleted records to be recovered.
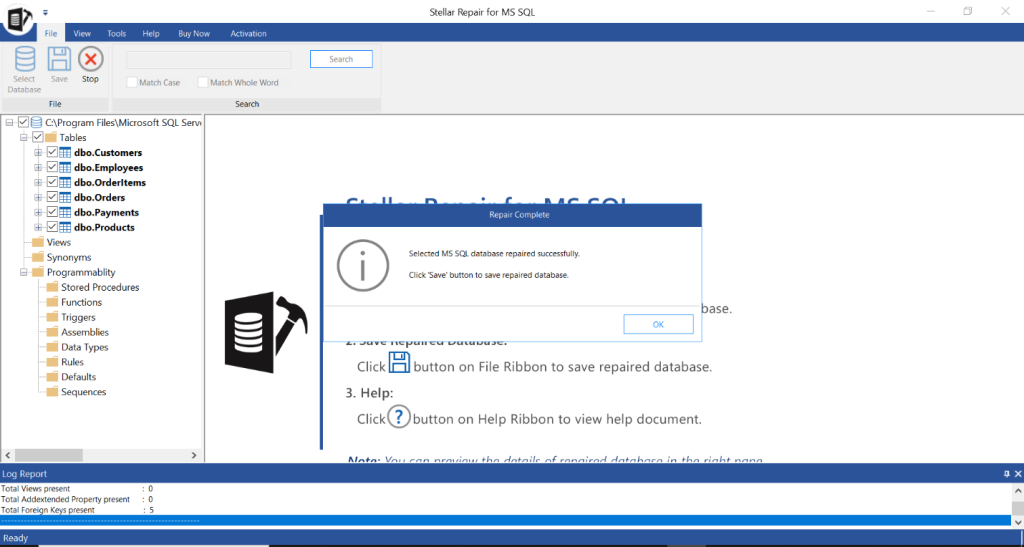
Step 4: When the repair process is complete, it will display a “Selected MS SQL database repaired successfully” message. Click OK.
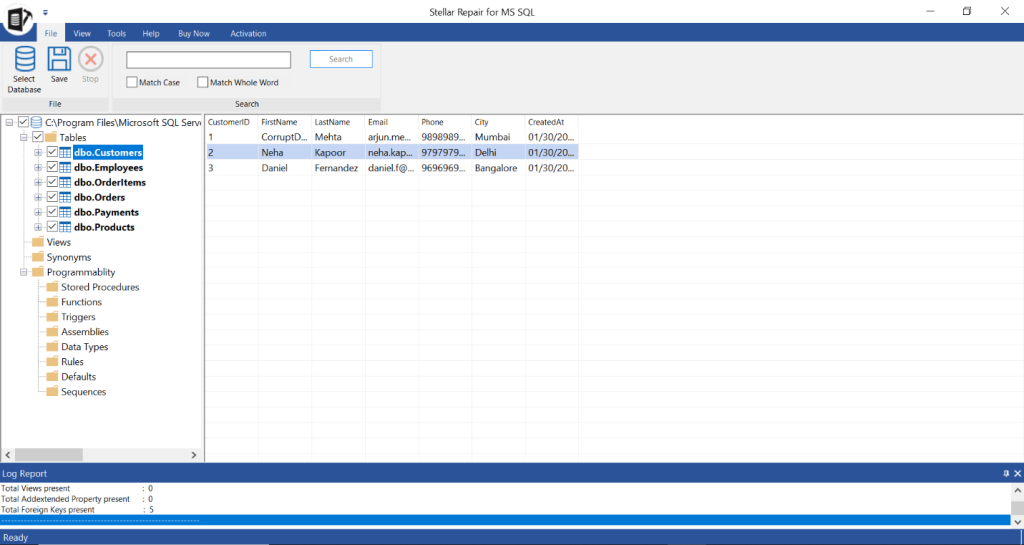
Step 5: The software will present all the recoverable SQL database objects. You can preview the objects.
Step 6: Click Save on File menu to save the repaired file.
Step 7: On the Save Database window, under the Saving Option, select New Database, Live Database, or Other Formats. Click Next.
Step 8: On the next window, fill in the details required under Connect To Server and click on the Next option.
Step 9: Select the Save Mode and click Save.
When the database is repaired, open SSMS and attach the repaired database file. You will now be able to access the database.
Conclusion
Above, we have discussed the solutions to recover MS SQL database from suspect mode. The best approach is to restore the database from a healthy backup. If you don’t have a healthy or updated backup, then use the DBCC CHECKDB command to repair it. However, the DBCC CHECKDB command with REPAIR_ALLOW_DATA_LOSS option can result in data loss. A better option is to use Stellar Repair for MS SQL – a specialized SQL database repair software that can repair the database without any data loss and help you recover the database from suspect mode.
Read Suspect Mode Case Study: St. Robert, MO, USA Police Department Repairs Large MS SQL Database by using Stellar Toolkit for MS SQL