A shared mailbox is a special mailbox that can be accessed and managed by multiple users. This makes it easy for a group of users - with the right permissions - to monitor, receive, and send emails from a common email ID – e.g. support@xyz.com or info@xyz.com. It is often used to manage customer inquiries, support requests, and other common communications from one email address.
Several organizations import PST files into shared mailbox to keep old emails in one place, centralize historical email, migrate former employee mailbox data, and make important business emails accessible to multiple team members. Read further to know how to import PST into Office 365 shared mailbox.
Can my mailbox even hold the PST?
It depends on the storage limit of shared mailbox. In the standard license, there is a 50 GB shared mailbox storage limit on Microsoft 365. Therefore, it is pertinent to check the size of your PST file before importing it. If it is huge, then ensure the mailbox – where you’re importing - has enough free space or use an archive mailbox. You can also take additional license to increase the mailbox size.
Decision Table – Which Method should you Use
The comparison table mentioned below helps you to choose the right method for your environment:
NOTES: Global Admin or Exchange Admin permissions are required for Methods 2 and 3.
|
Scenario |
Method |
Role Required |
Microsoft 365 Cloud Support |
Best For |
|
Importing 1–2 PST files where Outlook is already configured with the shared mailbox |
Import/Export Feature |
Full Access permission on shared mailbox |
Yes |
Quick single PST import |
|
Enterprise-scale or batch PST migration |
Microsoft Purview (Network Upload) |
Mailbox Import Export + Mail Recipients roles |
Yes |
Enterprise and bulk migration |
|
No admin access, bulk migration, or non-technical users |
Stellar Migrator for Outlook |
Delegated Full Access permission |
Yes |
Bulk PST import and simplified migration |
Prerequisites for Importing PST into Shared Mailbox on Microsoft 365
You must assign the Mailbox Import Export and Mail Recipients roles to the user account – you’re using for process. These prerequisites are only required for Microsoft Purview Network Upload and Drive Shipping Methods.
NOTES: If you want to migrate PST files directly to Microsoft 365 mailboxes, check our guide on migrating Outlook PST files to Office 365.
Before starting the import:
- Use a Global Admin or Exchange Admin account. Standard user accounts cannot create import jobs in Microsoft Purview.
- Verify the shared mailbox already exists and has a valid primary SMTP address such as shared@xyz.com. The import process maps to the SMTP address, not the display name.
- Assign the Mailbox Import Export role:
- Open Exchange Admin Center.
- Go to Roles.
- Select Admin Roles.
- Open Organization Management.
- Go to the Permissions tab.
- Add Mailbox Import Export.
- Click Save.
- Also assign the Mail Recipients role to the same role group. Many administrators miss this second permission, which later causes mailbox mapping failures during import.
- Wait up to one hour for Microsoft 365 role propagation. Sign out and back into Microsoft Purview after the wait period. If the New import job button is missing or greyed out, role propagation is usually the reason.
- Ensure the PST file is available locally, on a network share, or ready for Azure upload depending on the method you choose.
- Verify the PST format:
- ANSI PST: Outlook 97–2002
- Unicode PST: Outlook 2003 and later
Both formats are supported, but checking the file type before upload helps avoid compatibility issues.
8. Make sure that Full Access permission to the mailbox is assigned. Without it, import operations often fail due to access validation issues.
9. Make sure to check that your PST file is healthy and not corrupted before starting the import. Corrupted files often cause failed or incomplete imports. You can use SCANPST.exe, if repair is needed.
NOTES: If the required roles are not assigned, then the New Import Job button does not appear. Also, missing Recipients role can cause “Mailbox not found” error during the import.
Best Practices before Importing PST into a Shared Mailbox
Consider the following best practices before importing your PST file:
- Backup the PST file before import.
- Verify Full Access permissions on the shared mailbox.
- Check mailbox storage.
- Test with a small PST before large datasets.
- Apply date filters to control mailbox growth.
- Validate CSV mappings carefully.
- Review duplicate handling to avoid duplicate messages.
Methods you should Use to Import PST into Shared Mailbox Office 365
Below we have mentioned the methods to Import Outlook data file (.pst) into Shared Mailbox on Office 365.
Method 1: Use Outlook to Import PST into Office 365
If you have full access and permissions to the shared mailbox and your Outlook is connected to the shared mailbox, then you can import the PST file without using the Microsoft 365 admin center.
You can do this by navigating to File > Open & Export > Import/Export. Choose Import from another program or file > Outlook Data File (.pst) and then select the shared mailbox as the destination folder. No admin portal required.
This approach provides a straightforward way to restore or migrate data without additional administrative steps. It works best for small PST files and occasional imports. If you are managing large PST files, multiple mailbox migrations, or enterprise-scale projects, then you should opt Microsoft recommended methods. Because it provides centralized management and better scalability.
NOTES: Shared mailbox must be visible in Outlook.
If the shared mailbox is hidden from the Global Address List – GAL – or not auto-mapped to the Outlook profile, it will not appear as a destination during import. In such a case, you can add the shared mailbox manually through File > Add Account before starting. Here’s how to import PST:
- Verify the shared mailbox appears in the Outlook folder pane.
- Open Outlook and go to:
- File
- Open & Export
- Import/Export
- Select:
- Import from another program or file
- Click Next
- Select:
- Outlook Data File (.pst)
- Click Next
- Click Browse and select the PST file.
- Choose duplicate handling:
- Replace duplicates
- Allow duplicates
- Do not import duplicates (recommended)
- Expand the shared mailbox folder tree.
- Then select the correct destination folder. Make sure you choose the shared mailbox — not your personal mailbox.
- Click Finish.
- Check the Outlook status bar to monitor the import progress.
NOTES: The import process may take 20–60 minutes or longer to complete, depending on file size and your internet connection speed.
Limitations of the Above Method
- It requires Outlook desktop installation
- Not supported in Outlook Web or mobile Outlook
- The Import/Export Wizard may be unavailable in some Outlook configurations – such as – certain Microsoft 365 policies or virtual desktop environments.
- Large PST files may take a considerable amount of time to import.
- It does not provide centralized import-job management, detailed audit reporting, or compliance-focused tracking.
- It is not ideal for bulk PST migration.
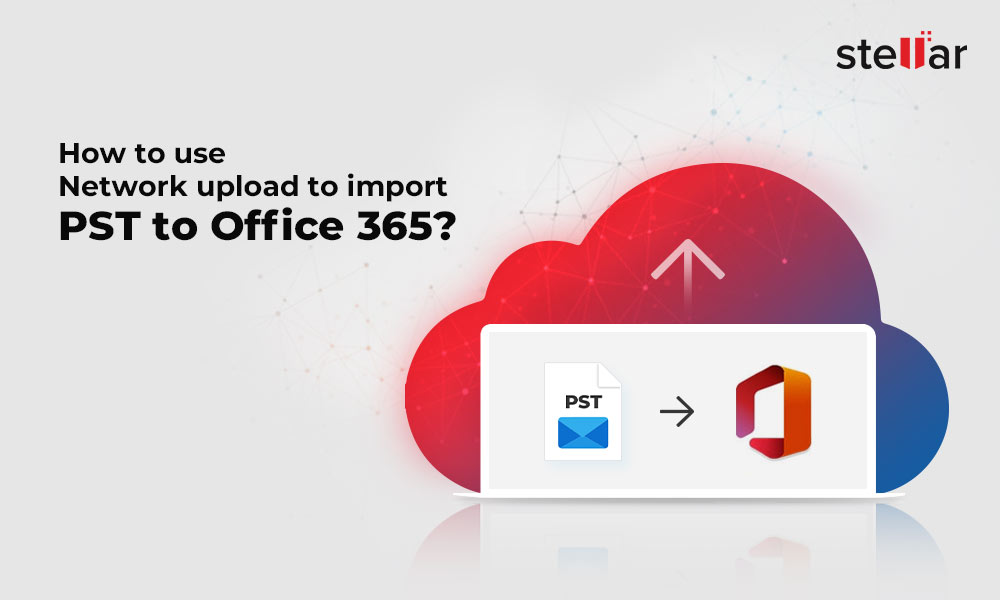
Method 2: Use Network Upload to Import PST into Office 365 Shared Mailbox
You can use Network Upload – (Microsoft Purview) method to import PST files into Shared Office 365. In this method, you can upload a PST file to Azure Blob Storage using AzCopy and map it through a CSV file.
To use this method, you must have the required permissions, including the Mailbox Import Export and Mail Recipients roles. You can access the portal at purview.microsoft.com. Then go to Data lifecycle management > Microsoft 365 > Import. You need the Mailbox Import Export and Mail Recipients roles assigned. Below are the steps:
Note: This import process is managed in Microsoft Purview, not in the Exchange Admin Center. The old Security & Compliance Center has been replaced and now redirects users to Microsoft Purview.
Step 1: Create a new import job
- Sign in to Microsoft Purview.
- Go to:
- Data lifecycle management
- Microsoft 365
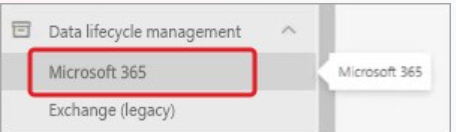
-
- Import
- Click + New import job.

Step 2: Configure the import job
- Enter a job name such as:
- SharedMailbox-PST-May2026
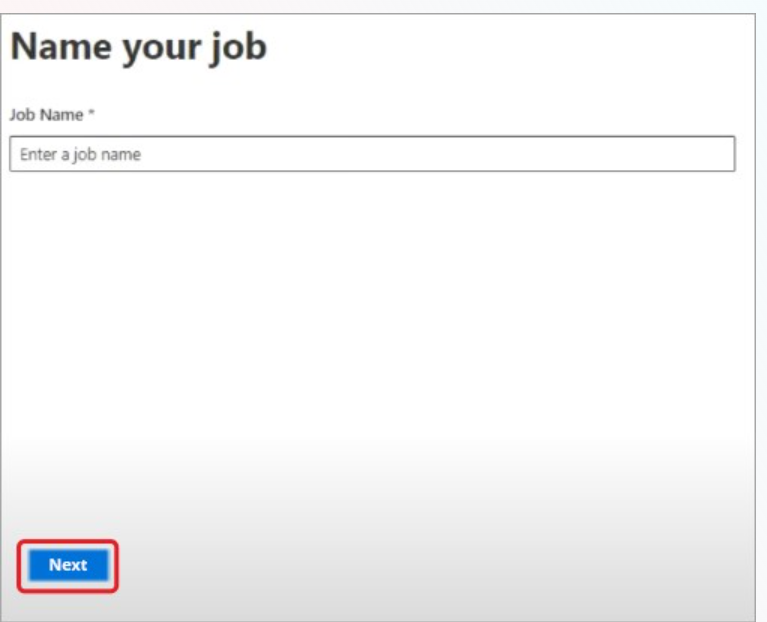
- Click Next.
- Select:
- Upload your data
- Click Next.
Step 3: Generate the SAS URL
- Click Show network upload SAS URL.
- Copy the SAS URL to the clipboard.
Note: Do not close the import job window. You must return to it after uploading the PST files.
Step 4: Upload PST files using AzCopy
- Download AzCopy from Microsoft and extract it to C:\Temp.
- Open Command Prompt and run:
- cd C:\Temp
C:Program FilesFSLogixApps
frx version
- cd C:\Temp
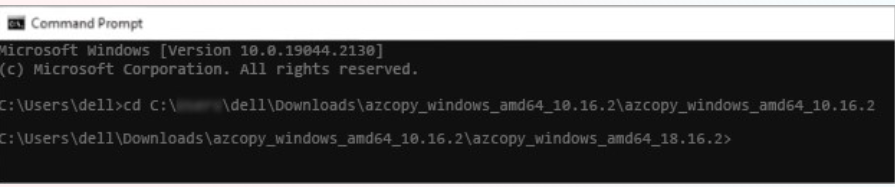
This uploads the PST files to Microsoft’s Azure ingestion container.
Step 5: Create the CSV mapping file
- Create a CSV file with the following structure:
Workload,FilePath,Name,Mailbox,IsArchive,TargetRootFolder
Exchange,,sharedteam.pst,shared@contoso.com,FALSE,/
Important CSV mapping rules:
- Use the primary SMTP address in the Mailbox column
- Do not use aliases or display names
- Set IsArchive to FALSE
- Set TargetRootFolder to /
- Do not leave TargetRootFolder blank
Leaving the root folder blank can place emails into unexpected folders after import.
NOTES: If you want to keep imported mailbox content to display in a separate folder, then set a path like /Imported PST. It ensures a clear separation between newly imported emails and the mailbox's current data.
Step 6: Upload the mapping CSV
- Return to the Purview import job page.
- Enable:
- “I’m done uploading my files”
- “I have access to the mapping file”

- Click Next.
- Upload the CSV file.
Step 7: Submit the import job
- Review all settings carefully.
- Optionally apply a date filter.
- Click Submit.
Microsoft first analyzes the PST file before starting the import. The analysis stage alone may take several hours.
NOTES: This import process is managed in Microsoft Purview, not in the Exchange Admin Center. The old Security & Compliance Center has been replaced and now redirects users to Microsoft Purview.
TIP: Import only the last 2–3 years of email when possible. This keeps the shared mailbox smaller, improves Outlook performance, and reduces long-term storage growth.
Method 3: Import PST into Shared Mailbox via Drive Shipping
Drive Shipping is another native method that you use for importing the PST files into Microsoft 365. In this, instead of uploading PSTs over the network, you can store them in an encrypted hard drive and ship it to Microsoft. This approach is useful for bulk imports, large datasets, or when network bandwidth is limited.
Read How to Use Drive Shipping Method to Import PST into Office 365?
Method 4: Import PST into Office 365 Shared Mailbox using Stellar Migrator for Outlook
If you are importing multiple PST files or managing large-scale migrations, then you can use Stellar Migrator for Outlook. Unlike manual methods that require Azure SAS URL configuration or Exchange Admin roles, this tool enables direct import of PST files. Its advanced capabilities helps you to reduce administrative overhead while ensuring accuracy and efficiency. Additionally, it provides features like incremental migration, concurrent processing, and detailed reporting.
When to Use this Tool?
Use this migration tool if:
- You do not have Exchange Admin access
- You need to migrate 10+ PST files
- Multiple shared mailboxes are involved
- Incremental sync is required
- Non-technical staff will run the migration
- You need detailed reporting and dashboard
Here’re the steps to use this tool:
- Purchase the license and install the tool.
- Launch it.
- Create a Job in the Create migration job window.
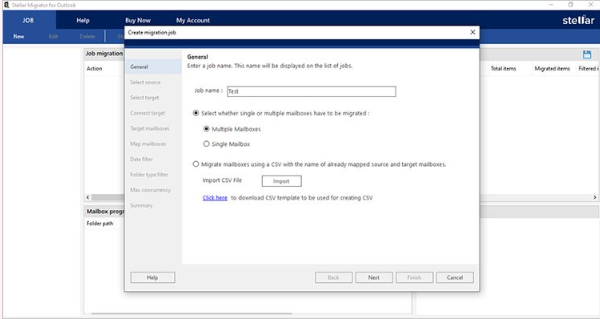
- Enter the Job name
- Choose the Select whether single or multiple mailboxes have to be migrated option.
- Click Next.
- Click on Select Files on the Select source window.

- Click the Next button.
- Choose the Microsoft 365 option.
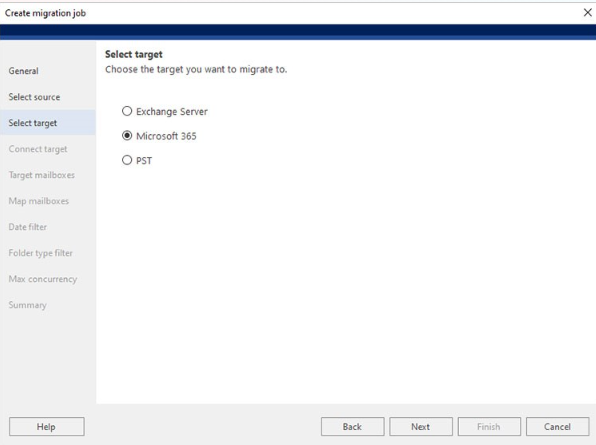
- Click Next.
- Now, choose either Auto Registration or Manual Registration.
- Auto Registration – This automatically connects to Microsoft 365 by using Microsoft Azure (Entra ID) credentials.
- Manual Registration – In this, you need to enter the details, such as Email Address, Application (Client) etc.
- Click Validate.
- Now the tool display a list of Target mailboxes.
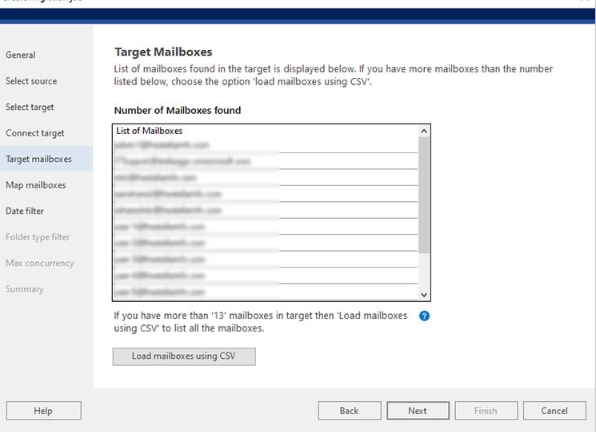
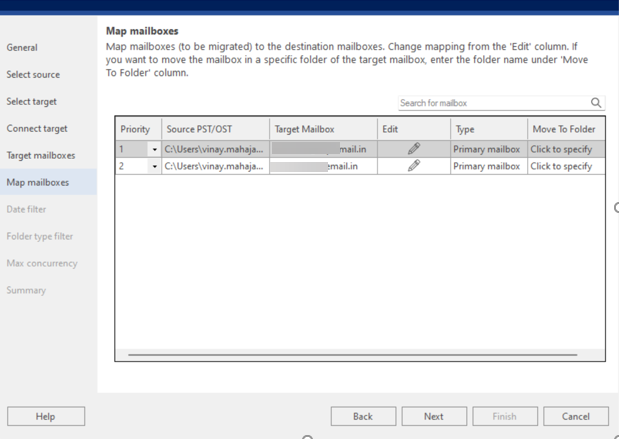
- The tool will map the mailboxes automatically to Microsoft 365.
- Click on Edit to change the mapping.
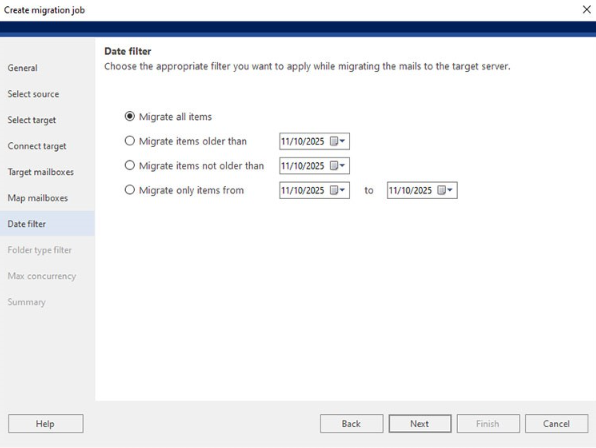
- Choose a date filter option.
- Click on Next.
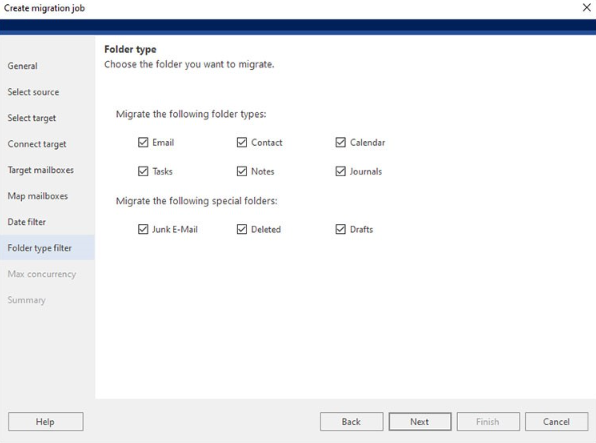
- Choose the folder you want to import.
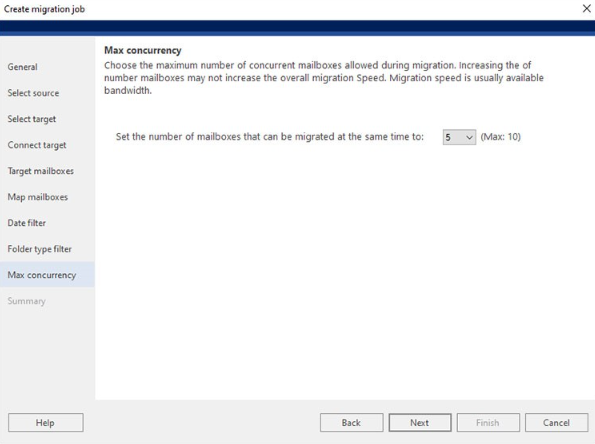
- Now select the number of mailboxes to be imported simultaneously.
- Review all the parameters before creating the job.
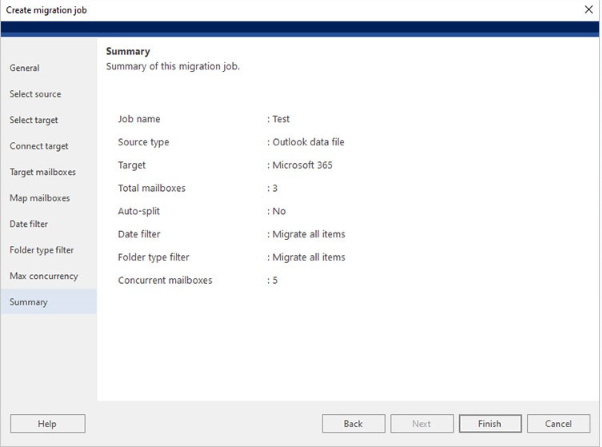
- Click on Finish.
- Now Job created dialog box will be displayed.
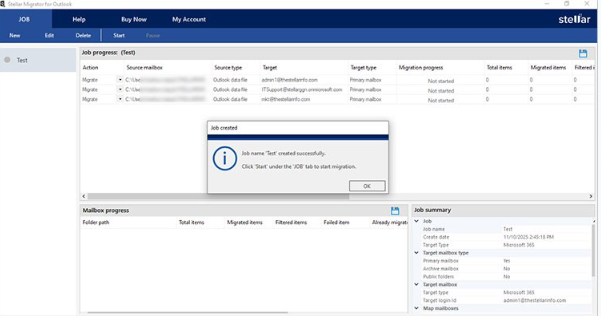
- Click OK.
- Click on Start to initiate the process.
- Select Connect to login to the licensing server.
- Once the connection is established, the tool will start migration.
You can track the progress of mailbox migration.
Factors to Consider when Selecting a PST Migration Tool
When selecting a PST to Office 365 migration solution—whether manual or third-party— you should consider the following features:
1. CSV pre-mapped migration
Admins can pre-create a CSV file to link PSTs to target shared mailboxes. The tool automatically processes the mappings and imports the data into the corresponding mailboxes during the migration process, which helps minimize human effort and the risk of mistakes in the mapping process.
2. Incremental migration
After the initial migration, rerun the job to transfer items that were not migrated during the previous migration attempt. This is useful during staged migrations.
3. Concurrent mailbox processing
Many enterprise migration tools can process multiple mailboxes simultaneously. This parallel processing capability helps reduce the overall migration time and improves efficiency when importing large numbers of PST files.
4. Folder and date filters
Admins can exclude:
- Junk Email
- Deleted Items
- Drafts
They can also import only recent email data.
5. Entra ID app registration
Stellar Migrator for Outlook requires an Entra ID application registration before connecting to Microsoft 365.
Typical setup includes:
- Creating an app registration in Azure
- Assigning permissions such as:
- Mail.ReadWrite
- Mail.Send
- full_access_as_app
- Providing:
- Tenant ID
- Client ID
- Client Secret
Allow 15–20 minutes for setup and permission propagation.
Microsoft Purview vs Specialized PST Migration Tool - A Comparison
The following table compares the Microsoft Purview method and third-party PST migration tool for importing PST files into Office 365 shared mailbox.
|
Feature |
Microsoft Purview Method |
Specialized PST Migration Tool |
|
Admin permissions required |
Exchange Admin role required |
Only Full Access permission required |
|
Azure SAS URL configuration |
Required |
Not required |
|
Bulk CSV mailbox mapping |
Limited support |
Complete bulk workflow support |
|
Incremental migration |
Not available |
Supported |
|
Multiple PST processing |
Limited |
Configurable concurrent processing |
|
Data filtering options |
Date-based filtering only |
Date and folder-based filtering |
|
Migration reports |
Basic reporting |
Advanced dashboards and detailed reports |
Common Errors when Importing PST into a Shared Mailbox on Office 365
There are various errors and issues you may face when importing PST files into shared mailbox manually. The following section highlight some common errors and their fixes:
Error 1: New Import Job button is greyed out or missing
Cause: The required role was assigned recently, but the permission update has not finished yet.
Fix:
- Wait up to 1 hour after assigning the role in Exchange Admin Center.
- Sign out of Microsoft Purview and sign in again.
- Go to Exchange Admin Center.
- Click Roles > Admin Roles.
- Select Organization Management > Permissions.
- Confirm that the Mailbox Import Export role is added.
Error 2: Mailbox not found during import
Cause: The CSV file contains the mailbox display name or alias instead of the primary email address.
Fix:
- Check the correct mailbox address by running the command:
- Get-Mailbox -Identity "Shared Team" | Select PrimarySmtpAddress
- Update the CSV file with the full email address.
- Upload the corrected CSV file again in Microsoft Purview.
Error 3: Import job stuck at 0% or “Analysis” for many hours
Cause: Microsoft first scans the PST file during the Analysis stage. If the import stays at 0% after analysis, there may be an upload or SAS URL issue.
Fix:
- Wait up to 12 hours while the Analysis process completes.
- If the import still stays at 0%, check the uploaded PST file using:
- azcopy list "
"
- If the SAS URL has expired, create a new import job and upload the PST file again.
Error 4: PST files deleted from Azure before import finished
Cause: PST files stored in the Azure ingestion container are automatically deleted after 30 days.
Fix:
- Create a new import job in Microsoft Purview.
- Get a new SAS URL and upload the PST files again using AzCopy.
- Finish the import process within 30 days.
Error 5: Import completed but emails are missing or saved in the wrong folder
Cause: The TargetRootFolder value in the CSV file was left blank.
Fix:
- Open the CSV file and set the TargetRootFolder value to / (forward slash).
- Save the CSV file and run the import job again.
Error 6: Import request already exists
Cause: An older import request for the same mailbox is still available in the system.
Fix:
- Check the existing import request using:
- Get-MailboxImportRequest -Mailbox shared@contoso.com
- Remove the old request using:
- Get-MailboxImportRequest -Mailbox shared@contoso.com | Remove-MailboxImportRequest
- Run the import command again.
Error 7: Outlook Import/Export option is greyed out
Cause: Cached Exchange Mode, Outlook add-ins, or admin policies are blocking the Import/Export feature.
Fix:
- Open Outlook.
- Go to File > Account Settings.
- Select Server Settings.
- Uncheck Use Cached Exchange Mode.
- Restart Outlook and try the import again.
- If the option is still blocked, use Microsoft Purview or a third-party migration tool instead.
Error 8: PST file cannot be opened or import fails immediately
Cause: If your PST file that you are trying to import is corrupted or damaged, then you may encounter this error.
Fix:
- Verify that the PST file opens without issues in Outlook.
- Repair your PST file using ScanPST.exe – Microsoft’s PST Repair Tool.
- After repairing start the import again
Conclusion
The best method to import PST files into Microsoft 365 shared mailbox depends on your environment and migration needs. For quick single imports, Outlook desktop is fine. For enterprise and bulk imports, use Microsoft Purview. However, if you want to import or export PSTs in bulk, want incremental sync and high-level reports without setting up a lot, you can go for specialized PST migration tools like Stellar Migrator for Outlook.


Jyoti is a Senior Content Writer at Stellar, specializes in simplifying complex concepts in an easy-to-understand way for the end users. Her core expertise lies in providing solutions related to MS Outlook, Microsoft 365 and other email platforms. She focuses on addressing real-world challenges, such as data file (mailbox) corruption and data accessibility issues, helping the users find practical and reliable solutions.
 16 min read