If you’re migrating to Office 365 (Microsoft 365), you probably want to take your mailbox data (in PST files) from the existing email client to Office 365. Also, the PST files are easily accessed from multiple devices and are less vulnerable to corruption when stored on Office 365. There are various methods to import PST files into Office 365. One of the methods to import PST files into Office 365 is the Network Upload method.
In this guide, we’ll walk you through the process of importing PST files into Office 365 using the Network Upload method. We’ll also mention a specialized PST to Office 365 migration tool to import PST files into Office 365.
How to Import PST Files into Office 365 via Network Upload Method?
Before you proceed with the method, ensure the following:
- You (or the user profile you’re using) must have the Mailbox Import Export Role and the Mail Recipients Roles assigned in Office 365.
- PST files should not be larger than 20 GB, as they may impact the performance of the import process.
- You will also need to download the AzureAZCopy tool.
Once all the above conditions are fulfilled, follow the below stepwise procedure to import PST into Office 365.
Step 1: Assign Roles to the User
- Open any web browser on your PC and log in to Office 365 with your credentials.
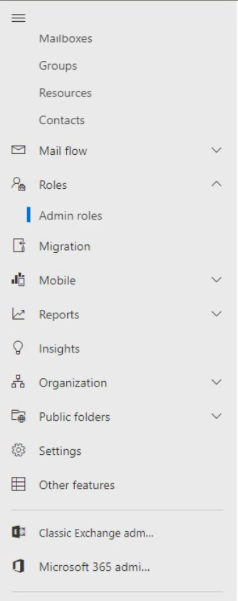
- Open the Exchange Admin Center and go to Roles > Admin Roles.
- The Admin Roles window will open. Look for Organization Management and select it.
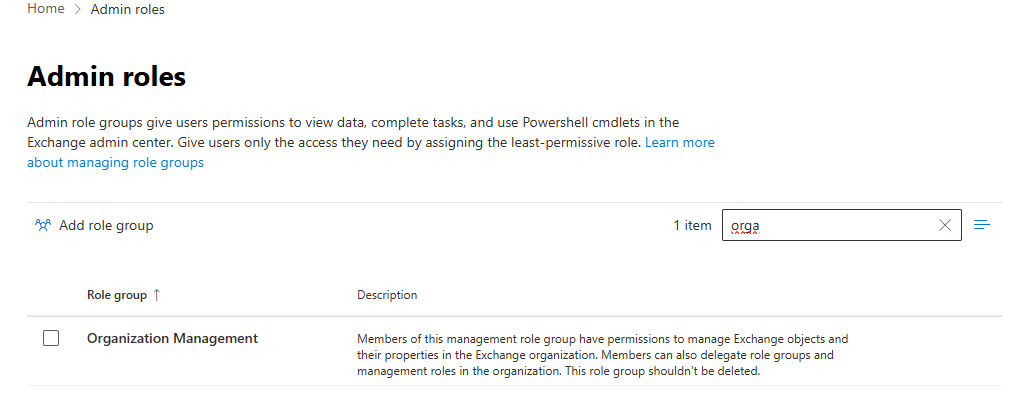
- The Organization Management screen will appear. Select the Permission tab.
- Scroll-down and select the Mailbox Import Export option. Click Save.
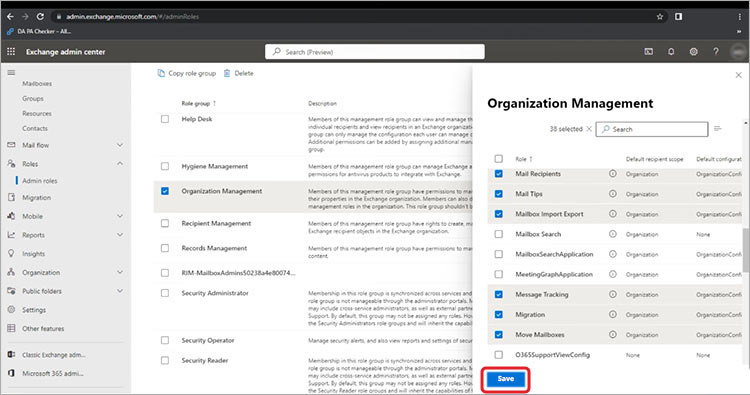
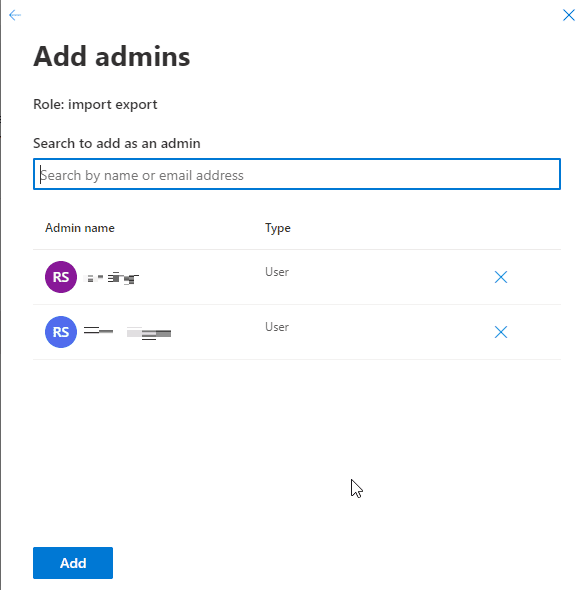
- Next, click on the Assigned tab and then click on + Add.
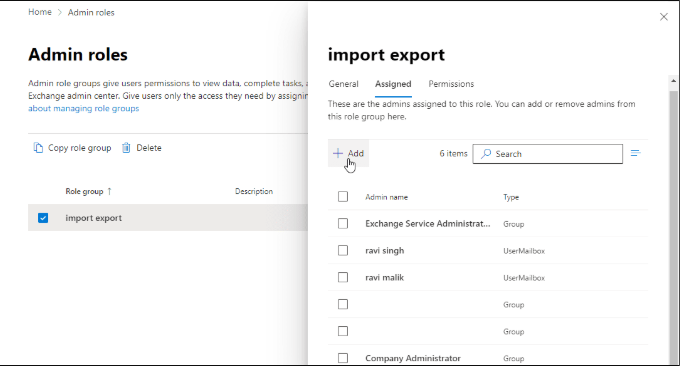
- Search and select the user and click Add.
Step 2: Create PST Import Job in Microsoft 365
The next step is to create an import job. Here is how it is done:
- Click on Microsoft 365 admin center in the left panel to go back to the home page.
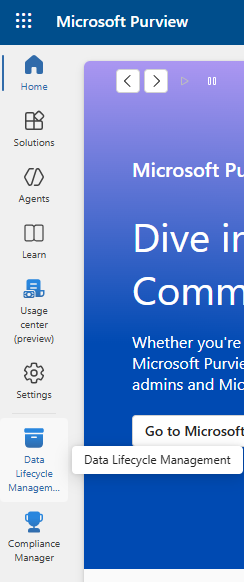
- On the Microsoft 365 admin center, click on Show all in the left panel and click on Microsoft Purview under the Admin centers section.

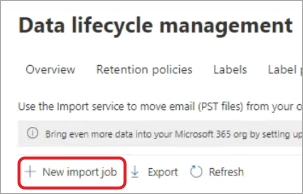
- In the window that opens, click on Data Lifecycle Management.
- Then, select Import in the left pane.
- Now, click on + New import job.
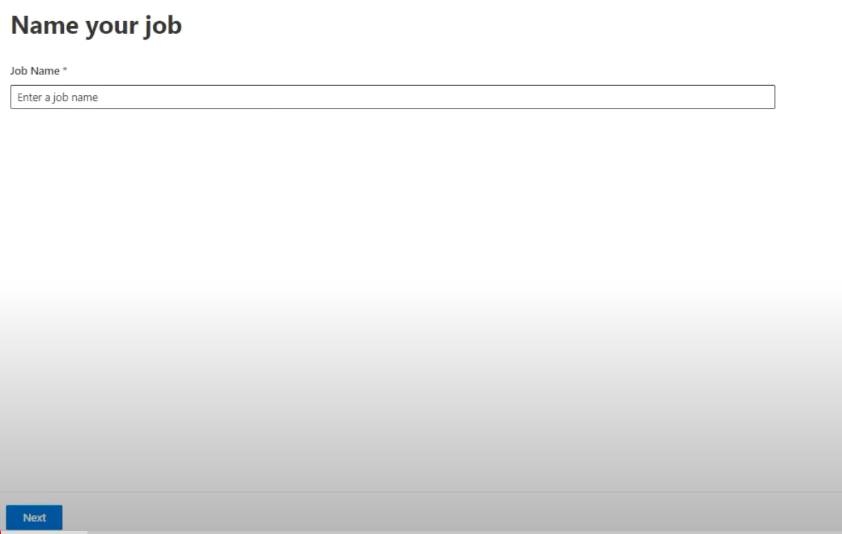
- Enter a job name and click Next.
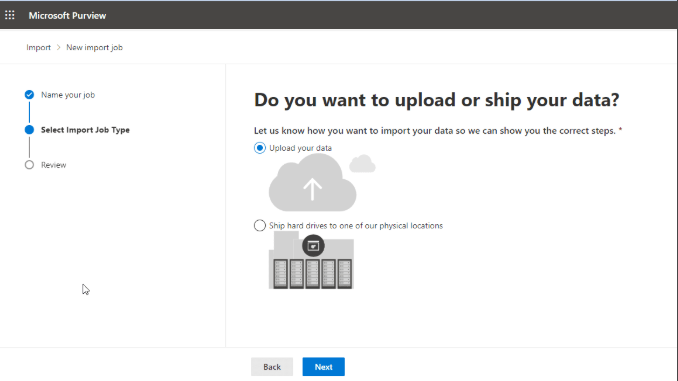
- Select the Upload your data option and click Next.
- Click Show network upload SAS URL.
- Next, click Copy to clipboard to copy the SAS URL. Paste it in a Notepad file and save it.
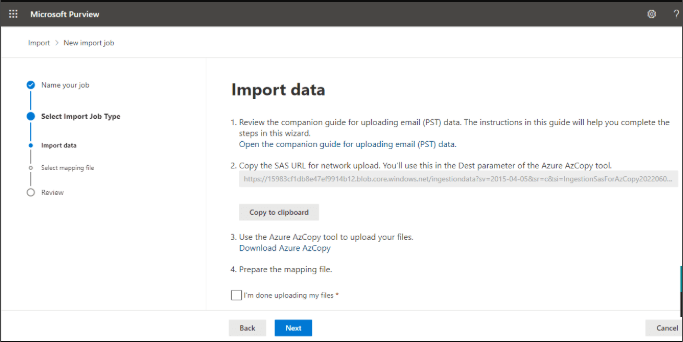
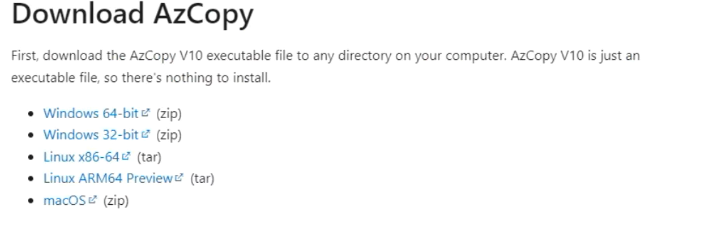
- Click Download Azure AzCopy to download the tool. It will open the Download AzCopy window with various versions of the software available. Select and download the version that is compatible with your system.
Step 3: Upload PST Files to Office 365 Azure Storage
To upload the PST files to Office 365 Azure Storage, follow these steps:
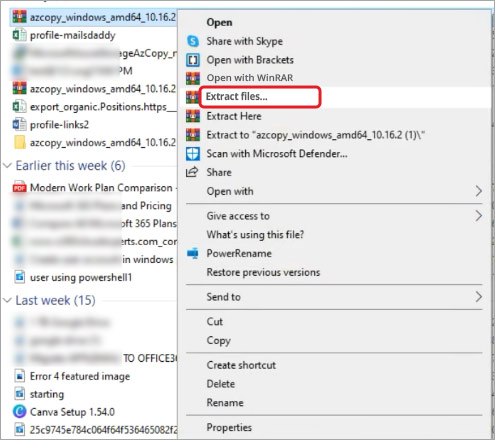
- After downloading the Azure AzCopy tool, extract it from the downloaded zip file.
- Open the extracted folder, copy its path, and paste it in a Notepad file.

- Now, launch Command Prompt and type cd followed by the path of the AzCopy tool copied in the previous step. Press Enter.

- Then, run the following command to upload the PST files to Azure Storage:
NOTES:
- In case you want to upload multiple PST files, simply add the path of the folder containing PST files.
- In case the PST files are in a subfolder, then use --recursive=true at the end of the command.

Wait for the PST files to upload. This may take a while, depending on the network speed, bandwidth, and size of the PST files.
Step 4: Verify the Uploaded PST Files
To verify that the PST files are uploaded successfully on the Azure Storage, you can use the Azure Storage Explorer. Follow these steps:
- After downloading the tool, launch the installer and click Install for me only.
- Complete the installation and then launch the Azure Storage Explorer.
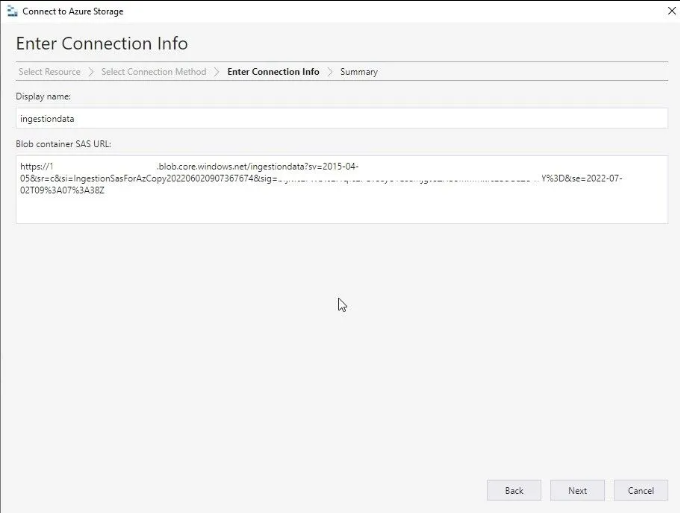
- Select Blob container > Shared access signature URL (SAS) and paste the SAS URL in the Blob container SAS URL field.
- Click Next > Connect.
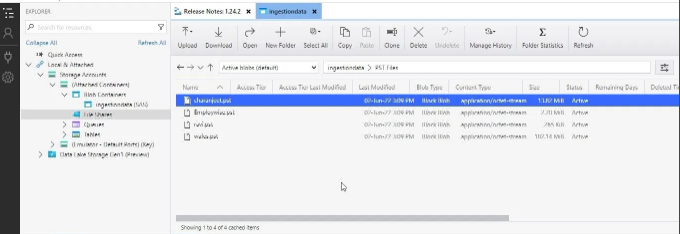
- Under File Shares, you can see the PST folder. Open it to check if the PST files are there.
Step 5: Create a Mapping File
The next step is create a CSV mapping file to map the PST files with the user mailboxes on Microsoft 365. For reference, you can download a copy of the PST Import Mapping file from the Microsoft website.

Step 6: Start PST Import Job
To start the PST import, go back to the Office 365 Import data wizard and follow these steps:
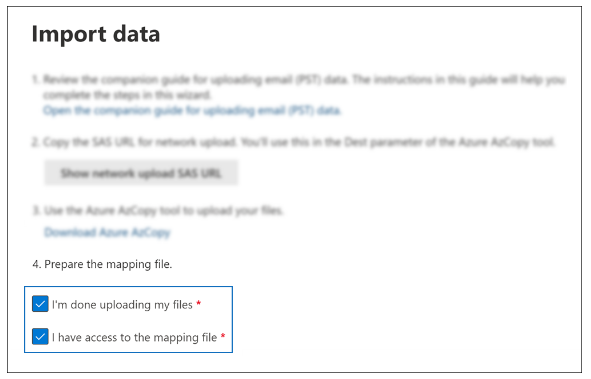
- Tick on the I’m done uploading my files and the I have access to the mapping file checkboxes. Click Next.
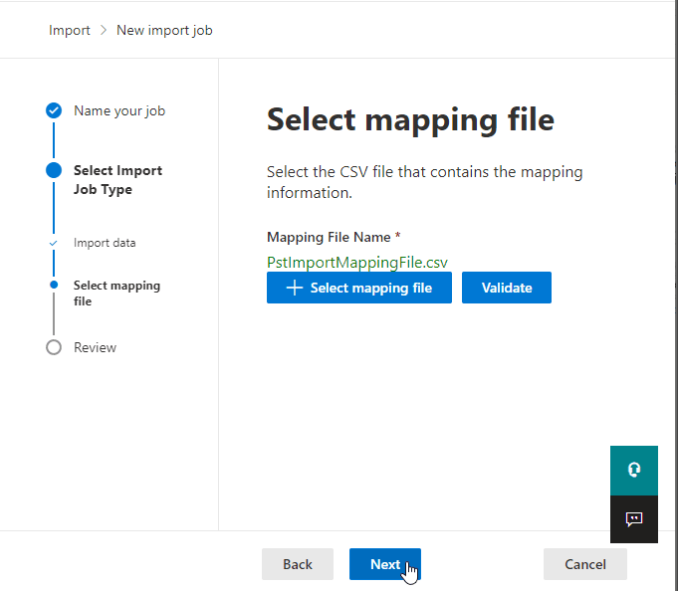
- Click +Select mapping file and then click Validate.
- Once validated, click Next to review the PST import job.
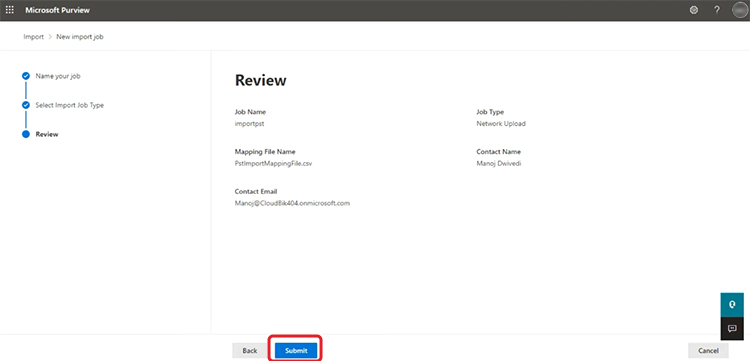
- After reviewing the details, click on Submit and then click Done.
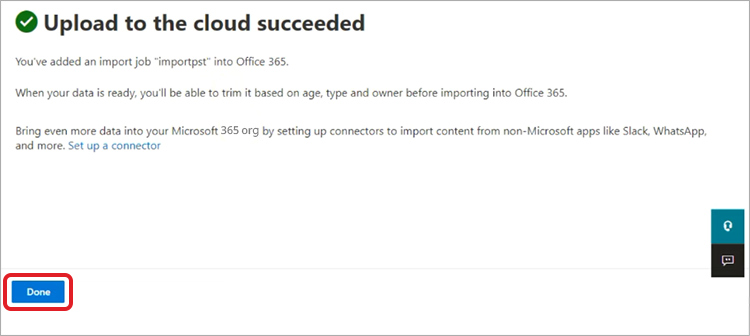
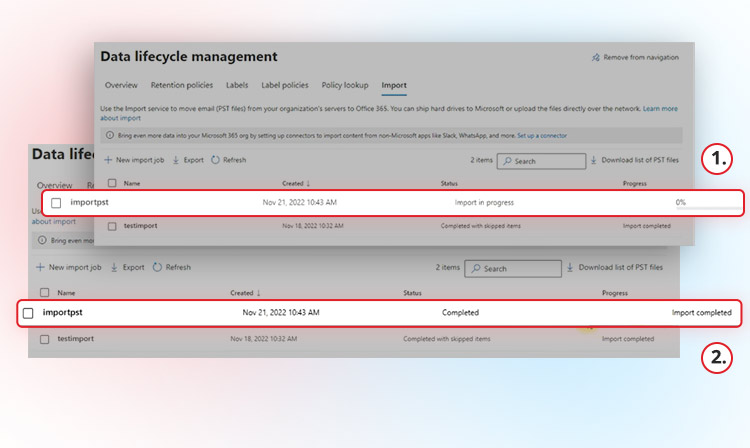
- Once done, it will create the import job. You can check its status in the Progress column under the Import tab on the Data lifecycle management window.

- Now, select the Import Job you’ve just created and click on Import to Office 365.
- It will ask if you want to filter the data or not. Choose a suitable option and click Next.
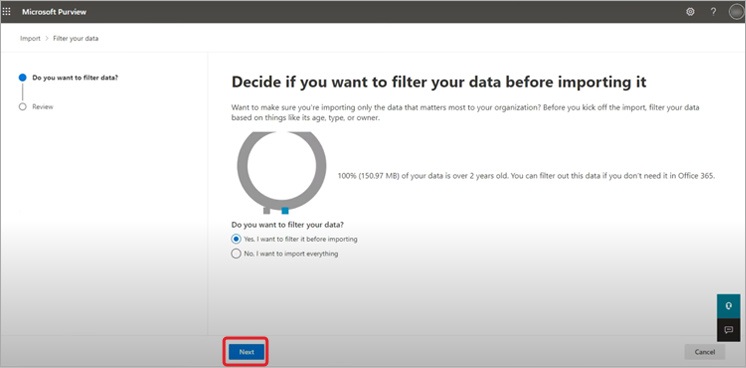
- Now, review the PST file transfer. If everything is fine, click on Submit.
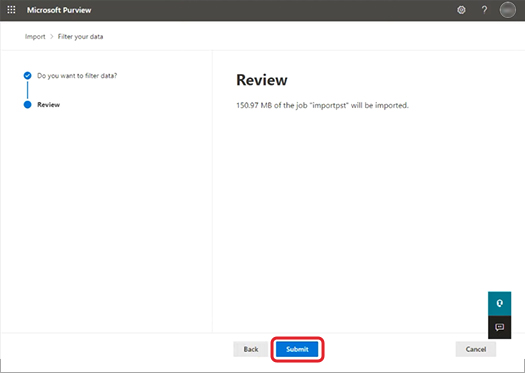
You can see the status of import job on the Data lifecycle management window.
How to Import PST Files into Office 365 Easily and Efficiently?
The above process to import PST files into Office 365 is lengthy and time-consuming. To make it faster and easier, you can use Stellar Migrator for Outlook - a powerful PST to Office 365 migration tool. It can import multiple PST files into Office 365, making the process straightforward and more efficient.
Now, let’s see the step-by-step process to import PST files into Office 365 using this PST to Office 365 migration software:
- Install the Stellar Migrator for Outlook software on your Windows system after purchasing the license.
- Launch the software.
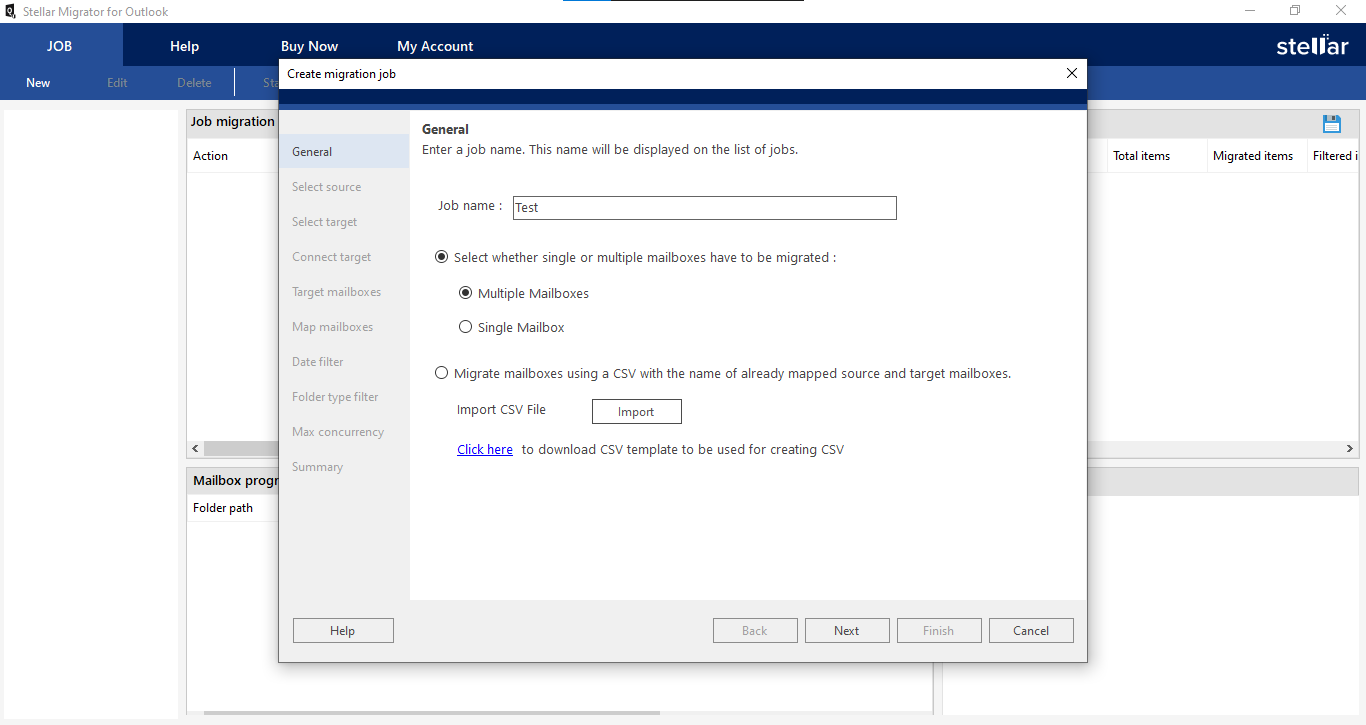
- You will see the Create migration job window. Enter the Job name and choose the Select whether single or multiple mailboxes have to be migrated option. Click Next.
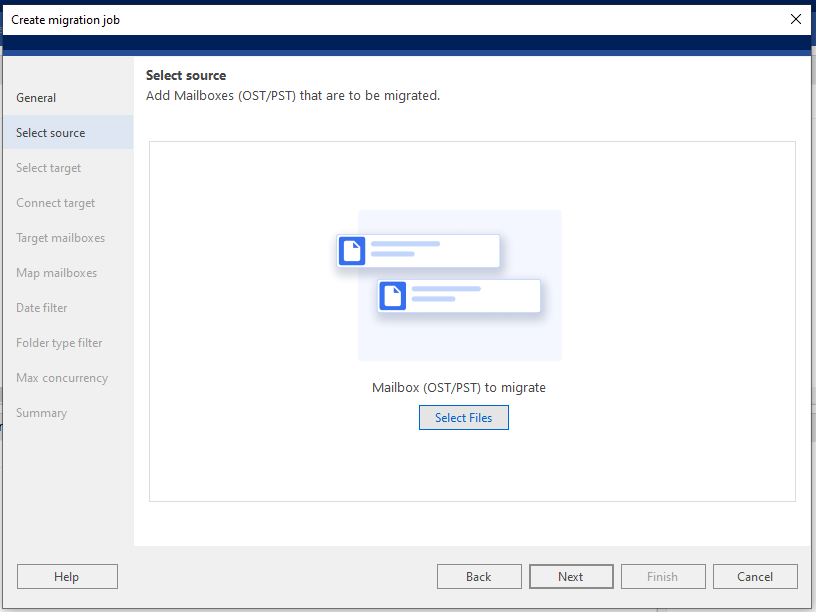
- Next, you will see the Select source window. Click on Select Files to choose the PST files you want to import. Click Next.
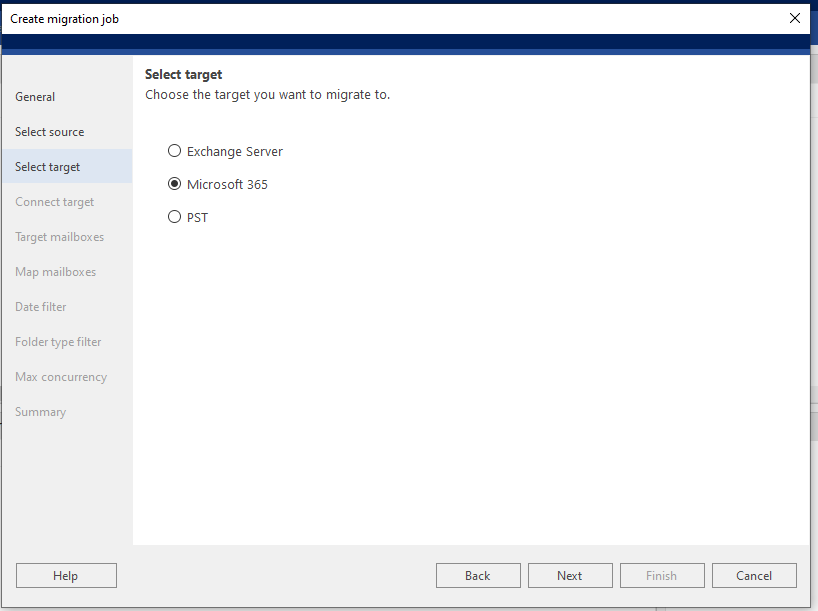
- The Select target screen will appear. Choose the Microsoft 365 option and click Next.
- Now, the Connect Target window will appear. Choose either Auto Registration or Manual Registration.
- Auto Registration – It allows you to automatically connect to Microsoft 365 by using the Global Admin credentials.
- Manual Registration – It requires you to enter the details, such as Email Address, Application (Client) ID, Directory (Tenant) ID, and Client Secret Value. Click on Validate after that.
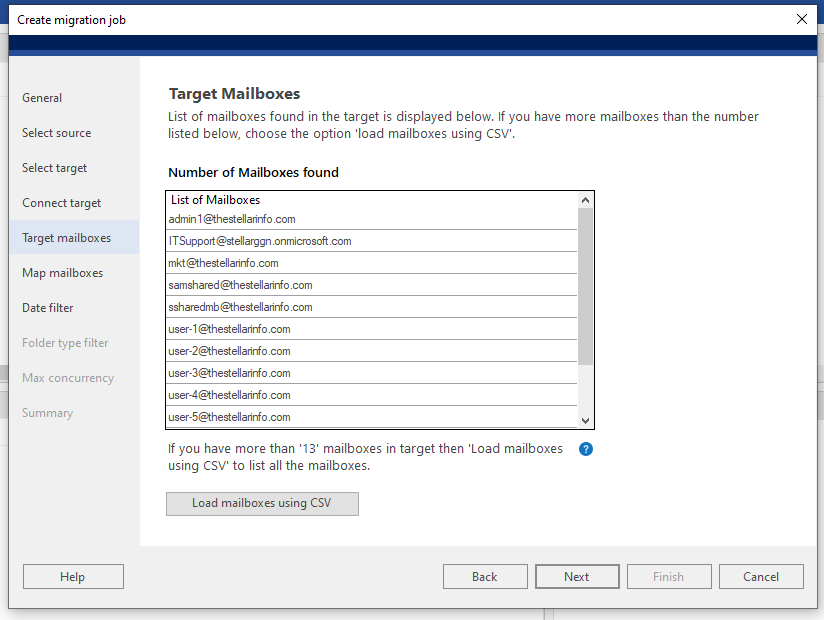
- After successful connection, the software will display a list of Target mailboxes that are found on Office 365 (target server). You can preview and validate the mailboxes. Then, click Next.
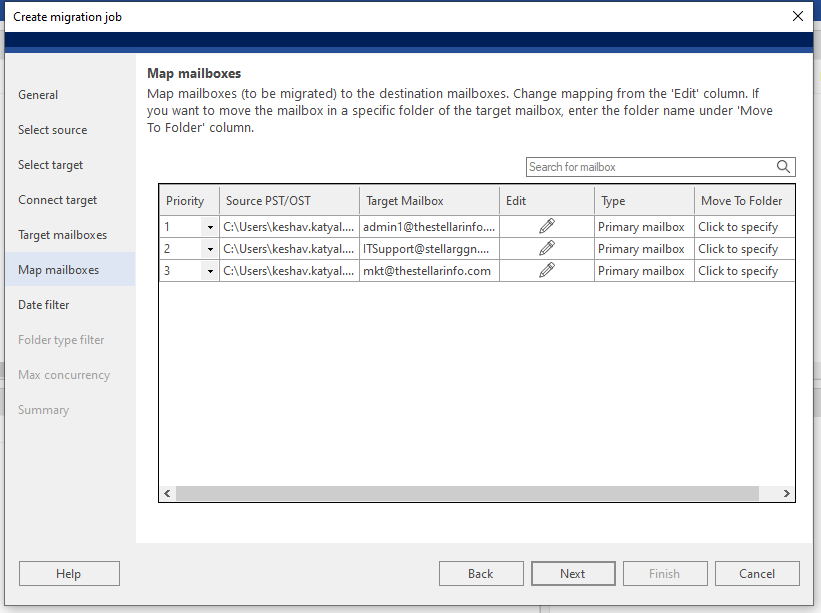
- The software will show the Map mailboxes screen. You can change the mailboxes mapping from the Edit column. If you want to migrate PST file data to a specific folder, use the Click to specify option. Click Next.
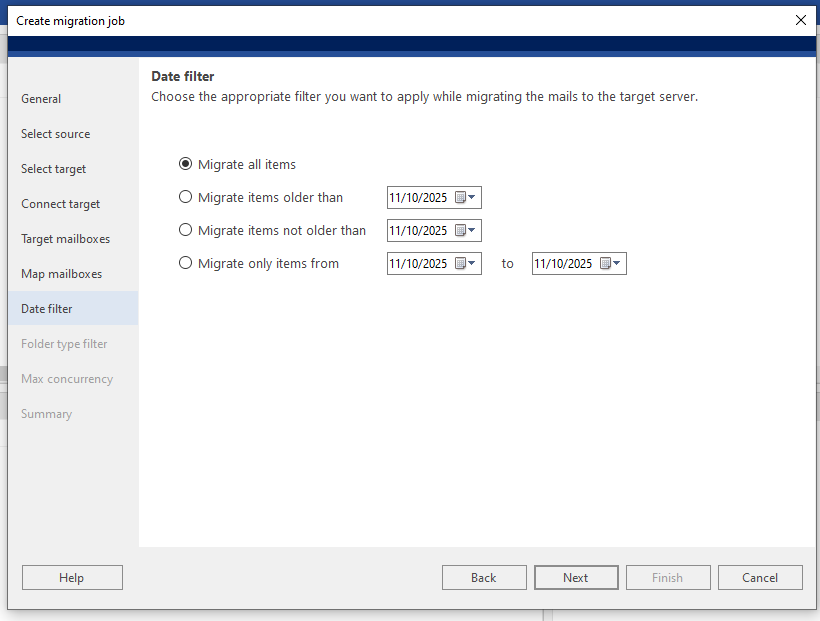
- The Date filter screen will appear. Choose a date filter option and click on Next.
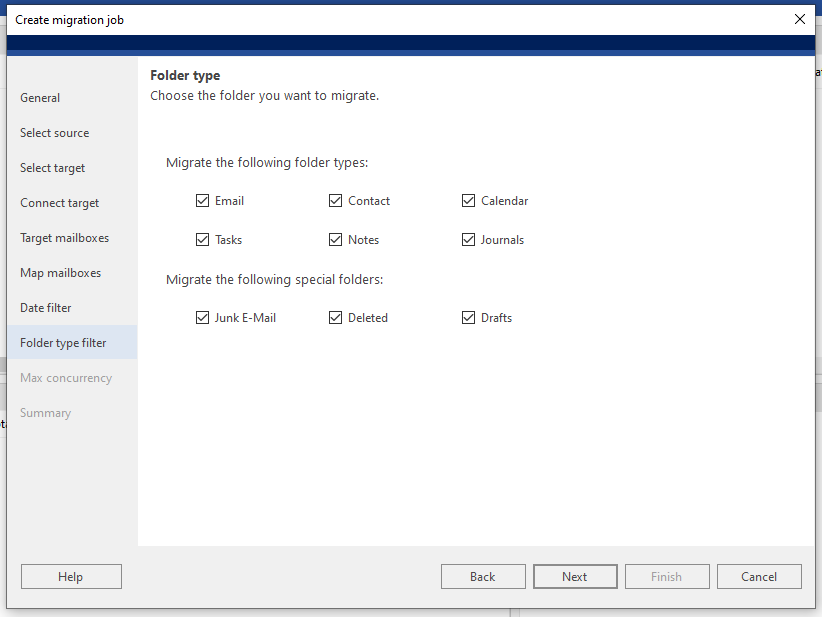
- The Folder type window will appear. Select the folders you want to migrate. By default, all mailbox folders are selected. Click on Next.
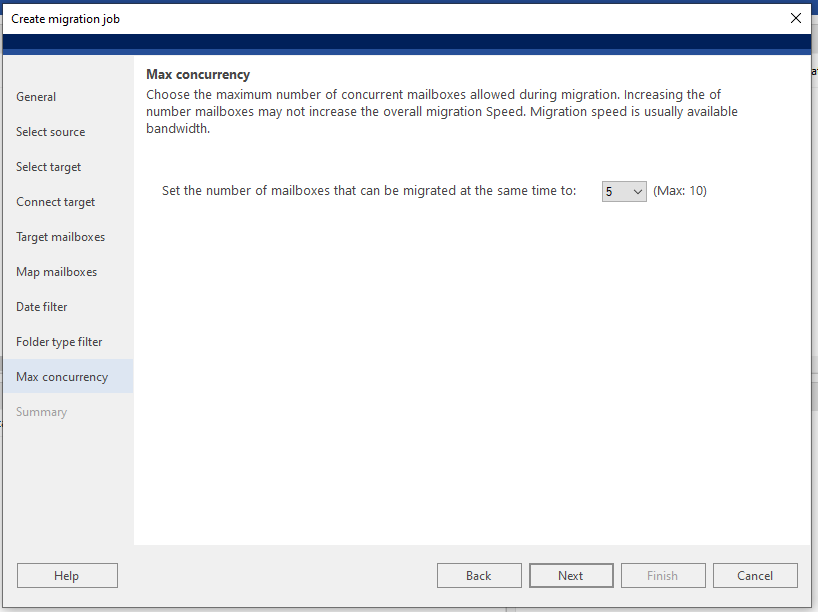
- You will see the Max concurrency window. Use the dropdown list to select the number of mailboxes to be migrated simultaneously. You can select maximum of 10 mailboxes. Click Next.
- The Summary window will appear. Review all the selected parameters before creating the job.
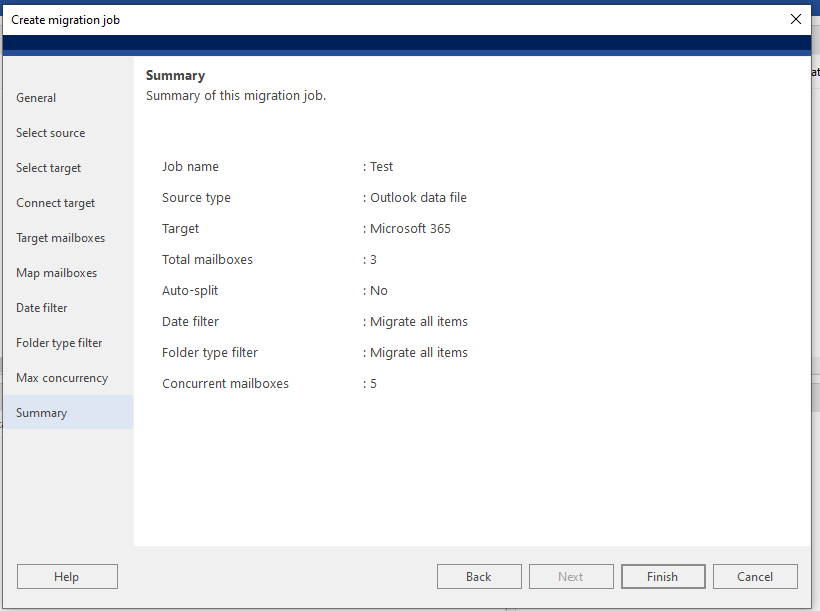
- After you have reviewed the selections, click on Finish.
- You will see the Job created dialog box. Click OK.
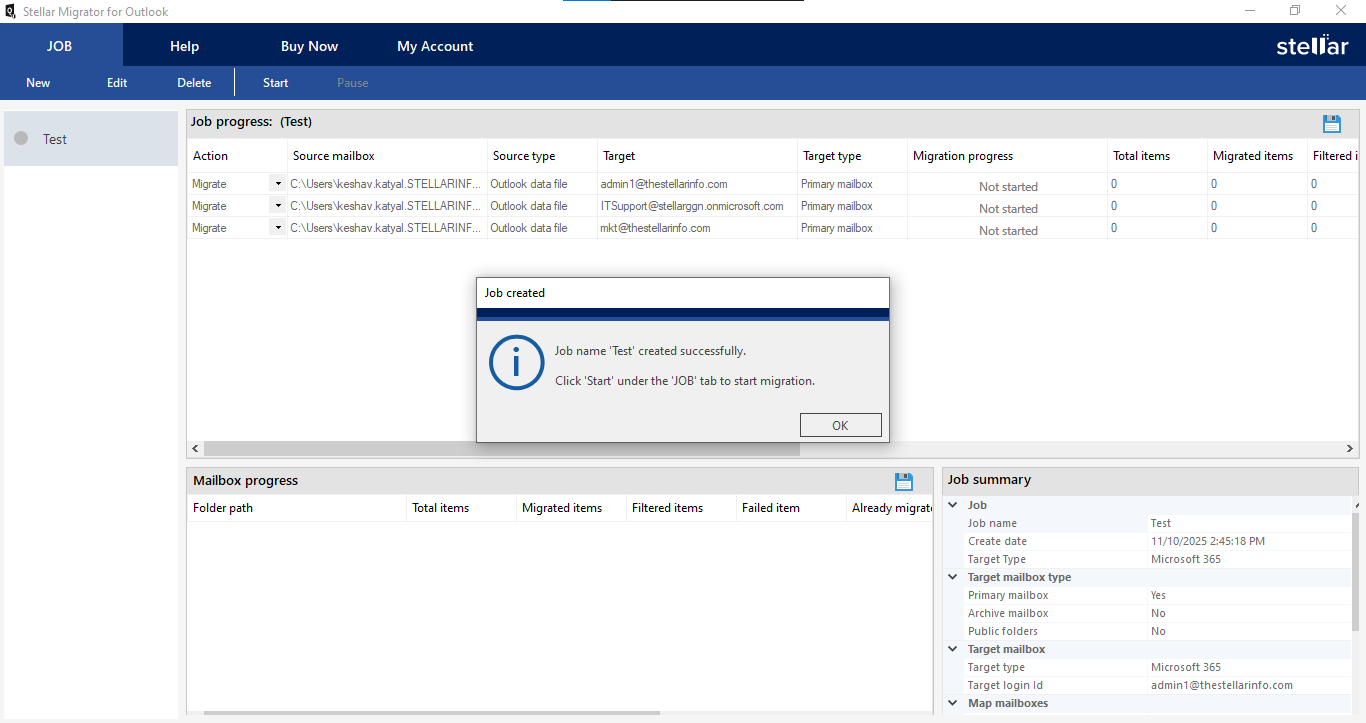
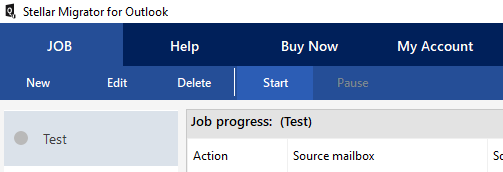
- After this, click on Start in the ribbon to initiate the import process.
- Next, click on Connect to login to the licensing server.
- After the connection is established, the software will begin importing the PST files into Office 365.
Once the import process is completed, you will see the Completed status in the Mailbox progress window.
Conclusion
Network Upload is one of the manual methods to import PST file into Office 365. You can follow the steps mentioned in this guide to import your PST files into Office 365 using this method. However, this method is lengthy, tedious, and time-consuming as it requires you to follow several steps. However, using Stellar Migrator for Outlook to import your PST files into Office 365 will definitely make the process easier and more efficient.


A passionate writer driven by his interest in everything tech, Keshav Katyal has always been captivated by the latest gadgets since childhood. His interest in technology grew when he got his first gaming console, the Nintendo Game Boy Advanced.
 16 min read