

Office 365 Email Limits: How and When to Disable EWS Throttling in MS 365 & Exchange Online?
April 7, 2026| 6 min read


Our content follows trusted Editorial Standards - accurate & unbiased.
Summary: Exchange 2016 has reached its end of life in October 2025. This means it no longer receives any security updates/patches. This makes migration to Microsoft 365 urgent. For this, the recommended method is hybrid using the Hybrid Configuration Wizard (HCW). This is a batch-based migration with full coexistence and ensures zero-downtime. The process typically takes 4–8 weeks depending on mailbox count and available resources.
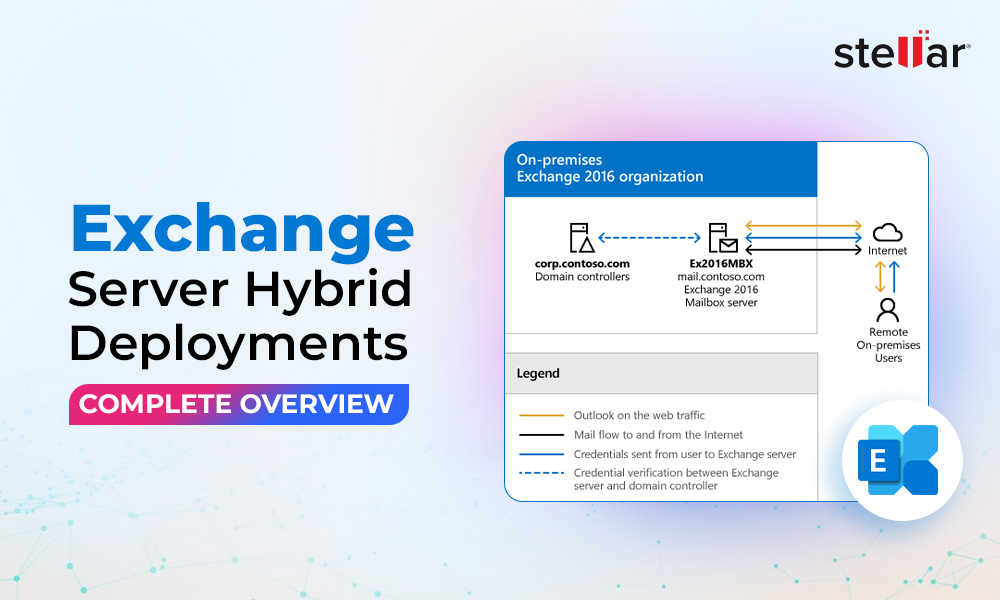
Free Trial 2 Mailboxes FreeFor migrating an Exchange Server 2016 to Microsoft 365, hybrid method is recommended as Exchange Server 2016 is out of support and end of life, since October 2025. The hybrid method offers zero downtime with seamless migration. It is a batch-based migration with full hybrid co-existence with Microsoft 365.
Exchange Server 2016 is still functioning but it is no longer receiving any security updates. It has several advantages compared to older versions. These are:
Running a core application such as Exchange Server 2016 would mean a big security risk for the business. Here’s the comparison with other server versions.
|
Factor |
Exchange 2013 |
Exchange 2016 |
Exchange 2019 |
|
End of Support |
April 2023 - Already EOL |
October 14, 2025 - Already EOL |
|
|
Time Remaining |
Zero. No support |
Zero. No support |
Zero. No support |
|
Security Patches |
None, since April 2023 |
Ended October 2025 |
Ended October 2025 |
|
Minimum CU for HCW |
CU23 only |
CU13 or later |
CU12 or later |
|
MAPI over HTTP |
Must be enabled manually |
Must be enabled manually on older installations |
Default |
|
Public Folder Type |
Legacy Public Folders |
Modern Public Folders |
Modern Public Folders |
You should make sure the following before proceeding:
Once the above are met, you can proceed with installing the Hybrid Configuration Wizard (HCW) and migrate the data.
Listed below are the possible ways for Exchange 2016 to Office 365 migration.
|
Method |
Best For |
Notes |
|
Hybrid Migration (HCW) |
Recommended for all |
|
|
Under 150 mailboxes only |
|
|
|
Stellar Migrator for Exchange |
Organizations without Exchange admin expertise |
|
Below, we will be explaining the stepwise process.
You need first ensure that your server is fully updated and CU 13 or higher is installed. For this, the below PowerShell command.
As an alternative, you can also use this command:

If you’ve an older build of Exchange Server 2016, this would not be enabled by default. So, you can use the below command to check MAPI ove HTTP is enabled on your server:

If it’s disabled, use this command to enable it:

After enabling the MAPI over HTTP, run the below command:
Certificates form an integral part of the migration project. The HCW and hybrid method rely on them. These are required for secure communication between on-premises server and Office 365 (Exchange Online). Self-signed certificates will not work. Moreover, certificates which are due to expire during the migration can negatively impact the migration process.
Check current certificates:
Get-ExchangeCertificate | fl FriendlyName, Subject, NotAfter, Services
Enable a certificate for SMTP/IIS (replace thumbprint with your actual value):
Enable-ExchangeCertificate -Thumbprint <thumbprint> -Services SMTP,IIS
The Entra ID connect is essential for the hybrid method. It will synchronize the users from your local Active Directory to Microsoft Entra ID.
You can choose either the Express Settings or the Custom Installation, during the setup process. The Express Setting is the simplest one as it sets up a single forest, with password hash synchronization.
During the process,
This will install Entra ID Connect and immediately run a full synchronization.
Once you’ve downloaded the Hybrid Configuration Wizard (HCW), select the Office 365 Worldwide. Sign in using the on-premises server credentials and then Office 365 global admin credentials.
You can select the suitable hybrid mode depending on your business needs. The wizard offers:
After this, you need to set the mail flow configuration. You can select the Centralized Mail Transport to route emails through the Exchange Server. Confirm the certificates to be used. During the setup, it will continue and create the required connectors.
Next, you need to enable the Security authentication and OAuth which will allow the token-based authentication for free/busy, mailbox moves, and eDiscovery features. The wizard enforces TLS 1.2. It may fail during the authentication process, if your on-premises server doesn’t support it or it is not enabled.
Now, you can start the migration of data. First, you have to connect to Microsoft 365 by using the below command:
Connect-ExchangeOnline -UserPrincipalName admin@yourdomain.com

Next, create the batch for migration. Use the below command:

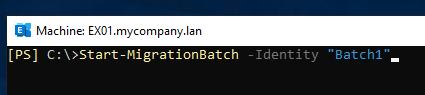
After this, you can start the batch by using this command:
Start-MigrationBatch -Identity "<batch name>
Here’s the command to check the migration batch status:
Get-MigrationBatch -Identity "<batch name>" | FL Identity,Status, TotalCount, SyncedCount, FinalizedCount, PercentageComplete

For a full reference of PowerShell commands to monitor migration progress, see how to check migration status with PowerShell.
Once ready, run the complete command (see the below example) to finalize the batch.
Complete-MigrationBatch -Identity "<batch name>

When all the batches are completed, confirm that the mailboxes are accessible in Outlook client.
Note: If you face any error during batch migration, refer our hybrid migration troubleshooting guide.
You can use the migration scripts provided by Microsoft to migrate public folders. For a full version-by-version guide, see our public folder migration to Office 365 guide.
The first part is to prepare the on-premises infrastructure by running the following scripts to ensure that the public folders are compliant.
These scripts will create empty public folders on Microsoft 365.
Now, connect to the tenant by executing this command:
Connect-ExchangeOnline -UserPrincipalName admin@contoso.com

When connected, create a new migration endpoint. Use this command:
New-MigrationEndpoint -PublicFolder -Name "PFEndpoint" -RemoteServer "mail.contoso.com" -Credentials (Get-Credential)

After creating the migration endpoint, create the migration batch using the public folder mailbox mapping file:
New-MigrationBatch -Name "PFMigration" -CSVData ([System.IO.File]::ReadAllBytes("PFMailboxMap.csv")) -SourceEndpoint "PFEndpoint

Now, start the migration batch by running the below command:
Start-MigrationBatch -Identity "PFMigration

You can use the following commands to monitor the migration status:
Get-MigrationBatch "PFMigration" | FL Status, TotalCount, SyncedCount

Get-MigrationUser -BatchId "PFMigration" | FL DisplayName, Status, PercentageComplete

Once done, use the below commands to complete the migration.
Set-OrganizationConfig -PublicFoldersLockedForMigration $true

Complete-MigrationBatch -Identity "PFMigration"

The native methods involve complex scripting and require technical expertise to setup the hybrid model, maintain and support it, as well as administrative effort. Stellar Migrator for Exchange – a specialized Exchange migration tool – can help simplify the process.
This tool allows to directly connect to the on-premises Exchange and Microsoft 365. You can then select and migrate mailboxes to Office 365. It comes with features such as automatic mailbox matching, and real-time and post migration reporting. It supports cross-forest migration and delta (incremental) synchronization.
Before purchasing the license, you can use its free trial version (with 2 mailboxes limit). It is compatible with all versions of Exchange - from 2007 to the newest Subscription Edition (SE).
Below are some tasks you should perform after the migration:
Once all done and verified, decommission your Exchange Server.
In this guide, we have explained the detailed process of Exchange Server 2016 to Office 365 migration. The full hybrid migration process can take a lot of time and is considered complex to setup and maintain. To make the migration process easier, you can opt for Stellar Migrator for Exchange. This specialized tool supports migration from any local server to Office 365 and vice versa. It also supports on-premises to on-premises and tenant to tenant migration.
Senior Content Writer
This article was written by Shelly Bhardwaj, a Content Writer at Stellar Data Recovery.
Curious about our content creation process? Take a look at our Editor Guidelines.
April 7, 2026| 6 min read
March 17, 2026| 6 min read
February 3, 2026| 6 min read


Get 2 Credits FREE to Experience Seamless Mailbox Migration
 6 min read
