Exchange Online or Microsoft 365 offers numerous benefits, including enhanced data security, storage capacity, collaboration tools, etc. However, migrating from Outlook 2013 to Exchange Online can be a complex process. This step-by-step guide will walk you through the process of migrating Outlook 2013 to Exchange Online with the right approach, preparation, and guidance for a seamless transition.
Steps to Migrate Outlook 2013 to Exchange Online
Outlook 2013 stores mail items in PST or OST file format based on the mail server. If the mail server is POP, Outlook stores mail items in PST format. If the mail server is IMAP or Exchange, the mail items are stored in an OST file. However, you can export all mail items from the IMAP/Exchange account to PST format via the Outlook Import/Export wizard. Once the mail items from Outlook 2013 are saved in a PST file, follow the below steps to migrate Outlook 2013 PST file to Exchange Online.
Step 1. Set up Exchange Online
Make sure you have set up the Exchange Online account and configured the necessary DNS settings. Also, you need to,
- Set up the same number of user accounts with the same names in Exchange Online
- Assign licenses to activate their mailboxes
- Configure other necessary policies that align with your organization's requirements
Step 2: Export Outlook Data
First, export all mailbox data from Outlook 2013, including emails, contacts, calendars, and tasks to PST files. For this, you can either use the built-in Outlook Import/Export wizard or third-party OST to PST converter tools. Post export, copy all the PST files from Outlook 2013 to a single folder. You can store this folder anywhere.
Step 3: Assign Mailbox Import Permission
Make sure the import-export role is assigned to the global administrator or user account which is going to be used to perform the migration. This role is not assigned to any user, including administrator, by default. To do this,
- Open the Microsoft 365 Exchange Admin Center.
- Navigate to Roles > Admin Roles.
- Select and then assign the import-export role to the user or administrator.
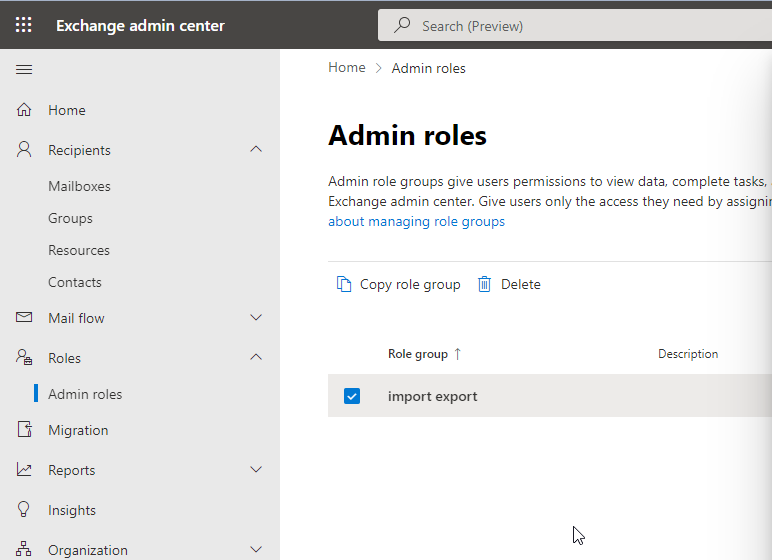
- Continue to follow the onscreen instructions to complete the process.
Once the role is assigned, you can create a PST import job and then upload and import the PST files into the Exchange Online mailboxes.
Step 4: Create a PST Import Job
Open compliance microsoft and log in using the global administrator account. Then, follow the below steps to create a PST import job:
- In the Microsoft 365 dashboard, click Data Lifecycle Management > Microsoft 365 > Microsoft 365 > Import.
- Click on the +New import job button.
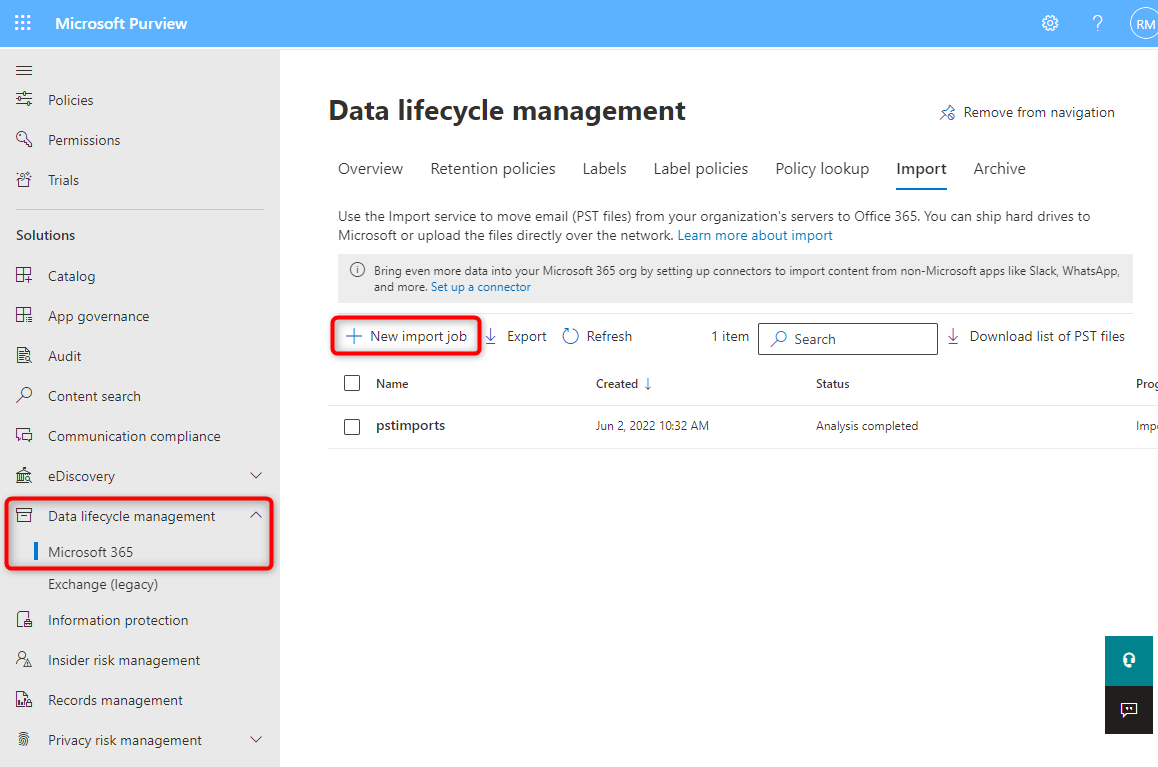
- Type a name for the PST import job and click Next.
- Then, click Upload your data (for the Network Upload method) and click Next.
- Click Show network upload SAS URL and copy it.
- Click Download Azure AZCopy to download the AZCopy tool on your system.
Note: Uploading PST files by yourself can be a taxing process. It also requires the use of PowerShell. If you are not familiar with PowerShell or don’t feel comfortable using it, you can select the ‘Ship hard drives to one of our physical locations' instead of the ‘Upload your data’ option. Then, you need to copy all PST files to a hard drive, encrypt the drive with BitLocker, and then ship it to the nearest or any one of the Microsoft data centers. Once it reaches the Microsoft Data Center, Microsoft will upload the PST files to Azure storage on your behalf. However, they charge you $2/GB or $2000/1TB.
Once the PST files are uploaded to Azure storage, you can import the PST files and complete the migration process.
Step 5: Upload and Import Outlook 2013 PST Files into Exchange Online
To upload the PST files to Azure storage, follow these steps:
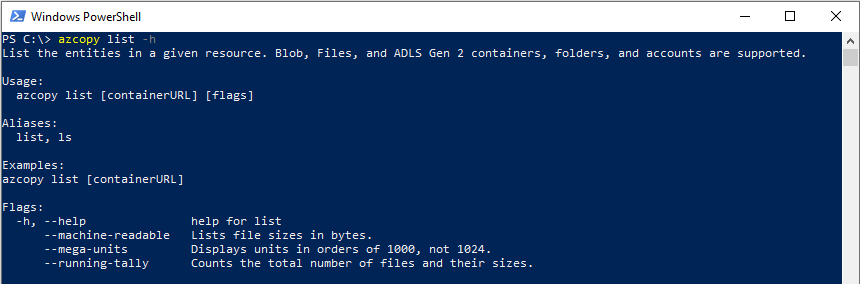
- Press Windows + S and search PowerShell.
- Click on PowerShell and choose Run as administrator.
- Using the cd command as mentioned below, navigate to the folder location where the Azure AZCopy tool is extracted/stored.
cd C:/Users/YourUserName/Desktop/
Use the above command if you have extracted the Azure AZCopy (azcopy.exe) on the Desktop. - Then, run the following command to upload all the PST files from the folder to Azure Blob storage.
azcopy.exe copy "" ""
- This may take a while to complete.
- Meanwhile, you can create a CSV mapping file that is required to map the uploaded PST files with user mailboxes you created on Exchange Online. To get started, download this sample CSV file and then fill in the details, such as FilePath, Name, Mailbox, and TargetRootFolder as shown below.

- Use MS Excel or Google Sheets to edit it.
- After the PST upload process is finished and you have created the CSV mapping file, go back to the Microsoft 365 dashboard (PST import job) and select the below options.
- ‘I’m done uploading my files
- ‘I have access to the mapping file
- Then, click Next.
- On the next screen, click +Select mapping file.
- Browse and select the CSV mapping file you just created.
- After the upload, click Validate. This will check for any errors or issues with the CSV file. If everything is good, you can click Next.
- Then, continue to follow the wizard to start the PST import and finish migrating Outlook 2013 to Exchange Online.
The job doesn’t end here. You must monitor the progress and check for any error or issue during the import job.
In case you are not able to resolve the issue or find the entire process cumbersome and tiring, you can use an advanced Outlook to Exchange Online migrator tool, such as Stellar Migrator for Outlook, to quickly migrate Outlook 2013 to Exchange Online in a few clicks. The software makes the entire migration process much easier and more convenient. Besides, it can save you
- Significant time
- Manual efforts
- Valuable resources
It also helps save additional cost that is required to execute the manual network upload or drive shipping method for the migration. Using this software, you can complete the Outlook 2013 to Exchange Online migration in a few simple steps:
- Launch the software.
- Select the PST file of your account configured in Outlook 2013.
- Enter the credentials of the Exchange Online or Microsoft 365 mailbox or the global administrator to upload the PST file.
Unlike manual methods that limit you to upload 20 GB PST files, you can upload PST files as large as 50 GB using the software with complete integrity. It uses Microsoft Modern Authentication for a secure connection with Exchange Online and upload/import your PST files. So, you don’t need to worry about data safety and security.
Conclusion
Migrating Outlook 2013 to Exchange Online can be a complex process. However, by following this step-by-step guide, you can seamlessly migrate Outlook 2013 to Exchange Online with complete integrity. Make sure to address any potential issues during the migration process. To avoid bad items or missing mail items after import, scan the PST files with SCANPST.exe (Inbox Repair tool) before uploading and importing the PST files. To avoid all the hassles, and save time, cost, and resources, use Stellar Migrator for Outlook. The software allows you to import multiple PST files into Exchange Online simultaneously from multiple PCs or workstations across your network.


-1193.jpg)
 6 min read