&media=https://www.stellarinfo.com/public/image/article/How-to-Recover-Deleted-Files-from-Empty-Mac-Trash-Step-by-Step-Guide-1923.jpg&url=https://www.stellarinfo.com/article/recover-deleted-files-from-empty-mac-trash.php)


Did you empty the Trash on your Mac and then realized some important files were in it? Before you panic and start clicking around your Mac, take a breather. Here's something you need to know –emptying the Trash doesn't actually erase your files. macOS just marks that space as available to be overwritten, so the data stays intact until something new gets written on top of it. That's why timing matters.
On modern Macs with SSD and TRIM enabled, the recovery window can be small. On older HDDs, it’s longer. This guide covers all the methods to recover deleted files after the Trash is emptied, including checking APFS local snapshots, app specific Recently Deleted folders, and Terminal recovery from ~/.Trash directory.
Can I Actually Recover my Data from Empty Mac Trash?
Not all deleted files have the same recovery odds – your chances depend on a few important factors. Take a moment to access them before choosing a recovery method. First of all, stop using your Mac as further use increases the risk of overwriting the very data you’re trying to recover.
- Is the Trash actually empty? Double-check before anything else. macOS has an option to automatically delete Trash contents after 30 days – files may be gone without you manually emptying it. In case the files were deleted from an external drive then that drive needs to be connected for those files to appear in Trash.
- Do you have a Time Machine backup? If yes, that's your most reliable path — go to Method 1. No external drive connected? APFS local snapshots may still help. Go to Method 2.
- Were the files in Photos, Notes, Mail, or Messages? These apps keep their own Recently Deleted folders, separate from Trash. Check Method 4 before reaching for recovery software.
- Are you on an SSD or HDD? Most Macs from 2013 onward use SSDs with TRIM enabled — deleted blocks can be purged within minutes. HDD users have a longer window. Either way, act fast.
- No backup and Trash is already empty? Mac Data recovery software is your best option. Go directly to Method 7.
How Trash Works on Mac?
Deleted files on Mac are moved to the Trash folder. Those deleted from the internal drive are stored in the hidden ~/.Trash folder and the ones which are deleted from external drives go to a hidden .Trashes folder on that volume. The files remain there until you empty the Trash or macOS removes them automatically - if the 30-day auto-delete option is enabled.
When you empty the Trash macOS only removes the file's directory entry and marks those storage blocks as available. The data physically remain on disk until new data overwrites it, which is exactly what makes recovery possible.
macOS can reclaim those blocks quickly on SSDs with TRIM enabled, sometimes, within minutes. On HDDs, the data typically lingers longer. Hence act fast and stop all Mac activity to ensure successful recovery.
How to Recover Deleted Files from Emptied Mac Trash?
We will outline the most effective ways to recover data from an emptied Mac Trash – using both backups and data recovery software. The table below maps each recovery path to your specific scenario – find yours and jump straight to the right section.
|
Method |
Works Without Backup? |
Best For |
|
Time Machine |
No - Needs prior setup |
Mac users with an external backup drive |
|
APFS Local Snapshot |
Yes (if within 24 hours) |
Users without external backup drive connected |
|
iCloud Recently Deleted |
No - Needs sync enabled |
iCloud Drive users |
|
App-Specific Recently Deleted |
Yes |
Files deleted from Photos, Notes, Mail, or Messages |
|
Third-Party Cloud Backup |
No - Needs prior setup |
OneDrive, Google Drive, Dropbox users |
|
Terminal |
Yes (if Trash not emptied) |
Tech-savvy users, recent deletion |
|
Data Recovery Software |
Yes |
No backup; Trash already emptied |
1. Recover Using Time Machine
Time Machine, Apple’s built-in backup system, is an excellent tool for recovering deleted files. If you have emptied the Trash, this is exactly the kind of situation Time Machine is designed for – all you need is the external hard drive containing the Time Machine backups and your Mac.
- Connect the Time Machine backup drive to your system
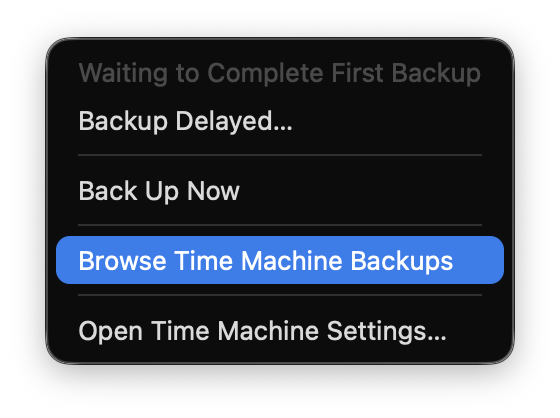
- Click the Time Machine icon in the menu bar
- Select Browse Time Machine Backups
- Use the timeline to navigate back to a date before the file was deleted
- Select the backup files/folders you want and click Restore
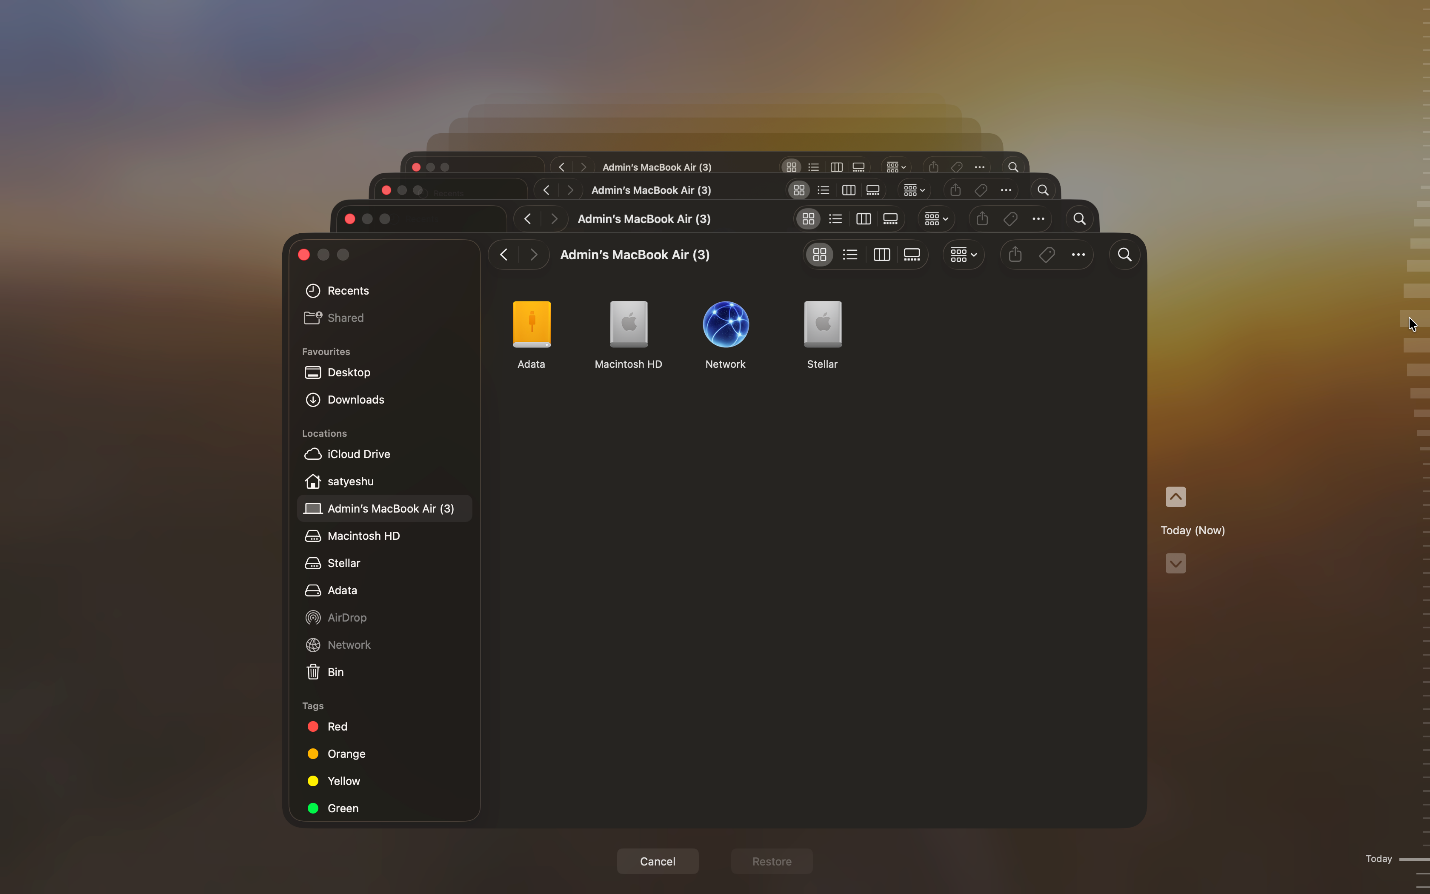
- The file will return to its original location
2. Recover Deleted Files Using APFS Snapshots
No external backup drive connected? You may still have a recovery path. Time Machine on macOS High Sierra and later automatically creates hourly local snapshots directly on your Mac's internal drive – no external disk needed. These snapshots are kept for more than 24 hours, giving you a short but genuine window to recover recently deleted files.
Note: Local snapshots are only created if Time Machine is already enabled on your Mac.
- Open terminal on your Mac
- Type the following command and press Return:
tmutil listlocalsnapshots /
- A list of snapshots with timestamps will be displayed. For example: com.apple.TimeMachine.2026-05-28-155033
- Identify the one from before deletion
- Open Finder and navigate to the folder that originally contained the deleted file
- Click the Time Machine icon in the menu bar
- Select Browse Time Machine Backups
- Use the timeline to navigate to the snapshot timestamp you just identified
- Select the file and click Restore
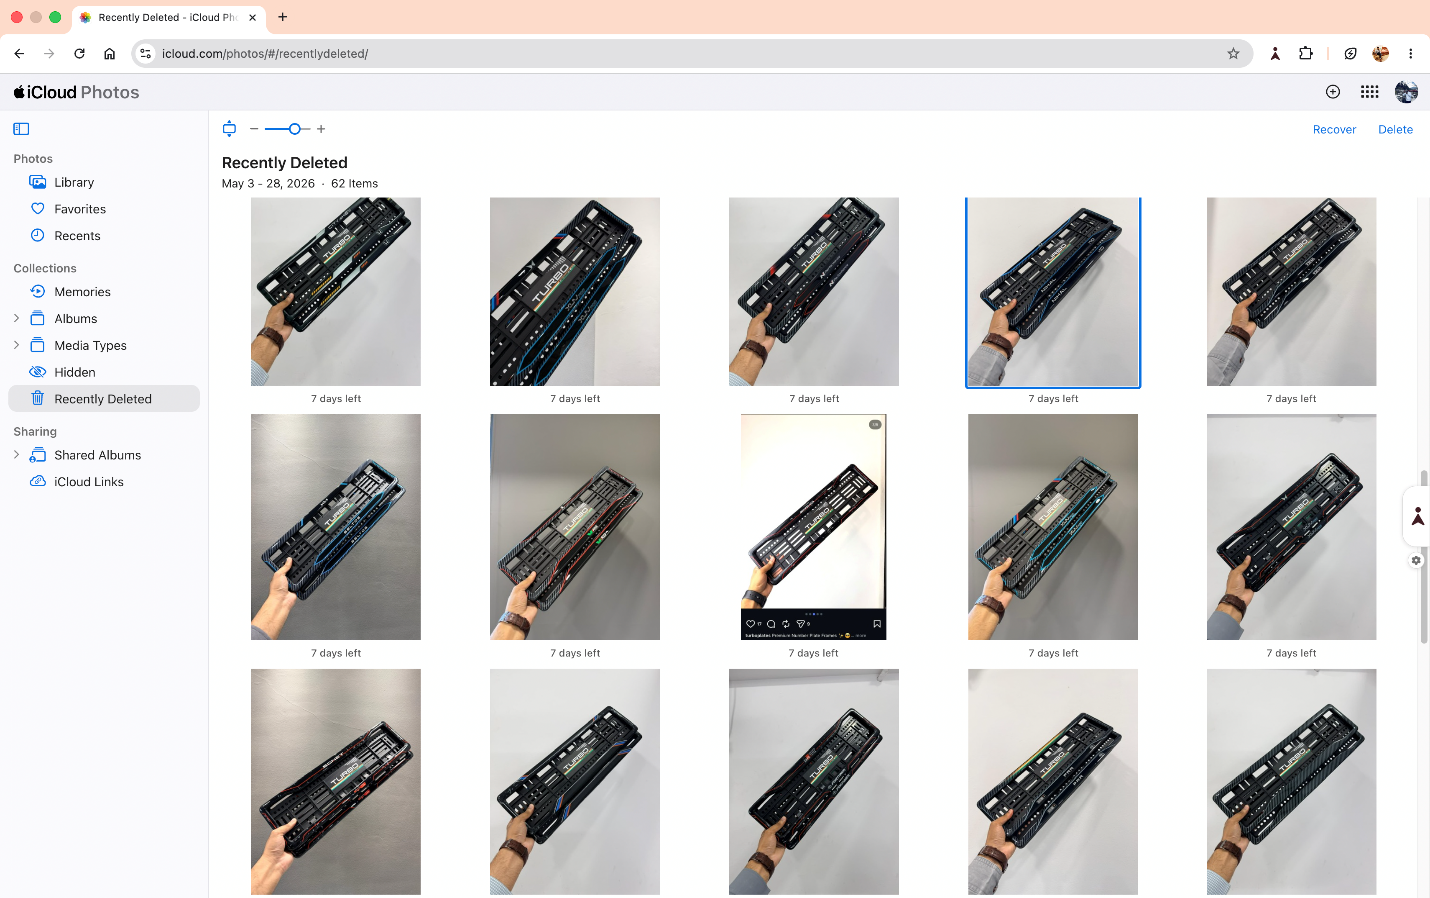
3. Recover Deleted Files from Mac Trash Using iCloud
In case your files were stored in iCloud Drive and synced before the deletion – recover them directly from iCloud's Recently Deleted folder. iCloud keeps deleted files for 30 days before permanently purging them, which gives you a reasonable window to act.
- Go to iCloud.com and sign in using your Apple ID
- Click Drive and open the Recently Deleted folder
- Select the files you want to restore and click Recover
4. Check App-Specific Recently Deleted Folders
Photos, Notes, Mail, and Messages each maintain their own Recently Deleted folders – completely separate from Trash.
Photos
Deleted photos & videos are moved to the Recently Deleted album which stores them for 30 days before permanently removing them.
- Open the Photos app
- Select the Recently Deleted folder
- Select the photo or video you want
- Click Recover
Notes
Deleted notes are kept for 30 days in a dedicated Recently Deleted folder.
- Open the Notes app
- Go to the Recently Deleted folder
- Right-click the note you want to recover and select Move To
- Choose a folder to restore it
Deleted emails are moved to the Trash mailbox within Mail – separate from the macOS system Trash entirely.
- Open the Mail app
- Find and click Trash
- Right-click on the email you want to recover and select Move To
- Choose the destination folder
Messages
Messages doesn't have a traditional Recently Deleted folder, but recently deleted conversations can be recovered if you act quickly.
- Open the Messages app
- Go to Edit > Undo immediately after deletion (this only works within the same session)
- If that window has passed, check your most recent Time Machine or iCloud backup
5. Check Third-Party Cloud Backup Services
Deleted items may still be recoverable if you use Google Drive, OneDrive, or Dropbox to sync your files –each platform maintains its own deleted files folder with a set retention window.
Google Drive
Google Drive keeps deleted files for 30 days.
- Go to drive.google.com and sign in
- Click Trash
- Locate your file, right-click and select Restore
OneDrive
OneDrive retains deleted files for 30 days for personal accounts and up to 93 days for Microsoft 365 business accounts.
- Go to onedrive.live.com and sign in
- Click Recycle Bin in the left sidebar
- Select your file and click Restore
Dropbox
Dropbox keeps deleted files for 30 days on free & Plus plans and 180 days on Business plans.
- Go to dropbox.com and sign in
- Click Deleted files
- Locate your file and click Restore
6. Recover Using Terminal
Terminal gives direct command-line access to your Mac's file system – including the hidden .Trash folder where deleted files live before Trash is emptied. This method works in two distinct scenarios:
1. When Files Are Still in Trash
Use these commands when Finder is unresponsive, files aren't showing in Trash, or you prefer the command line.
- Open Terminal
- Navigate to the Trash folder: cd ~/.Trash
- List all files in Trash, including hidden ones: ls -al ~/.Trash
- Move your file back to the Home folder. Replace filename.ext with your actual file name: mv filename.ext ~/

- Type exit and press Return to close Terminal
- Open Finder. Your file is in the Home folder
2. Trash Has Already Been Emptied
Native Terminal Commands do not have a method of recovering deleted files once the trash is empty. Once you empty the trash using Terminal commands (rm) or emptying your trash in Finder – the file is removed from the directory. Your deleted data will remain on your hard drive until that space is written over by new data but there is no native method within Terminal to locate deleted data.
You may be able to find some recoverable information using command line utility (such as PhotoRec) that you run from the Terminal. However, running these utilities requires significant technical knowledge and will typically yield much lower success rates than professional recovery products.
7. Use Mac Data Recovery Software
If the Trash is empty and you haven’t backed up via Time Machine – Mac data recovery software is your last resort. It scans the drive at the sector level – reconstructing files using their signatures and rebuilds them for recovery. The files are recoverable as long as the drive is detectable in Disk Utility and the existing data is not overwritten.
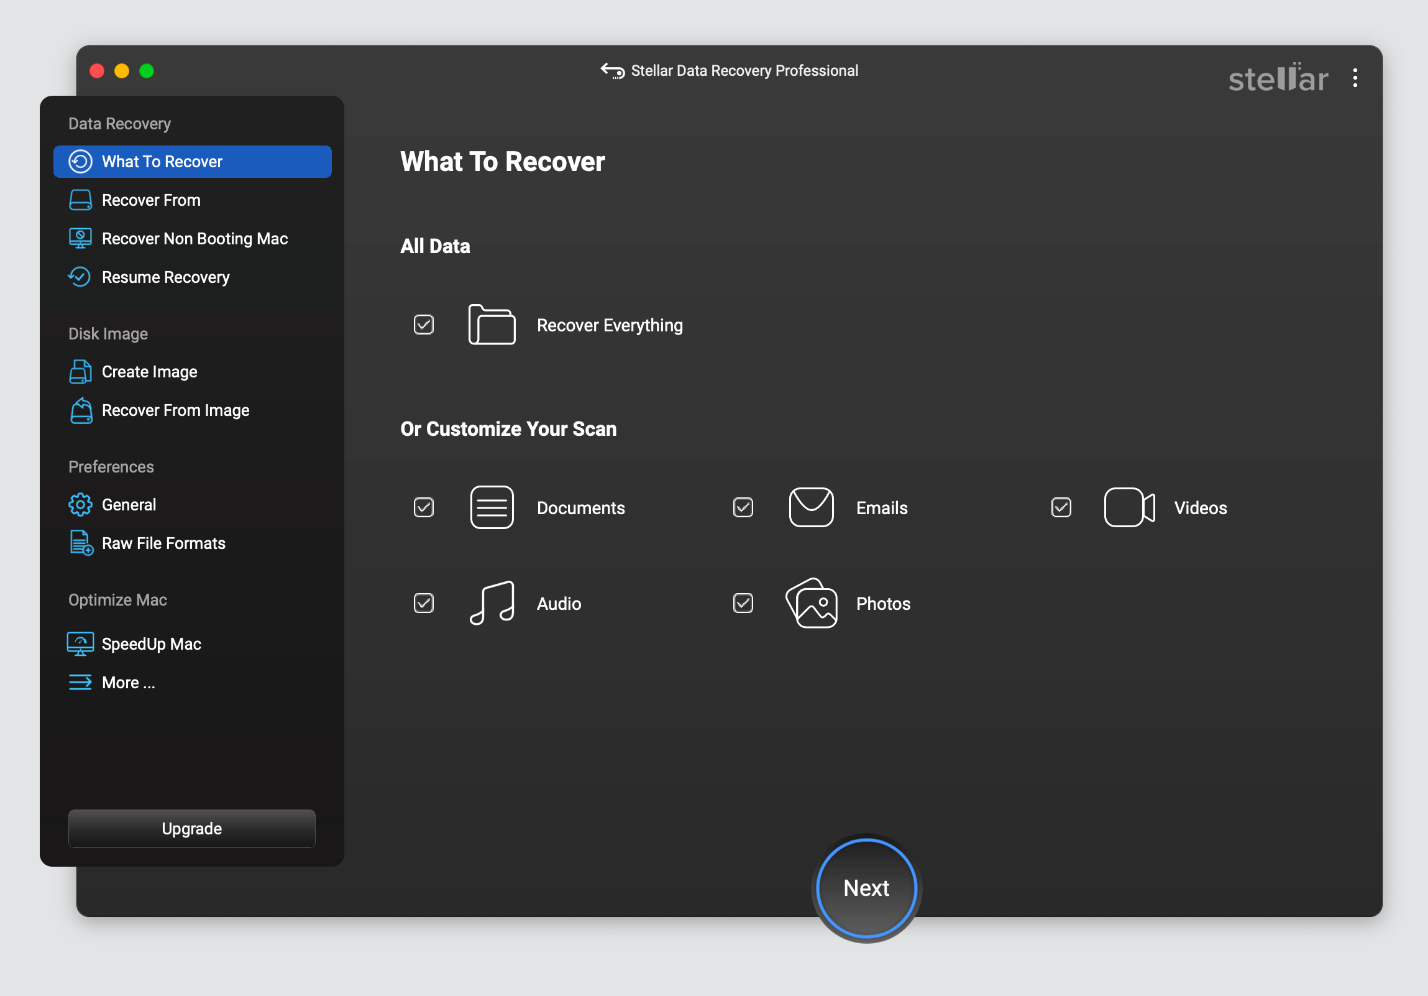
- Download and install the software on an external drive and connect it to your Mac.
- On the What to Recover screen, choose the file type you want to recover and click Next.
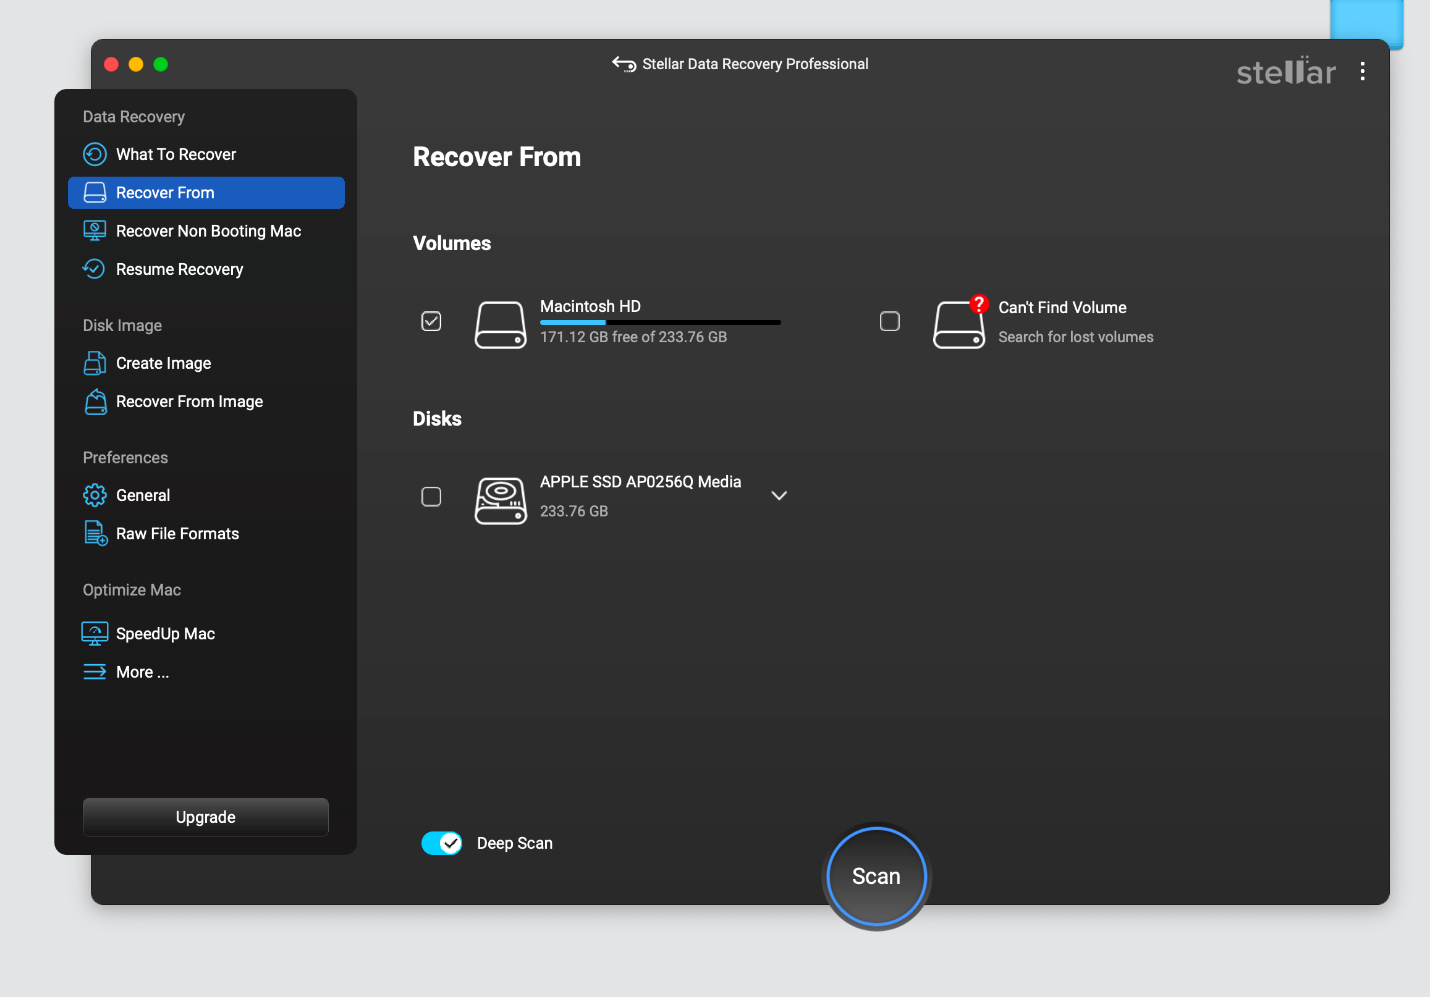
- Choose the storage location that you want to recover from and click Scan.
- The recovered files will be shown for you to Preview.
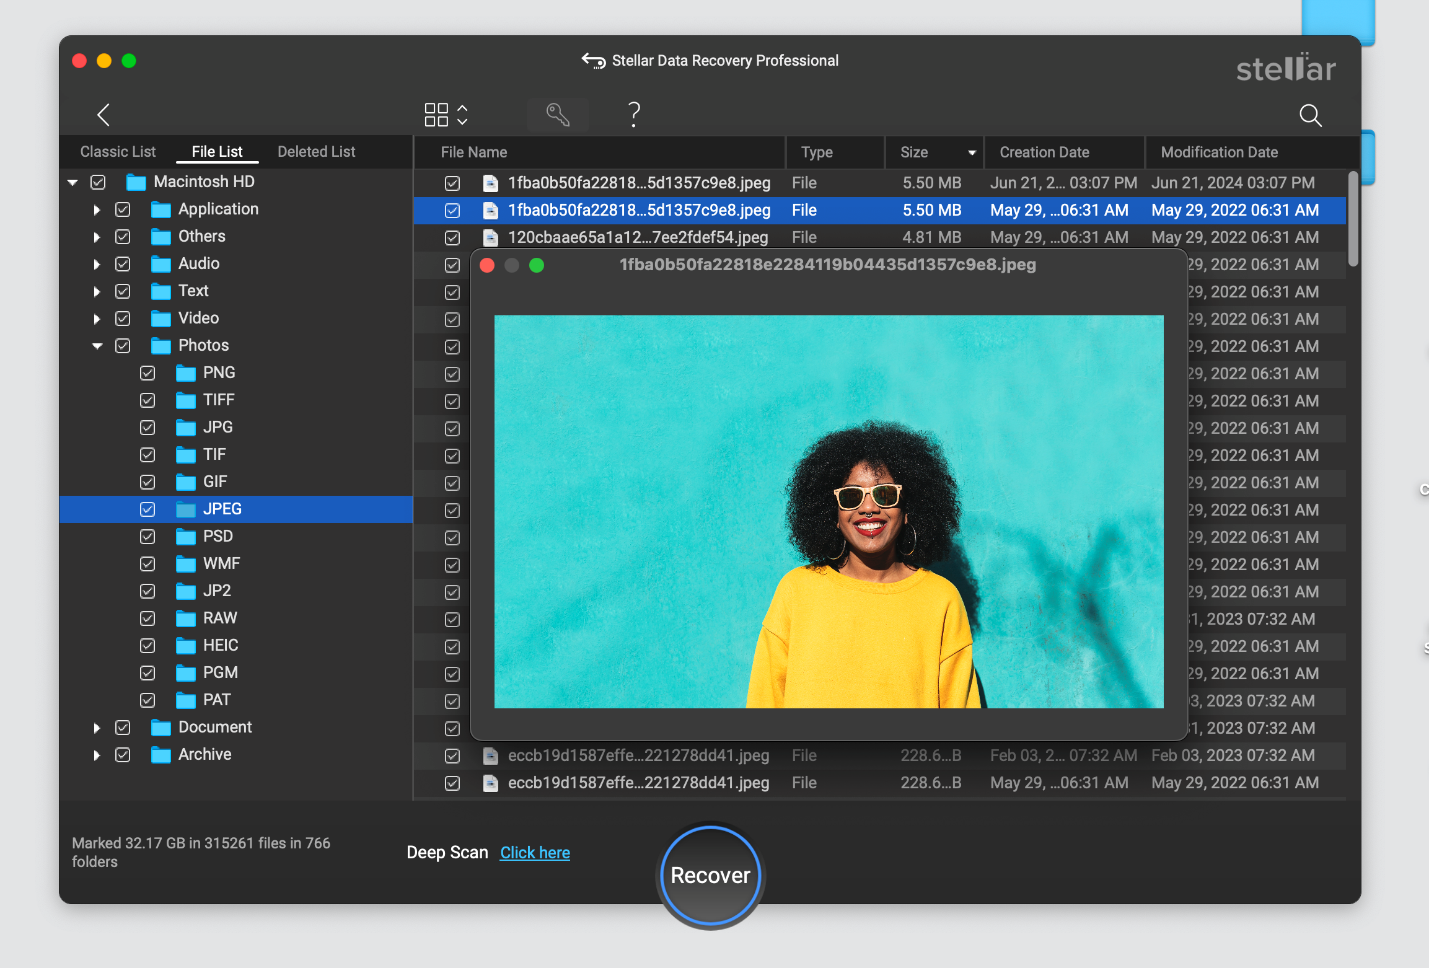
- Choose the files you need and click on Recover to transfer them back to your preferred destination.
How to Avoid Losing Files from Mac Trash Again?
Recovering deleted files is stressful and not always guaranteed. These habits take minutes to set up and can save hours of recovery work later.
- Enable Time Machine. Connect an external drive and go to Apple Menu > System Settings > General > Time Machine. Set it up once and it runs automatically in the background.
- Turn on iCloud Drive sync. Go to Apple Menu > System Settings > Apple ID > iCloud and enable iCloud Drive. Your Desktop and Documents folders stay continuously backed up.
- Disable auto-empty Trash. Go to Finder > Settings > Advanced and uncheck "Remove items from the Trash after 30 days" if you want full control over what gets deleted.
- Pause before emptying Trash. Take five seconds to scan the contents before clicking Empty Trash. If you accidentally dragged a file in, press CMD + Z immediately before closing the Finder window.
- Avoid using rm in Terminal for important files. The rm command bypasses Trash entirely with no undo. Use Finder deletion whenever possible.
- Pre-install data recovery software. Having a tool already installed before data loss occurs means one less thing to figure out under pressure and avoids writing new data to the drive at the worst possible moment.
Recover Your Mac Files Before It’s Too Late
Emptying Mac Trash isn't the end of the road. As long as the deleted data hasn't been overwritten recovery is possible. Start with the simplest paths first – Time Machine, APFS local snapshots, iCloud, or an app-specific Recently Deleted folder. If none of those apply, data recovery software is your best remaining option but only if you act fast and stop using your Mac in the meantime. On SSDs, that window is short. Every minute counts.


Rishabh is a senior content specialist at Stellar Information Technology, where he writes about comprehensive data care solutions.
-1920.jpg)
 15 min read