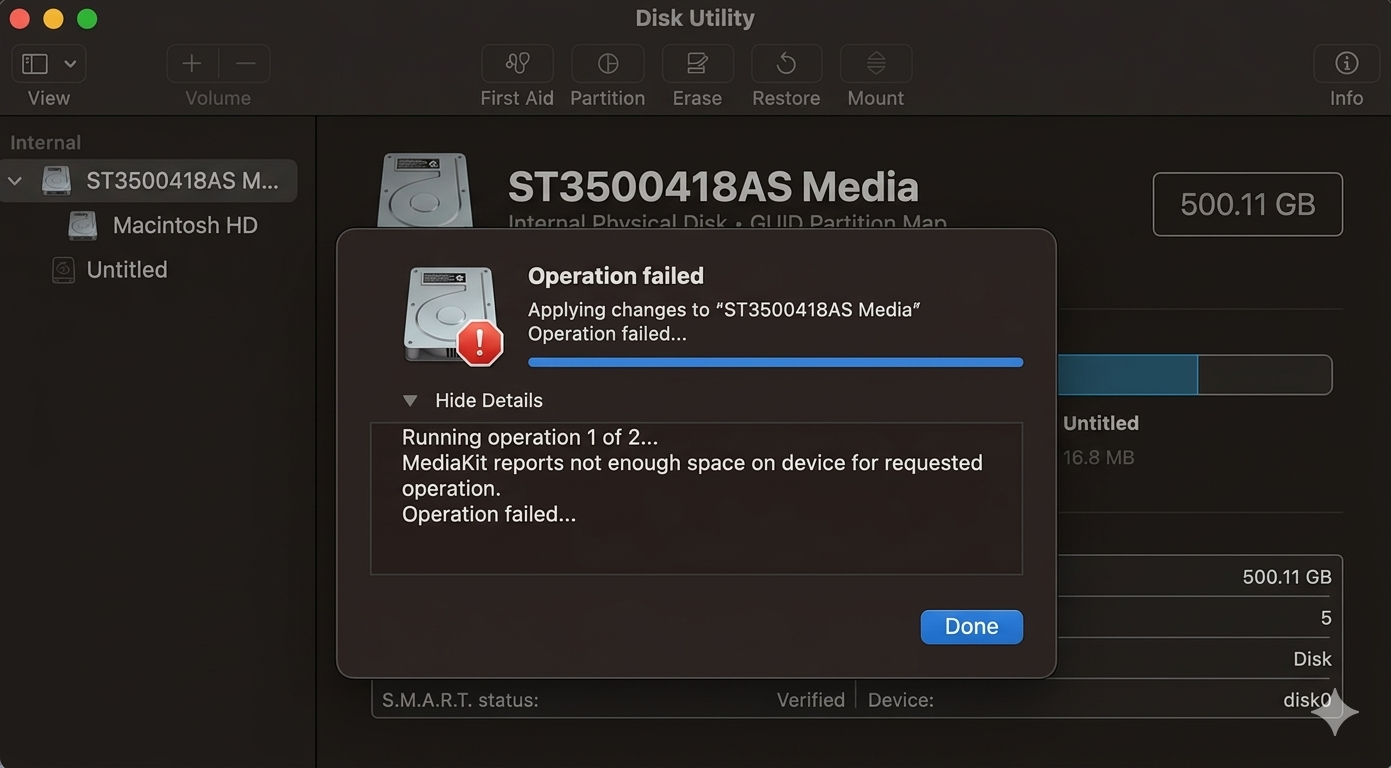
You connect your external drive to a new Mac, expecting everything to work smoothly… but suddenly you see the error “MediaKit reports not enough space on device for requested operation” and now nothing makes sense anymore. This cryptic Disk Utility error most of the time pops up when attempting to format or partition a disk. Let’s understand it with the most common scenario. A Mac user plugs in his WD Elements 1TB drive that he was using on Windows and gets the error upon trying to erase it for macOS. In some cases, users find this issue while using Time Machine backup drives or while merging partitions, because APFS container resizing can cause MediaKit errors and partition map conflicts.
In this guide, we’ll walk you through the common causes of the MediaKit error and then explain step-by-step methods to fix it. The following sections show methods to do exactly that.
What are the Methods to Fix “MediaKit Reports Not Enough Space on Device” Error?
Below we have shared 4 methods you can use to erase and repartition your drive so that macOS no longer gives this error.
Method 1: Erase & Reformat Drive Using Disk Utility
This is the simplest approach if it works:
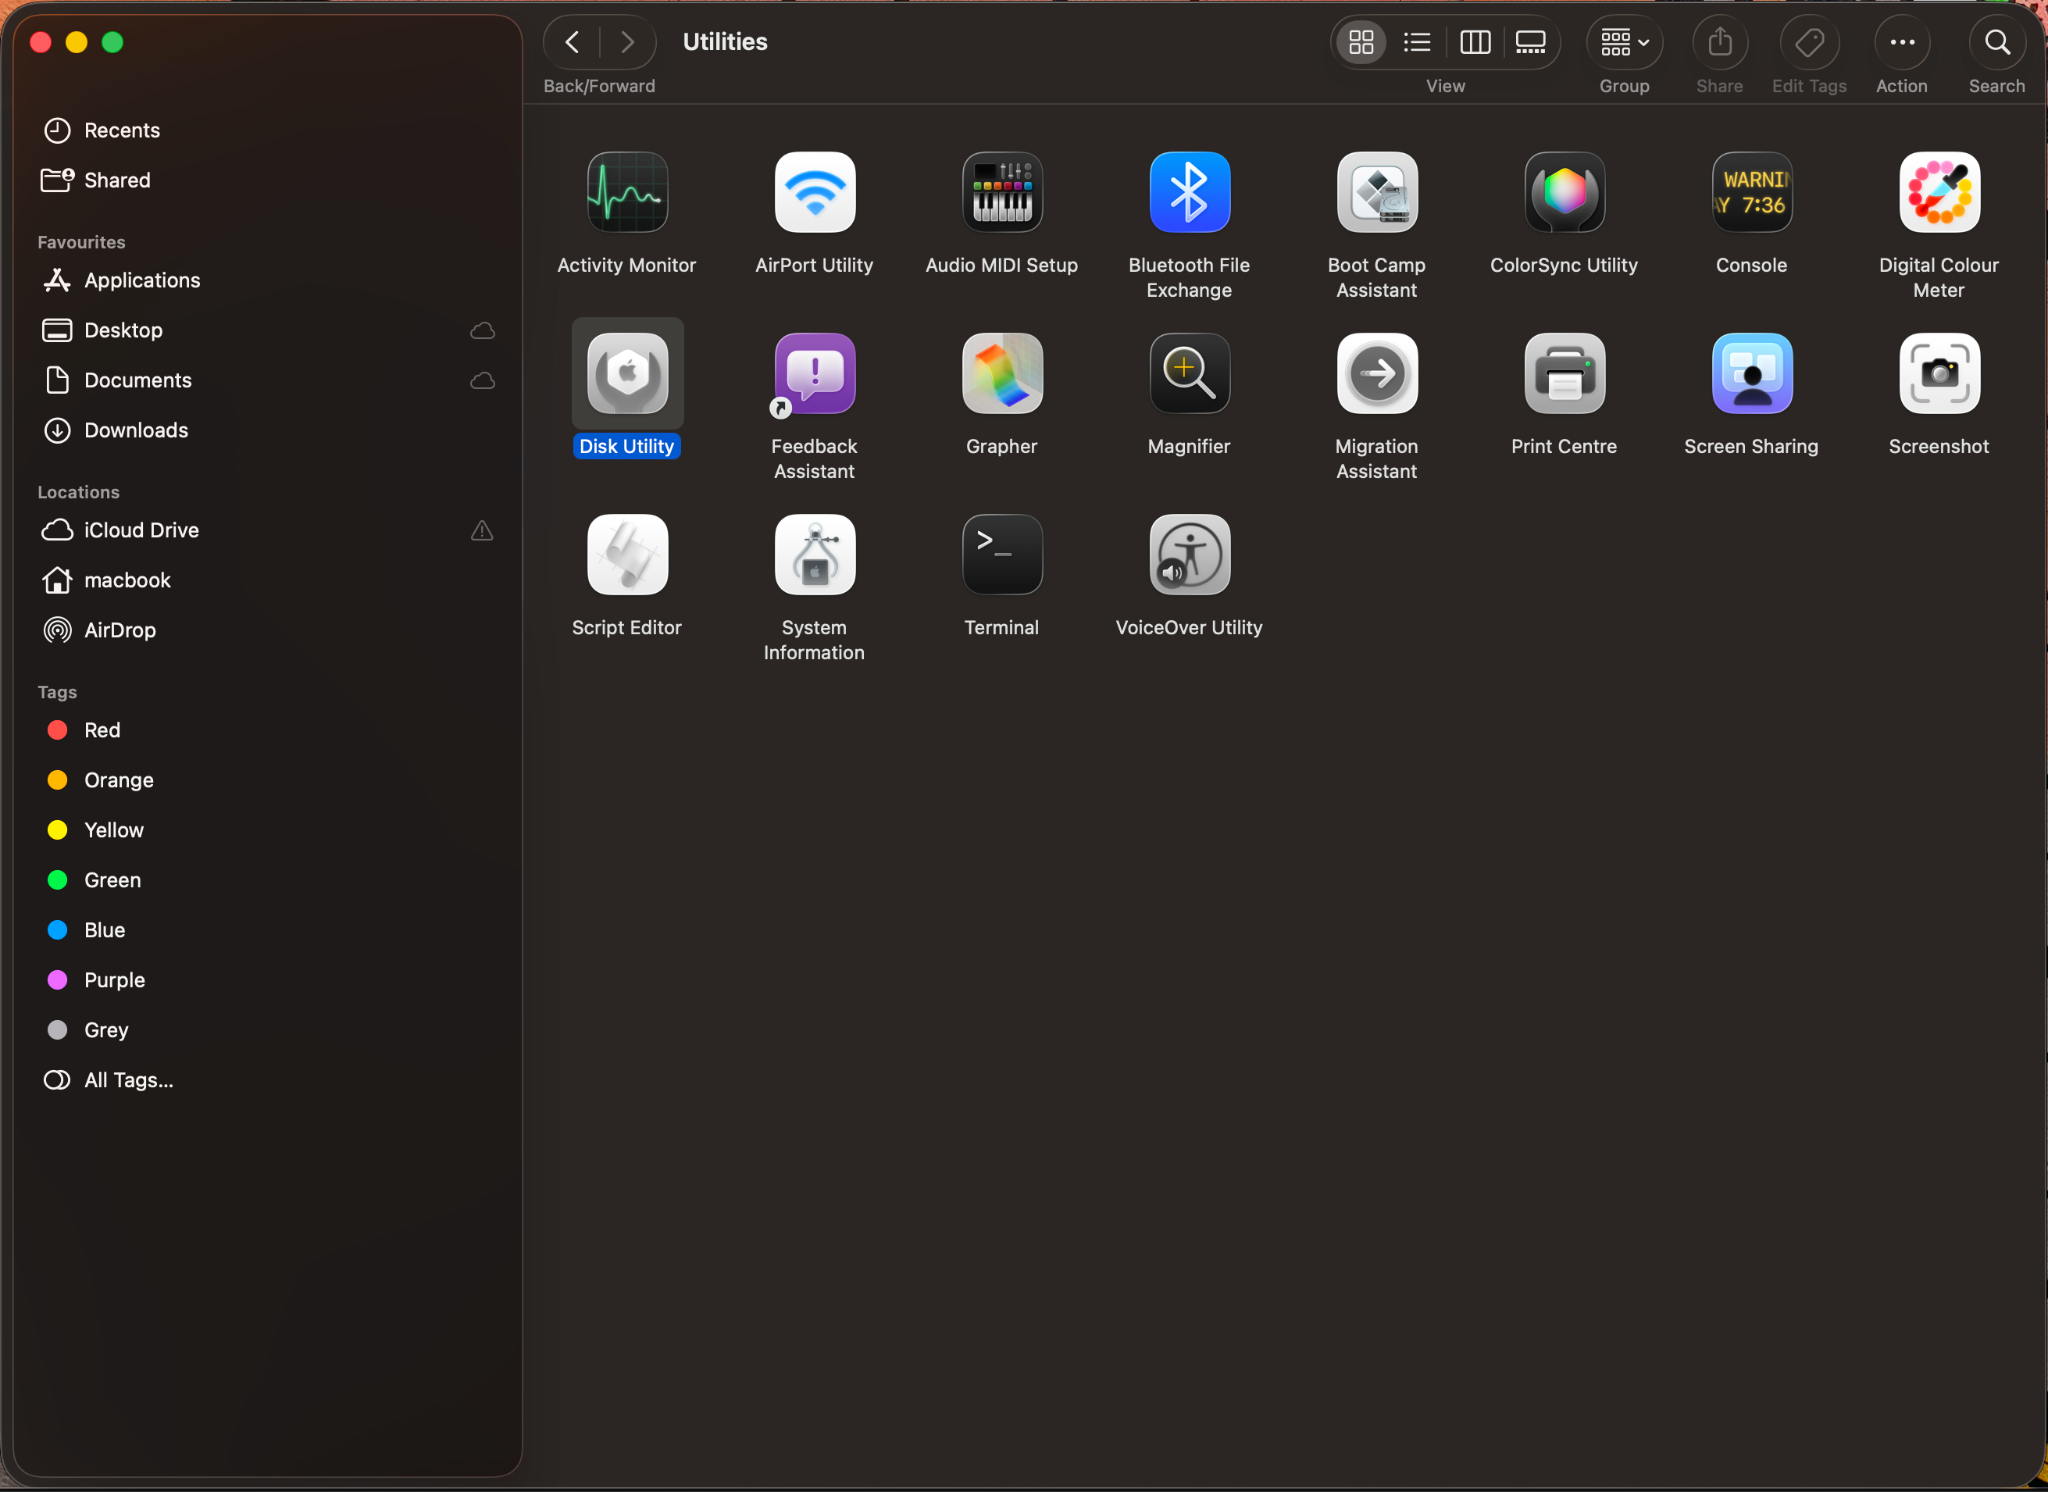
- Launch Disk Utility on MacBook. You can just find it via Spotlight or in Applications > Utilities.
- Click View > Show All Devices. This ensures you see the physical drive, not just its volumes.
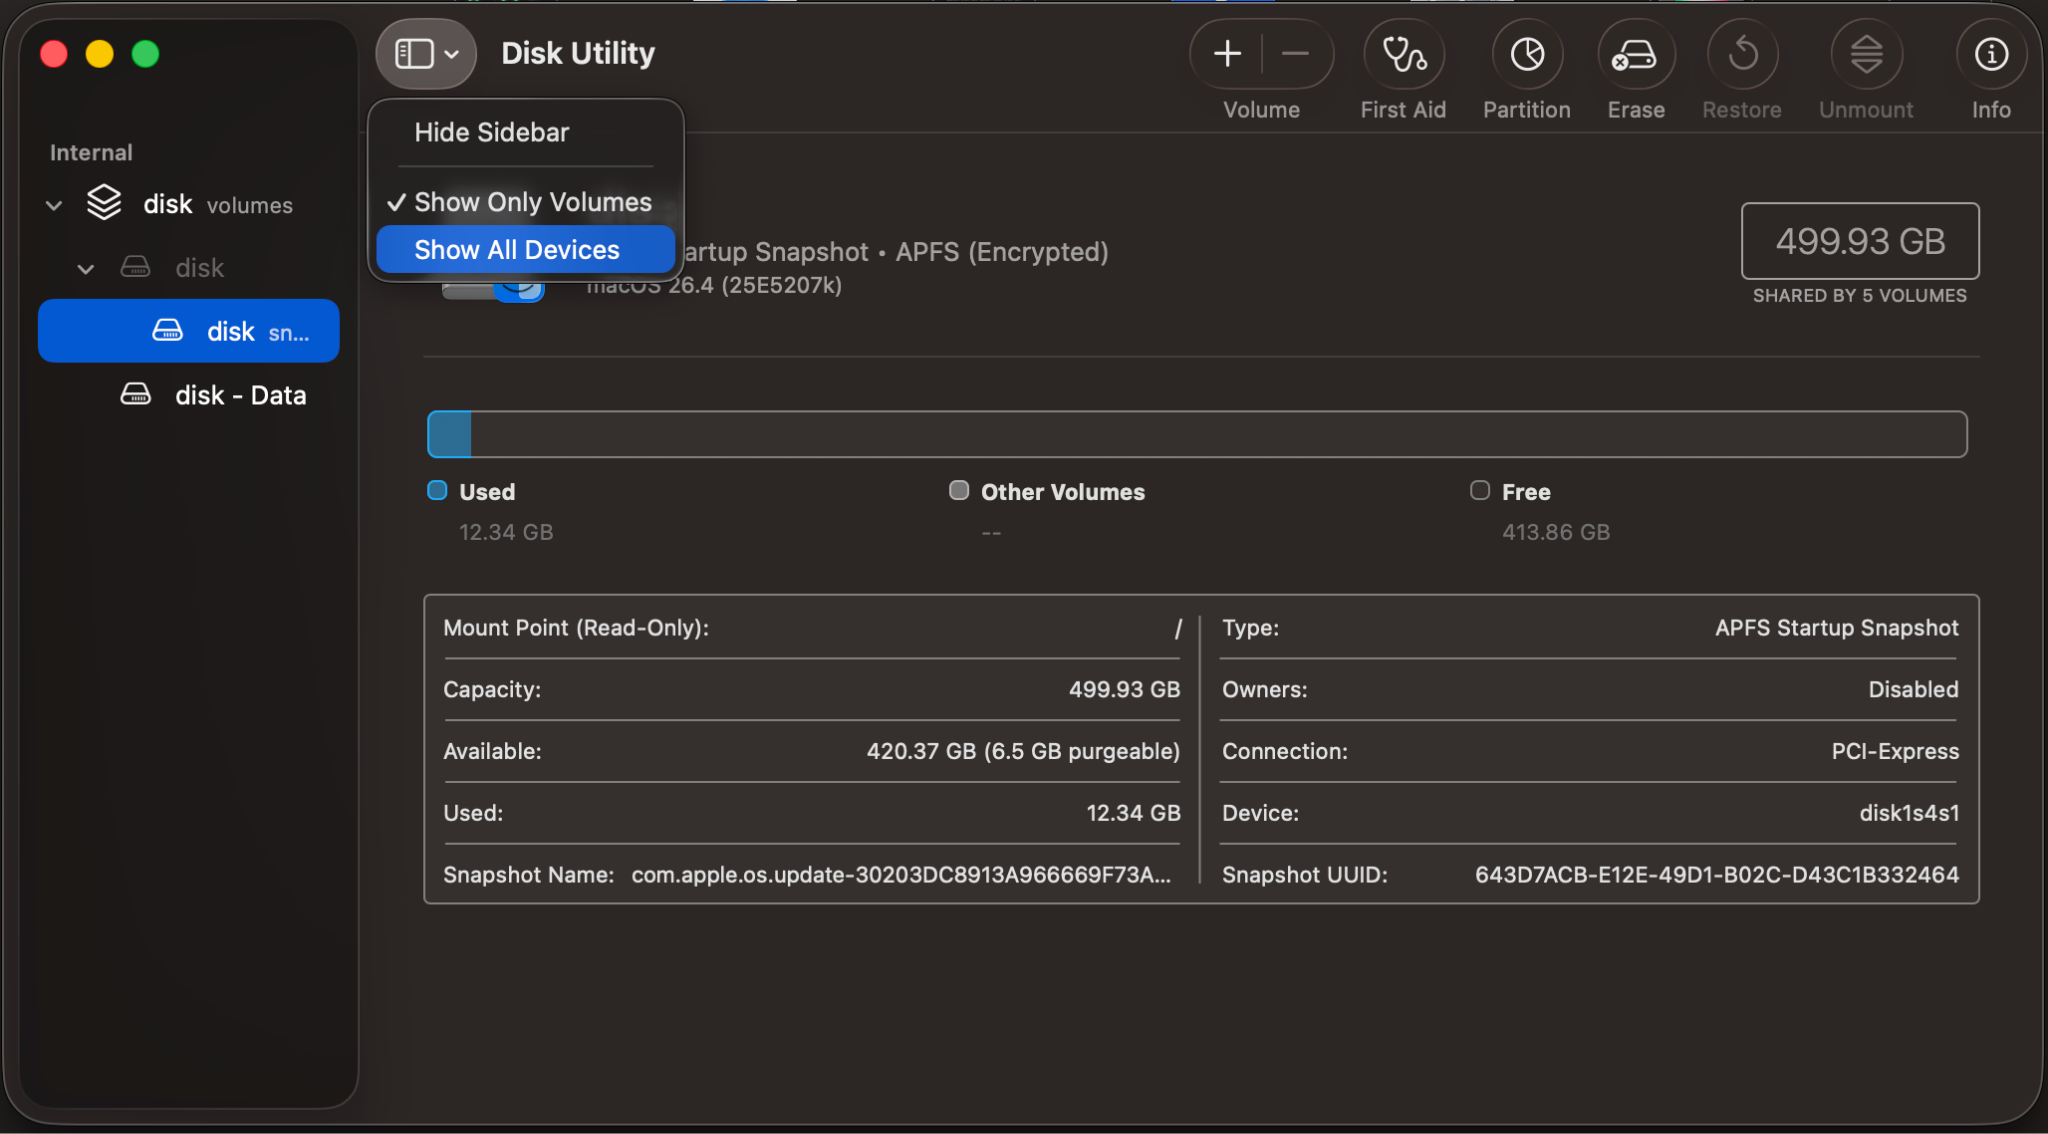
- In the sidebar, top-level entry for the external drive (the physical device)... not just one partition/volume under it. This is very important because this error is caused due to a partition map issue and this thing only gets fixed when you erase your whole device not just a volume.
- Click the “Erase” button. In the dialog:
- Name: Give the drive a name (e.g. “AES Media 3”).
- Format: Use APFS for most cases but go ahead and use Mac OS Extended if you need compatibility with older macOS versions or certain workflows specifically.
- Scheme: Choose GUID Partition Map.
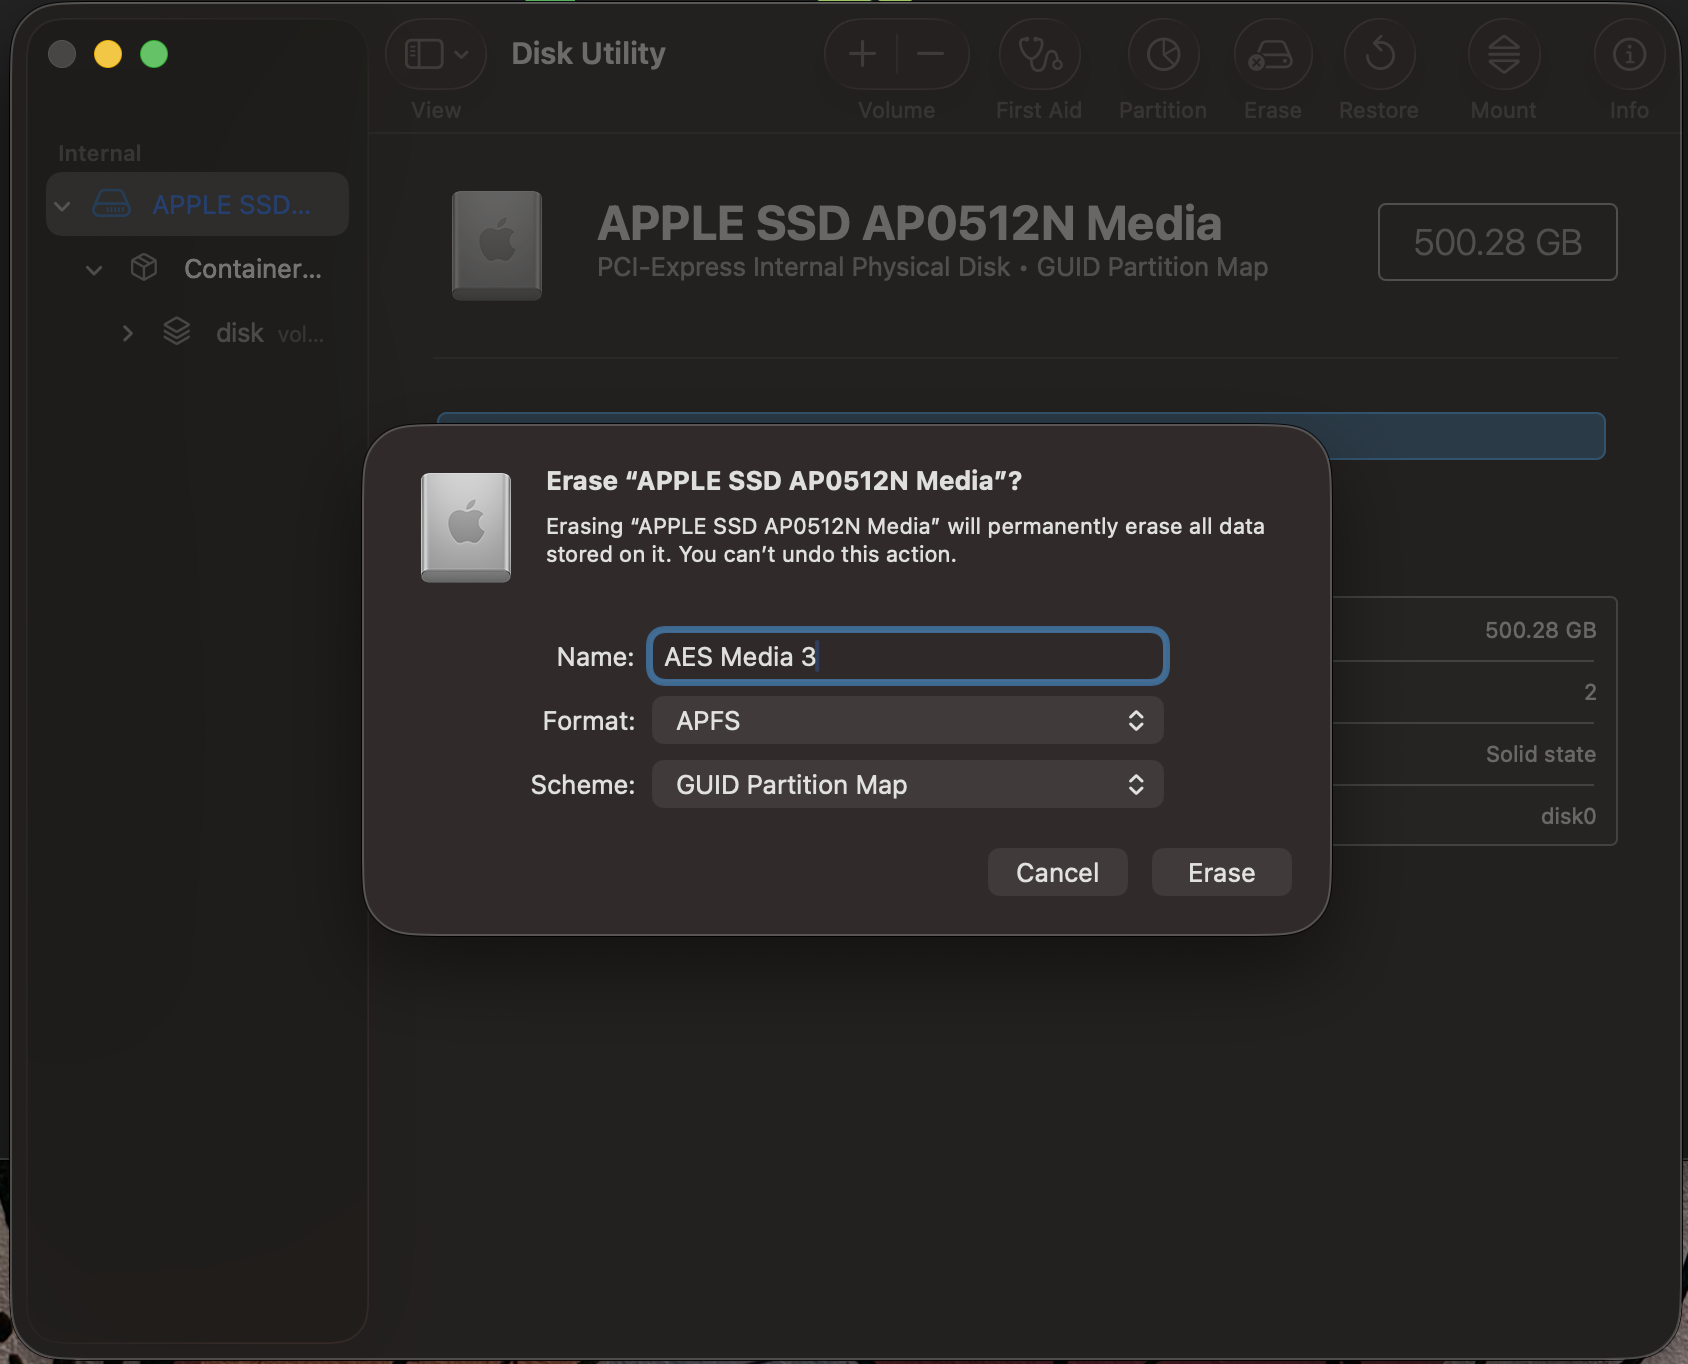
- Click Erase. This will recreate the partition map and make the drive usable again if the problem is only a stale or inconsistent partition layout.
If the erase succeeds, eject the drive, disconnect it, reconnect it, and confirm that it mounts normally. If it fails with “MediaKit reports not enough space on device” then Disk Utility is not able to rewrite the device metadata cleanly and you should just move on to the next method.
Method 2: Force Erase using Terminal Commands
If Disk Utility still doesn’t work for you, just go ahead and manually wipe and partition the drive using those Terminal commands. This method just zeroes out the partition table of your drive and creates you a new one:
- Go to Applications > Utilities and open Terminal.
- Run diskutil list and note the disk identifier of your external drive (e.g. disk2).
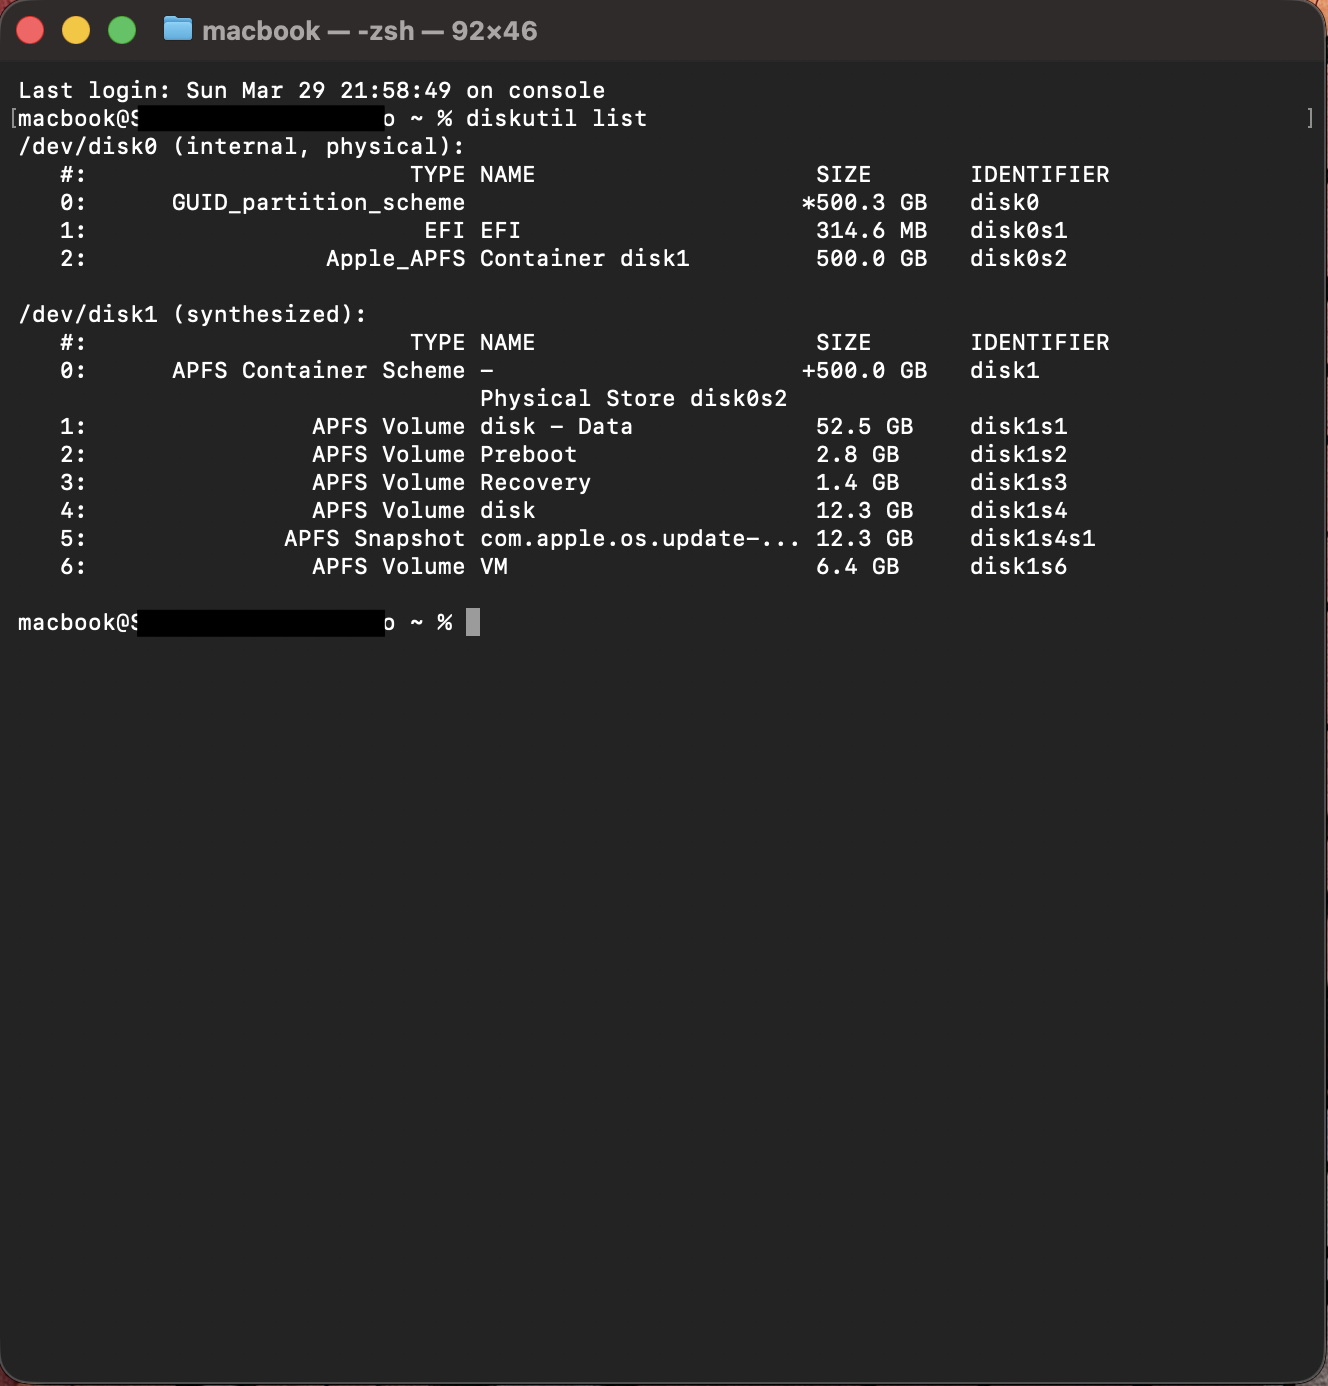
- Unmount the Disk using command:
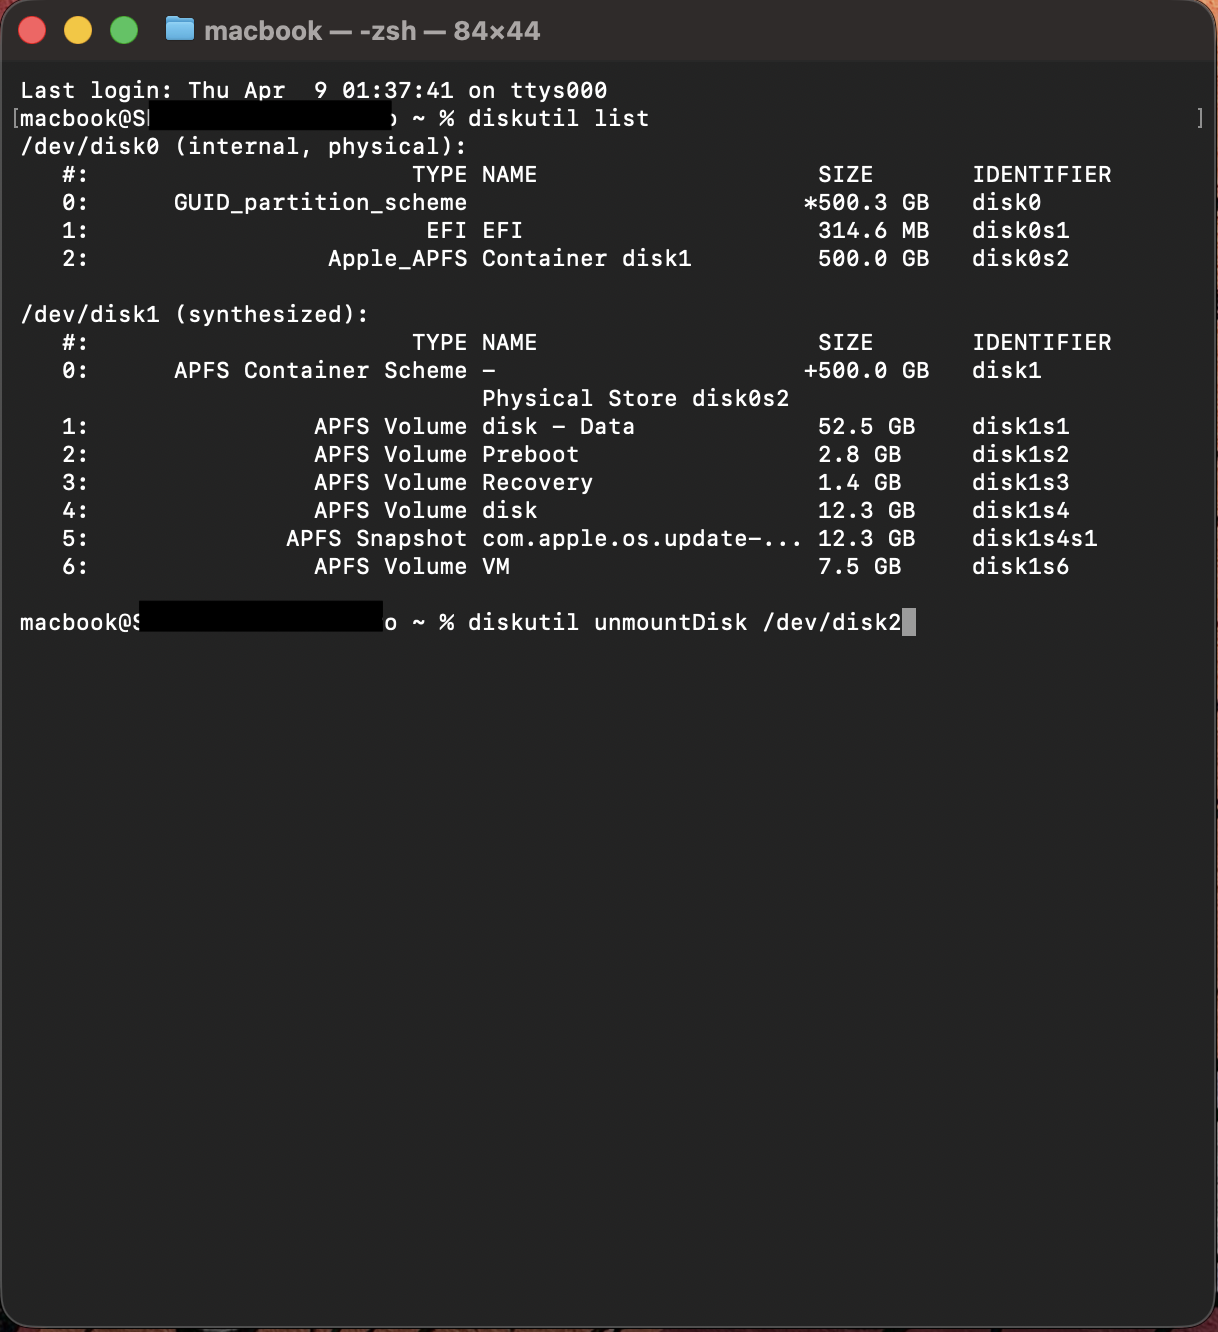
Replace diskX with your disk number, e.g. diskutil unmountDisk force disk2. This makes sure the whole disk is unmounted.
- Zero Out the Partition Table (This clears any existing partition info):
sudo dd if=/dev/zero of=/dev/rdiskN bs=1024 count=1024
(Replace diskN as above; rdiskN refers to the raw device, for faster operation)
Note: This command is dangerous if you choose the wrong disk and it may jeopardise your data safety. So proceed only if you are have a fair amount of idea how these commands work
Enter your admin password when prompted. This writes zeros to the first 1MB of the disk, effectively erasing the partition map.
- Create a New GPT and Volume: Now repartition the drive. For example, to make one large Mac-formatted volume:
diskutil partitionDisk diskN GPT JHFS+ "NewName" 0g
This creates a GUID (GPT) partition scheme with one Journaled HFS+ (Mac OS Extended) volume filling the disk. (You could use APFS instead of JHFS+ if desired).
- Use diskutil list again to confirm the new partition layout. Then eject and reconnect the drive. It should now mount as a clean Mac-formatted disk.
If you need APFS, just go ahead and replace JHFS+ with APFS in the command (or maybe let Disk Utility convert it later). The key here is that dd only wipes the first few blocks of the drive, which removes the old partition map, and diskutil partitionDisk then sets up a fresh GUID partition scheme and creates the EFI partition. These Terminal steps unmount it forcefully, wipe your old partition map and then rebuild the drive’s partition structure. It is a powerful fix honestly when Disk Utility alone just would not work.
Method 3: Use Windows to Reformat the Drive
There’s a quick workaround we found that you can perform. Initially format the drive to NTFS (or FAT32/exFAT) on a Windows PC, then reformat it on the Mac. The idea is that Windows formatting rewrites the partition table, which can remove corrupted or incompatible structures that macOS fails to fix. To do this:
- Connect that drive of yours to a Windows PC.
- Use Disk Management or just right-click the drive and click Format.
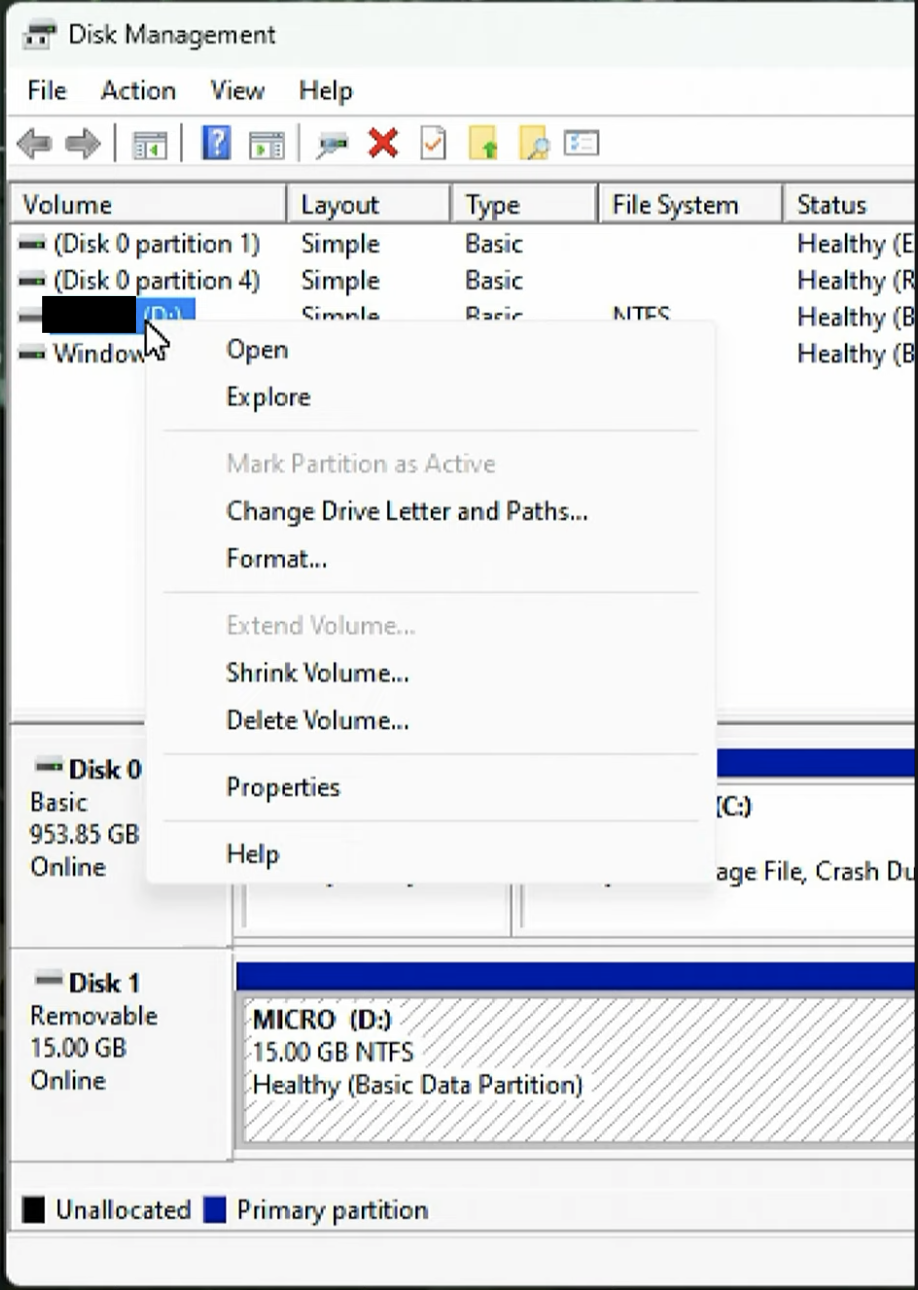
- Here, select NTFS or exFAT and just give it one big partition.
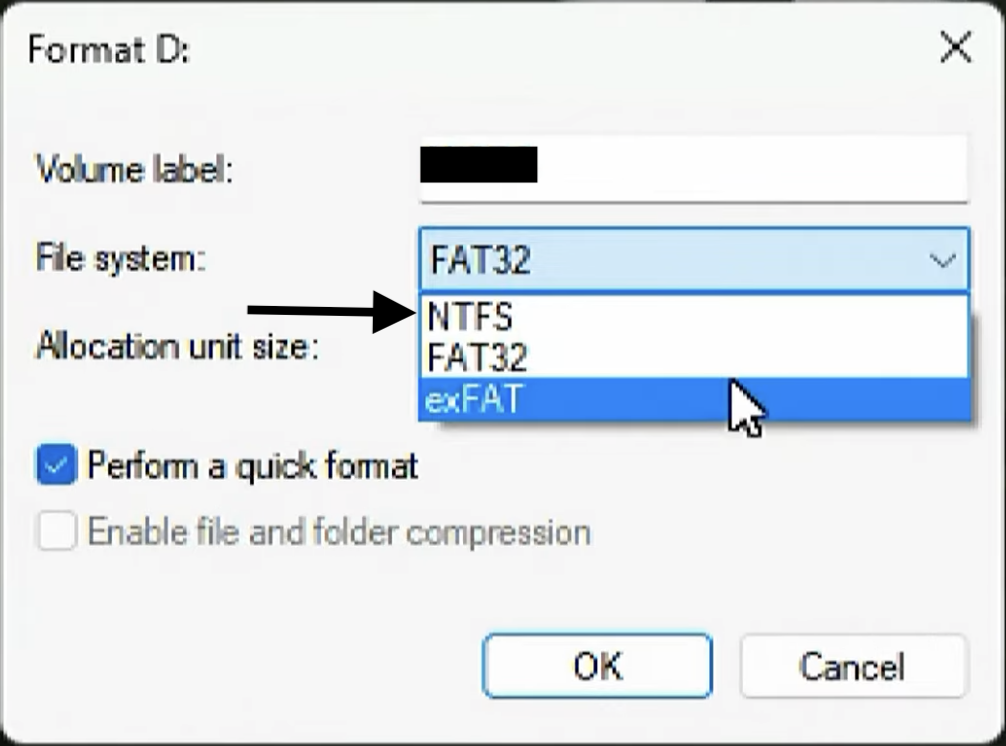
- Once you have formatted, plug it to your Mac.
- Now it is time to Disk Utility on your Mac to erase and reformat the drive to a Mac format… HFS+ or APFS.
Formatting in Windows forces the drive to just start with a clean state with a standard EFI partition.
Method 4: Use Manufacturer or Third-Party Tools
Some drive manufacturers also provide you utilities that can reformat your drives when macOS tools just fail:
- WD Drives: Download and run WD Drive Utilities (for Mac or Windows). Use its Erase or Format function on the drive. It will reformat the drive to FAT32 or NTFS. Then reconnect to Mac and use Disk Utility to reformat to macOS format. As noted on Apple Communities, using WD’s own utility often succeeds where Mac’s Disk Utility did not.
- SanDisk/Other Drives: Similar utilities exist (e.g. SanDisk SSD Toolkit). These can wipe the drive’s partitions. After that, go back to macOS and erase it.
Manufacturers’ tools are designed to work with their hardware. These tools perform low-level initialization that can succeed where Disk Utility fails.
Precautionary Measures
To prevent running into the MediaKit error and to protect your data, follow these best practices:
- Always backup data
- Keep macOS up-to-date
- Use Quality Drives
- Run First Aid periodically
- Use “Show All Devices”: In Disk Utility, enable View > Show All Devices. Always select the top-level disk (not just a volume) when erasing or partitioning.
- Choose GUID Partition Map: When formatting for macOS, pick GUID (GPT) as the scheme, not MBR or APM.
- Avoid Interruptions: Don’t disconnect the drive or power off while erasing. Interrupting the process can corrupt the partition map.
By taking these steps, you reduce the chance of encountering those partition or formatting errors. If you have to erase a drive, just double-check that you’re not in Recovery/Installer mode and the correct disk is selected.
Conclusion
The MediaKit “not enough space on device” error can stop you from formatting or installing macOS to a drive. It usually stems from partition-table or EFI-partition issues – for example, leftover Windows partitions. The cure here is just to wipe and reformat the disk so that macOS itself creates a fresh GUID partition scheme (with a 200–300 MB EFI). You can actually do this via Disk Utility (Show All Devices, Erase) or by using those Terminal commands (diskutil + dd). You can also go with reformatting the drive on Windows or just use the drive maker’s tools and then try Disk Utility again. Each method essentially forces a new clean partition map.
Just remember that these fixes will erase all that data of yours. So always try to take a back up before proceeding. If you do lose files though, Stellar Data Recovery for Mac can scan that formatted drive and help you to recover those photos, documents, and other data that you lost. With the right method and precautions, you will fix the MediaKit error shown here and get your drive working with macOS again.


Pallavi is a literature graduate turned content strategist, specializing in data recovery. She creates insightful, user-friendly content to help people rescue their data from hard drives, SSDs, memory cards, and more. When she’s not decoding tech for everyday users, she’s curled up with a book - or secretly planning her next adventure.
 15 min read
-1920.jpg)