Deleting the files or formatting the drive does not necessarily mean they are completely erased, as they can still be recovered using data recovery tools. You can overwrite the data or use secure file erasure software to permanently delete files from a USB drive, SD card, HDD, or SSD, or other external devices.
The right file erasure software makes data recovery impossible from external storage devices. Read this guide for step-by-step instructions along with effective solutions to help you permanently delete files from USBs, HDDs, SSDs, SD card and other external storage devices.
Why is Deleting Files From an External Storage Device Important?
External storage devices harbor your documents, pictures, videos, music, and other personal files. Many people use external storage media as a backup storage option for their PC. Nevertheless, sometimes the data in the external storage device needs to be permanently erased.
There are many reasons why you might want to wipe your external storage device, including recycling, sharing, or selling your external storage device, it’s important to clean it to prevent unauthorized exposure of sensitive personal data.
When a file is deleted from the external storage media, only the pointer or address to the file is removed, not the actual file, and it is relocated to the Bin/Trash folder. Files stay in this folder for 30 days after deletion, and if the time period expires or you manually empty the folder, then the OS removes the file from disk’s folder directory and makes the previously occupied space on the sector as available for storing new data.
This means that the Master File Table (MFT) used by the device’s OS to track the record of files and folders no more holds the address to the file.
However, if deletion doesn’t remove your data from the external storage devices, just format the device.
Formatting any storage device not only deletes the files and folders stored in it, but wipes the device clean. However, there’s still some scope of recovery left depending on the type of formatting carried out.
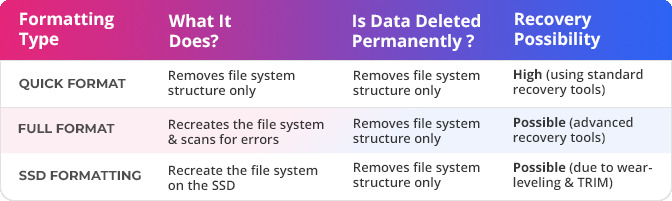
In all cases, quick, full, or SSD formatting, formatted data may remain recoverable unless a secure erasure technique is used to wipe them.
Permanently Deletion Strategies from External Storage Devices
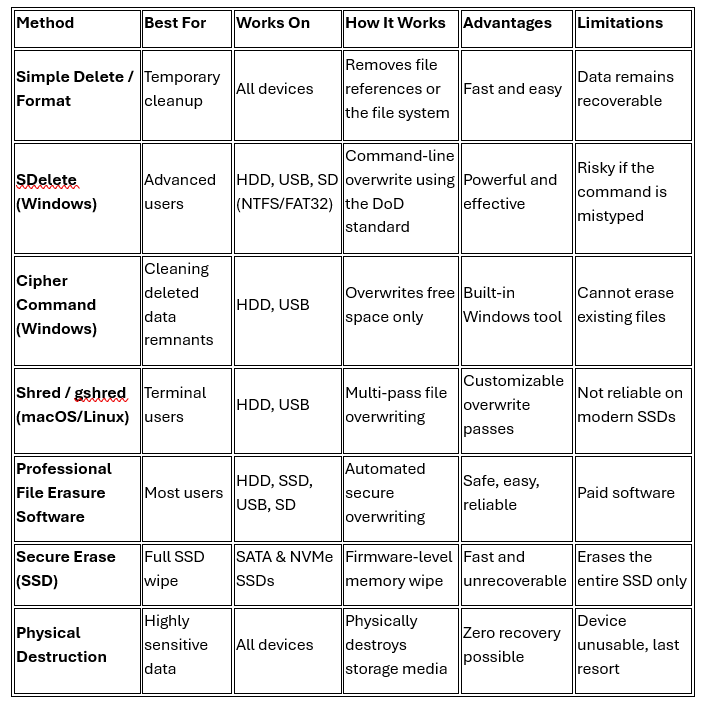
To permanently delete data from external storage devices beyond the scope of recovery, you can use one of the following methods:
Method 1: Overwriting data
Method 2: Professional file erasure software
Method 3: Secure erase commands (for SSDs)
Method 4: Physical destruction
Each of these permanent deletion strategies works differently depending on the type of storage device.
Method 1: Overwrite Data to Permanently Delete Files from Storage Devices
Overwriting is a method to write new data over existing or previously saved data in the storage device, reducing the chances of deleted file recovery with each overwrite. Unlike simple deletion, which just removes the file reference, overwriting replaces the original data with a new data pattern, such as Zeros (0x00), Ones (0xFF), and Random characters.
Overwriting works well on external HDDs, USB flash drives, memory card and magnetic storage devices as they store data in fixed locations, which permits the overwrite tool to directly replace the original data. However, overwriting is not recommended for SSDs, as here the data is spread across memory cells, which forbids the overwrite command from targeting the original data block.
Most overwriting tools allow:
- Single-pass overwrite: Replaces original data once with a zero, and is sufficient for personal and everyday use.
- Multi-pass overwrites: Writes new data multiple times using a different pattern, best for highly sensitive data and legacy HDD.
- Industry-standard overwrite methods predefined by organizations and governments, such as DoD, NIST)
Some of the best tools and commands for overwriting data on Windows and Mac are: SDelete (Windows Command-Line), Cipher Command (Built-in Windows Tool), Shred Command (macOS / Linux – Terminal), etc.
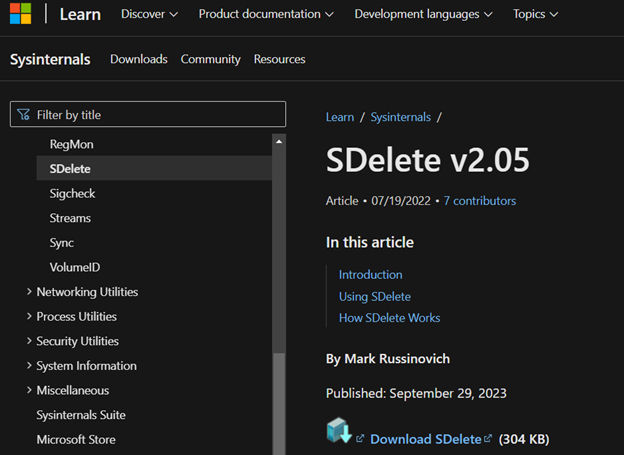
1. SDelete (Windows Command-Line)
SDelete is a secure delete utility that uses the DOD 5220.22-M standard to erase data from connected SD card with one pass.
To use SDelete for deleting files from the SD card, follow these steps:
Step 1: Download SDelete.exe from Microsoft’s official site.
Step 2: Copy ‘SDelete.exe’ and paste it into the root folder of the SD card (for example, if the SD card is assigned the letter D:, then paste the SDelete at D:\SDelete).
Step 3: Press & hold the Shift key and right-click in the root directory of the SD card.
Step 4: Choose ‘Open command window here’ from the context menu.
Step 5: To delete a file, at the command prompt, type: sdelete –p 2 ‘FilePath’ (replace FilePath with the file location, such as “D:\PrivateFiles\MySecretFile.txt”).
Step 6: To delete a folder containing subfolders and files, type sdelete –s –r –p 2 ‘.\FolderPATH’ (here –s and –r are used to erase the folder and subfolders recursively along with contained files with 2 passes).
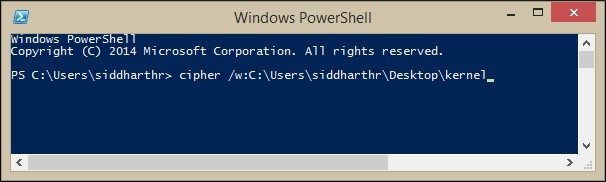
2. Cipher Command (Built-in Windows Tool)
Cipher.exe can overwrite data that has been deleted, so it can’t be recovered or accessed. It is a Windows built-in feature run in Windows PowerShell that can completely erase deleted data beyond recovery.
- Quit all programs. Select Start >> Run, type cmd, and then press Enter.
- Type cipher /w:<directory>, and then press ENTER, where <directory> is any folder in the volume that you want to clean.
- Data that isn’t allocated to files or folders is overwritten, while data on the allocated space will not be touched.
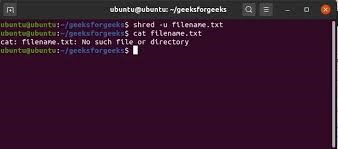
3. Shred Command (macOS/ Linux Terminal)
This secure file-deletion application in Mac or Linux overwrites a file’s data multiple times before actually removing it. macOS does not include shred by default, can be installed via Homebrew (part of GNU coreutils), where it is available as gshred.
Command: gshred -n 3 -z -u filename. Here, it overwrites the file 3 times.
The shred command doesn’t guarantee complete data destruction on external storage media connected to Modern Macs, which is why it is recommended that professional eraser tools are more reliable.
Important Note: Limitations of Using Conventional Command-line Tools
These command-line tools might not be suitable for non-technical users as they are complex and time-consuming. In addition, they are often unable to recognize, access, or overwrite data contained in bad and hidden sectors. Relying on these tools could leave fragments of sensitive data recoverable, putting your privacy and security at risk.
Method 2: Use Professional File Erasure to Permanently Erase Your External Device Files
Simply deleting files using your PC or Mac settings does not erase them from your computer, as any data recovery software can easily trace and recover them.
Therefore, a file erasure software is the prescribed method to permanently delete files from any external storage devices, such as Hard drive, USBs, SD cards, etc. This software functions by overwriting the files you wish to delete. This overwriting can be done once or multiple times.
As a result of the erasure, the files become unreadable and beyond the capacity of data recovery software. This is known as erasure beyond recovery, and only an efficient file erasure software can accomplish that.
Stellar File Eraser is a recommended file eraser software that can easily and efficiently erase all contents of your external storage device. This will ensure that your data is destroyed and cannot be accessed by anyone.
Follow the steps below to remove temporary files using Stellar File Eraser:
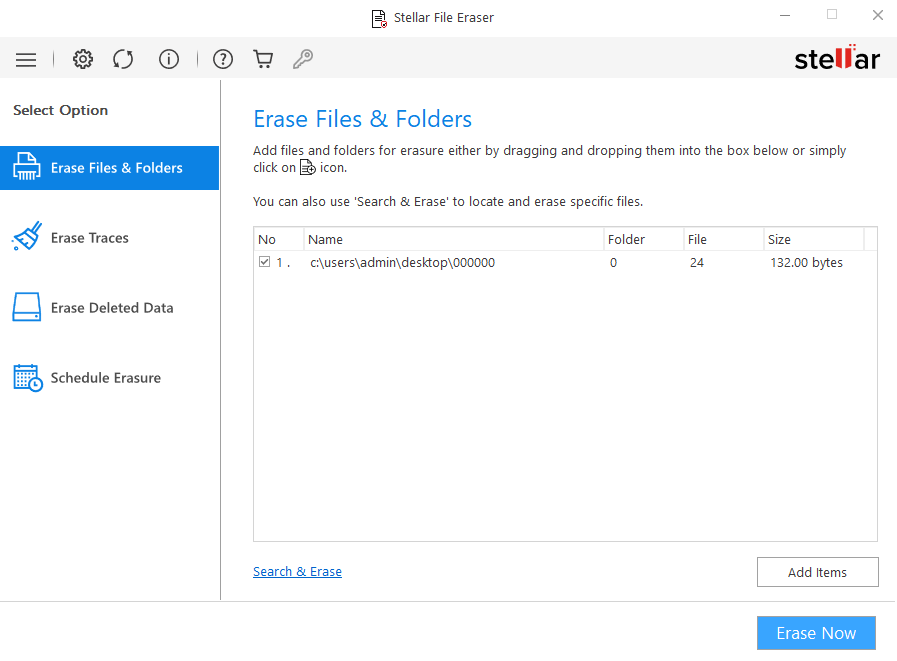
- Install and launch Stellar File Eraser on your PC.
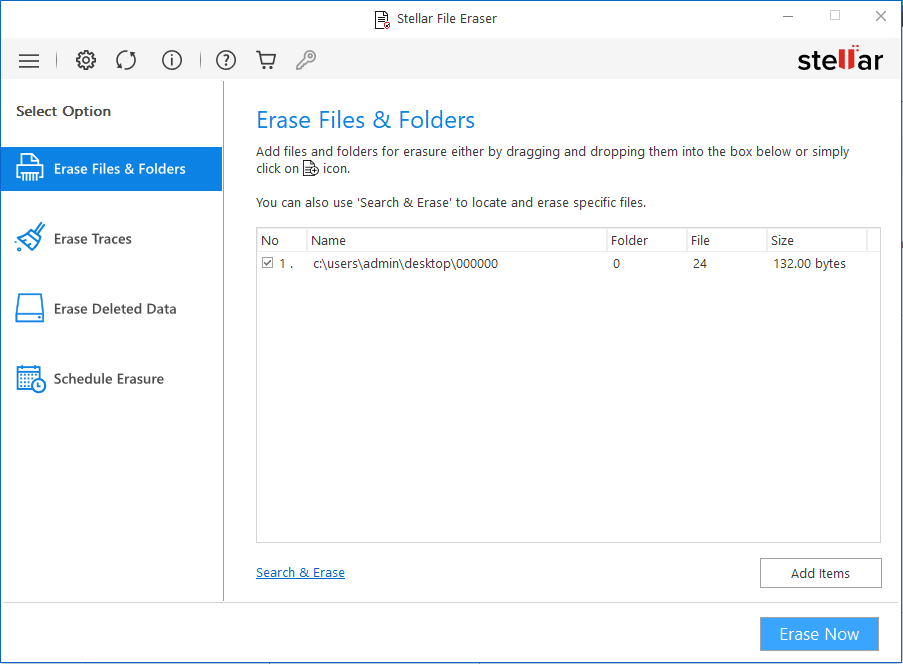
- From the left menu, select Erase Files & Folders.
- Click Add Items to add the temporary files you wish to delete, and click Erase. Click Proceed to continue when the Confirm Erasure dialog box appears
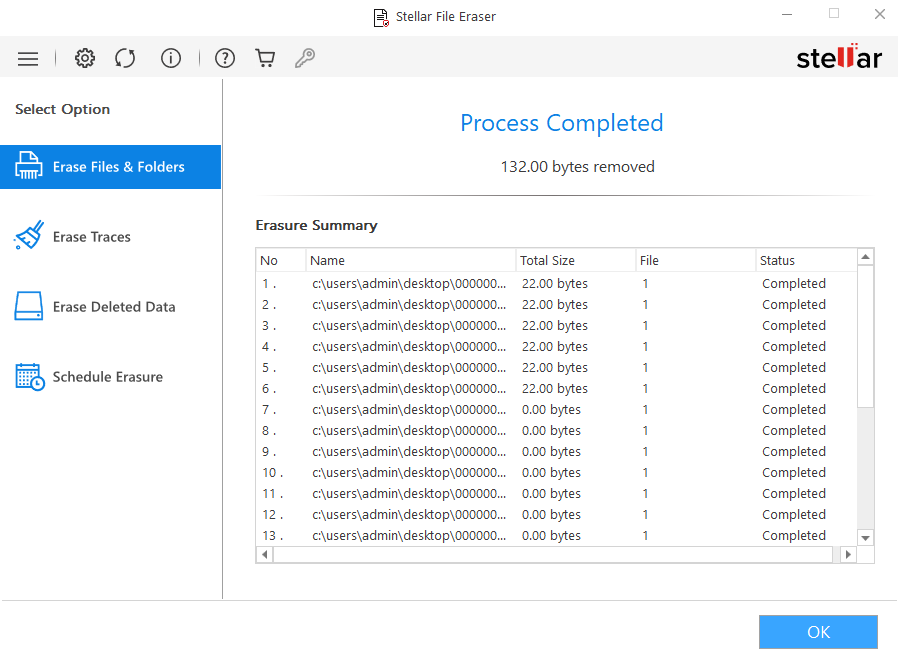
- The Process Completed window appears with the Erasure Summary of deleted files. Click Ok to finish the process.
Method 3: Secure erase commands (for SSDs)
Permanently deleting files from an SSD can become challenging due to SSD wear and the TRIM command. SSD wear may result in data being scattered around different blocks, which poses difficulties for the overwriting and formatting process. The TRIM command, on the other hand, leads to immediate data deletion, making successful file recovery a matter of how quickly a user reacts.
Despite the above-mentioned limitations connected to the SSD wear level and the enabled TRIM command, successful data recovery from SSD is possible.
This is why the Secure Erase command is used to erase all memory cells and reset mapping tables to destroy all stored data, ensuring data is deleted beyond recovery.
Common methods include:
- ATA Secure Erase (SATA SSDs),
- NVMe Format/Sanitize (NVMe SSDs),
- Crypto Erase (self-encrypting SSDs)
Here’s how to perform Secure Delete via BIOS/UEFI Settings:
SSD manufacturers include the ‘Secure Erase’ option (different manufacturers use different names) with their drives that can be accessed via BIOS.
- Go into the BIOS/UEFI settings.
- Look for the SSD that you wish to wipe. Select it.
- Look for the Secure Erase option.

- Follow the process after selecting the Secure Erase option.
Read More: The 5 Best Methods to Wipe an SSD
Method 4: Physical destruction
Sometimes file erasure attempts are unsuccessful, or users can still recover the files deleted successfully using the Secure Erase command or software-based overwriting. If this is the case, destroy the data completely from the external storage devices using drilling, degaussing HDDs, crushing drives, and certified e-waste destruction services.
Conclusion
Although the blog mentions tools such as SDelete, Cipher, and the Shred command to overwrite data, it’s worthwhile to know that these tools are neither easy nor safe to use. While SDelete can lead to accidental erasure of important files if you mistype the drive letter or command, the Shred and Cipher command requires technical knowledge and are difficult to use by a non-technical person. Similarly, the Secure Erase command wipes the entire SSD, but not individual files.
Hence, we recommend using Stellar file eraser to securely erase the data from your external storage devices.