Did you know that millions of people use Macs worldwide? With all those machines out there, it’s natural to assume partitioning is still a go-to method for managing space… but that’s changed in recent years. Today, Apple’s modern APFS file system makes partitions less necessary. Apple itself notes that “with APFS, you shouldn’t partition your disk in most cases”, since APFS volumes can flexibly share space. So unless you have a special need, your Mac’s drive can just stay as one big container. Still, there are a few scenarios where splitting the drive (or more often, creating an APFS volume) is necessary. Let’s slice into when you might need it – and how to do it safely, just in case you decide to.
When Should You Consider Partitioning a Mac?
For most users, keeping everything on that one big disk is fine but there are some cases where carving out a slice of your drive might help. Here they are:
- You are running multiple operating systems: If you want to boot Windows on your Mac, there is Boot Camp Assistant. It creates a Windows partition for you. Like this, some enthusiastic power users might keep a second macOS on its own partition so as to switch by holding Option at startup.
- Testing beta or alternate macOS versions – Tech enthusiasts sometimes test new macOS betas on a separate volume. This way your main work environment stays safe. (You do need at least 30-50 GB of free space to spare.) By adding a new partition or APFS volume, you can install the beta as if it were a second Mac. That lets you try out the latest features without risking your daily drive.
- Bootable backups or clones: Some Mac users also create a bootable clone of their system on another partition. They normally create it as emergency backup if your main drive crashes, you can boot from the clone and keep working.
- Cross-platform file access: If you are one of those who share a drive with Windows PCs or other devices, you may make a small FAT32 or ExFAT partition. That partition can hold files safely for both operating systems without Mac-specific formatting.
Even with these valid reasons, remember that partitioning isn’t magic at all… it splits your existing space into fixed chunks. If your drive is already almost full or near it… carving it up might do more harm than good.
How to Partition a Mac Hard Drive (Safely)?
If one of the above scenarios sounds like your need, you can proceed – but do it cautiously. First and foremost: back up your Mac before you start. Any drive surgery carries risk, even with Apple’s tools.
On modern Macs (macOS 10.13+), you usually create APFS volumes rather than rigid partitions. APFS volumes share space dynamically, so one volume can grow into unused space when needed. We’ll cover both approaches: using Disk Utility’s graphical interface, Boot Camp for Windows, and an advanced Terminal method.
Using Disk Utility
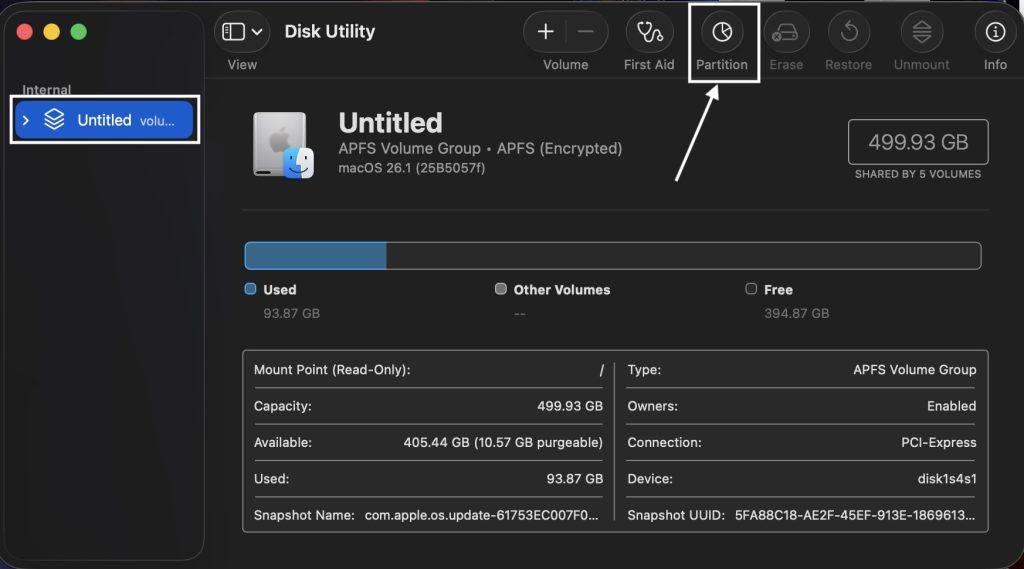
Apple’s built-in Disk Utility app (in Applications > Utilities) is the standard way to slice and dice your drive. It shows your disk as a pie chart, which makes it pretty user-friendly (see image below).
Disk Utility’s Partition view (Macintosh HD is split into two partitions, shown in the chart). Always back up before editing this pie!
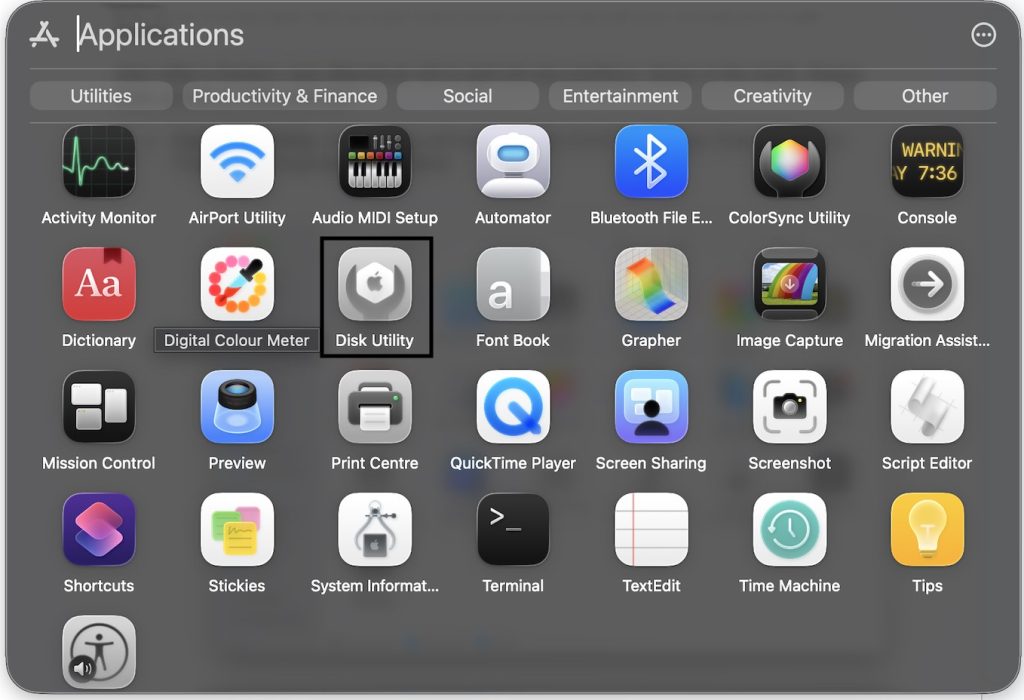
- Open Disk Utility: For this, you will have topressCmd+Space, type “Disk Utility” or in Finder under Applications > Utilities.
- Select the correct drive. In the sidebar, click the physical disk or volume you want to partition. If your Mac has multiple drives, pick the right one.
- Click “Partition” (or “Add Volume”). In the toolbar, click the “Partition” button. (On an APFS drive, you can also click the small “+” below the chart to add a new volume instead, which is simpler and more flexible.)
- Name and format the new slice. In the dialog that appears, click Add Partition. Give the new partition a name (e.g. “Windows” or “Test macOS”). Then choose a format from the menu… for a Mac OS partition, pick APFS (or “Mac OS Extended (Journaled)” on older macOS versions). If you need cross-platform sharing, pick ExFAT (good for >4 GB files, compatible with both macOS and Windows).

- Set the size. Drag the pie chart’s divider or enter a size (like “50 GB”) for the new partition. This determines how much space is reserved. Be generous: once created, resizing later may require deleting and re-creating partitions.
- Apply changes. Click Apply (or Partition) and confirm the warning. Disk Utility will take a few moments to carve out the slice. When it’s done, you’ll see the new partition or volume appear in both Disk Utility’s sidebar and the Finder.
Using Disk Utility’s graphical interface is fairly straightforward. It handles both APFS and older formats. The built-in guidance even shows how much space is used vs. free, which helps avoid errors. When finished, each volume gets its own icon in Finder, so you can copy files on/off it as needed.
Using Boot Camp Assistant
If your goal is Windows on a Mac, don’t use Disk Utility… use Boot Camp Assistant. Boot Camp takes care of creating the Windows partition (named BOOTCAMP) and installing the OS. Here’s how:
- Backup and prepare. Again, make sure you have a current backup. Also check you have a 64-bit Windows ISO and enough free space (at least 64 GB, 128 GB recommended).
- Open Boot Camp Assistant. Find it in Applications > Utilities. It walks you through the entire process.

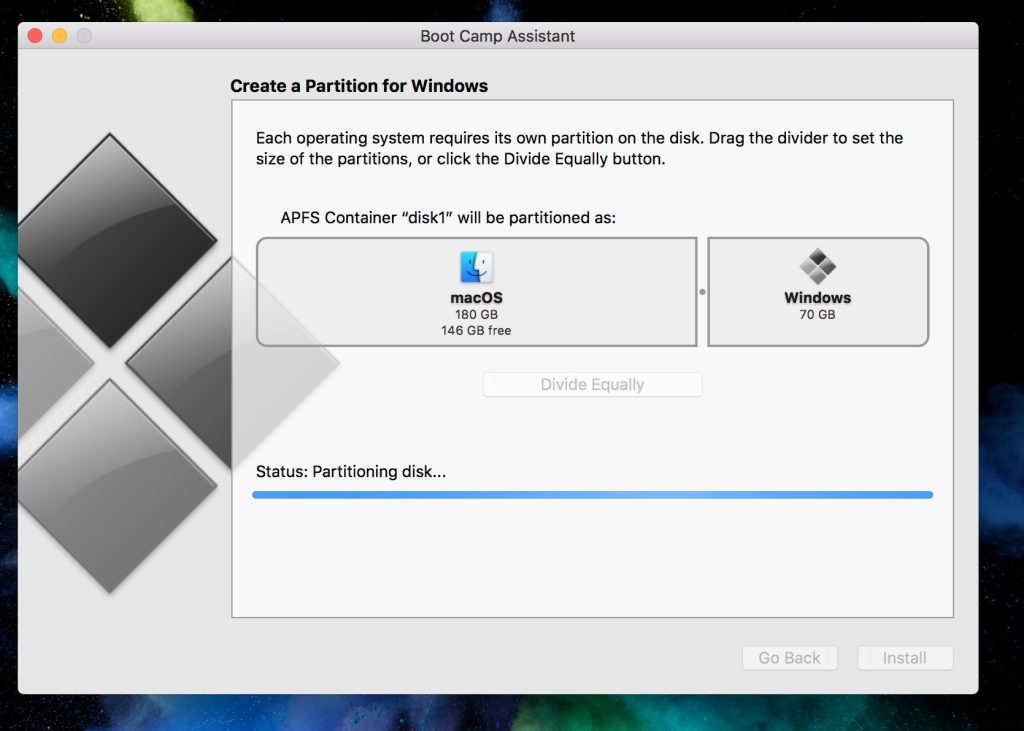
- Set the Windows partition size. Boot Camp will show a slider for how much space to give Windows. Choose the partition size. Make sure to allocate enough, since resizing later is tricky.
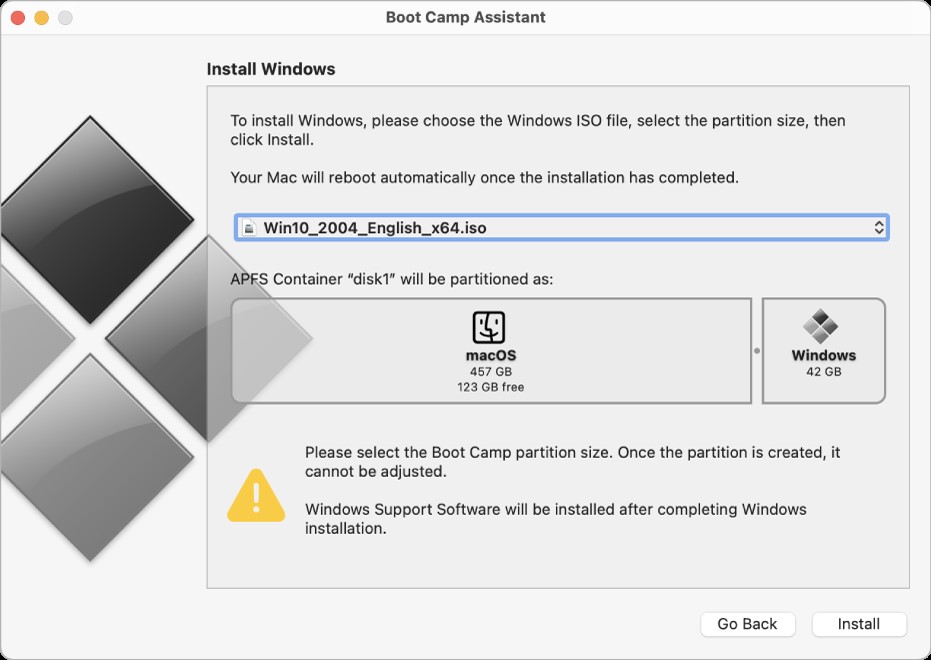
- Create the partition and install. Follow the prompts. Boot Camp will reboot your Mac into the Windows installer. When asked where to install Windows, select the “BOOTCAMP” partition. The installer may format it for you (usually as NTFS). Then just proceed with the Windows setup.
- Complete setup and switch OS. After Windows installs, your Mac will boot into Windows and run the Boot Camp driver installer. Once that’s done, you can hold the Option key at boot to choose macOS or Windows.
Boot Camp makes partitioning a breeze for Windows users. Just remember: it’s mainly for Intel Macs (Apple Silicon Macs use a different approach) and once set, you can’t shrink the Windows partition without deleting it and starting over.
Using Terminal (diskutil)
For advanced users comfortable with the command line, macOS provides the diskutil tool. It can add, resize, or delete partitions and volumes. Use this only if Disk Utility isn’t doing exactly what you want, since mistakes here can wipe data. (Seriously, triple-check your commands and backup first.)
Steps with diskutil:
- Open Terminal. (Applications > Utilities > Terminal.)
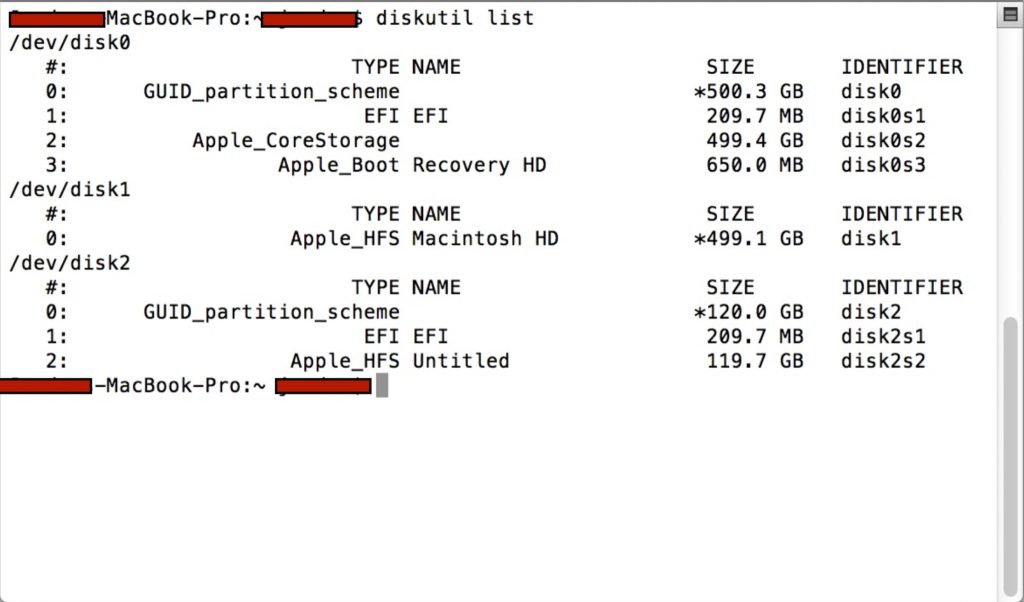
- Identify your disk. Run diskutil list to see all drives and partitions. Note the identifier of the disk you want to split (e.g. /dev/disk0).
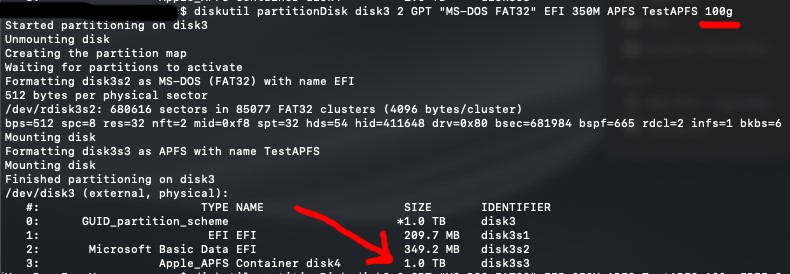
Add a partition or volume. For example, to add a new APFS partition on the main disk, you might run something like:
diskutil partitionDisk disk3 GPT “MS-DOS FAT32” TestAFPS 100g
This would carve out a 100 GB APFS partition named MS-DOS FAT32.
You can also use diskutil addVolume: e.g.
diskutil addVolume disk0s1 APFS NewVolumeName 20g
- Wait for confirmation. The Terminal will do its thing. When it finishes, the new partition or volume should mount in Finder.
Be very cautious: command-line partitioning ignores many safety checks. A typo could erase the wrong disk. Make sure the disk/partition ID is correct before hitting Enter. But if used correctly, diskutil offers powerful control when the GUI isn’t enough.
Follow these methods, keep backups time and again and you can split your drive with minimal risks involved.
What is worth emphasizing here is that you should always back up before partitioning or resizing without a miss. Use Time Machine or a cloning tool whenever and wherever you can. This way, if anything goes the wrong way, you can restore your system to its previous state and those precious files of yours are safe and sound.
But remember, even with best efforts, mishaps can happen any time. If you accidentally delete any of your files or that partition gets corrupted, there are recovery tools that exist. For example, you can try Stellar Data Recovery for Mac, a free-to-try professional Mac data recovery software that recovers deleted or lost files. In its free version, it can retrieve up to 1 GB of data for free and handle those recoveries from deletions, formatted or corrupted drives, and more. So if files go missing during a partition experiment, you can scan your Mac immediately with this tool to reclaim documents, photos or other data.
Conclusion
Partitioning a Mac’s drive can be useful in the right circumstances… dual-booting, testing another macOS, or keeping a cloned backup, for example. These scenarios can bring real benefits like isolation and multi-OS flexibility. However, partitions also have their own downsides… they lock in space, can complicate backups, and aren’t as necessary on modern APFS systems. And if that drive of your Mac is nearly full, slicing a part off is not advised. Ultimately, you will definitely have to weigh the trade-offs. Pros of partitioning include running Windows or a second macOS natively and having separate bootable backups. Whereas, Cons include wasted space and added complexity. Whether or not you cut up your Mac’s disk, practice safe disk management… keep your backups, use your disk utilities carefully and consider all those alternatives before partitioning. With caution and the right tools that we explored here, you can keep your Mac’s storage healthy and your data safe… come what may.