What is RAID 5 Array?
RAID 5 is one of the configurations that individuals and organizations deploy for securely storing critical data. Typically, this array consists of a minimum of three storage drives (called member drives) that together work as a single logical unit. It uses both data striping and distributed parity in conjunction. Striping makes data storage efficient, while the distributed parity offers fault tolerance in case of a single drive failure.
Yet, there are reasons because of which a RAID 5 array fails.
So, if you have a damaged RAID 5 array and want to recover data from it, this post is for you. In this, we will explain the reasons for RAID 5 damage or failure and how to recover data from such a RAID array.

What are the Causes for RAID 5 Damage?
Here are some reasons why, despite having fault tolerance, RAID 5 fails:
- Logical errors, like bad blocks are introduced due to bit-flip or when incorrect data is written on the drive.
- Degradation of the platter causing physical bad blocks or head crash.
- DDoS attack on the RAID server connected to a network.
- Sudden power loss or outage while writing data onto the drives.
- Malfunctioning RAID controller.
- Improper RAID 5 rebuild.
- Drive failure or critical errors.
- Corrupted boot information.
- Outdated firmware.
Recover Data from a Damaged RAID 5 Array
It may not be inherently risky to hot swap the failed member disk or use an available hot spare to rebuild the degraded RAID 5 array. But doing so when the other drives are not in good health can cause permanent data loss. Instead, your priority should be to recover data from the failed RAID 5 array.
For this, you can rely on Stellar Data Recovery Technician – an advanced DIY RAID data recovery tool that lets you rescue critical files and folders from a damaged or inaccessible RAID 0, RAID 5, RAID 6, and nested RAID arrays. It can recover all kinds of files, like documents, media files, virtual machine files, emails, etc. You can also use it to recover files that were accidentally deleted.
The tool virtually rebuilds the failed RAID array by intelligently using probable parameters and then scans it to retrieve the data.
Let’s see how to recover data from RAID 5 using Stellar Data Recovery Technician:
Note: Disconnect the drives from the RAID enclosure and connect in the same order to a Windows system.
- Download Stellar Data Recovery Technician software from its official page and then and install it.
- Launch it.
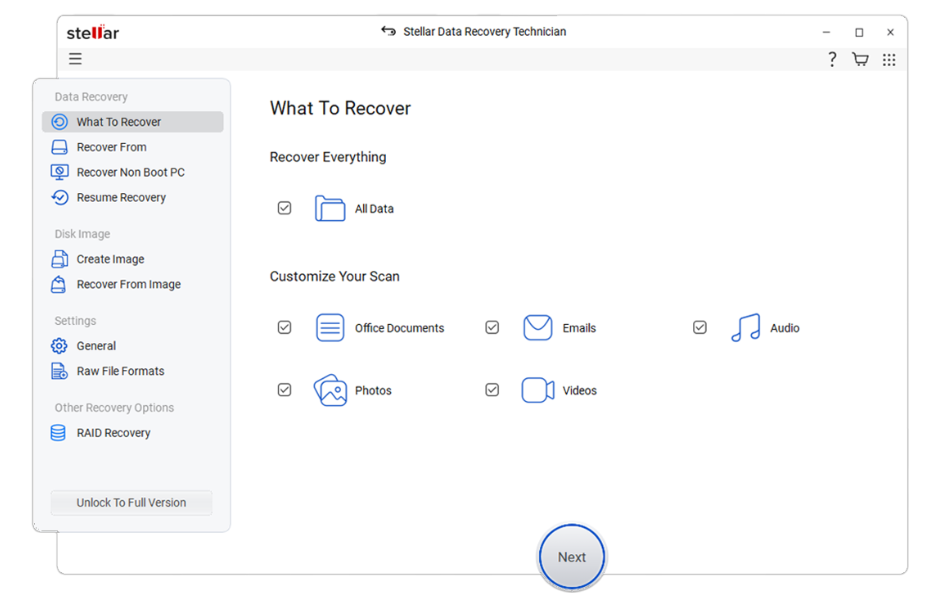
- The What to Recover screen will appear. By default, all file types are selected. You can unselect the option you don’t require. Click Next.
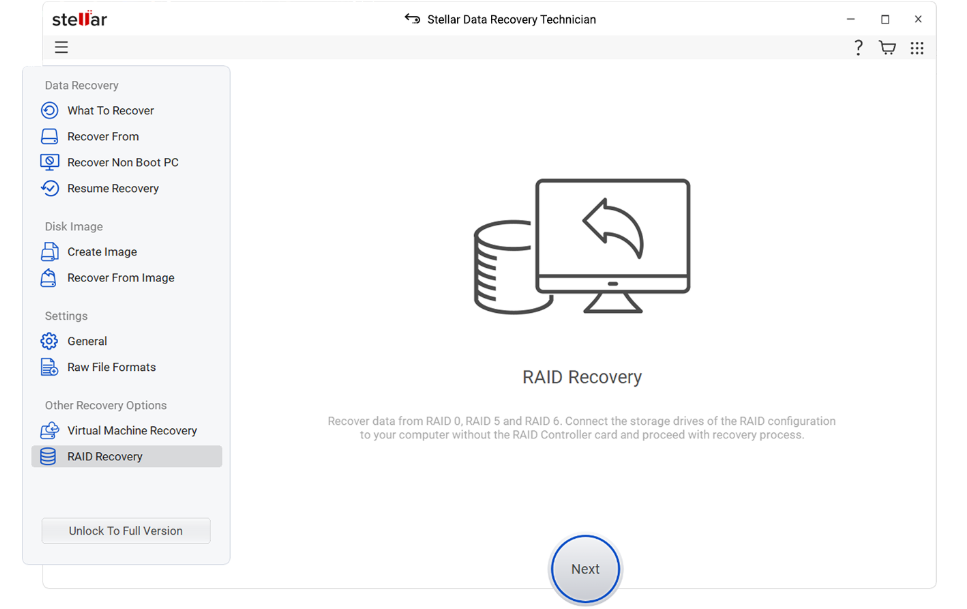
- Select RAID Recovery from the left pane.
- It will open the RAID Reconstruction window.
- Select RAID 5 from the given RAID types at the top of the window.
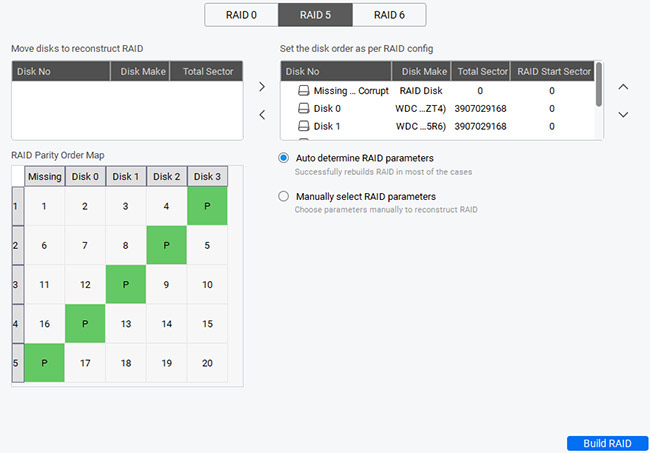
- Use the sideward arrow buttons to move the member drives in the box on the right. Then, use the upward-downward arrows to place the drives in the correct order.
- Now, choose either Auto determine RAID parameters or Manually select RAID parameters.
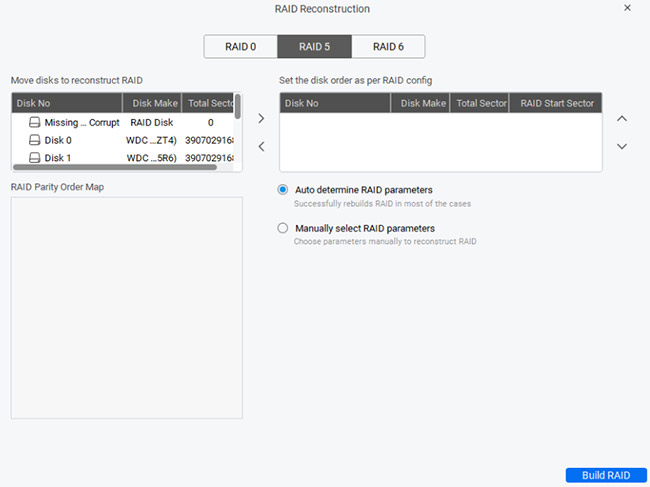
Note – With the Auto determine option, the software will use probable parameters to reconstruct the virtual RAID. With the manual option, you will have to add parameters such as Start Sector, End Sector, Parity Order, etc.
- After this, click on Build RAID. The software will begin reconstructing the damaged RAID 5 virtually.
- Once the process is complete, the reconstructed RAID will be listed. Select it and click on Show Volume List.
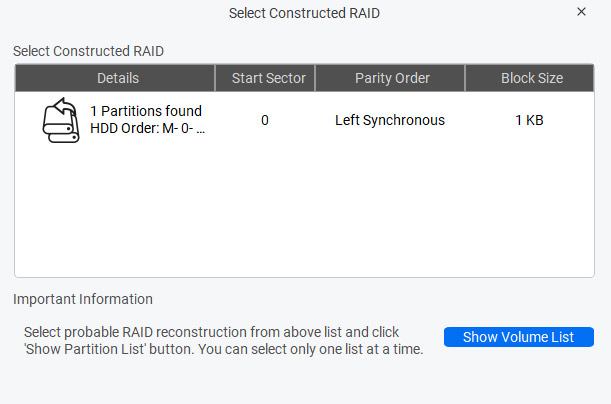
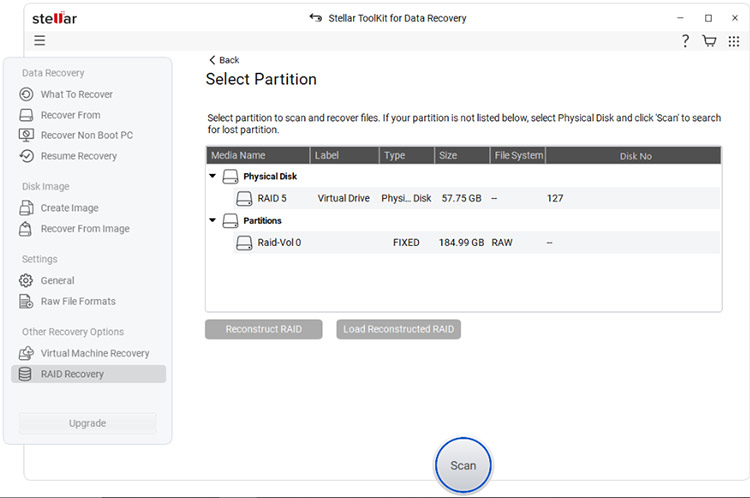
- On the next screen, you will see the reconstructed RAID array listed under “Physical Disk”. It will also list the available partitions under “Partitions.” Select the partition and click on Scan.
Notes:
- In case your partition is not listed, select the Physical Disk to scan.
- If the reconstructed RAID is not appropriate, click on the Reconstruct RAID button to rebuild the virtual RAID again.
- If you have a previously saved image of a virtually reconstructed RAID, click on the Load Reconstructed RAID button.
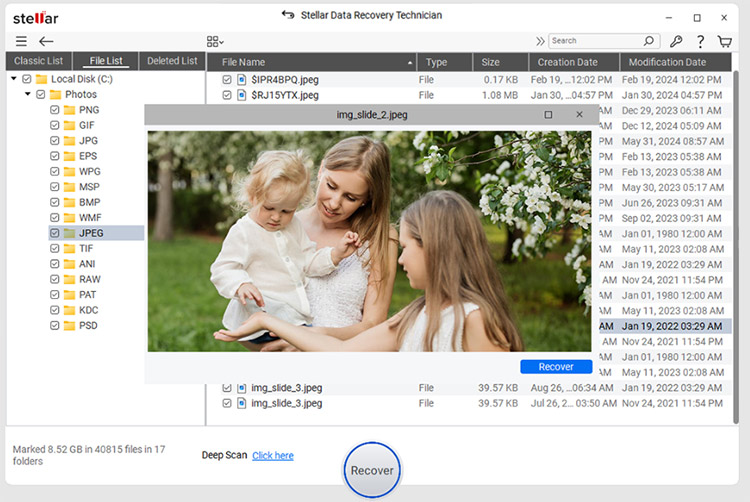
- The software will scan the selected RAID partition/physical disk. It will populate the preview window with all the recoverable files and folders. You can click on any item to preview it and verify.
- After verifying the data, select the required files that you want to recover and click on Recover. By default, all files and folders are selected.
- Browse for the location where you want to save the recovered files. Click on Save.
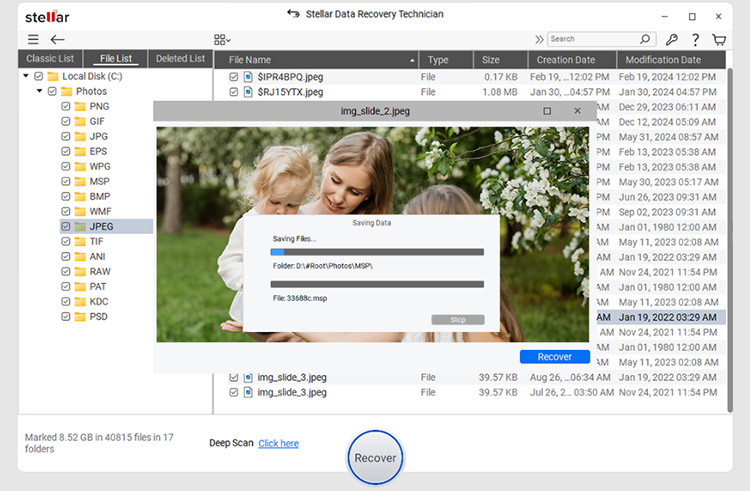
Your data will be saved at the selected location. Now, you can rebuild the RAID array from scratch.
- Be it a hardware-based or a software-based RAID, this RAID data recovery tool can extract the data effectively.
- The tool uses powerful algorithms for automatically matching the patterns and recognizing the RAID parameters. It creates an image of the hard drive for quick and secure data recovery.
- The software offers you an option to either rebuild a probable RAID or manually rebuild the RAID if you have details, like Parity Order, Strip Size, Parity Delay, etc.
- It enables you to find even the lost or undetected drive partitions. You can use the ‘Can’t Find Drive’ feature.
- If you can’t see the RAID volume after reconstruction, select the physical disk and scan it to locate its partition/s.
Conclusion
A RAID 5 array may get damaged or failed due to different reasons, leading to a data loss situation. You may try rebuilding the RAID to recover data. However, reconstructing RAID is a risky process and requires expertise. The safest way for data recovery is to use an advanced RAID data recovery tool, such as Stellar Data Recovery Technician. This software efficiently retrieves the data from a damaged RAID 5 array. It can also recover data from other storage devices, like HDD, SSD, SD card, flash drive, and more.