Partitioning is splitting a hard drive into multiple volumes. Each partition on the drive acts as a separate entity. Creating partitions on a hard drive or storage device helps keep data organized and safe. It also helps increase the system's efficiency and performance. Suppose, if something happens to the hard drive or partition, your entire data will be at risk.
Similarly, creating partitions on RAID divides total storage into each partition, thus helping in better organization and safety of data. In this article, we will share different methods to create partitions on RAID.
Methods to Create RAID Partitions
Below we’ve mentioned methods to create partition on RAID 0, RAID 1, and RAID 5 on Windows.
Note: Before creating a RAID partition, you must ensure that you have at least three hard disks attached to the storage to create partition on all three RAID configurations. Also, back up all your data from the hard drives as data will be erased during the RAID partition setup.
Method 1: Use Disk Management to Create RAID Partitions
You can use Disk Management utility in Windows to set up, create, and resize RAID partition. Follow these steps to create RAID partition using Disk Management:
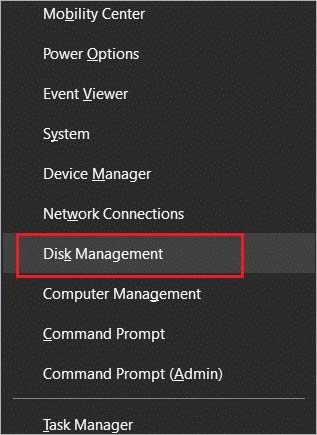
Right-click on the Start menu and click on Disk Management.
A Disk Management window will appear with all the connected drives. Right-click on the unallocated space and select the New Striped Volume option.
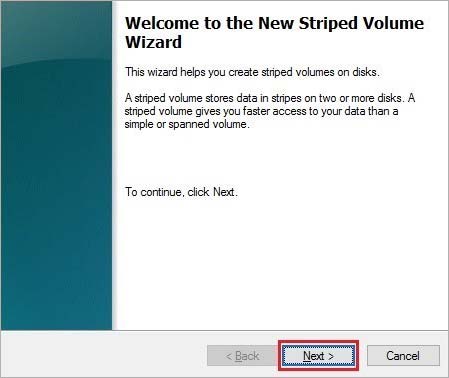
Click Next in the New Striped Volume Wizard that opens.
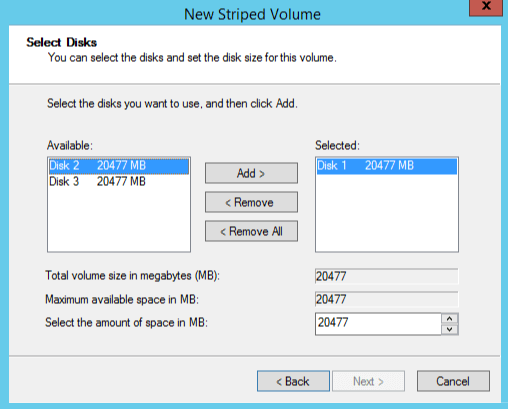
Now, select the disks listed in the left box and click Add.
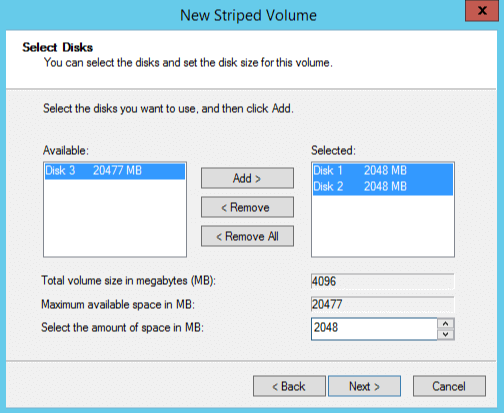
Once you have added all the disks required for striped volume, select the amount of space for each disks in MB (for example, 2048 MB). Then, click Next.
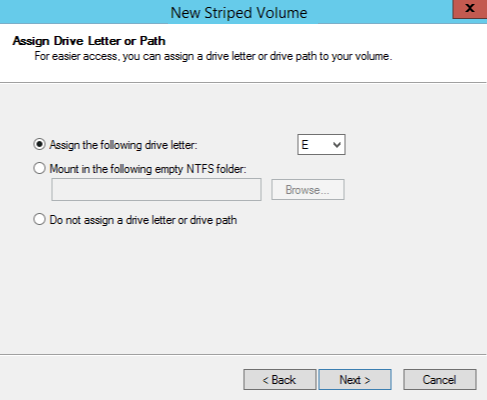
Assign a drive letter to the volume from the dropdown list and click Next.
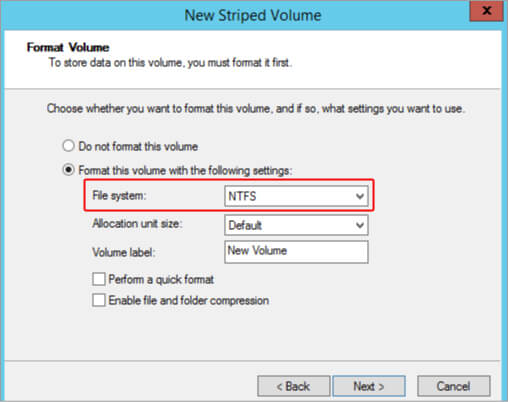
Select the default NTFS option in the file system You can also change it, if required. Then, click Next.
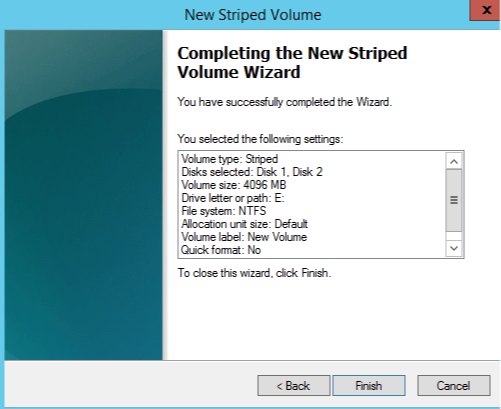
The Confirmation wizard with all the selected settings will appear. Verify the details and then click Finish.
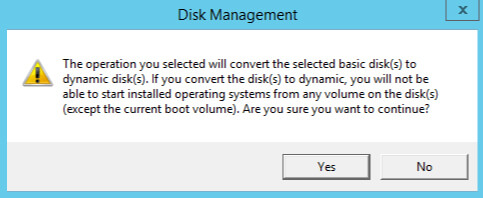
Click Yes to complete creating the RAID 0 partition. This process will take some time to finish.
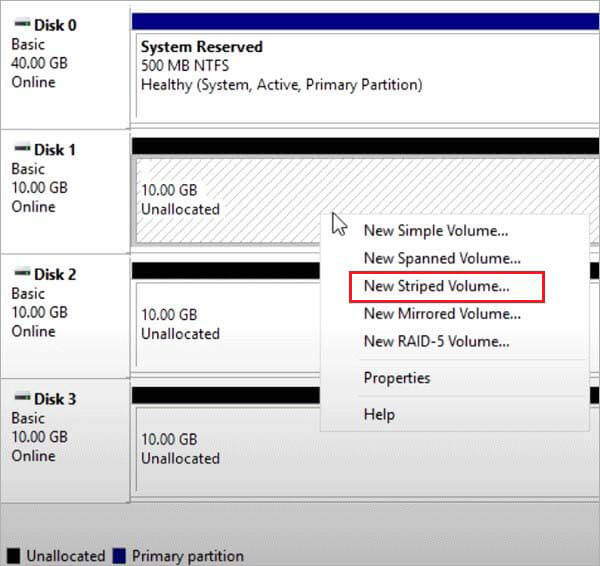
Note: The Stripped Volume option is for RAID 0 configuration. Likewise, the Mirrored Volume option is for RAID 1 configuration.
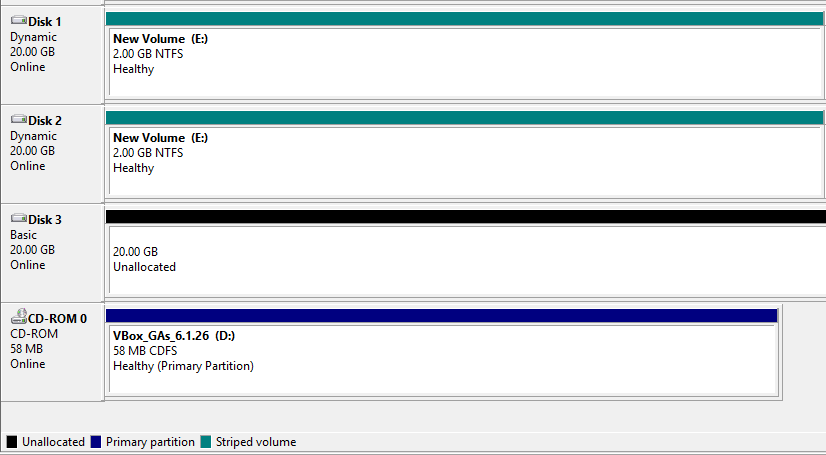
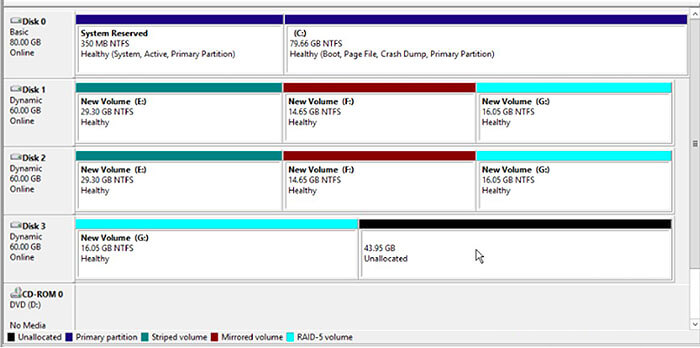
The RAID 0 partition with Disk 1 and Disk 2 has been created.
To create partition for RAID 1, you can select the New Mirrored Volume option instead of New Stripped Volume (see step 2). The remaining steps are same.
For creating partition for RAID 5 array, all you need to do is select New RAID-5 Volume (see step 2) and add three disks instead of two as RAID 5 requires a minimum of 3 disks.
Method 2: Use DiskPart to Create RAID Partition
DiskPart is the oldest and free Windows operating system tool useful for many drive-related jobs, such as creating and deleting disks, volumes, partitions, or virtual hard disks. The DiskPart utility also works with virtual hard disks and removable media like USB flash drives.
Caution: You need to be careful while using DiskPart. Any incorrect command could cause irreversible damage.
Here is how to use DiskPart utility to create RAID partitions:
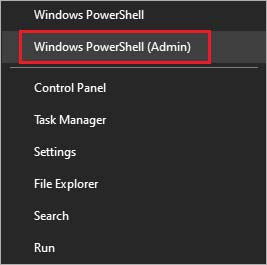
- Right-click on the Start menu and select Windows PowerShell (Admin).
- Now type diskpart and press Enter.
- In the diskpart prompt, type listdisk and press Enter to see the list of the connected drives.
- Now, select the drives one-by-one you want to add to the RAID and turn them into dynamic drives by using the following commands:
- Select Disk X and press Enter. Here X is the number of the desired disk.
- ConvertDynamic and press
Repeat this process three times for RAID 5 to convert three disks into dynamic.
- Once the disks are converted, create a RAID volume by entering the following commands:
- Select Disk X and press Enter. Here X is the number of the desired disk.
- Create Volume RAID Disk 1, 2, 3 and press Enter
- Type list volume to ensure the array is created and press It will show all the selected disks as a single unit.
- Now you have to format the disk and assign it a disk letter. To do this, type the following commands:
- Select Volume 2 (the new volume created by combining the selected drives) and press Enter
- Then typeFormat FS=NTFS Label=MyNewVolumeand hit Enter key.
- After that, typeAssign Letter=Fand hit Here, you can replace the letter F with the letter of your choice.
- Type exitand press
- The RAID 5 partition has been created by using selected drives.
To create a RAID 0 partition, type the following commands and press Enter after each command:
- List Disk
- Create volume stripe size=n disk=1,2,3. Here 'n' is disk size in MB and 1,2,3 are the disks you want to include in RAID 0.
To create a RAID 1 partition, enter the following commands and press Enter after each command:
- List Disk
- Select Disk X (X is the disk number for which you want to create a mirror)
- Convert Dynamic
If you get the prompt saying, "reboot your computer to complete this operation," then restart your PC. Otherwise, continue normally and enter the following commands:
- Select Volume Y (Y is the desired disk)
- Add Disk=1 (add required disk for the mirroring)
- Wait for some time for the RAID 1 partition to create.
Conclusion
This article mentioned methods that can help you easily create RAID partitions on Windows. You can use Disk Management or DiskPart in PowerShell or Command Prompt for creating RAID partitions. However, use DiskPart only if you are well-versed with the command-line.
You must save all the data of the disk you are using to create partition on another drive or external storage medium.
If you encounter data loss while creating RAID partitions due to file system change or accidental deletion, use Stellar Data Recovery Technician software to recover the lost data. It is an efficient RAID recovery tool that can recover deleted or lost data from corrupt/RAW partitions of RAID 0, 5, and 6.


Vishakha Singh is a Senior Writer at Stellar with half a decade of experience in writing content in diverse verticals. She loves creating photo/video recovery & repair tutorials. Vishakha also specializes in writing full-blown iPhone and Android guides.

 6 min read