


Data Parity in RAID: What is it? How it Works and its Role in RAID Data Recovery
October 1, 2025| 6 min read


Our content follows trusted Editorial Standards - accurate & unbiased.
Summary: To recover lost data from a failed RAID 6, immediately stop using it and label each drive carefully so nothing gets mixed up. Then connect the drives to a separate system and use a RAID recovery software like Stellar Data Recovery Technician to virtually rebuild the array from the remaining disks. If only one or two disks have failed, the array can still be degraded, and a software-based rebuild or replacing the RAID controller might bring it back online.
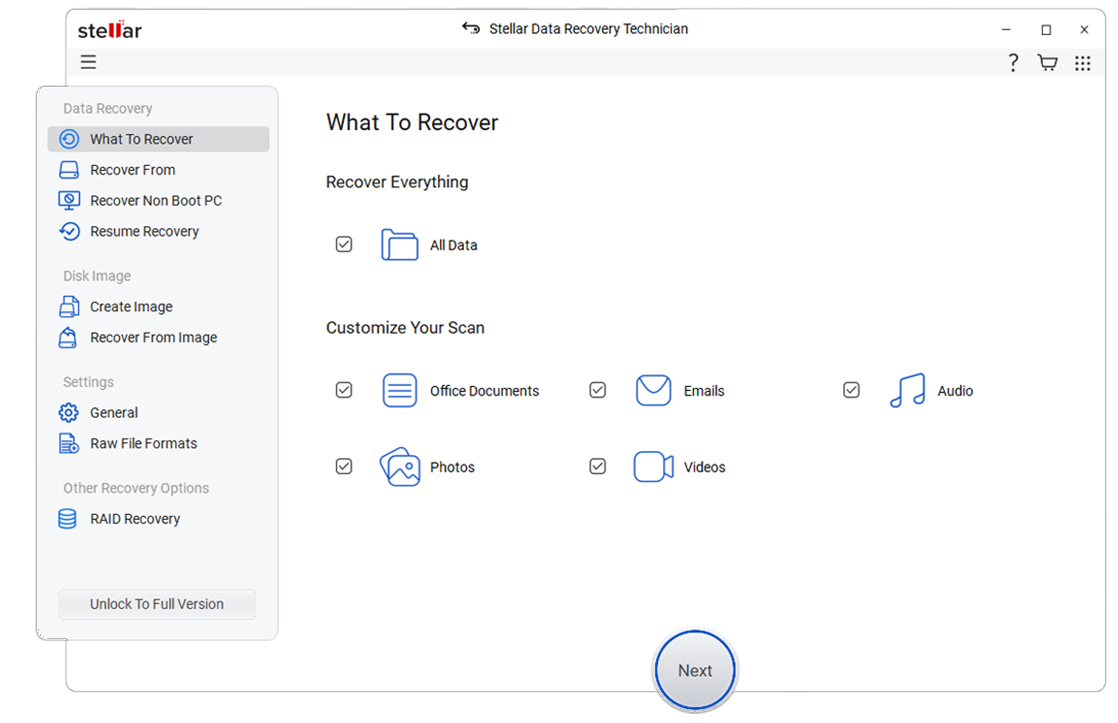
Free Download 100% SecureSame as any other RAID level, the intent of RAID 6 is to ensure system security and increase system and data availability. RAID 6 configuration requires minimum of four drives and employs block-level striping with double distributed parity technology. RAID 6 has a fault tolerance of 2 drives; this means even if two drives fail in the configuration, you can recover data from RAID 6. If more than two drives fail, RAID 6 fails which completely means that RAID 6 is not intact. Consequently, the necessity to perform failed RAID 6 data recovery arises. In such a situation, you can use Stellar Data Recovery Technician as a solution. There are certain reasons to choose this data recovery software. The RAID recovery software is capable of successfully recovering lost or inaccessible data from three RAID levels: RAID 0, RAID 5, and RAID 6. In addition, it is a powerful and user-friendly software devised to perform failed RAID data recovery on Windows 10, 8, 7, Vista, and XP machines. Further, It recovers data from a failed RAID regardless of the causes of failure.
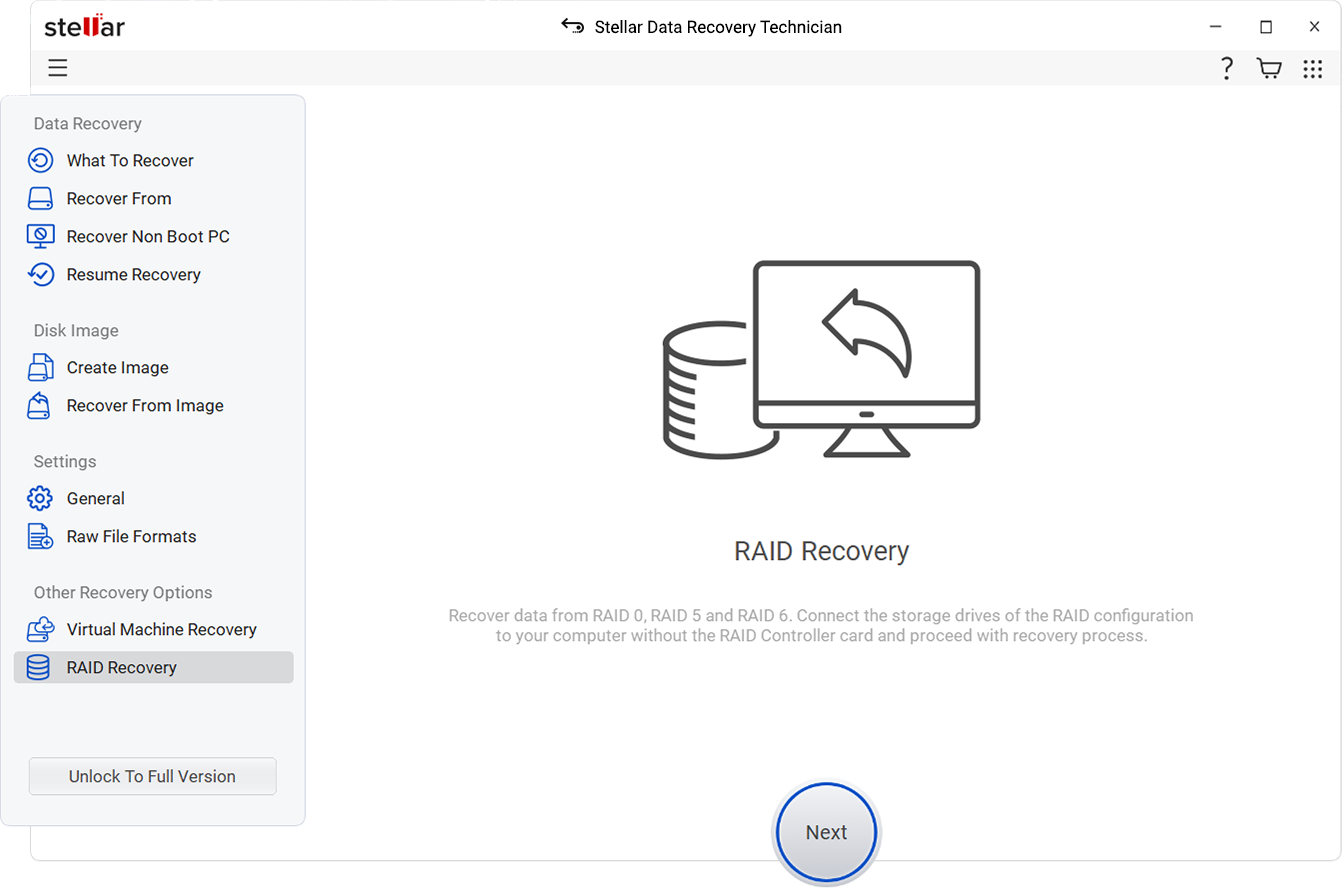
Using Stellar Data Recovery Technician for RAID 6 recovery
To be able to recover entire data from a failed RAID 6 using the Stellar software, it is essential to know the correct usage of the software. The software performs RAID data recovery by 'rebuilding RAID' and 'scanning' the found RAID volumes. Thus, in case of the RAID 6 recovery, you will have to rebuild the RAID 6 and then scan the found volumes using software. Nonetheless, know the detailed steps below:
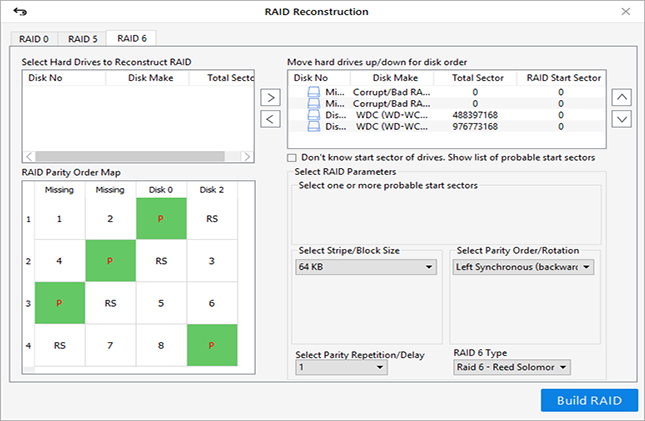
a) Go to 'RAID 6' section
b) In the 'Select Hard Drives to Reconstruct RAID' section, choose the missing or failed hard drives and click '>' to move the drives in 'Move hard drives up/down for disk order' section. If you want to remove any drive that you added by mistake, select the drive and click '<' button.
c) In 'Move hard drives up/down for disk order' section, click buttons to move the drives Up/Down and finally placing the drives in an order
d) Next, select other details of the parameters: Stripe/Block Size, Parity Order/Rotation method, Parity Repetition/Delay time, and RAID 6 Type from the drop-down menus provided for each parameter
Note - If you do not know the details of the parameters, check 'Don't know start sector of drives. Show list of probable start sectors' checkbox. Further, choose one or more feasible Start sectors from the provided list. You can even add 'Start sector' up to 20 if the Sectors are not enlisted.
e) After providing the necessary details, click on the 'Build RAID' button on doing which a single RAID appears in the 'Select Constructed RAID' screen
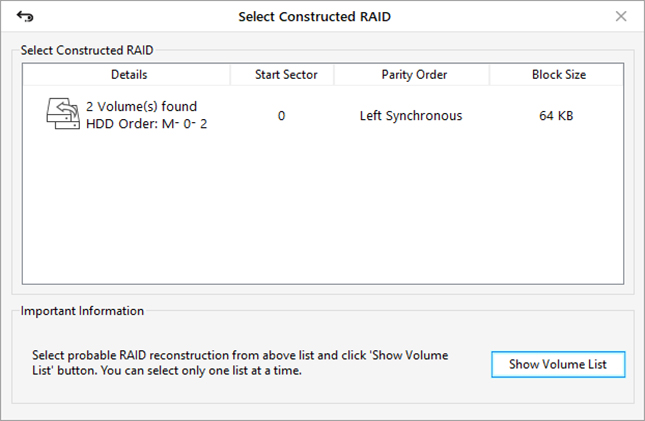
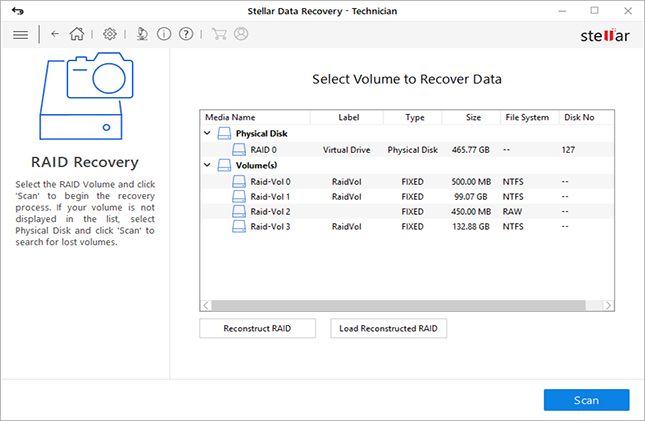
6. Select a RAID Volume from the list of Found Volumes and click on the 'Scan' button to display the files (data) lost from a failed RAID
Note - If the Volume is not enlisted, select the 'Physical Disk' and click 'Scan' button. This is to search for lost volumes, or you can also perform Raw Recovery in this case. The software provides the 'Reconstruct RAID' feature to reconstruct RAID if you are not satisfied with the constructed RAID 6. 'Load Reconstructed RAID' feature is to select another constructed RAID from the list of probable RAIDs.
7. In the Preview window, select the files you want to recover and click the 'Recover' button. You will get the option to save the recovered data/files
Note - If the desired files are not found, you can use the 'Deep Scan' feature of the software. To utilize it, click 'Click Here' link beside the 'Deep Scan' in the Preview window.
Senior Content Writer
This article was written by Mansi Verma, a Content Writer at Stellar Data Recovery.
Curious about our content creation process? Take a look at our Editor Guidelines.
October 1, 2025| 6 min read
March 26, 2025| 6 min read

September 10, 2024| 6 min read


 6 min read