Dealing with a Mac that just unexpectedly shut down can be a pain… your screen goes dark and suddenly you are unable to find the files you were working on. But don’t panic at all. We’ll walk through practical steps to recover your files. Yes, this can be scary but Macs have several built-in tricks and a third-party helper to help you bounce back. Read on to get your files back on Mac?
Why Unexpected Shutdowns Lead to File Loss
Unexpected shutdowns can cause data loss for a few common reasons:
- System crash (kernel panic): If macOS encounters a critical error like a kernel panic or a rogue app crashes hard… it forces a restart. Any files still in memory or temp storage can be lost.
- Hardware or software malfunction: When components of the system are failing, causing abrupt shutdowns, corruption, or freezing and results in data loss.
- Malware or corrupted software: A malicious program or a severe software bug can crash the OS or corrupt files.
- Unsaved work: Simply put in words, if there are any documents or edits that you hadn’t saved yet… they are going to vanish. When your Mac shuts off, only the last saved version exists.
- Power failure or interruption: A blackout, an unplugged cable or battery that got drained is bound to cut power of your system in that very instance, therefore, any unsaved work that you have done is lost.
Each one of these scenarios that we just listed above can suddenly yank power or resources away from running apps on the system. But the good news here is that if your Mac does restart, there are several reliable ways to try to recover your lost files.
Methods to Recover Lost Files After a Mac Shutdown
Apple provides built-in backup and recovery options (like Time Machine and iCloud) and many apps that use the auto-save features. Alright… let’s go through the best options one by one and get those files of yours back.
Method 1: Using Time Machine Backup
If you use Time Machine on your Mac system, which is Apple’s backup system, your files are most probably sitting safe on an external drive or network. Time Machine is made to keep historical snapshots of your folders so that you can “go back in time” to before the crash. To clarify, this method only works when you previously created a backup of your files. To use it, you’ll have to follow these steps here:
- Connect your Time Machine drive. Plug in the external disk (or ensure network backup is reachable).’
- Open the Finder folder where the files were. For example, if you lost a file in Documents, open the Documents folder.
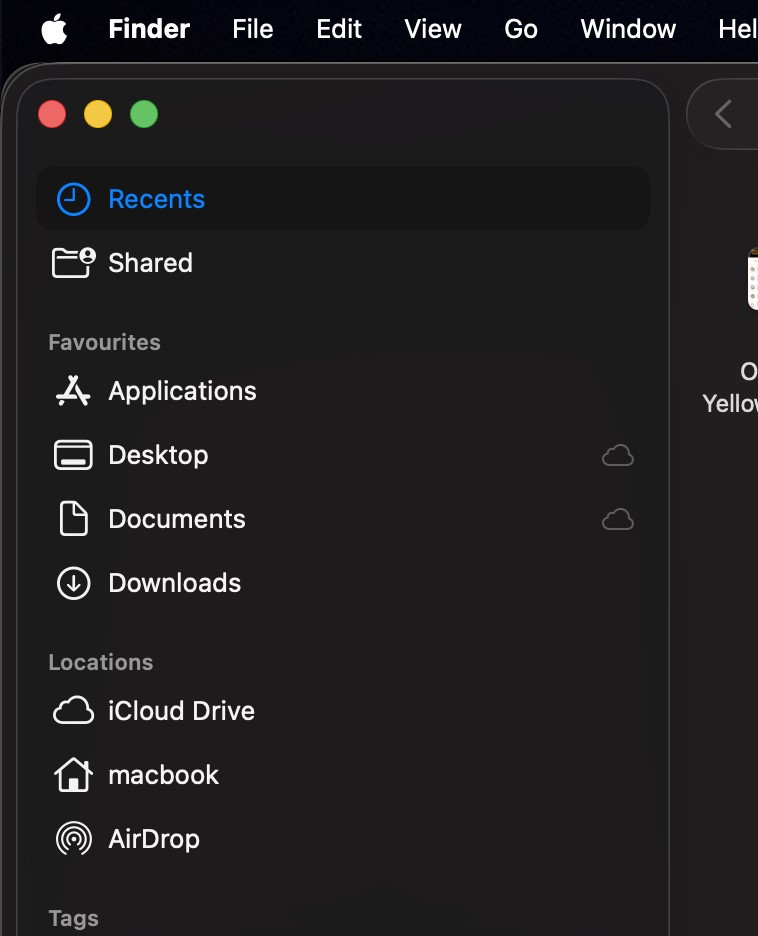
- Enter Time Machine. Click the Time Machine icon in the menu bar and choose Browse Time Machine Backups. If the icon isn’t there, open System Settings > Control Center > Time Machine and enable “Show in Menu Bar”, then click it.
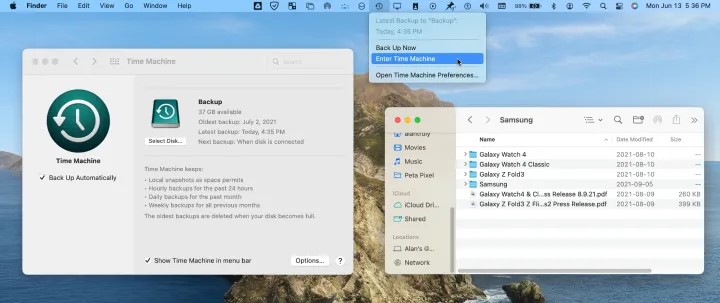
- Find the lost files. Use the timeline on the right or the up-arrow to go back to a date before the shutdown. Navigate the Finder view to locate your missing files or folders.
- Restore them. Select the files you want and click Restore. Time Machine will put them back in their original locations.
Once the restore completes, you should see your files back where they were. (If the Mac’s system was also corrupted, you may need to boot into Recovery mode and reinstall macOS before restoring, but for typical file loss you can just restore normally.) In short, it easily recovers any backed-up versions of your files, provided you know how to back up files using Time Machine.
Method 2: Checking Temporary and AutoSave Folders
Even without a backup, macOS and many apps often save work-in-progress in temporary places. It’s worth searching these spots:
- Look in the Trash (or Bin) for “Recovered Files”. After a crash, macOS sometimes moves leftover temporary app data to a ‘Recovered Files’ folder in the Trash. These aren’t guaranteed to be your documents, but occasionally include fragments of unsaved work. Open the Trash (click the Trash icon) and see if any “Recovered Files” or similar temporary folder is there. If so, drag the needed items out to your Desktop or another folder before emptying the Trash.

- Check your app’s AutoRecovery (AutoSave) folder. Many apps keep hidden autosaved copies. For example, Microsoft Word for Mac saves AutoRecover files in a hidden Library path. In Finder, choose Go > Go to Folder…and enter a path like:
~/Library/Containers/com.microsoft.Word/Data/Library/Preferences/AutoRecovery/
- See if your document appears there and open it.
Use Terminal for hidden temp files.
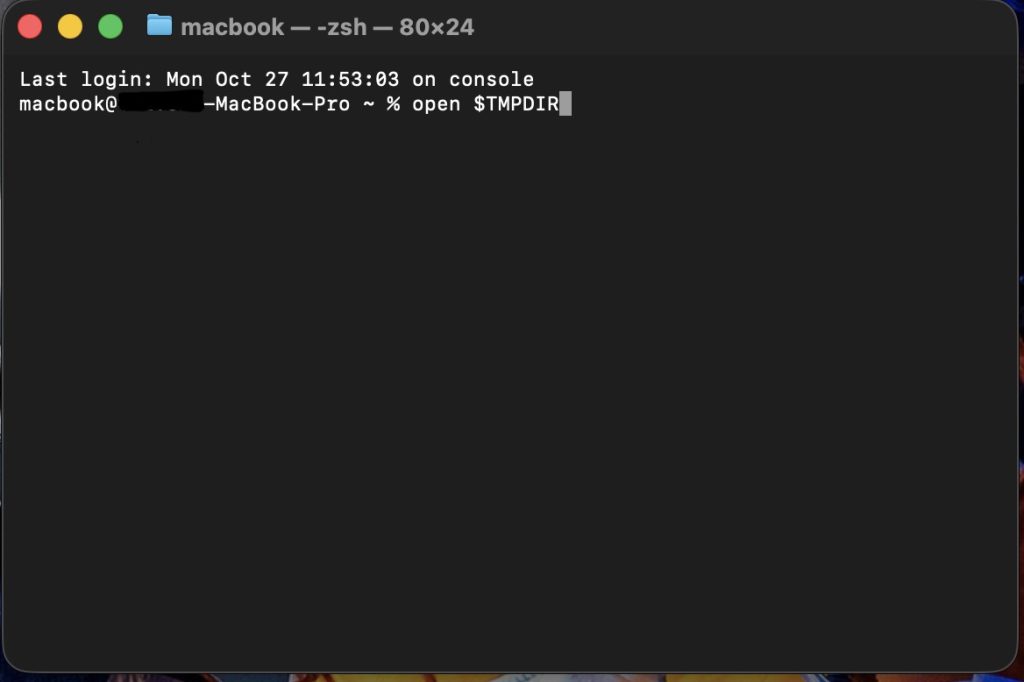
- Open Terminal (in Applications).

- Run: Open $TMPDIR. It is to be noted that this folder, containing temporary files, resets with each reboot, so if you have restarted your system multiple times, you probably have lost files from this folder.
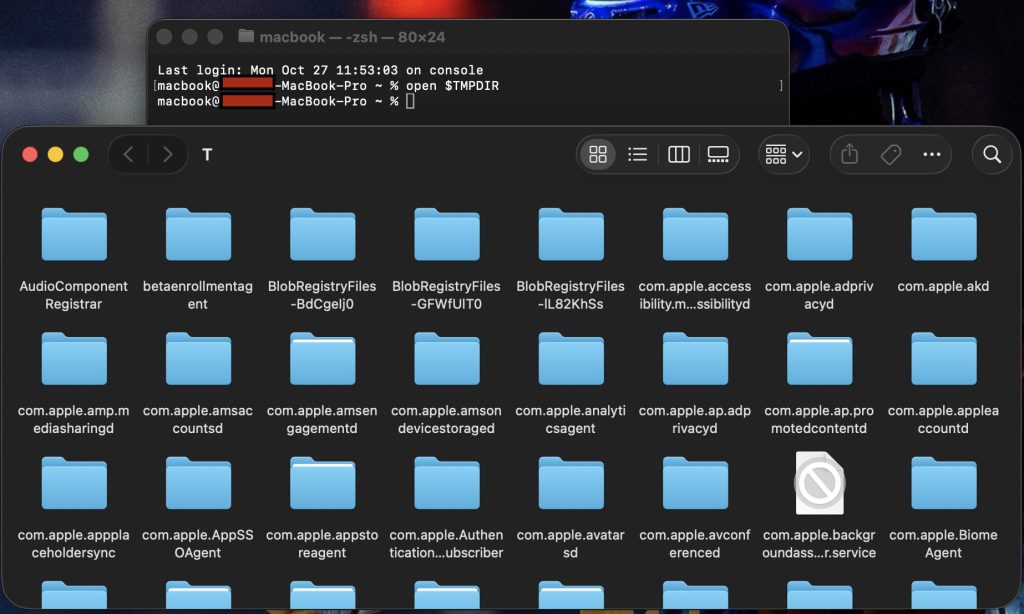
- This will open your Mac’s hidden temporary folder. Inside, look for a folder named TemporaryItems. Often, Word or other apps will leave unsaved files there. You might see files with names like Word Work File [random].tmp. You can open these in a program (or even TextEdit) and recover content.
- Search for invisible auto-saved files. Some apps (like Office or other editors) allow you to Recover Unsaved Documents via their File or Open menu. Check if your app has a recovery menu.
These steps use macOS’s own auto-save/auto-recover features. They often unearth documents you thought were lost. For example, Apple notes that after a crash, “Recovered Files” folders in the Trash contain temporary files apps couldn’t save before quitting. By dragging those out and checking hidden AutoRecovery folders, you can retrieve unsaved work even if it doesn’t show up in your original folder.
Method 3: Recovering from iCloud Drive
If you use iCloud Drive (including Desktop & Documents in iCloud), your files are backed up to Apple’s cloud, which has its own recovery system:
- Go to iCloud.com. In a web browser, sign in at icloud.com with your Apple ID.
- Open iCloud Drive. Click the iCloud Drive icon.

- Find “Recently Deleted”. In the sidebar, click Recently Deleted (at the bottom). iCloud keeps deleted files here for up to 30 days if Desktop and Documents are syncing. If you have deleted a file locally and the syncing was off, it won’t show up on iCloud.
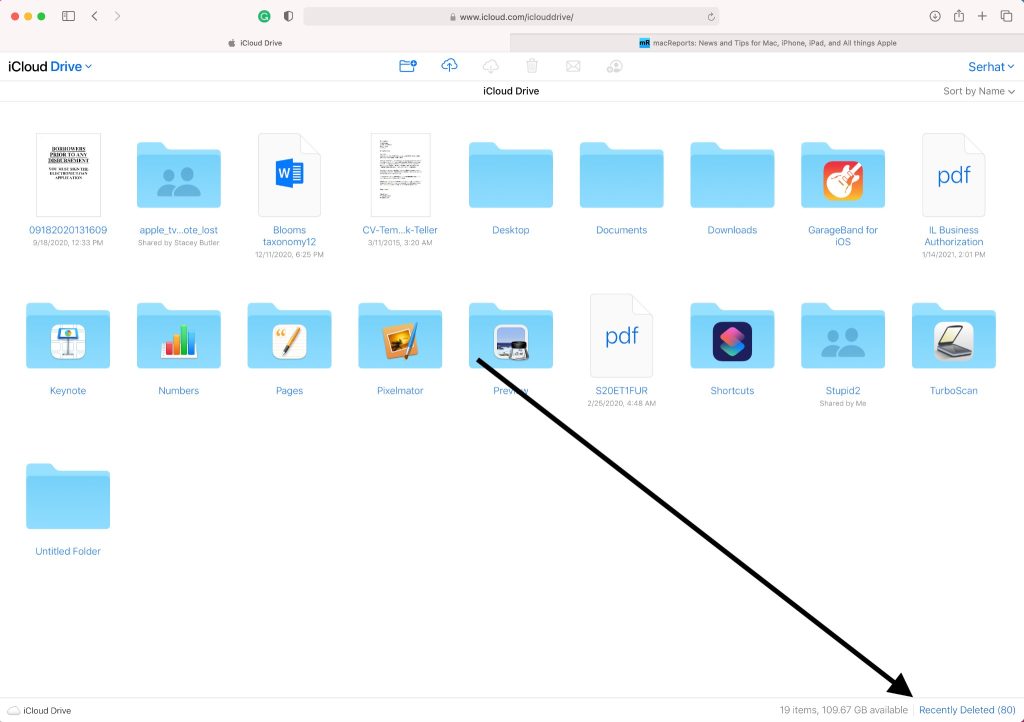
- Select and recover. Check the boxes next to files or folders you want back, then click Recover (or click Recover All to restore everything). The files will return to iCloud Drive in their original folders.
Any document you had in iCloud (or Desktop/Downloads synced to iCloud) can be restored via iCloud.com’s interface. Just be sure to check both “Recently Deleted” and the main iCloud Drive folder. Once recovered, the files will sync back to your Mac.
Method 4: Using Stellar Data Recovery for Mac (Mac File Recovery Software)
If none of the above methods find your files, a dedicated recovery app can often succeed. Stellar Data Recovery for Mac, a reliable Mac Data Recovery tool that scans your drive’s data structures for lost files, even from corrupted disks.
Note: In case of encrypted drives, this tool can scan and recover data from a volume of a FileVault drive, provided you unlock it. If you don’t have the keys to the drive, this tool can’t scan in.
Here’s how to use it:
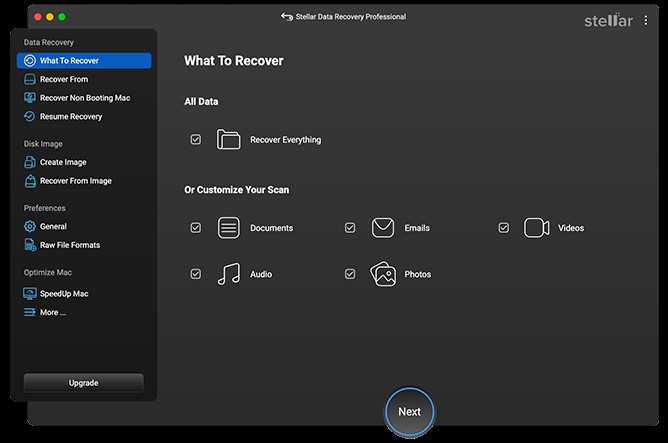
- Download and install Stellar Data Recovery for Mac. You can get the free trial from Stellar’s website. (It supports both Intel and Apple Silicon Macs on modern macOS versions.)
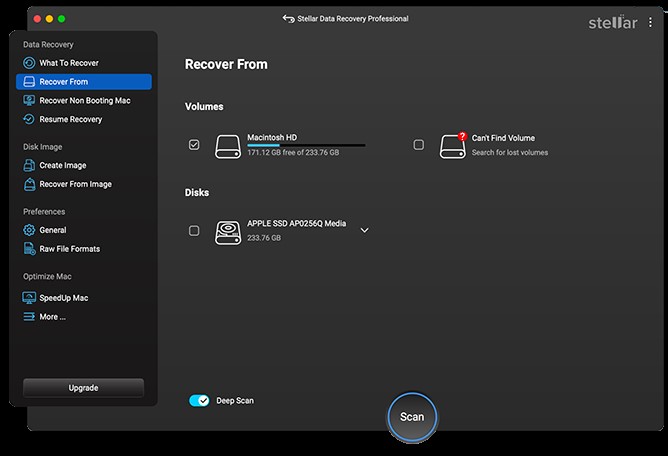
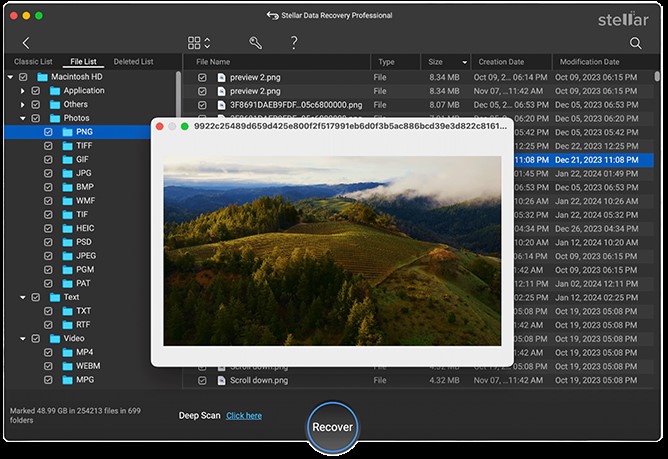
- Run the program and select what to recover. Launch it, then choose either Everything or specific file types (Documents, Photos, etc.) to search for. Click Next, and pick the disk or partition that had your files.
- Scan for lost files. Click Scan and turn on Deep Scan before doing so. The software will deeply scan the chosen drive. This may take some time.
- Preview and recover. When that scan finishes, the tool will show you a list of those recovered lost files. Now you shall have to search within that list and find the specific files you need. Then you have to select the files or folders you want and then click Recover. Also, don’t forget to choose a different drive to save those recovered files of yours in order to avoid overwriting data.
Stellar’s software can recover permanently deleted data and even files from drives that macOS thinks are damaged. In short, this third-party app often pulls out files that the built-in tools miss.
Using Stellar Data Recovery for Mac is effectively a last resort, but a powerful one. This tool also provides you the support for scanning an encrypted FileVault drive but you will have to unlock it first before being able to restore your lost files.
Precautionary measures to avoid data loss after unexpected shutdowns
Taking small steps today can save you from losing files. Follow these practical habits:
- Regular backups: Use Time Machine with scheduled backups and occasionally create a bootable clone and check them every now and then.
- Cloud & Copies: Keep important folders synced to iCloud (or any other cloud service that you have).
- Keep the disk healthy: Maintain 15-20% of free space always in your system. Don’t forget to run Disk Utility > First Aid on a weekly or fortnightly basis and also monitor S.M.A.R.T. status for early warnings.
- Use AutoSave & save often: Enable apps’ AutoSave/Versions and develop a quick save habit (Cmd+S) during long edits or exports.
- Keep software stable: Install official macOS and app updates and try to avoid developer or public beta OS builds on primary machines.
- Plan for encryption: If you enable FileVault, store the recovery key safely and make sure that a verified backup exists before turning on encryption.
Conclusion
A sudden Mac shutdown can be alarming but you’ll have to remember that your data often still exists somewhere. Juggling between in-built backup like Time Machine, cloud backup like your iCloud, your app auto-save features and even a recovery software, you have a good chance that you will be getting back those lost files of yours. The key thing here in your lap is that you’ll have to act methodically and in the correct order that we have followed here. The way to go is to check your backups and Trash first, look in app-specific recovery folders, check the cloud folders, and then consider a recovery app like Stellar Mac Data Recovery. With these steps, most Mac users find that they can rescue their important files. So take a deep breath, follow the plan above, and don’t lose hope… your work just may be a few clicks away from being saved.