Network Attached Storage (NAS) is a centralized file storage device connected to a local area network. The storage drives in a NAS enclosure can be configured to act either as a single storage pool or a RAID. RAID-based NAS is preferred because it offers increased storage capacity, data redundancy, improved data availability, improved read/write performance, and scalable architecture.
Much like any conventional storage device, a RAID-based NAS is susceptible to failure or data loss. This can happen for several reasons. In this article, we will take a look at the reasons behind RAID-based NAS failure and see how to recover data from it.
Common RAID Configurations used in NAS Device
Before we move on to the reasons behind RAID-based NAS failure, let’s take a look at some commonly used RAID arrays in NAS setup:
Here is a table showing features of the popular RAID-based NAS setups:
| Type of RAID | Data Storage Technology Used | Min. No. of Drives Required | Fault Tolerance (Max. no. of drive failure/s allowed) |
| RAID 0 | Striping | 2 | Not available |
| RAID 1 | Mirroring | 2 | 1 drive failure |
| RAID 5 | Striping + Distributed Parity | 3 | 1 drive failure |
| RAID 6 | Striping + Double Distributed Parity | 4 | Up to 2 drives failure |
Reasons behind RAID-based NAS Failure
There are several reasons why a RAID-based NAS setup fails:
- Member drive/s failure due to mechanical wear or a logical error
- Faulty RAID controller, SATA connectors, or NAS enclosure
- Backplane issues
- Improper or loose SATA connections
- Buggy RAID controller firmware/NAS updates
- Corrupted RAID configuration
Best Way to Recover Data from RAID-based NAS
If your RAID-based NAS setup is in a degraded state, you need to first perform a preliminary check before rebuilding the failed RAID array. This will help you identify the cause of failure, gauge the extent of drive failure, and find any possibility for data recovery.
If the number of failed drives is within the permissible limits (fault tolerance) of the configured RAID, there is a chance to recover data from the failed RAID-based NAS using a specialized NAS data recovery software. Otherwise, you would need to use a backup to restore the lost data after rebuilding the RAID-NAS setup.
To recover data from a failed RAID-based NAS device, you can use Stellar Toolkit for Data Recovery – a powerful NAS data recovery software. You can use it to recover data from NAS device in case of volume formatting, member drive failure, or more. It can also recover accidentally deleted files and folders from NAS device.
Let’s look at some salient features of this advanced tool:
- Simple-to-use DIY NAS/RAID recovery tool
- Supports NAS devices of QNAP, ASUSTOR, and Synology
- Recovers data from inaccessible or degraded RAID-based NAS setups
- Virtually reconstructs the RAID (0, 5, and 6) for recovery
- Supports data recovery from all VM image file formats, including VMDK, VDI, VHD, and VHDX
- Recovers files and folders from HDDs, SSDs, flash drives, etc.
- Compatible with NTFS, FAT16, FAT32, exFAT, APFS, HFS, HFS+, Ext4, Ext3, and Ext2 formatted storage devices
Here’s how to use Stellar Toolkit for Data Recovery to recover data from RAID-based NAS:
- Carefully disconnect the member drives from the NAS enclosure and label them in the correct order.
- Next, connect the member drives in the same order to a Windows PC with the help of a RAID controller interface card and SATA cables.
- Now, launch Stellar Toolkit for Data Recovery on the same system.
- On the Select What to Recover screen, select the type of data to recover. By default, All Data is selected. Click Next.
- The Recover From screen will appear. You will see various drives and connected devices.
- Here, the tool will automatically detect the connected drives and display the NAS with its brand name under the Connected Drives section. Click on Scan to proceed.
- The software will scan the connected NAS drives and show the recoverable data.
- After previewing the files, choose the files that you want to recover. Click Recover.
- Next, click on Browse to select the location to save the selected data.

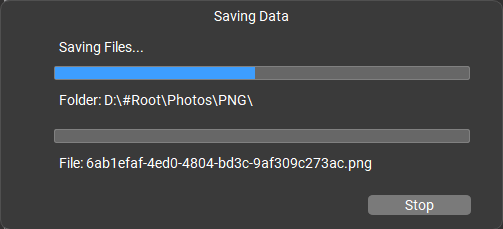
- After selecting the destination, click on Save. The software will start saving the recoverable files at the selected location.
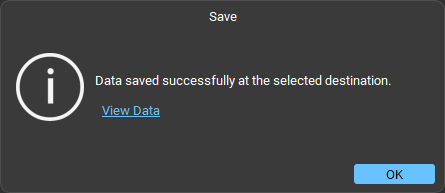
- When finished, it will show the Data saved successfully message.
Conclusion
A RAID-based NAS can fail due to a number of reasons discussed above. This could disrupt your business operations or jeopardize your critical data. In this situation, you can rely on a powerful NAS data recovery software, like Stellar Toolkit for Data Recovery. It can help you safely recover all the data from failed or inaccessible RAID-based NAS and other storage devices.