macOS Monterey 12.3 Update Bricking Macs with Logic Board Replacements
Summary: The macOS Monterey 12.3 update is here and so are issues associated with it. If you are stuck with a bricked Mac after macOS Monterey 12.3 update, you will find all the related details and probable solutions in this blog.

With the release of the macOS Monterey 12.3 update, users were excited about the Universal Control feature to enhance the accessibility and performance of their Mac.
However, several reports emerged on popular forums within a week of its release. According to these reports, Macs with replacement logic boards are getting bricked on installing macOS Monterey 12.3 update.
Furthermore, many users have successfully updated their Mac as the problem is specifically reported for Macs that have their logic boards replaced.
The macOS Monterey 12.3 is bricking some Mac devices, and reports indicate that the affected Mac is rebooting without successfully installing the update.
An iBoot Panic (Kernel Panic) message appears on the screen.
There are no confirmed reports of the problem getting resolved even by Apple-authorized technicians. They are simply replacing the logic board again.
Further reports stated that some Mac users with replacement logic boards have successfully installed the macOS Monterey 12.3 updates using the IPSW files.
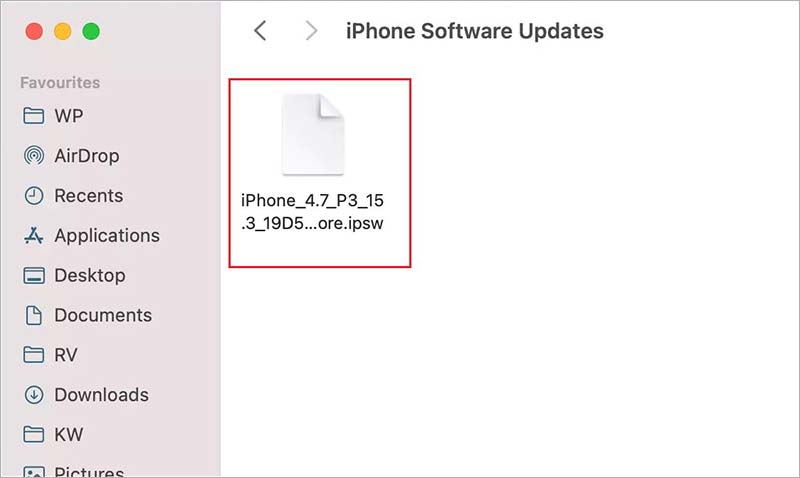
Here is how you can access the IPSW files on your Mac.
- Launch Finder from the Dock.
- From the left pane, locate and open the Library.
- Find iTunes in Library and click to open it.
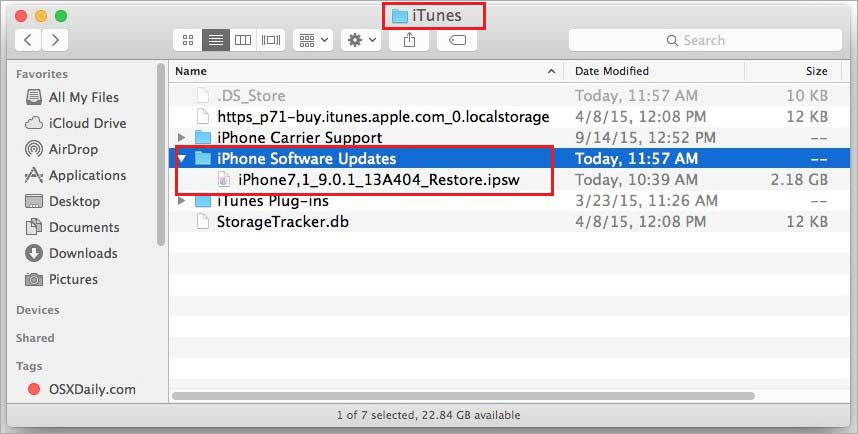
- Open the iPhone Software Updates folder and click on the file with the .ipsw extension.
You can also try the instructions from Apple on how to revive an Apple Silicon M1 Mac or how to revive the Intel Mac.
Resolve macOS Monterey 12.3 update issue in DFU Mode
Apart from the probable solutions discussed above, you can also try to resolve the bricking issue by booting your Mac into Device Firmware Update (DFU) mode.
But, to use the DFU mode, you need to fulfill the requirements mentioned below.
- You need a healthy Mac (host Mac) apart from the affected Mac (target Mac).
- Both the Macs should be running on the same OS version.
- The host and target Macs must have a USB C-Port.
- USB-C to USB-C cable supporting both power and data.
- Download and install the latest version of Apple Configurator on the host Mac.
Note: You need to understand that although the DFU and Recovery modes appear similar, they are two different features. While the Recovery mode uses a hidden recovery partition on your OS to boot, the DFU mode is not part of your macOS and is burned on the hardware as a part of SecureROM. Therefore, don’t get confused between the two.
Once you have met the requirements mentioned above, follow the steps below.
Caution: Tread very carefully and follow the exact steps as it is not easy to boot into DFU mode on your Mac.
Step 1: Shut down your Mac completely, unplug all the power sources, and drain any residual power by pressing the Power button for 5-6 seconds.
Step 2: Connect the target and host Mac with a USB-C cable.
Note: Insert the USB-C cable in any suitable port on the host Mac, but insert the other end of the USB-C cable on the target Mac according to the following instructions:
- On an Intel Mac, choose the front USB-C port closest to the trackpad.
- On an M1-Mac, choose the back USB-C port farthest from the trackpad.
Step 3: Launch the Apple Configurator on your host Mac.
Step 4: Now restart the target Mac using the right-Shift + left Option + left-Control key while continuously holding down the Power button for 10-12 seconds.
Note: If you have a desktop as a target Mac, hold down the Power button and connect the desktop to a power source while keeping the power button pressed down for another 10-12 seconds.
Step 5: You will see the DFU icon on your host Mac; right-click and select Advanced > Relaunch Device or Revive Device.
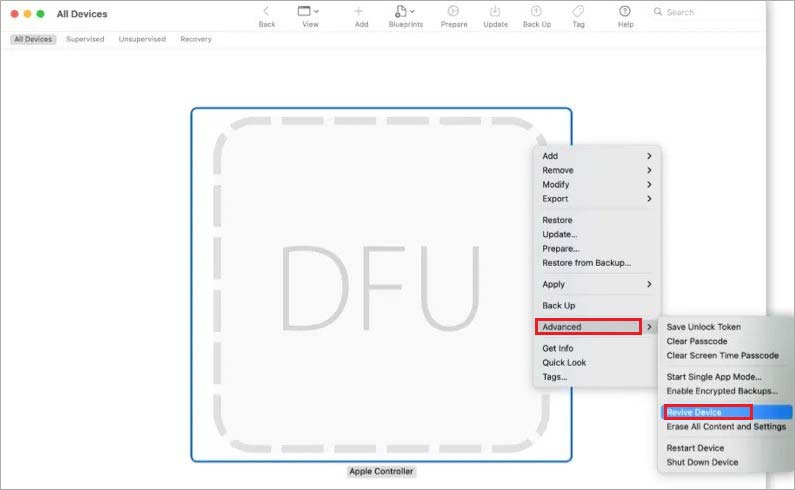
Step 6: Let the process complete; you might see the Apple logo appearing a few times on the target Mac.
The above discussed solutions may help you get your Mac back on track. However, it is not the only issue reported.
Within a day of the bricking issue appearing, reports were seen where users with PCI-E external GPUs reported speed and performance issues on their Intel Mac.
These issues might be due to some internal bug accompanying the macOS Monterey 12.3 update, but the official confirmation is yet to come.
Moreover, if you have lost data due to the bricking of your M1 or Intel Mac, you can recover it using the DIY Stellar Data Recovery Professional for Mac.
Meanwhile, you can avoid updating to the new version and wait for the update from Apple. Stay connected, as we will update this blog as soon as we get the confirmed fixes for this problem.
About The Author
Ashutosh is a Senior Content Writer at Stellar with over 8 years of experience in data recovery, IoT, and AI technologies domain. He is a tech enthusiast who enjoys researching and sharing DIY solutions to resolve complex technical issues. Apart from professional writing Ashutosh is a published poet and spends his weekends building small gadgets.


Is it possible to revive the silicon mac?
Hi Dorthy,
Along with the Intel-based Mac, the Apple-Silicon Mac can also be revived. Apple has already published on its support page under the Apple Configurator User Guide.
Cheers!
Is it possible to update macOS Monterey 12.3 on a Mac using IPSW files?
Hi Farid,
Some users have successfully installed macOS Monterey 12.3 on a Mac with a replacement logic board using IPSW files. However, just like reviving a Mac in DFU mode, this method requires a second Apple computer to perform.
Thanks!!