The best part of using a MacBook or MacBook Pro is its easy portability. A fully charged MacBook can run without a live power supply for almost 8-9 hours.
There might be claims for longer power backup, but that's possible only with effective power-saving practices.
However, sometimes a MacBook simply won’t charge due to known or unknown reasons. So what to do in such frustrating situation?
Don't worry. Here’s a comprehensive DIY guide to walk you through various reasons behind this issue along with the tested solutions.
Quick fixes for MacBook not charging
Your MacBook might not be charging due to a simple issue like improper connection, or it could be due to a complex problem like wrong power settings in SMC.
We will first try to fix the problem with some quick fixes.
- Check if the MacBook’s power adapter is properly attached to the power source and your MacBook's charging port. Remove it once and re-attach it.
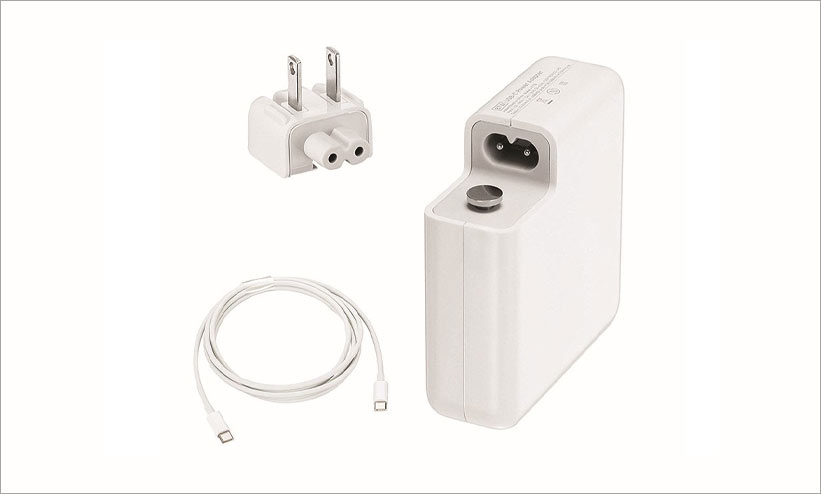
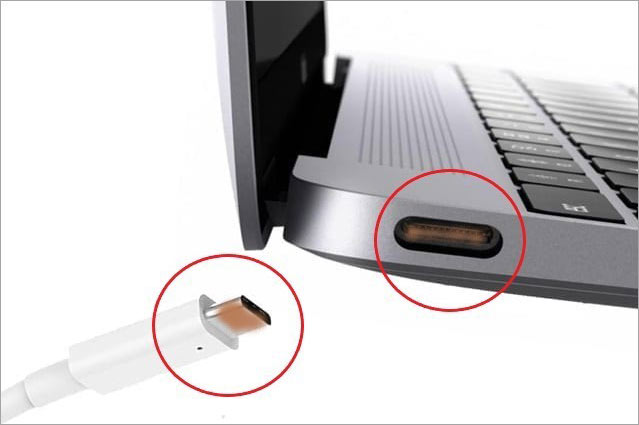
- The MacBook adapter has three parts: Adapter, removable plug, and cable. Detach the plug from the adapter and re-attach it 2-3 times. If there is any carbon deposit, it will get cleaned.
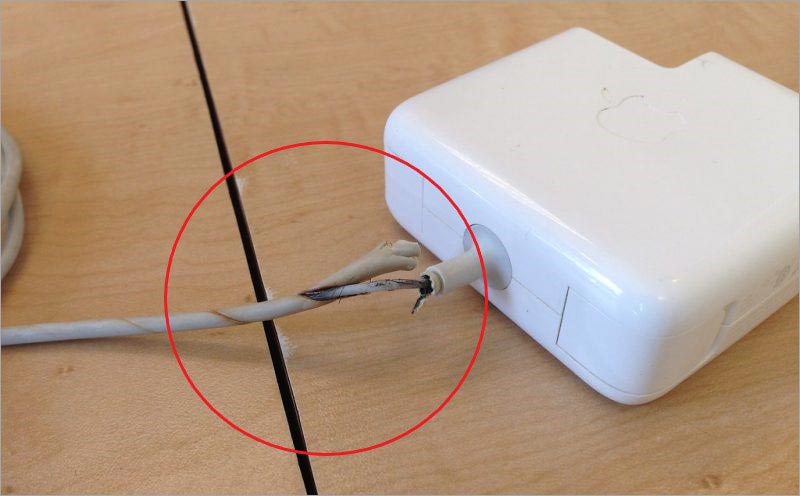
- Check the physical appearance of your adapter and cable. Are they worn out or look burnt? If so, try charging your MacBook with a different adapter.
- Are you sure that you are using the right charger compatible with your MacBook model? If not, check the types of chargers and their compatibility. Even if your MacBook uses a USB C-type charger, not all USB C chargers need to be compatible with your system. Every MacBook model requires its specific charging adapter; else, it won't charge.
- Make sure your adapter isn't overheating. If the adapter overheats, your Mac will shut the power intake until the adapter cools off. So don't cover the adapter with anything. If it's already heated, let it cool and try again after some time.
- Check the charging port on your MacBook and ensure no dust or dirt is accumulated in it. Dust or dirt might hinder proper connection of your Mac with an adapter cable port. Clean the port and re-attach the cable.
We hope the above tips have resolved the problem and your MacBook is charging normally. If not, try the other solutions discussed below.
How to resolve the MacBook won't charge problem?
Now that you have ensured that there is no glitch from your side, it's time to check some more complex reasons.
1. Update your macOS.
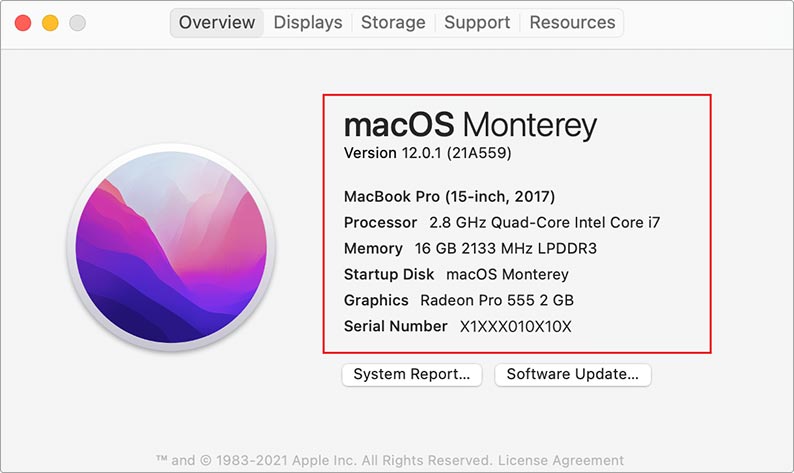
First, let's talk about the latest macOS Monterey. If you haven't updated your MacBook post-macOS 12.2 update, you must know that a bug was introduced with this update that causes massive battery drainage in some MacBooks.
There can be a similar problem with the earlier macOS too. So you should go for a software update of your MacBook and see if the issue is resolved. Here’s how to do it.
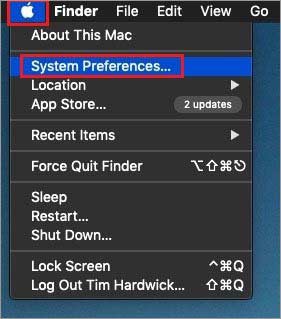
Step 1: Click the Apple menu button on the top-left.
Step 2: Select System Preferences from the menu.
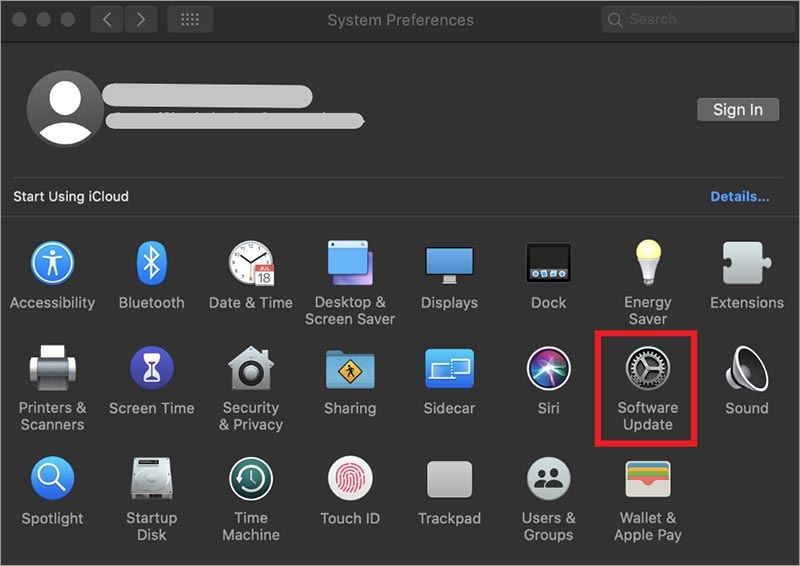
Step 3: Click Software Update from the System Preferences window.
Step 4: Check for any pending updates. If any, Download and Install it.
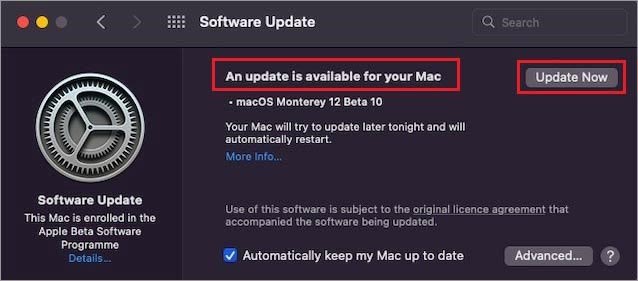
Restart your system for the changes to take effect and check if the charging problem is solved.
2. Check if Apple has recalled your MacBook.
From time to time, Apple recalls and repairs some of the products that may develop any issues. The company calls it the Exchange and Repair Extension Programs. Check the list of recalled devices and make sure that your MacBook isn't part of the list.
Unfortunately, if you find your device listed in the program, you need to contact Apple support and surrender your device for repair or replacement as per the case.
For example, Apple recalled some MacBook Pro (Retina, 15-inch, Mid 2015) devices due to the battery overheating problem in 2019.
Note: You can check your MacBook's model number and other details by clicking the Apple menu > About This Mac.
3. Reset System Management Controller (SMC).
The System Management Controller or SMC controls the power settings on your MacBook. Resetting the SMC will undo any changes you might have made accidentally or deliberately.
So, if any wrong settings are selected in the power settings, SMC will reset them to default settings.
There are different methods to reset SMC on a MacBook with a removable battery and with a non-removable battery.
Reset SMC on MacBook with removable battery
Step 1: Shut down your MacBook.
Step 2: Disconnect the power adapter from your MacBook and detach the battery.
Step 3: Again, press the power button for 6-7 seconds.
Step 4: Reconnect the battery and power cable.
Step 5: Switch on your MacBook and check if it's charging.
Reset SMC on MacBook with non-removable battery
Step 1: Shut down your MacBook with a non-removable battery.
Step 2: Detach the power cable from your system.
Step 3: Press the Shift (left side) + Control + Option (Alt) keys and the Power button simultaneously. Hold all the buttons down for at least 10 seconds.
Step 4: Release the keys and power button. Press the Power button again to switch on your MacBook.
Note: The light on your adapter might change or go off a few times when you reset the SMC.
4. Check the battery of your MacBook.
If none of the methods have worked for you, there are high chances that something is wrong with your battery. In general, the average life of a MacBook battery is somewhere around 5 to 6 years. It may last longer depending upon the usage.
You need to check the status of your battery's health, especially if you are using an aged MacBook older than five years.
Click on the battery icon on the desktop. If you can see a status like Service Battery or Replace Now, it indicates that the battery has lived its life and needs to be changed.
It's better to get it replaced at the authorized repair center, particularly in case of a MacBook with a non-removable battery.
What to do in case of data loss due to lack of power?
Obviously, if your MacBook won't charge, it could die the minute your battery drains away. Also, if you haven't taken the backup of your data and saved all the unsaved items, you will lose data due to the abrupt shut down of your discharged MacBook.
However, you still have a trusted option to get back your lost data. Once your charging issue is resolved, download and install Stellar Data Recovery Professional for Mac and scan your drives for the lost data.
The software conducts a comprehensive scan of all the sectors on your storage and retrieves any lost data.
Being a DIY tool, it doesn't require specialized knowledge of the data recovery process. You just need to follow the steps, and your data will be restored to its original location.
Conclusion
We hope you have resolved the problem and are enjoying the uninterrupted performance of your MacBook. This guide is designed in the most lucid way to help you \ troubleshoot the MacBook won't charge issue.
Have you tried any other method to avoid this trouble apart from the methods listed above? If so, do share it with us in the comment section below and stay connected for more updates.


Tech Enthusiast and Senior Writer at Stellar®
 9 min read