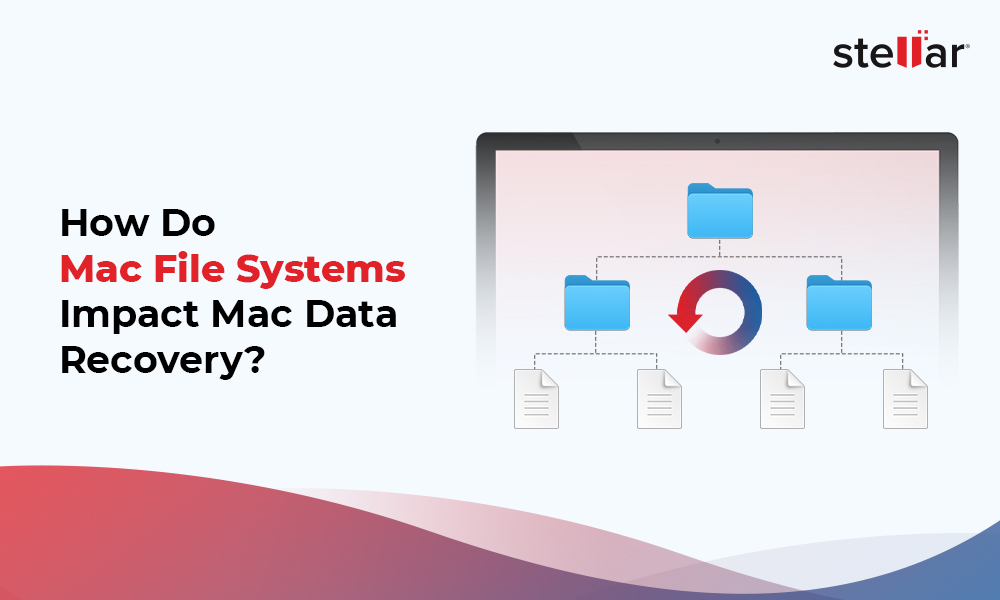
Every Mac user has a lot of files stored on their Mac. Some files could be crucial for work or personal usage. Imagine that your Mac won't start one day, and your files still need to be backed up. No panic!
You may be desperate about data loss; however, Mac data recovery can be easier than you think. Let's figure everything out in steps.
What is SSD on Mac?
SSD on Mac stands for solid state drive. This storage tool keeps data on solid-state flash memory. It's fast, silent, and efficient. Unlike hard disk drivers (HDDs), SSDs are significantly faster and perform the same essential functions as HDDs. With SSD, programs will perform faster, and the computer's system will load more rapidly. Most new Macs have built-in SSDs.
Here are steps to check your SSD health:
- Click About This Mac.
- Click More Info.
- Scroll down and choose System Report.
- On the left sidebar, find and click Storage.
- Look for the S.M.A.R.T. Status.
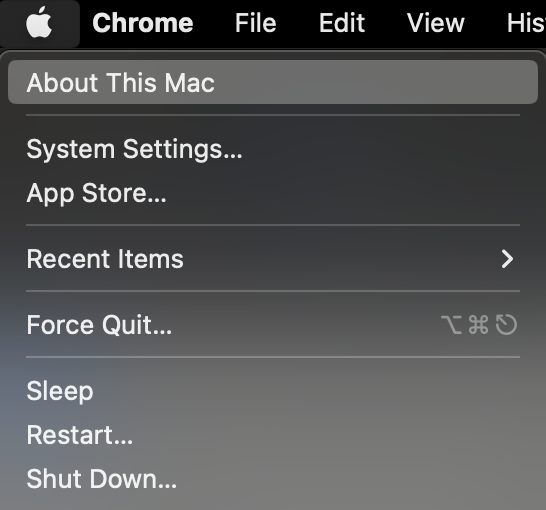
Apple logo > About This Mac
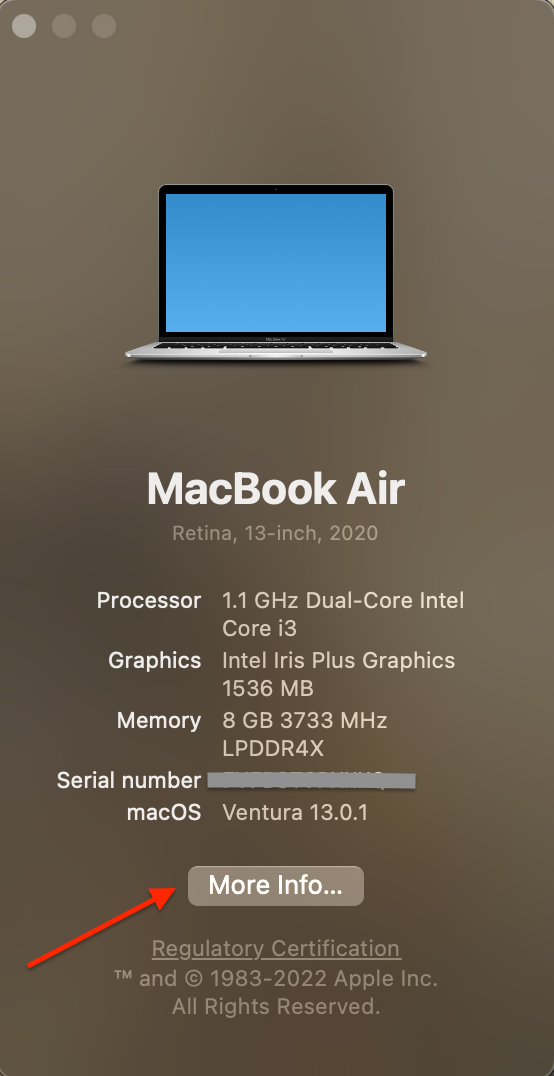
Preview > About This Mac > More Info
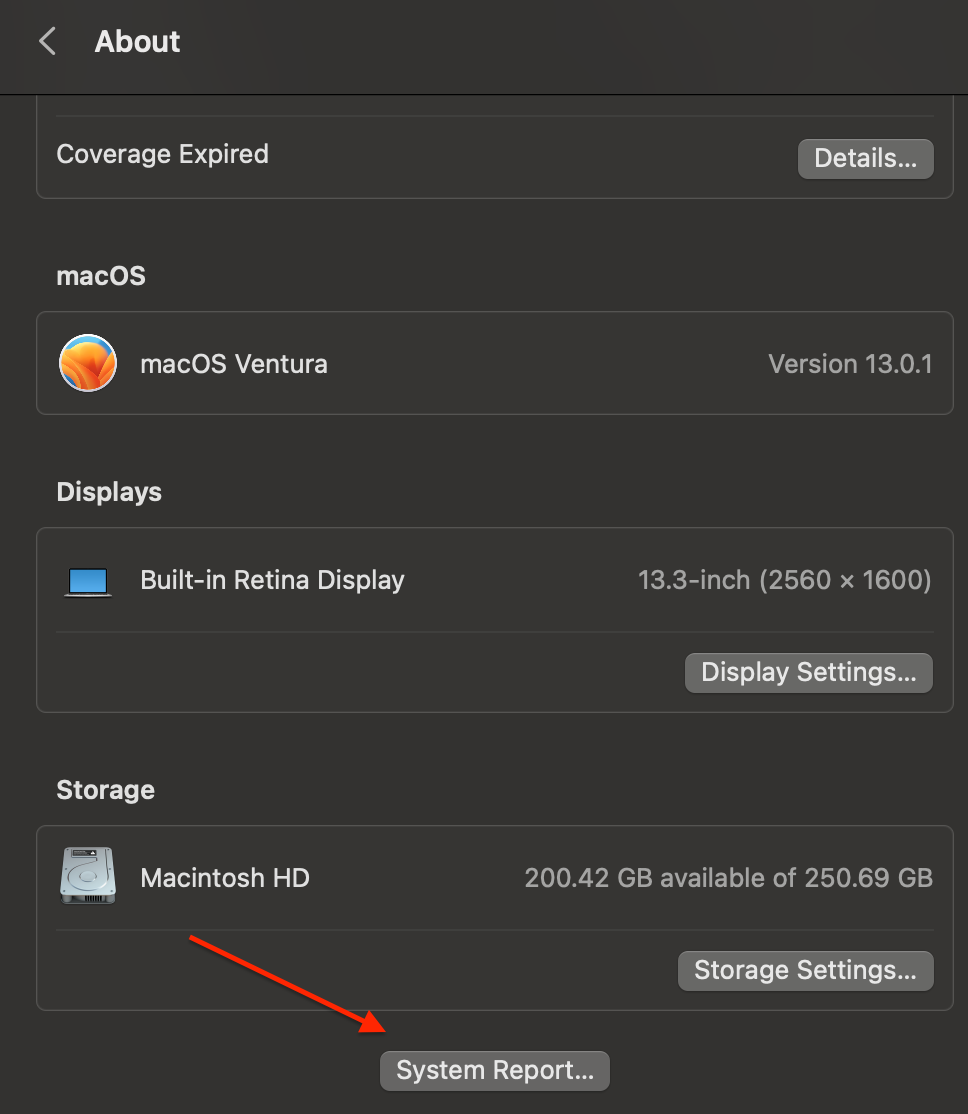
More Info > System Report
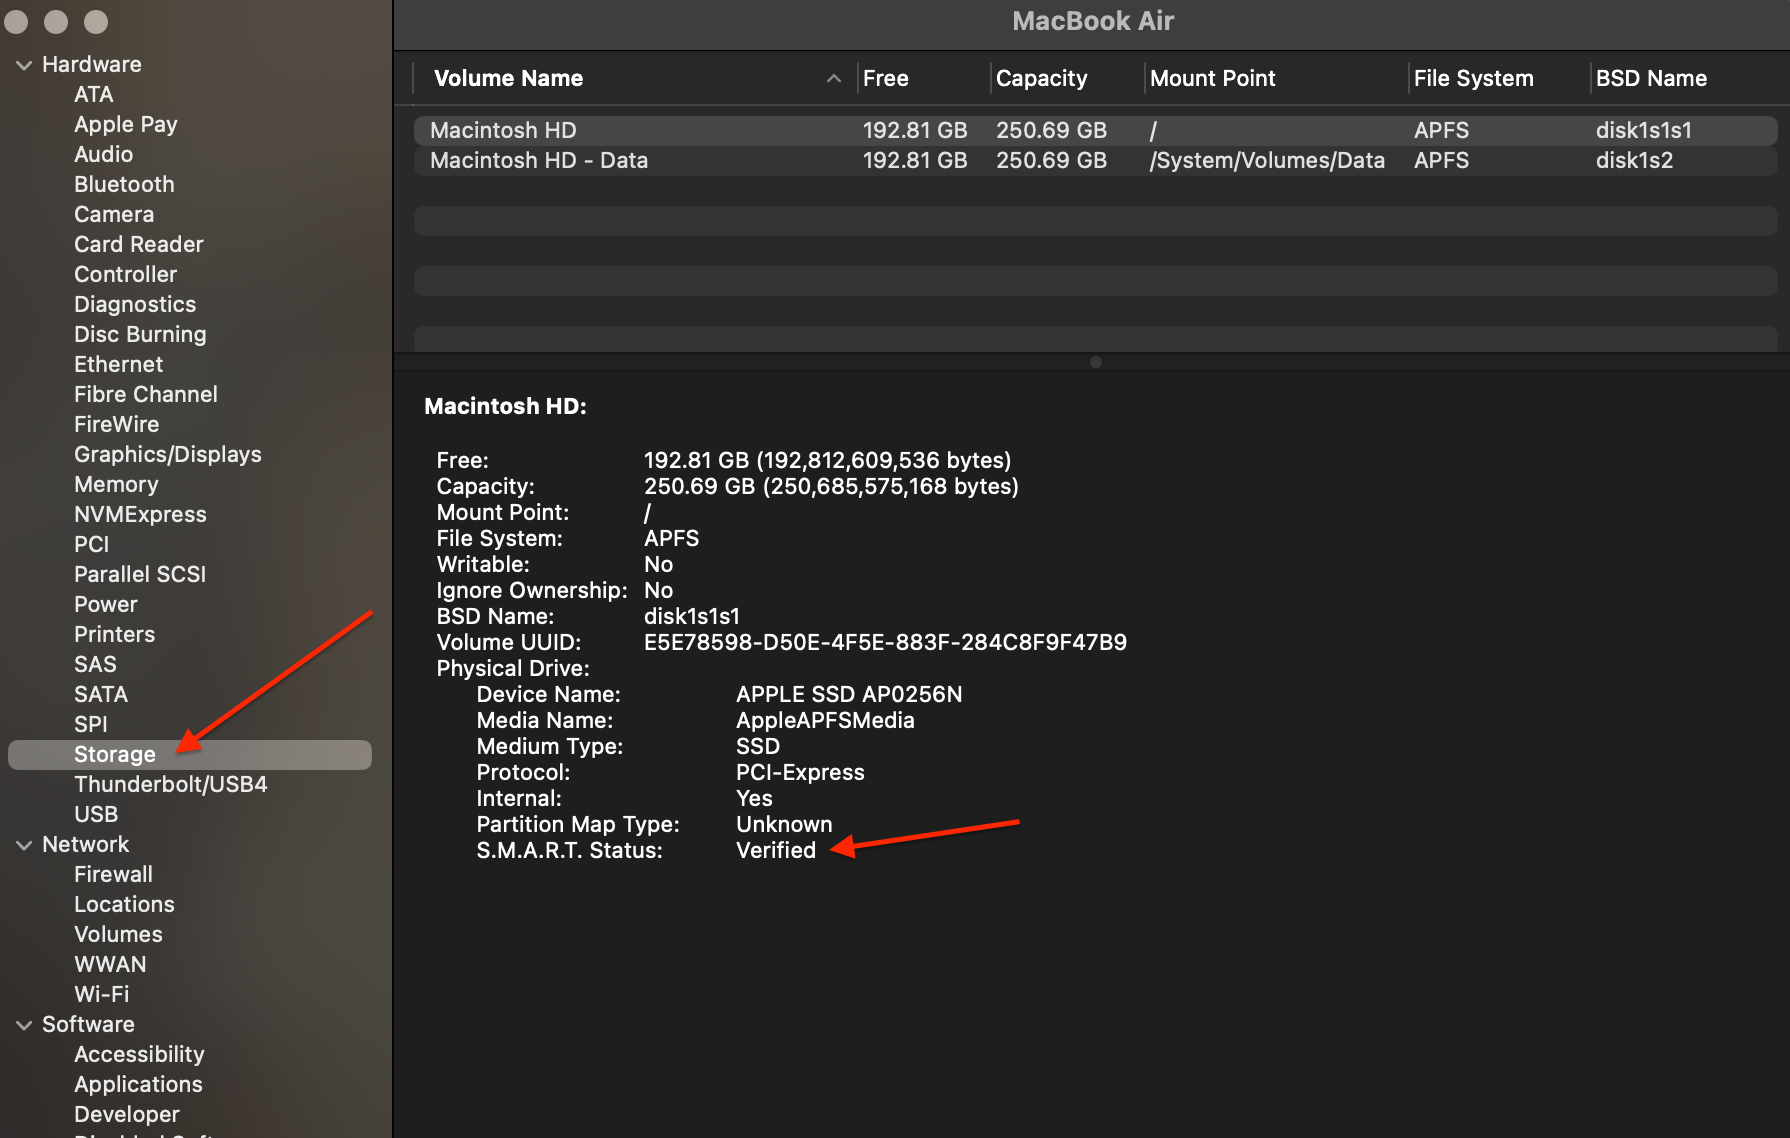
System Report > Storage
Generally, there could be 3 options:
Verified: The drive is healthy.
Failing: The drive has a problem that might cause a serious issue.
Failed: The drive is damaged and unusable.
If your external or built-in drive is damaged or contaminated, the chances for data recovery are significantly lower. The TRIM command has the most significant effect on SSD data recovery.
What is Trim?
TRIM is an internal tool designed to make processes on your SSD quicker. TRIM operates on your disk with available storage space, improving your device's performance.
TRIM command instantly considers deleted files as invalid. If your TRIM option is enabled, it prepares your SSD for storing new files every time you delete an unnecessary one. This process raises the performance of your SSD, but the problem is that this way, all your deleted files are harder to recover.
In most cases, TRIM is automatically enabled on Mac devices.
Follow these steps to check if you have TRIM turned on your Mac:
- Go to the Apple Logo, and click About This Mac.
- Click More Info.
- Scroll down and choose System Report.
- On the left sidebar, look for NVMExpress.
- Here, on the main window, you should see TRIM Support. Yes means that your TRIM tool is enabled.
Apple logo > About This Mac
About This Mac > More Info
More Info > System Report
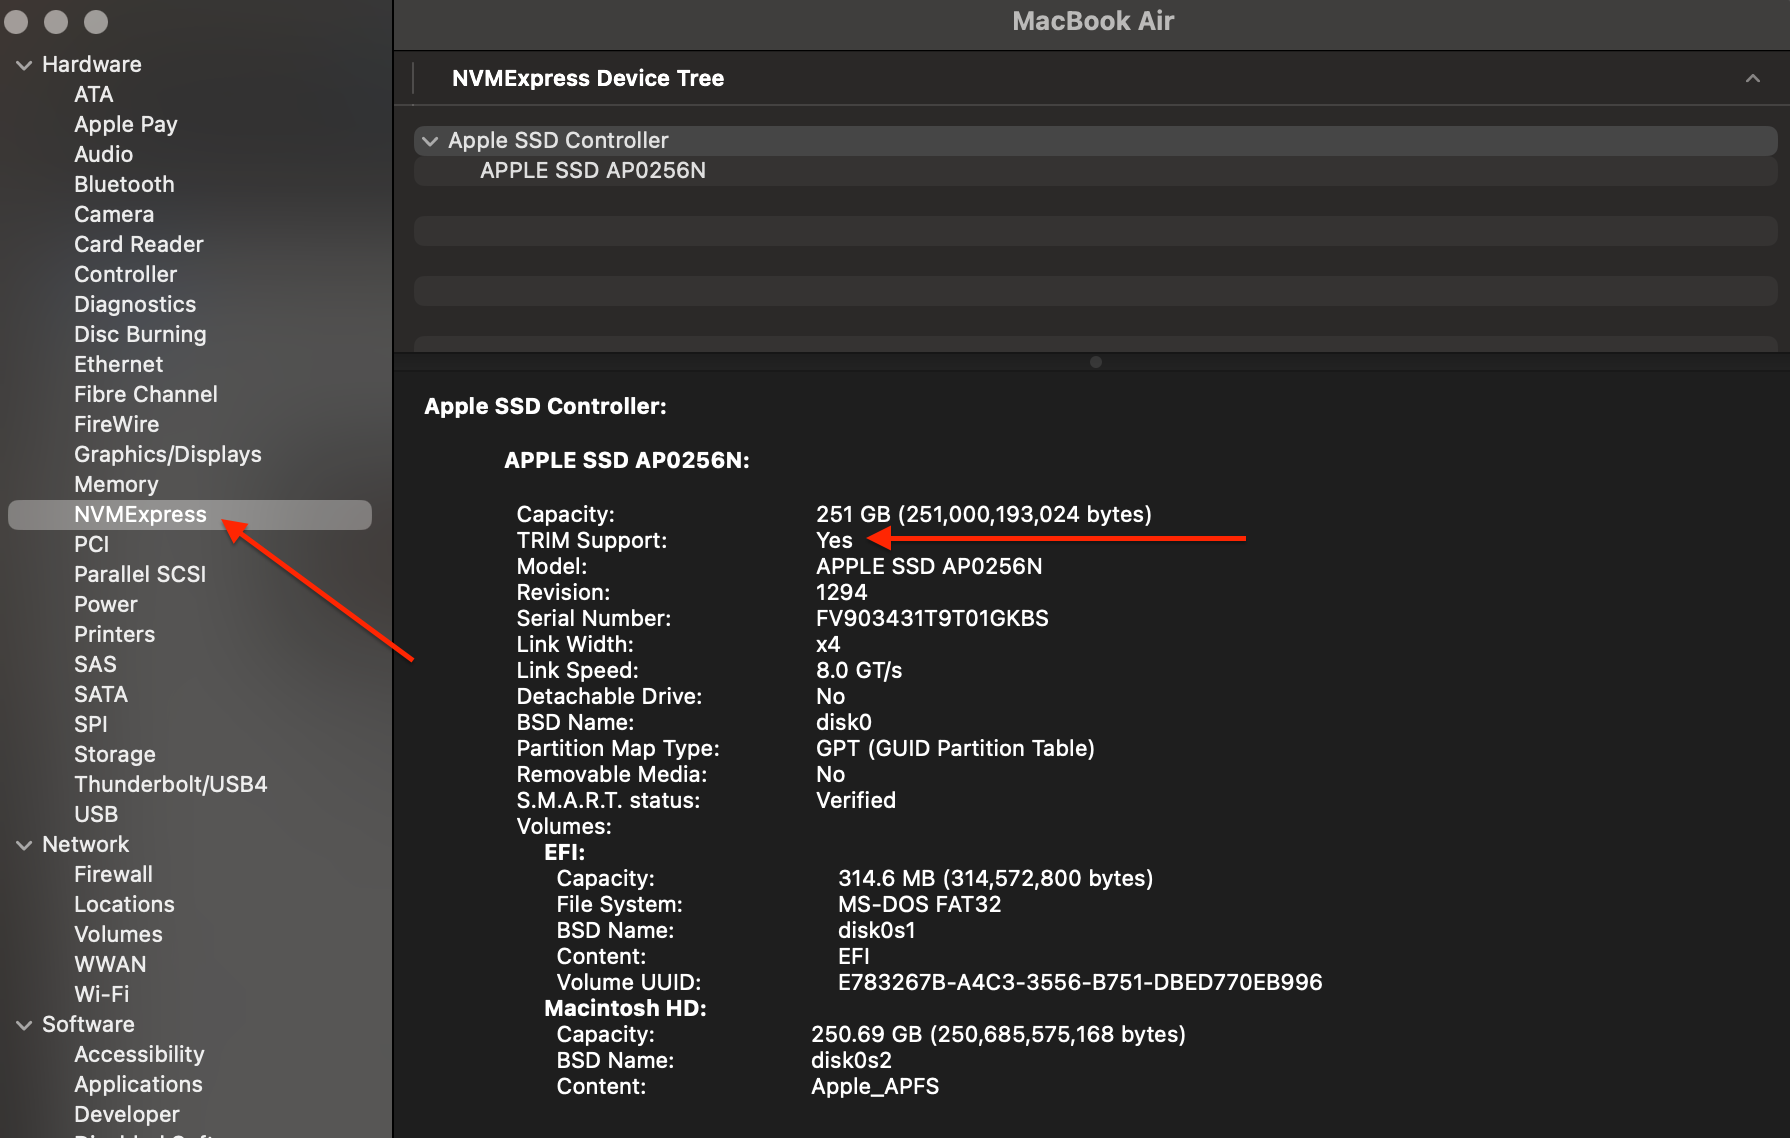
System Report > NVMExpress
Now that you've checked whether your TRIM is enabled and ensured that it is turned on, how do you recover data from your SSD?
How to Recover Data from Mac’s SSD if the TRIM is enabled?
Yes, you can still recover your data from SSD even if the TRIM has been enabled. TRIM tool deletes useless data when the computer is inactive, so if TRIM hasn't reached your SSD yet, there is a chance to restore your files. Please mind that the faster you react, the bigger the recovery possibility.
Steps to Recover Data from MacBook SSD
I. Use Time Machine Backup
This solution will work for you only if your Time Machine has been enabled before the data loss.
Follow these steps to check whether your Time Machine is enabled on your Mac:
- Go to the Apple logo.
- Click System Settings (or System Preferences).
- On the left sidebar, click General, then Time Machine
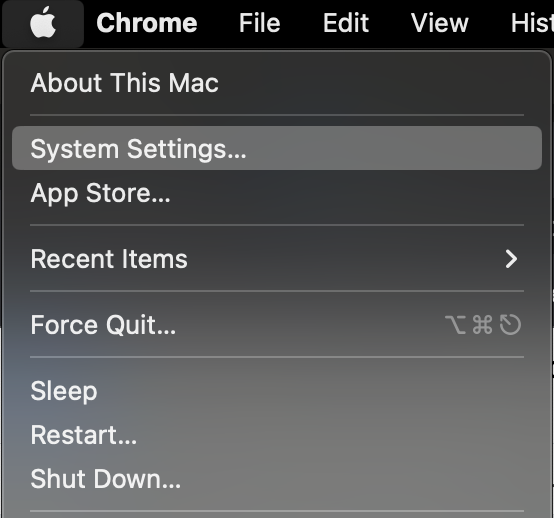
Apple logo > System Settings
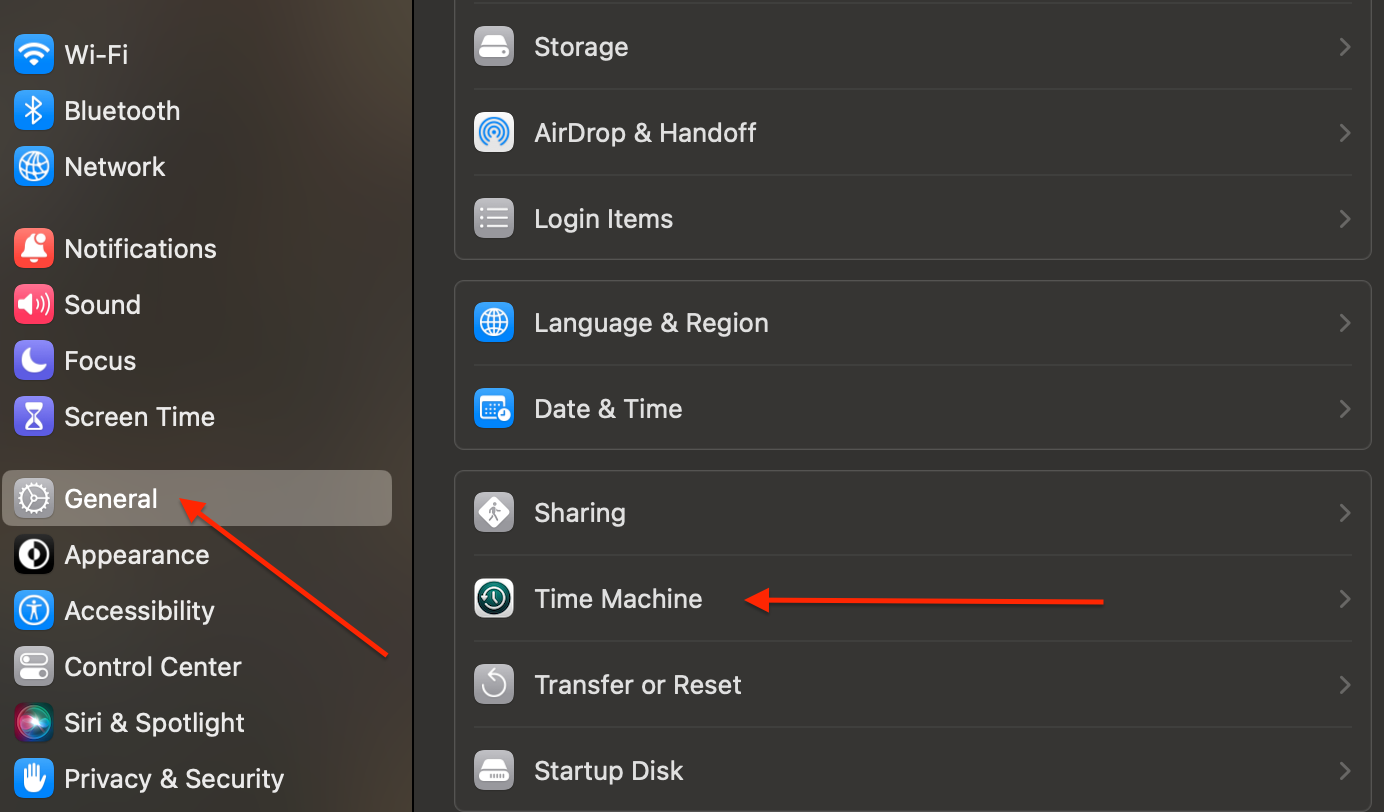
System Settings > General > Time Machine
Here, you can see whether your Time Machine is turned on or not.
II. Try Data Recovery Software
Only professional data recovery software can help you with the issue's complexity.
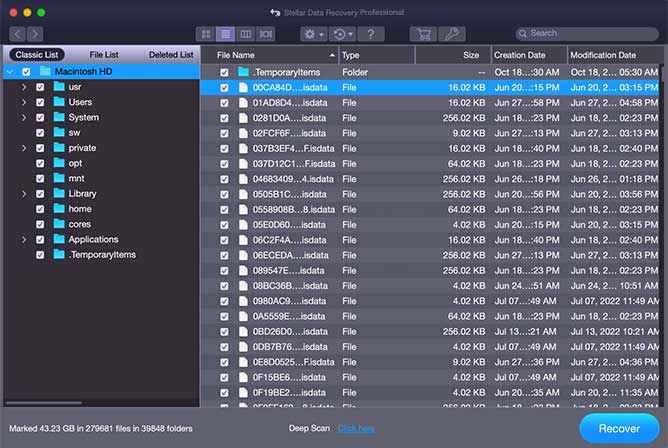
You can download Stellar Data Recovery for Mac to restore deleted data. With this app, you can recover even those files that have been removed or emptied from the Trash. Try to launch Stellar Data Recovery software to scan your start-up disk and rescue deleted files.
Follow these steps to download, install, and run the app:
- Open the Stellar software and select what files you want to restore.
- If you want to recover specific data, you can use a customized scan. Just turn off the Recover Everything toggle, and choose the files you want to bring back. Then click Next below.
- Select the drive from which you want to restore your data, and click on the Scan option.
- The scan process starts automatically. You can easily monitor it.
- After the recovery process is finished, the apps will list all restored data on the left.
- You can see specific files/pictures/videos on the right by double-clicking on them. Just put the checkmark on the files you want to bring back, and click on the Recover button.
- Provide the destination to save the data. You can select another drive or an external storage device.

Stellar Data Recovery > Select What To Recover
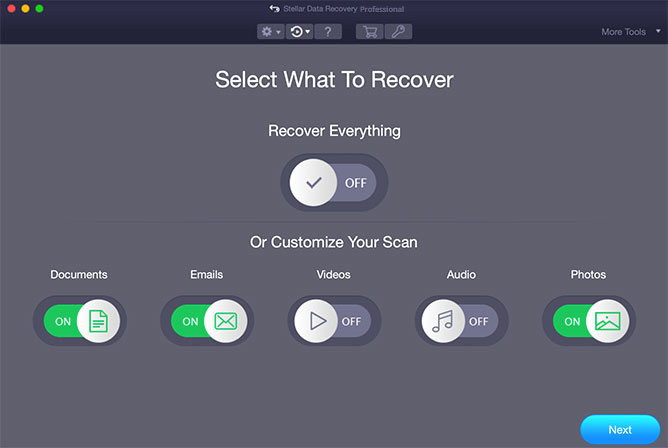
Stellar Data Recovery > Select What To Recover window
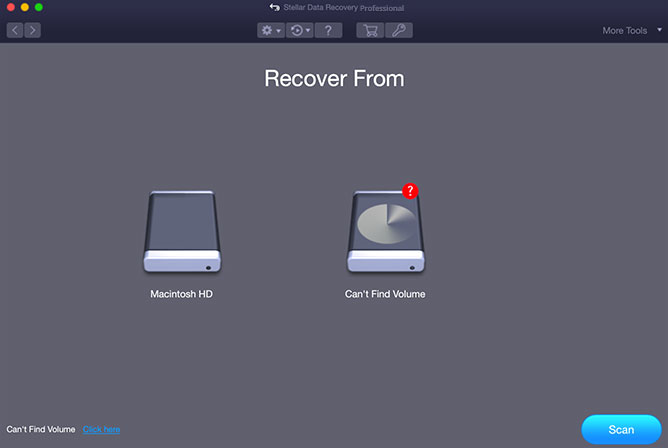
Stellar Data Recovery > Recover From Window
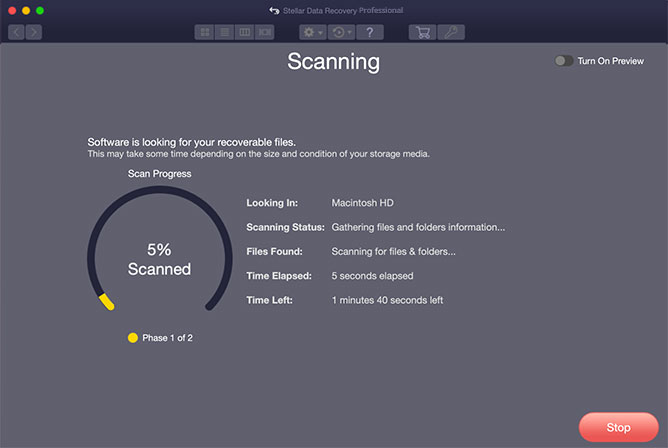
Stellar Data Recovery > Scanning Process
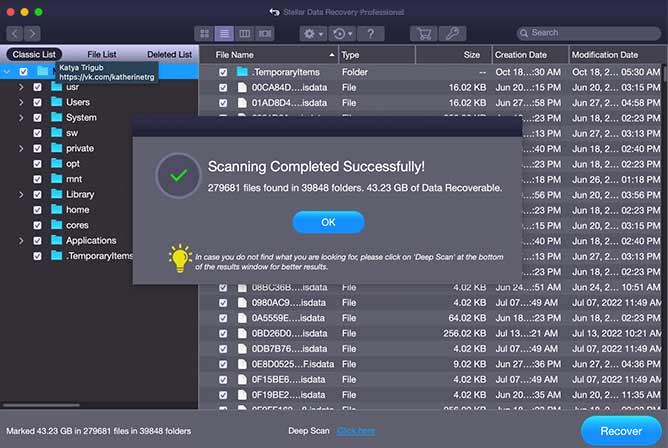
Stellar Data Recovery > Scanning Process Completed
Stellar Data Recovery > Recover Files
All done!
III. Visit Local Store
If two previous solutions haven't worked well for you or your disk has been seriously damaged, the best decision would be to send it to a local service center. This procedure might be expensive, but a technician may rescue your files.
Wrapping Up
SSD mechanism is beneficial for Mac's optimization processes. However, it makes it harder to recover your data. Try using Time Machine or specially designed software, or last but not least; you can bring your device to the local store. There are still chances available.
Related reading:
- Best SSD Data Recovery Software
- SSD vs HDD: Which is Better and Why
- 7 Early Warning Signs of Hard Drive Failure


 9 min read