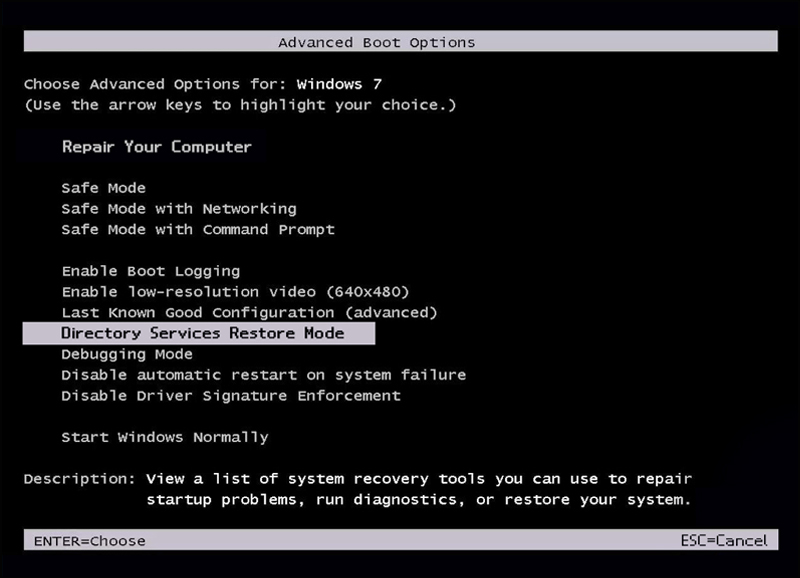
-
 For IndividualsBack to main menu
For Individuals
-
 Data Recovery
 -
 File Repair
 -
 Data Erasure
-
-
 For BusinessBack to main menu
For Business
-
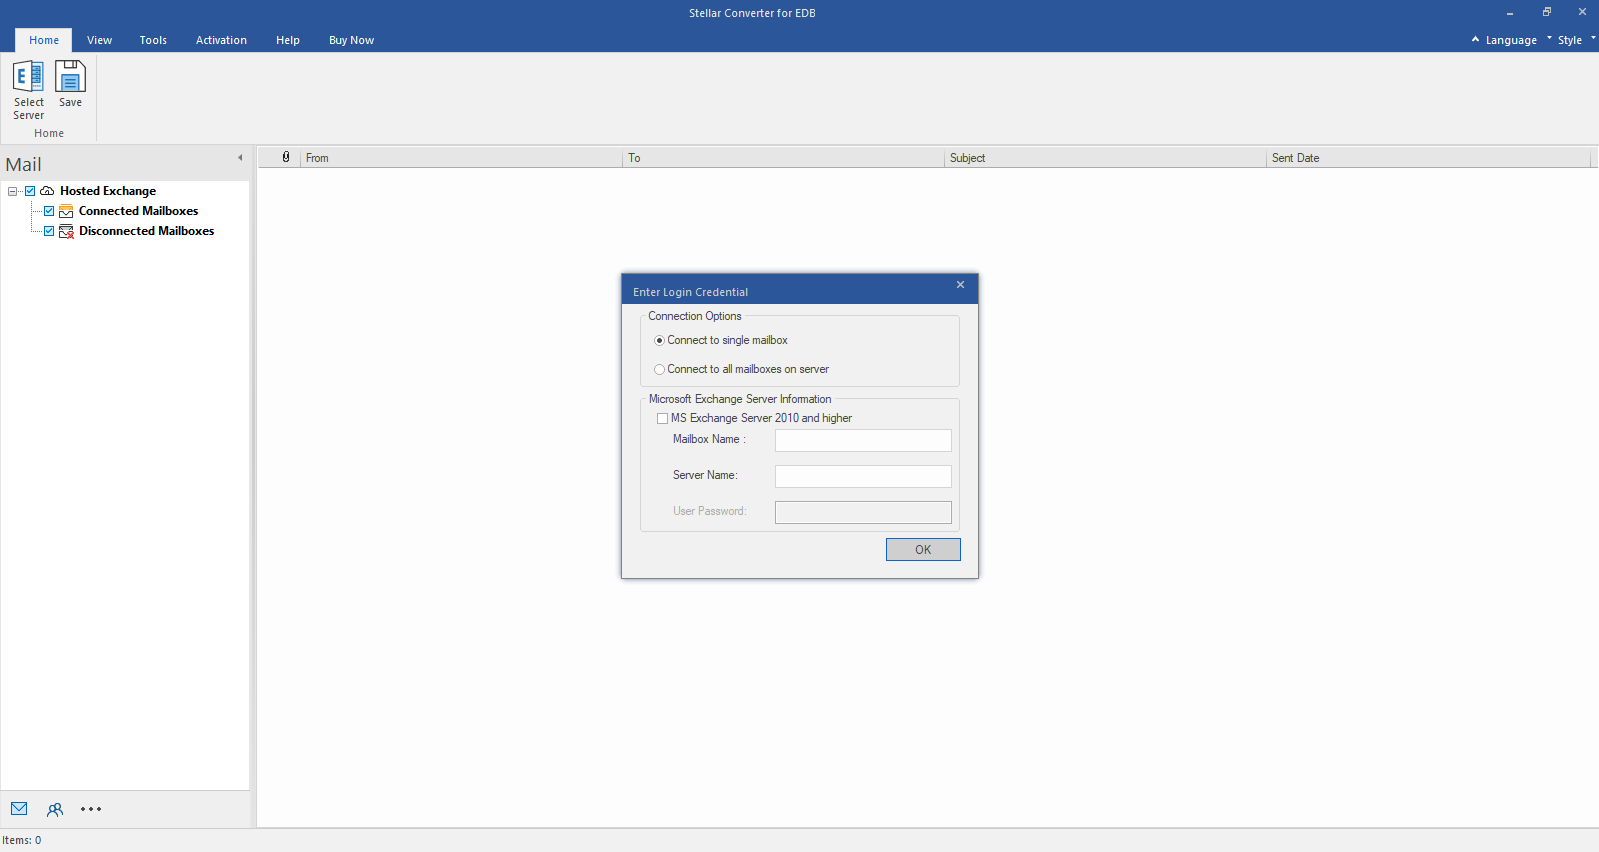
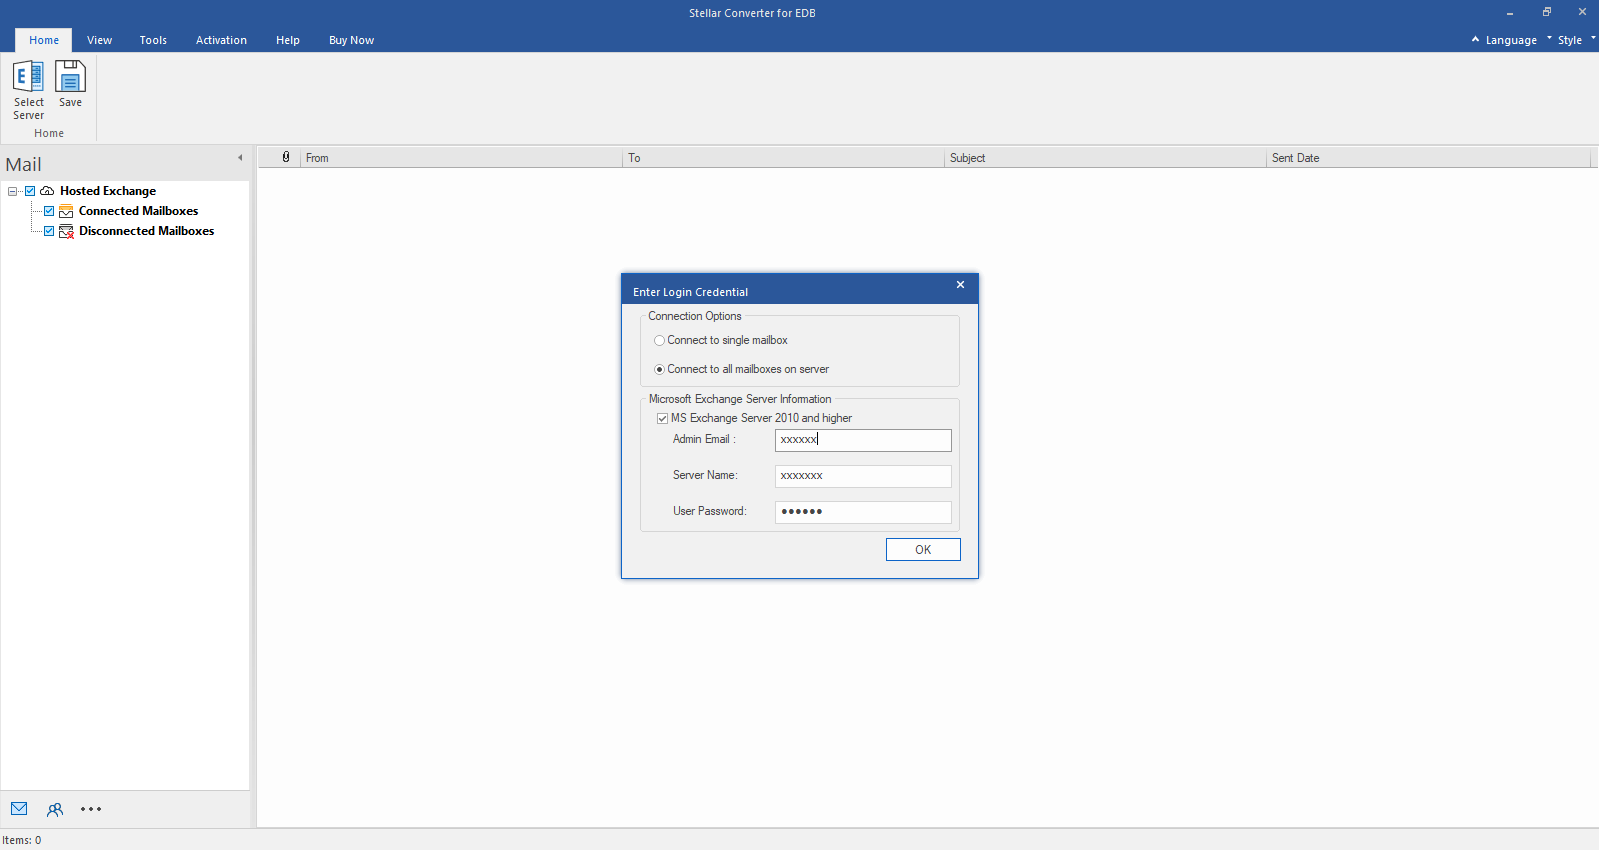
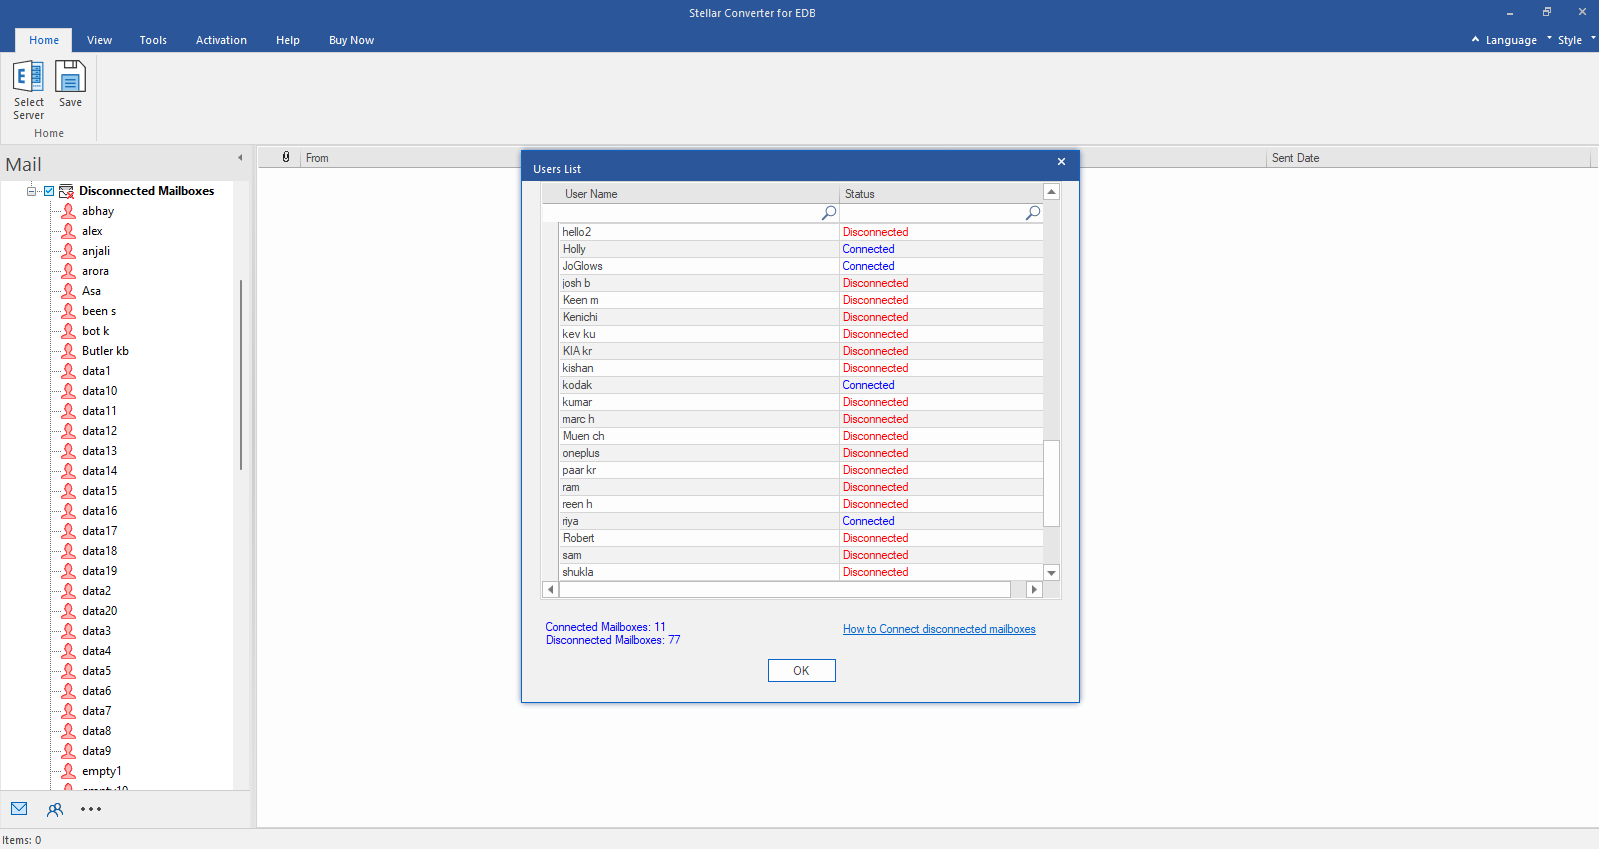
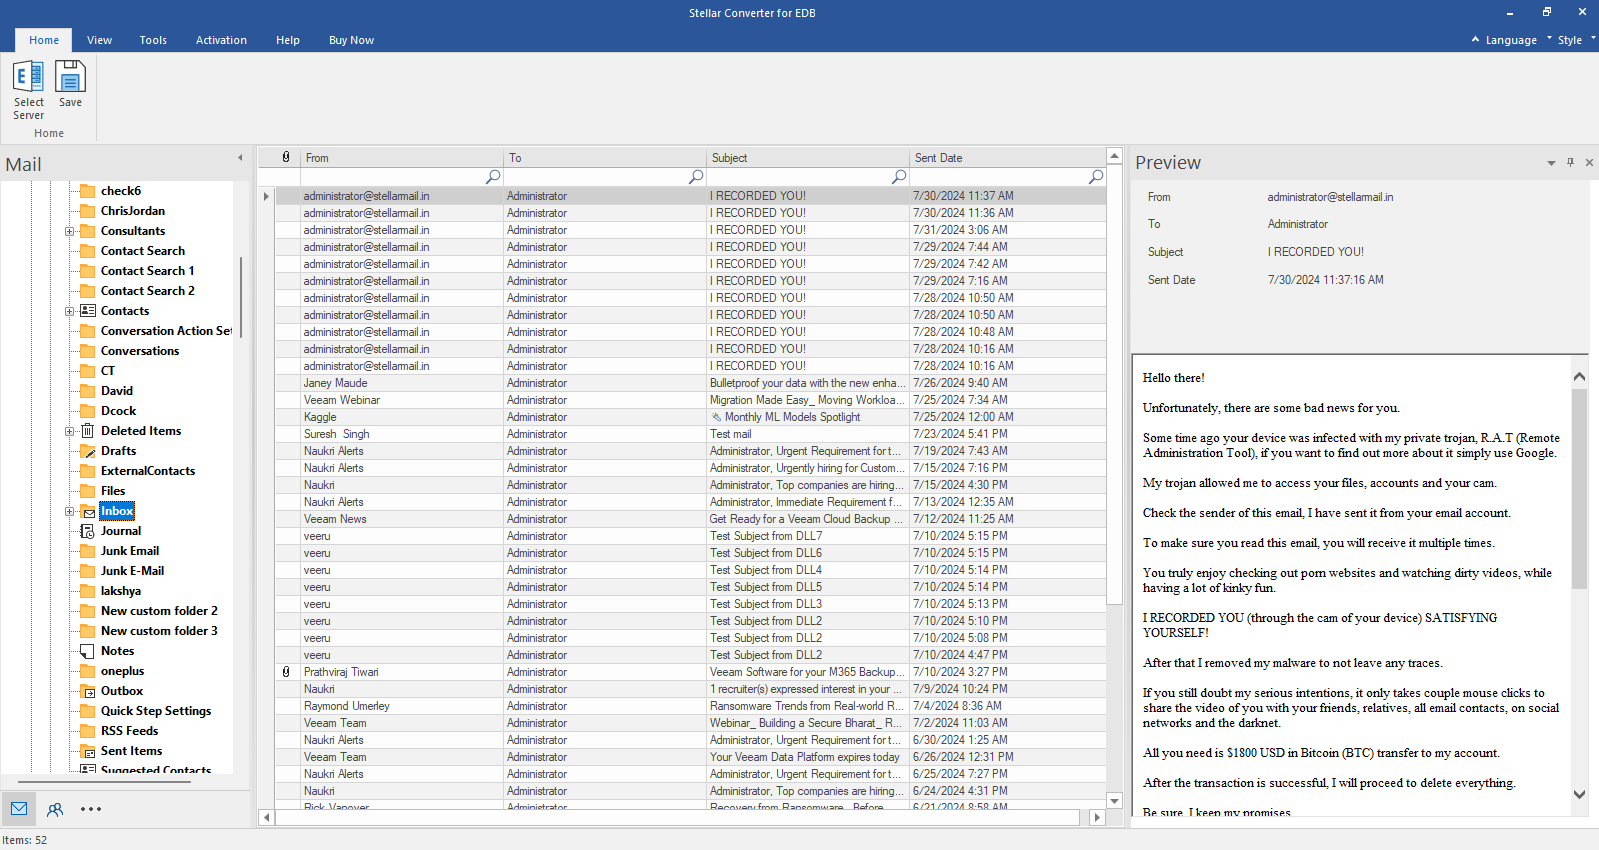
 Email Repair
 -
 Email Converter
 -
 Email Migration
 -
 File & Database Repair
 -
Data Recovery
-
Data Erasure
-
 Toolkit
 -
 Forensic
-
-
 Lab Services
 -
 Our Partners
 -
 About
About -
 Resources
 -
 Support
 -
 Contact us