Step 1: Launch Stellar Converter for MBOX. On the Home screen, you will see the ‘Select MBOX’ window.
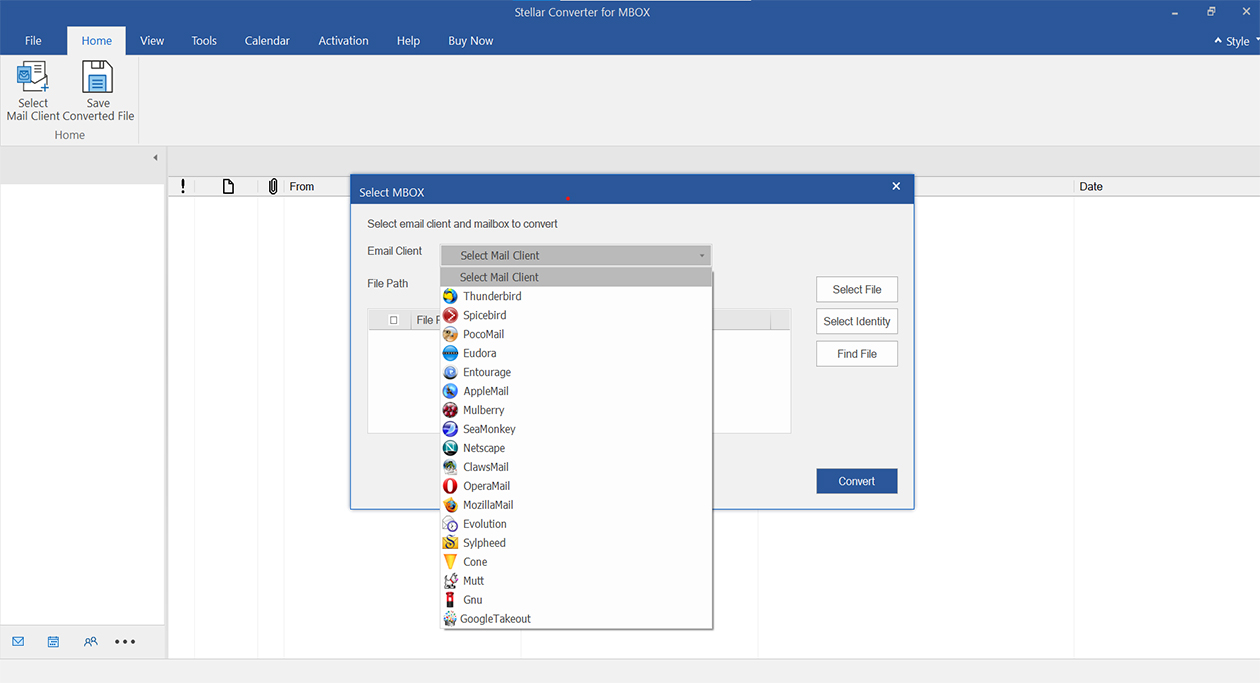
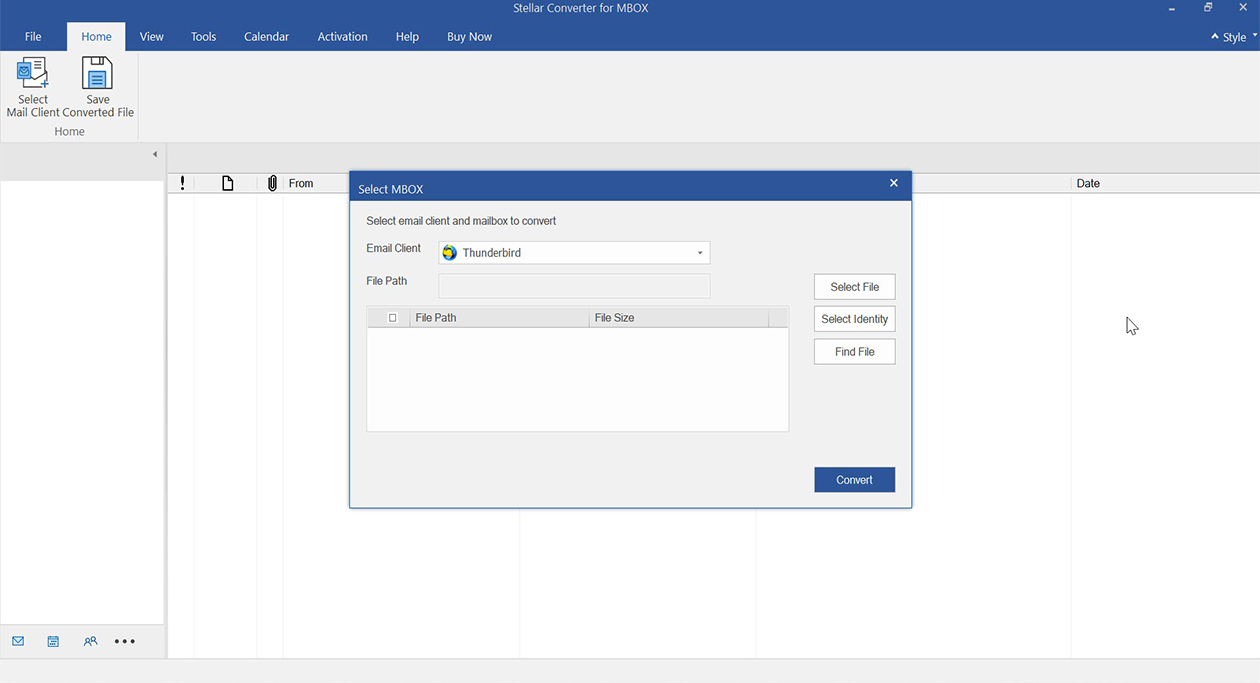
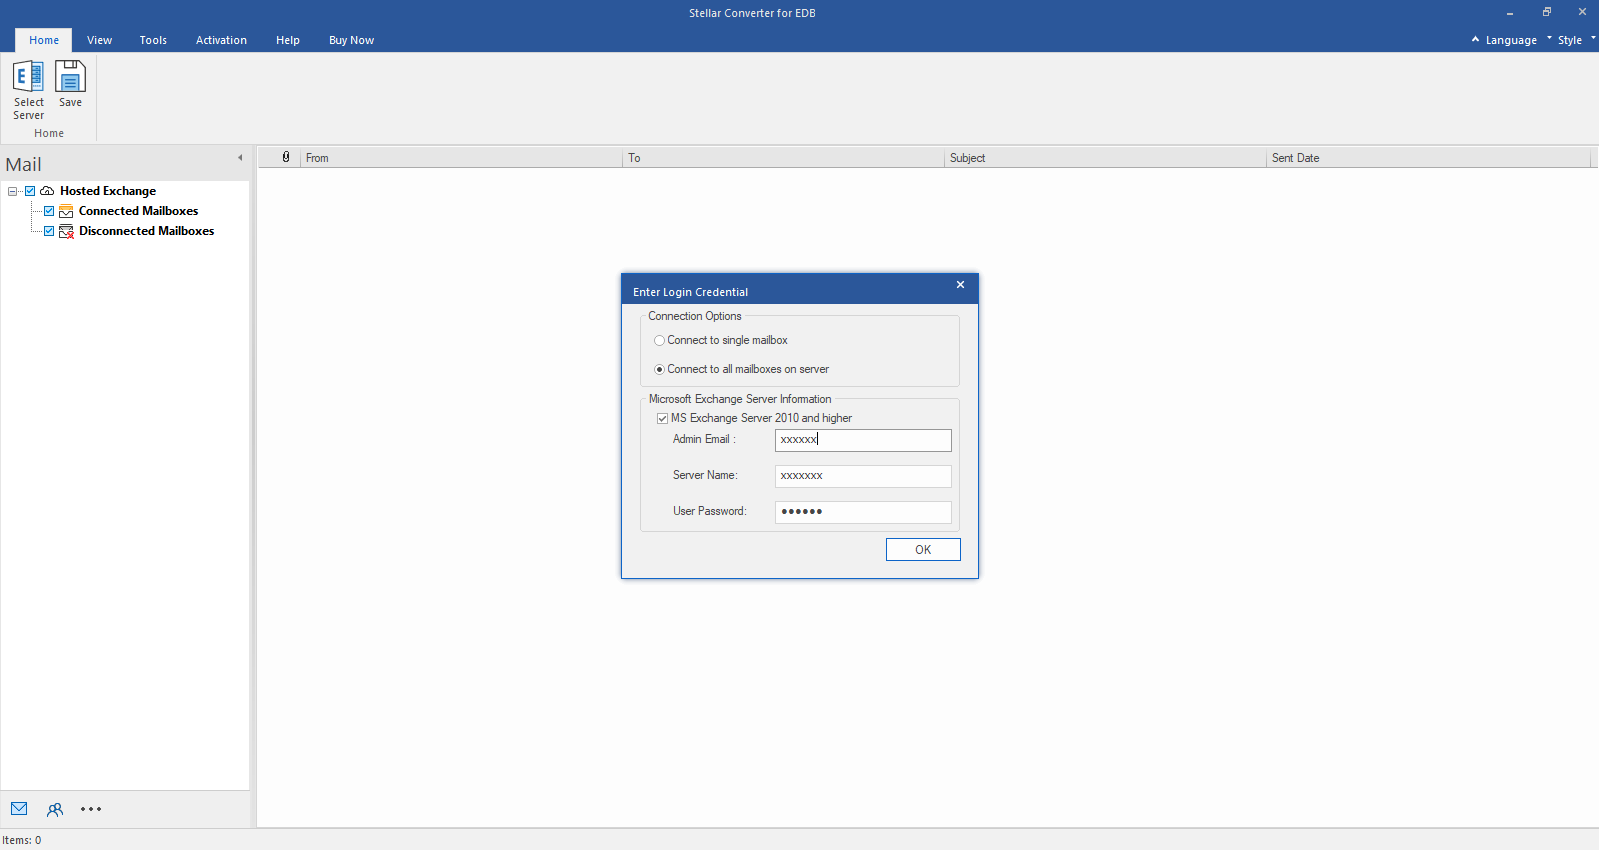
Step 2: Select the email client from the Select Mail Client dropdown and the associated MBOX file you want to convert. The software will automatically detect the default path of the MBOX file of the selected email client (applicable for Mozilla Thunderbird, Spicebird, Pocomail, Netscape, SeaMonkey, and Opera Mail). Click on Select File if you want to select an MBOX file stored at a location other than the default path. If the location of the MBOX file is not known, then click on Find File to search for the MBOX file on the system. Click on the Select Identity option to select the Mail Client's identity you want to convert. After selecting the email client and the associated MBOX file, click on Convert.
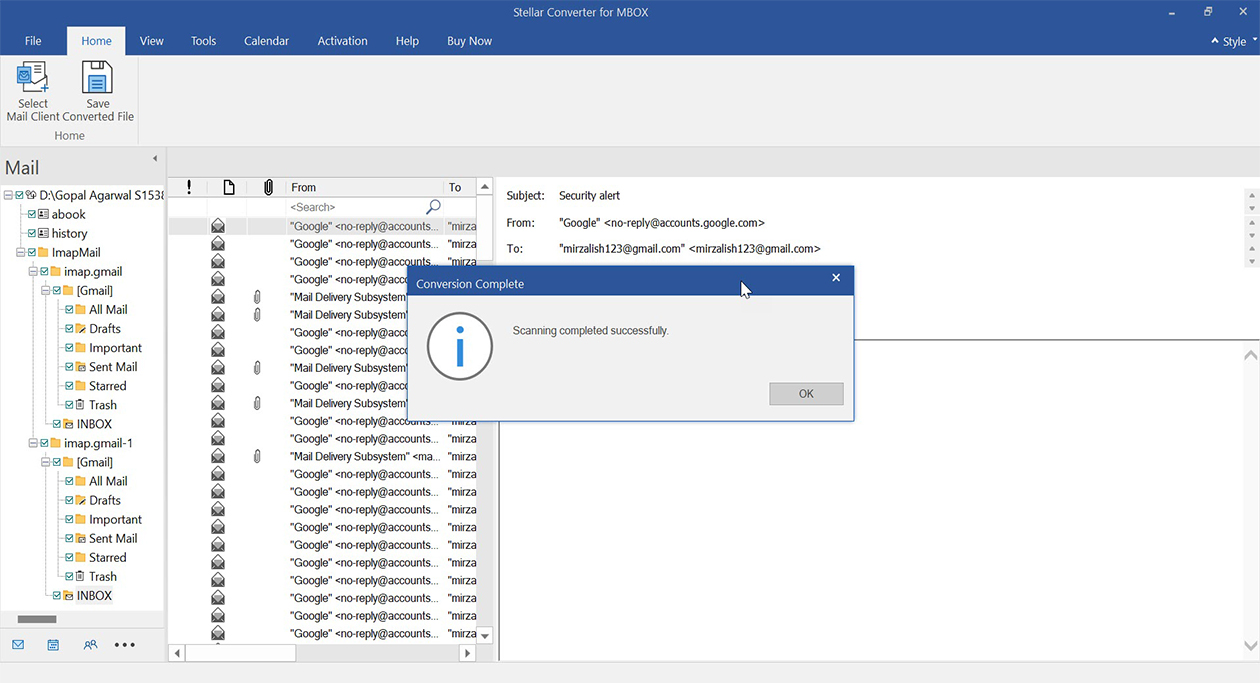
Step 3: The software start scaning the selected MBOX file. After the scan is complete, it displays the ‘Conversion Complete’ dialog box. Click on OK.
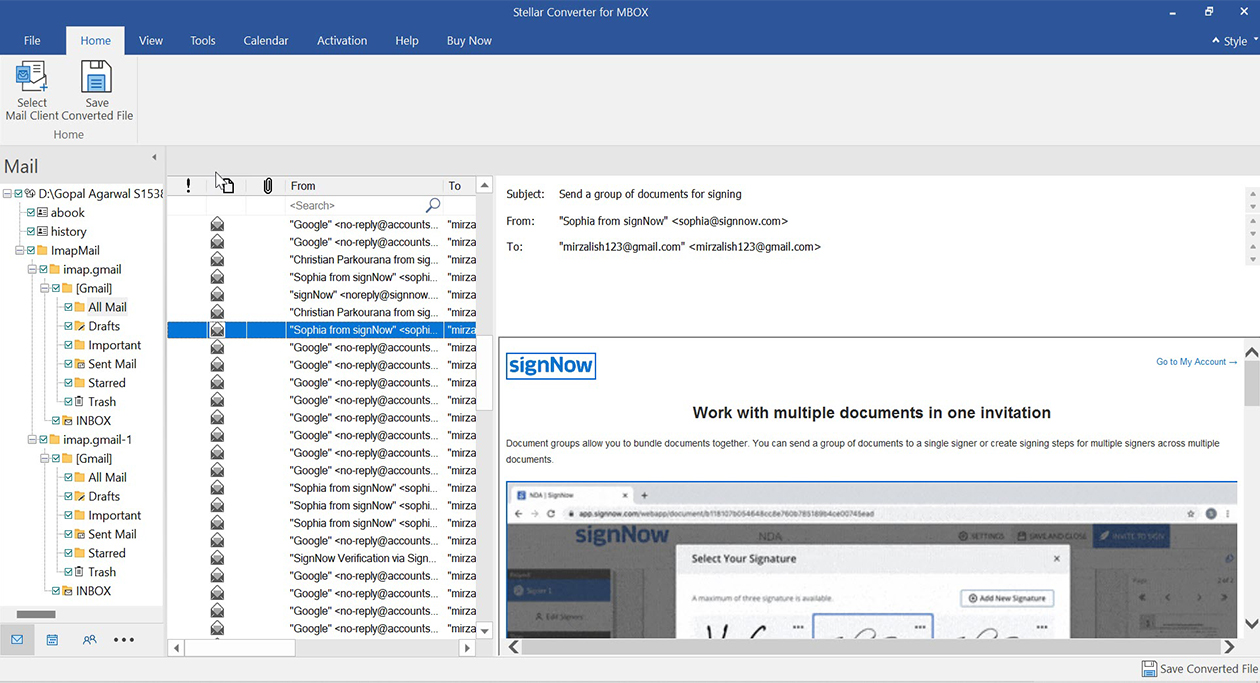
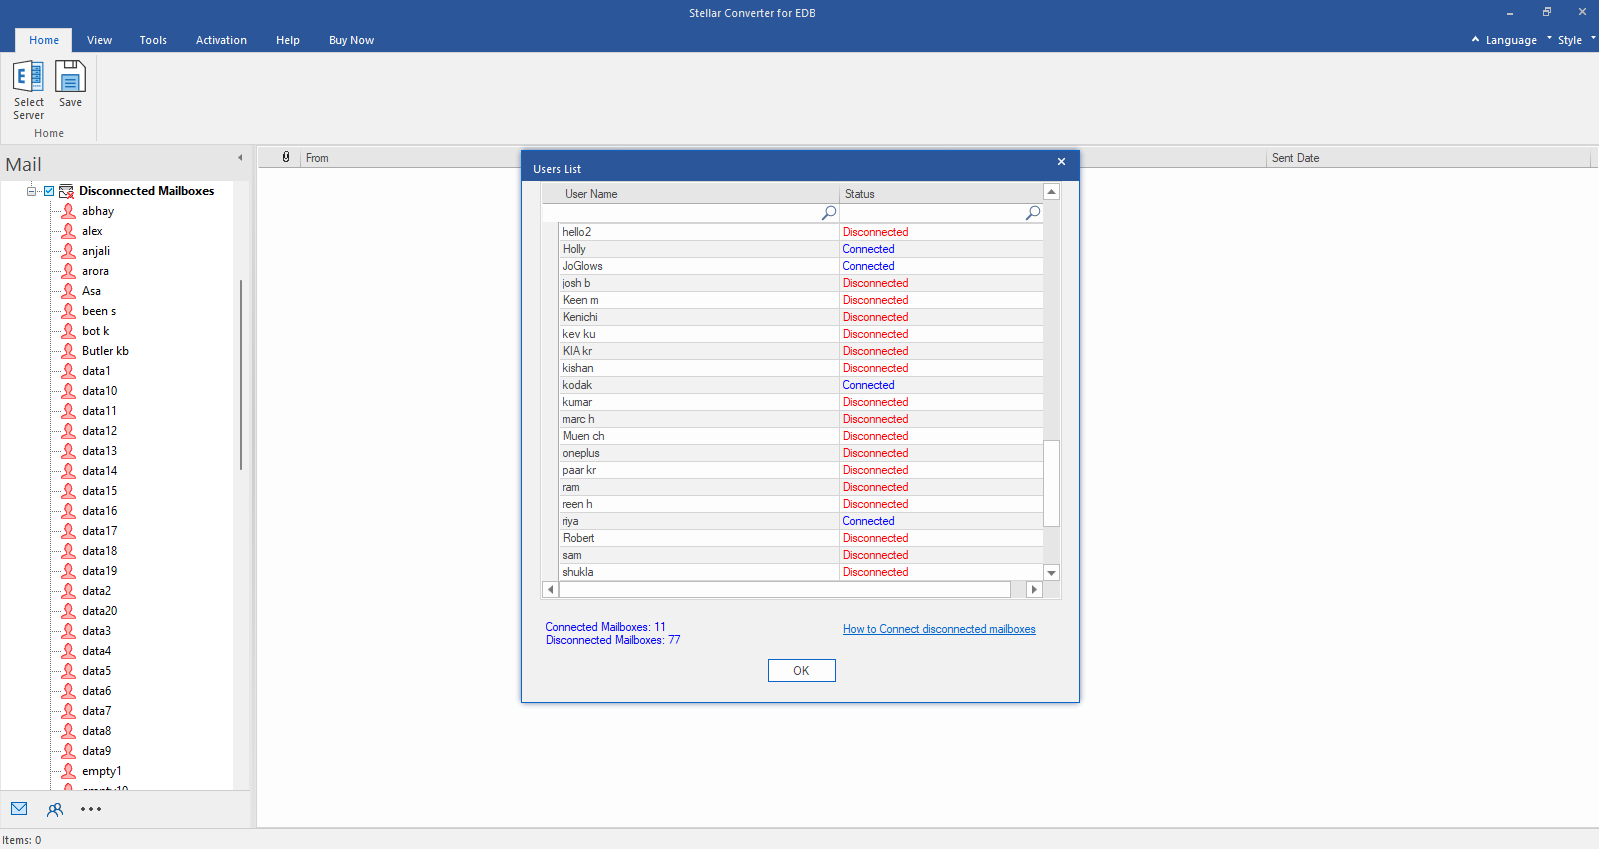
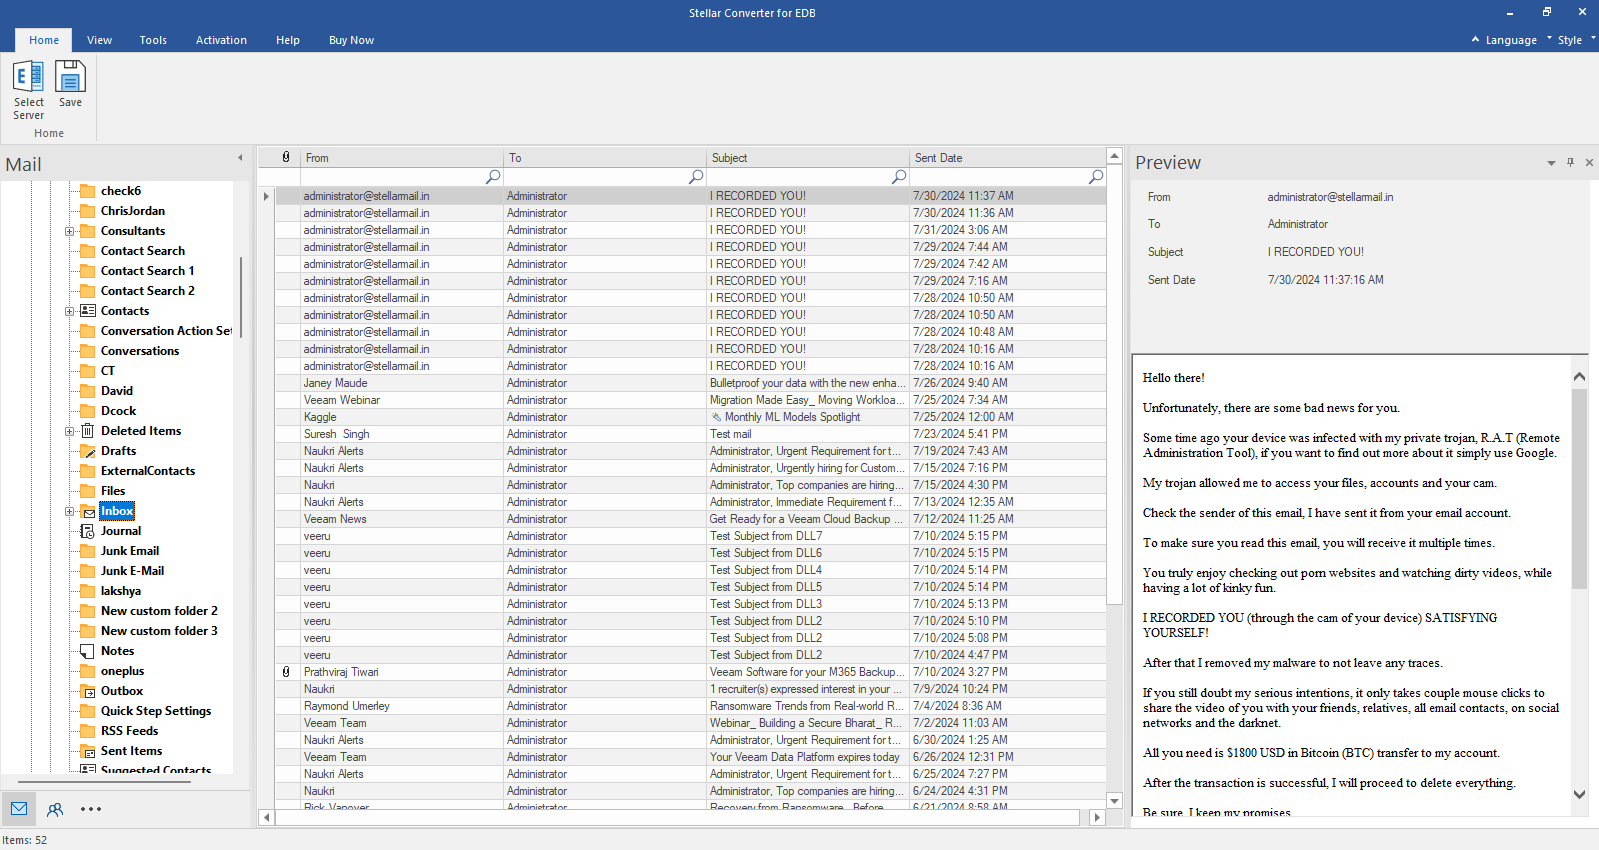
Step 4: The software displays the contents of converted MBOX file in a three-pane window. In the first (left) pane, it displays all the mailbox folders/subfolders in a tree-view structure. When you click on a folder/subfolder, it will display its mail items in the middle pane. You can click on a mail item to see its enhanced preview in the right pane. The Navigation Pane at the bottom-left lets you preview other mailbox items, such as Calendars, Contacts, and Tasks.
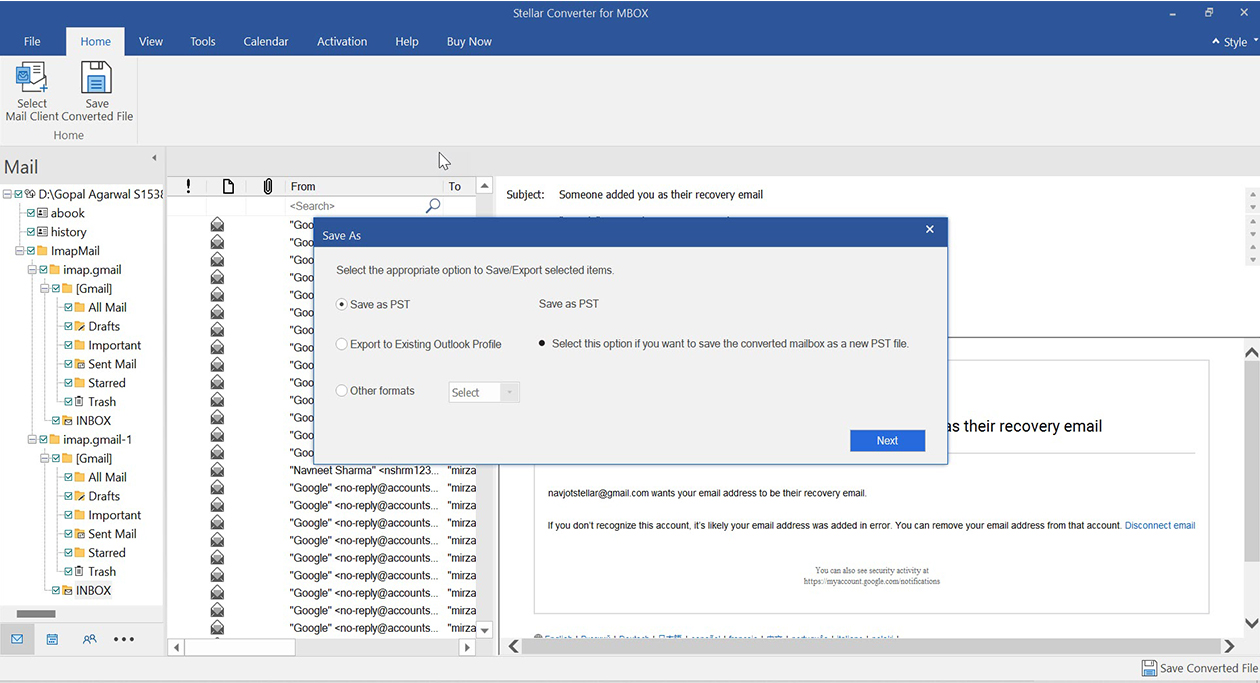
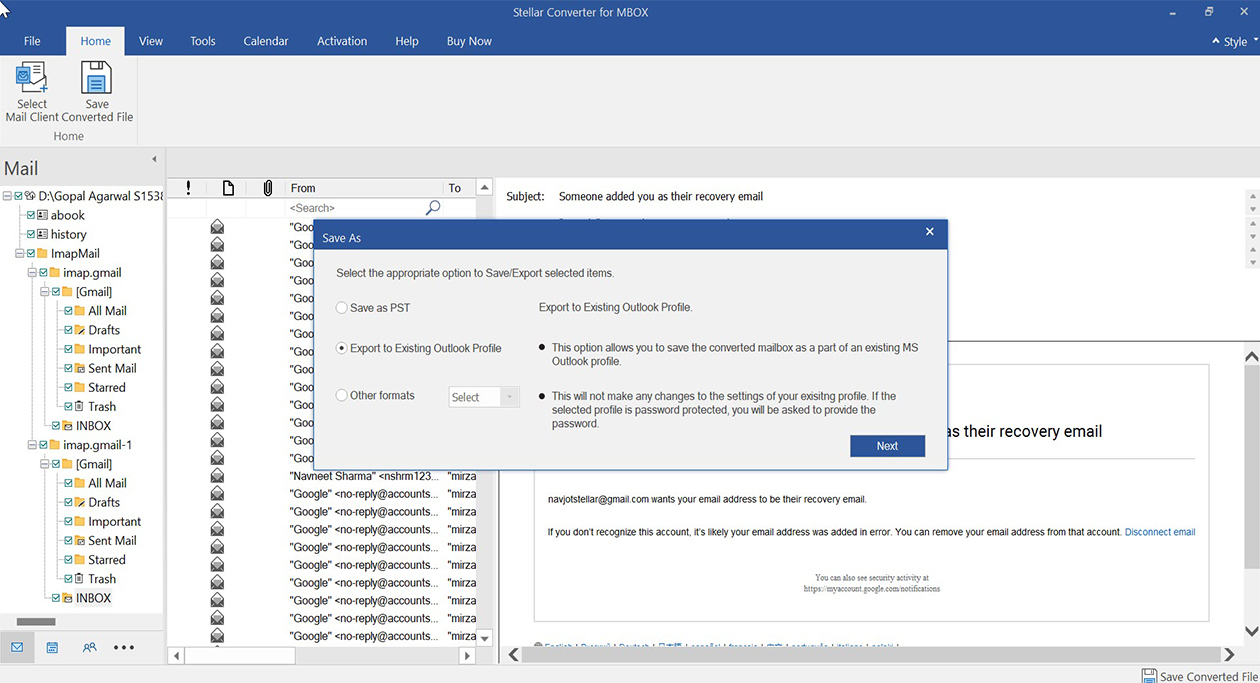
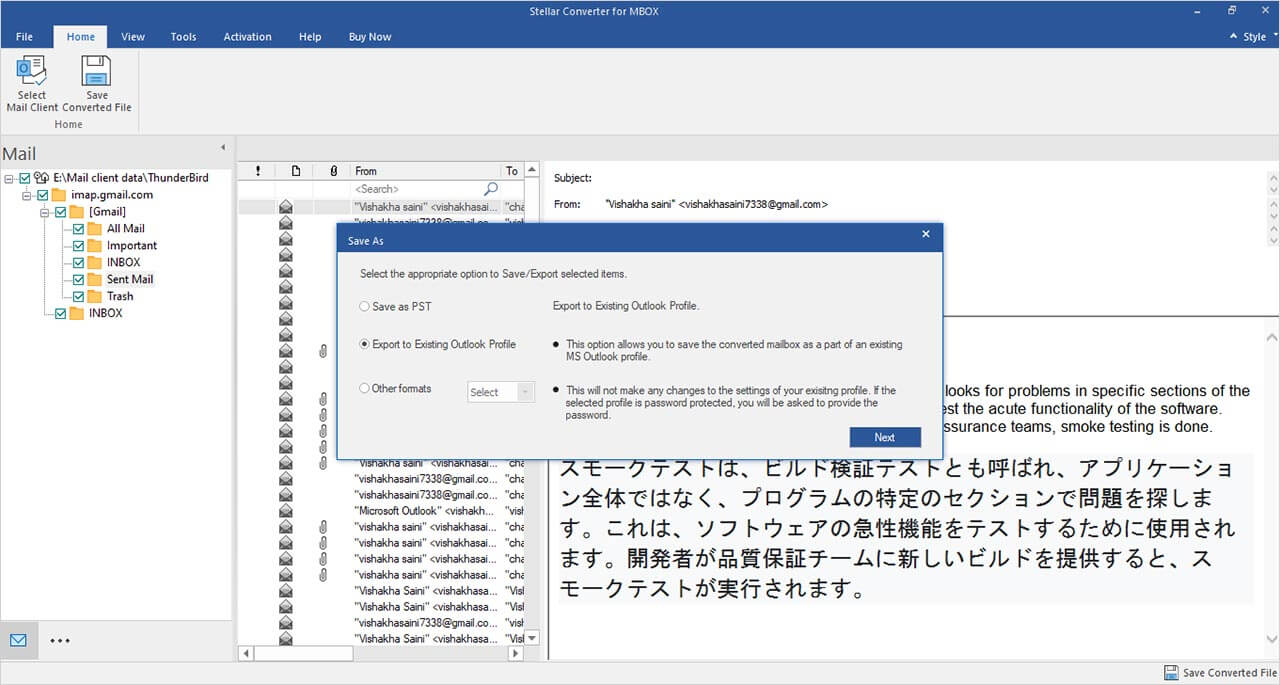
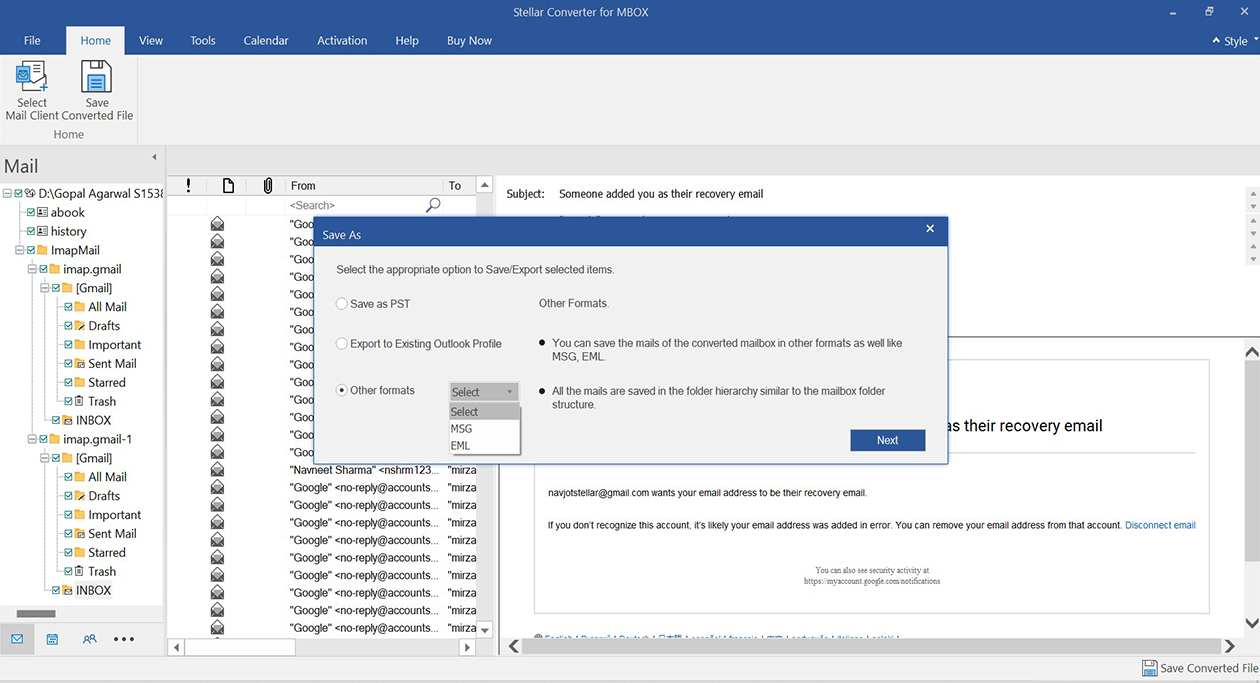
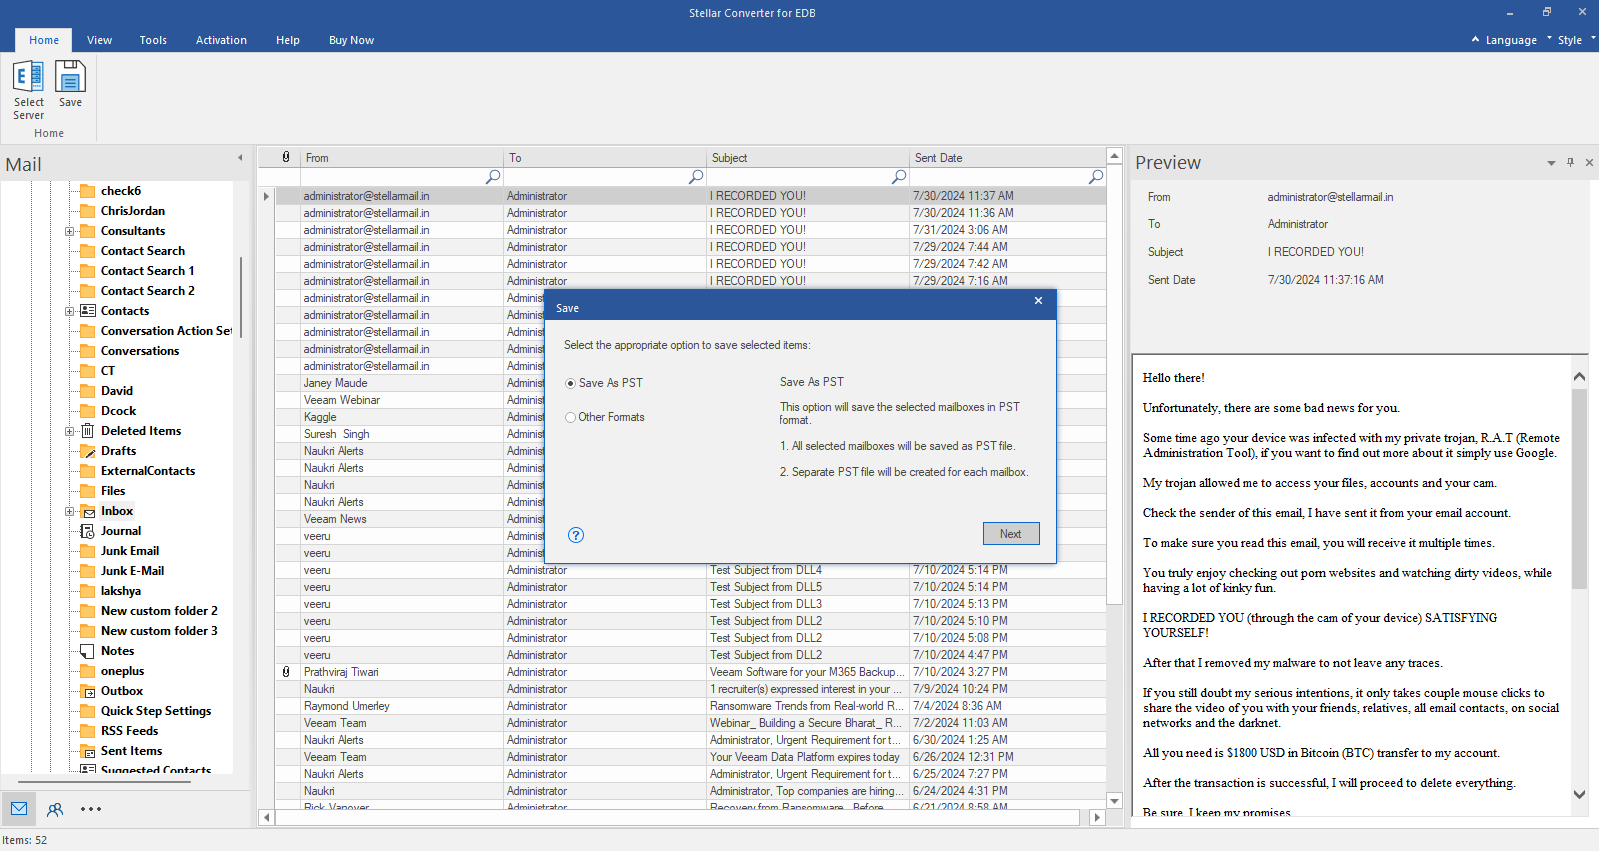
Step 5: Select the mailbox items you want to save. By default, all items are selected. After making the selection, click on Save Converted File in the ribbon. The ‘Save As’ dialog box will appear on the screen. Select the Save as PST option to save the selected mail items in a PST file. The Export to Existing Outlook Profile option lets you save the mailbox items to an Outlook profile or append them to an existing PST file. The Other formats option lets you save the mailbox items in MSG or EML file.
Step 6: After choosing the Save option, click on Next. It will show the ‘Choose Destination’ prompt. Click on Browse to select the location to save the converted file.
Step 7: Before saving, click on the Apply Advanced Filter option if you want to filter the converted items. You can include or exclude junk and deleted items folders, filter the items based on a date range, and exclude emails based on sender IDs. Click Next after applying the desired filters. Then, click on Save to start saving the items.
Step 8: When the process is complete, you will see the Saving Complete window. You may click on the Open Containing Folder link to go to the folder where the converted file (PST) is saved. Else, click on OK to close the window.
 For IndividualsBack to main menu
 Data Recovery
 File Repair
 Data Erasure
  For BusinessBack to main menu
 Email Repair
 Email Converter
 Email Migration
 File & Database Repair
  Toolkit
 Forensic
 Lab Services
  Our Partners
  About
About Resources
 Support
  Contact us
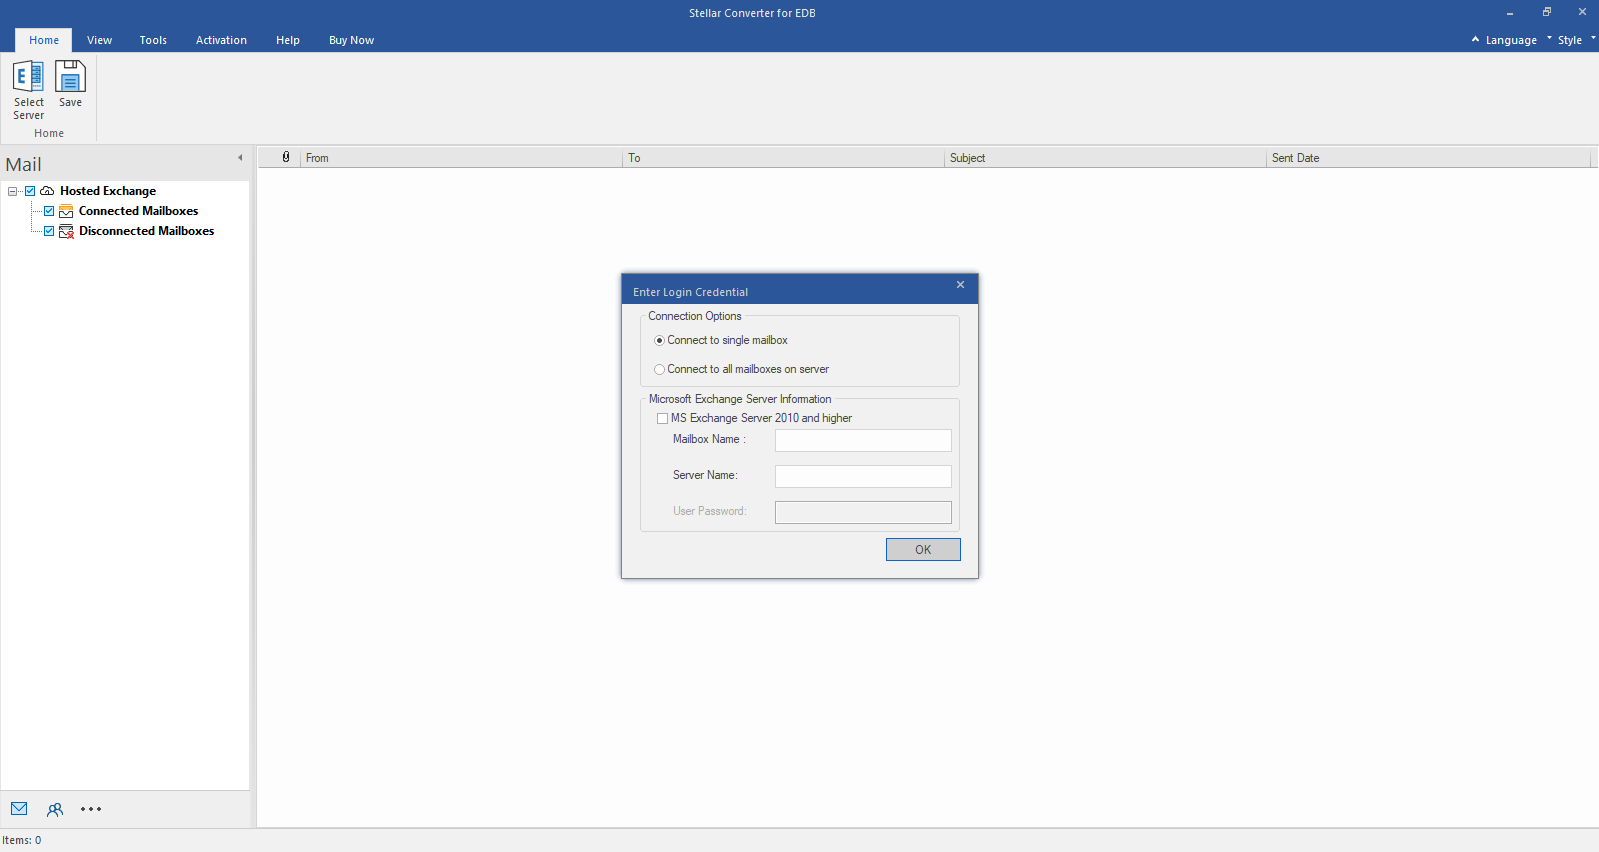
 Free Download
  Installation