


Whether you buy a new SD card or want to change the file system of the card, or the data stored on the card is no longer needed, formatting is the way forward. You may also need to format the card even when the SD card is inaccessible or corrupted, incompatible with the device used, low in storage space, etc.
Formatting the SD card on Mac wipes the data stored on it, so you need to back up your SD card data before formatting to avoid losing your precious files. But how do you back up data from an inaccessible or corrupt SD card? For that, you’ll need help of a photo recovery tool.
Here, we’ll discuss how to recover your photos, videos, and other media files from both accessible and inaccessible SD cards, and then format them using Disk Utility or Terminal on Mac.
How to Recover your Data from an SD Card?
The method to restore the photos, videos, and audio files from the SD card depends on whether the card is accessible or not. Let’s look at both scenarios.
Scenario 1 - When the SD card is accessible
If you can open the SD card and see its content without formatting, you can easily back up the data stored on it. Just import or drag and drop the files from the SD card to the desired location on your Mac or other external drives. Here’s how to do it:
- Insert the SD card into the SD card reader on your Mac.
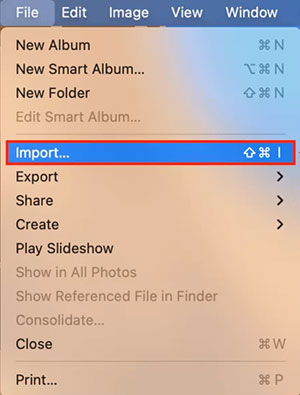
- Open the Photos app on Mac and click File > Import.
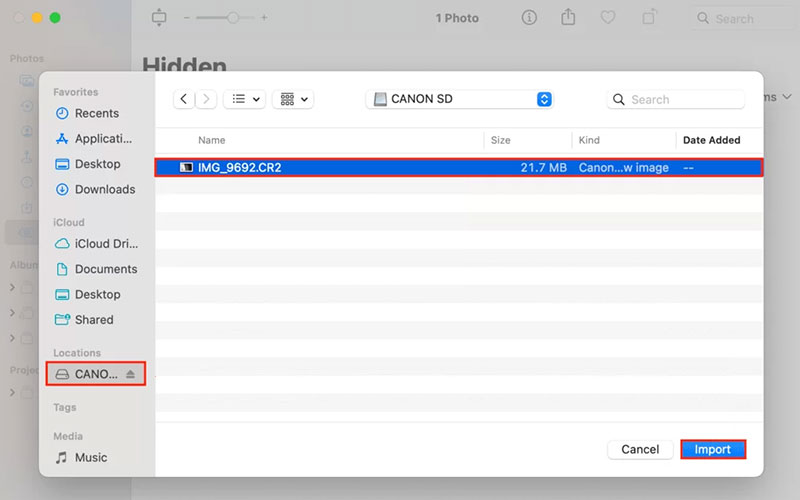
- In the next window, select your SD card from the left sidebar, and choose the photos you want to import. Then click Import to move pictures from the SD card to the Photos app.
Scenario 2 – When SD card is not accessible
Often, an SD card becomes inaccessible or damaged due to corruption, system error, or virus infection. In such a situation, format the SD card (following the methods mentioned later in the blog) and then restore the lost photos, videos, and audio files stored in an SD card using a reliable photo recovery tool or backup folder.
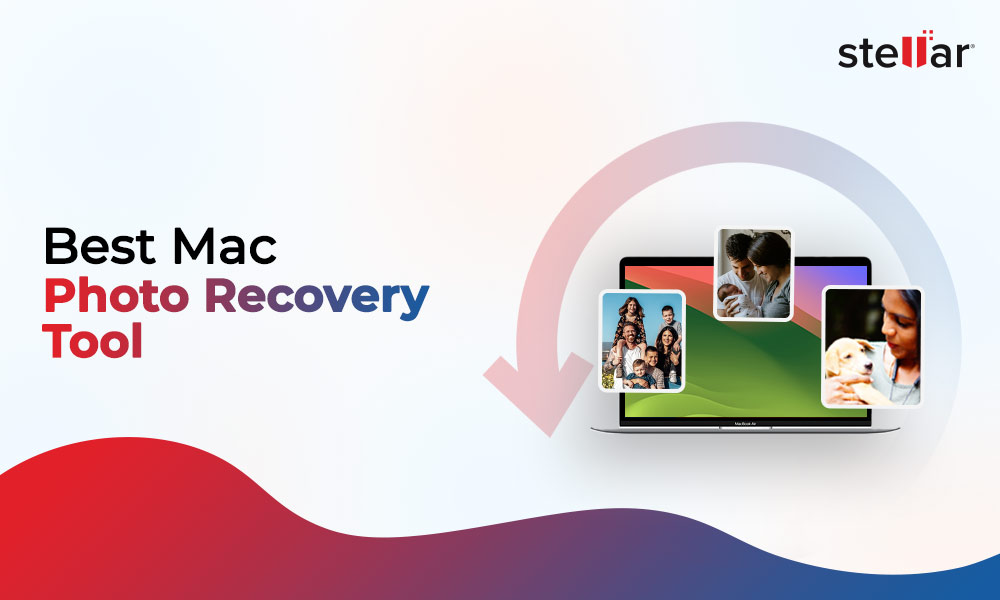
Recover Media Files Using Photo Recovery Software
Stellar Photo Recovery for Mac software retrieves lost or deleted photos, videos, and audio of any file format stored in various media, such as SD cards, memory cards, etc. This tool supports all kinds of SD cards, including Kingston, Samsung, SanDisk, Toshiba, Lexar, Panasonic, etc. Moreover, the tool offers two types of scanning i.e. Quick Scan and Deep Scan for comprehensive scanning of the storage media to ensure accurate and quick media file recovery.

Here’s how to use Stellar Photo Recovery for Mac to restore deleted photos, video, and audio files from inaccessible SD cards:
- Connect your SD card to your Mac using a card reader.
- Download and install Stellar Photo Recovery for Mac Launch the software.
- On the main screen, select your SD card and click Scan.

- The scanning process will begin, once completed, you can see the list of recoverable files.
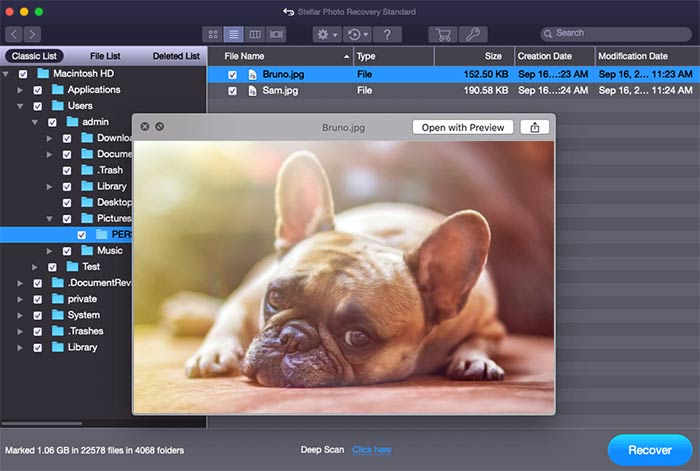
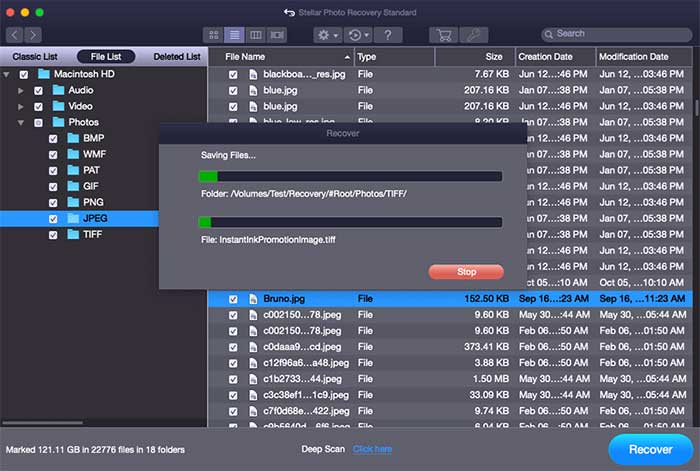
- Preview the recovered files, select the files you want to restore, and click Recover to save them at a desired location.
Recover Photos, Videos, and Other Media Files Using Backup
If you have a backup of the data stored on your SD card either on iCloud, iTunes, or any other cloud services, then restore it after formatting the card.
How to Format SD Card on Mac?
Here are a few methods to format SD cards on Mac:
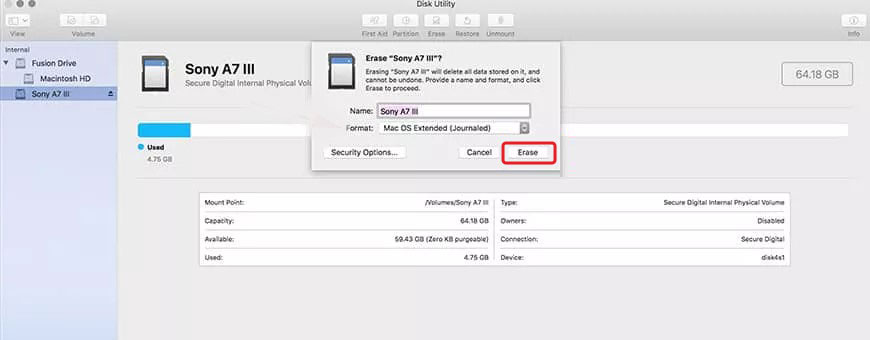
Format SD card on Mac using Disk Utility
- Connect your SD card to your Mac either by inserting it directly into the built-in SD card slot or using the memory card reader.
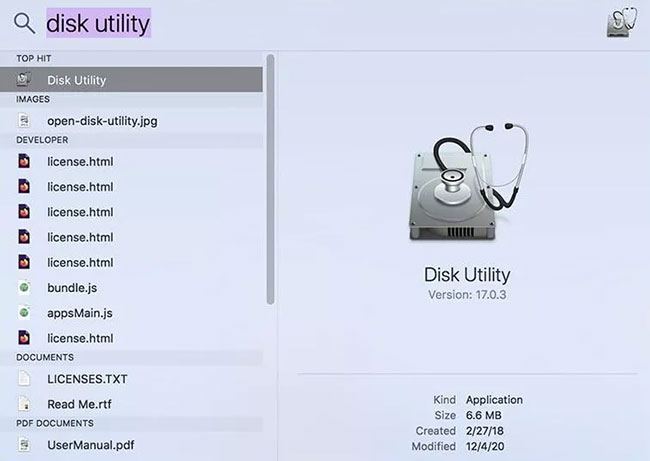
- Press Command + Space Bar and type Disk Utility into Spotlight search to open the Disk Utility App.
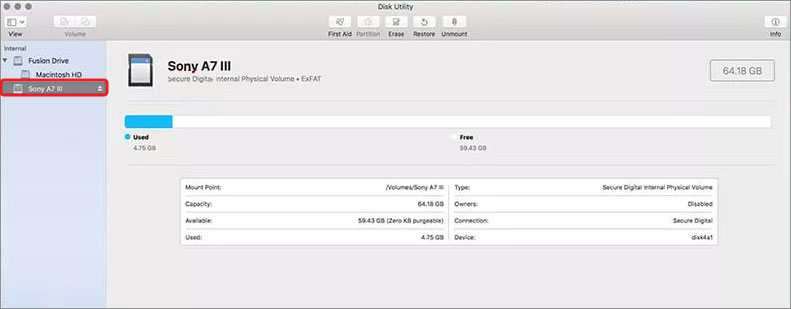
- Look for your SD card and select it.
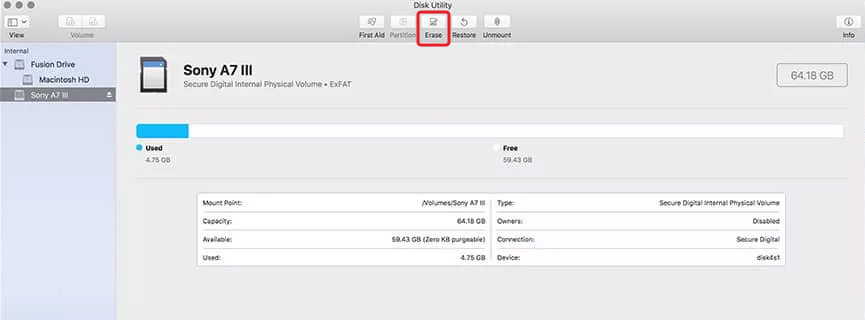
- Next, choose Erase button.
- A pop-up will appear with a warning that erasing the SD card will delete data stored on it.
- Here, you have the option to change the name of the SD card and select the file format from the drop-down menu.
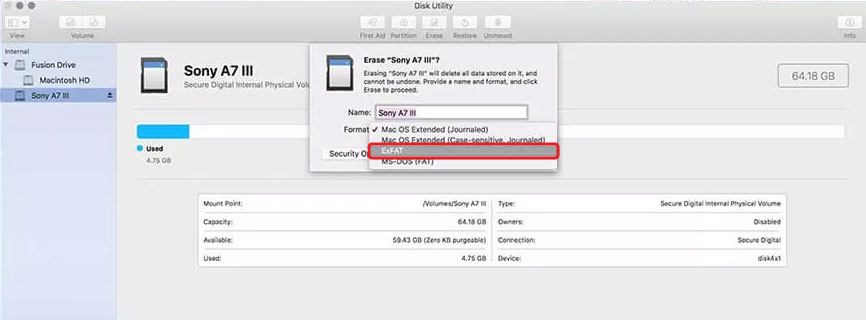
- At last, click the Erase button, all your media files stored on the card will be deleted and your SD card will be formatted to the appropriate file system.
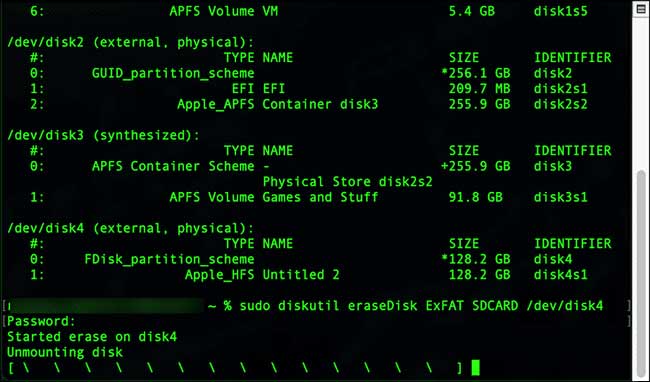
Format SD Card on Mac using Terminal
This is a complex way to format the SD card and is suitable for advanced users. Here are the commands you need to use while formatting the SD card using the Terminal app:
- Connect the SD card to Mac using a card reader.
- Press Command + Space and type Terminal to open it.
- Type diskutil list to know details about all disks connected to Mac.
- Search for your SD card in the disks list.
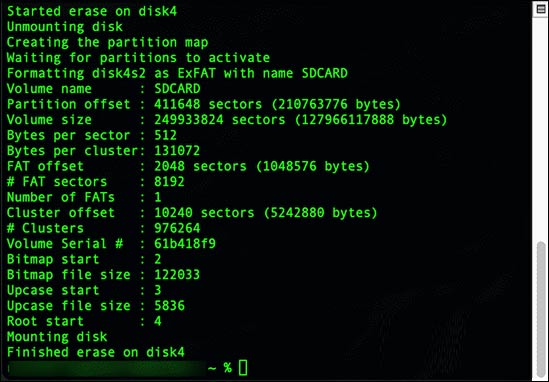
- Next, type sudo diskutil eraseDisk FAT32 SDCARD MBRFormat /dev/disk4 for 32 GB or smaller SD cards. For 32 GB and larger SD cards, type sudo diskutil eraseDisk ExFAT SDCARD MBRFormat /dev/disk4.
- If prompted, type your Mac password.
- Wait for the command to finish, once done, your SD card will be ready to use after formatting.
Format SD Card on Mac using SD Card Formatter
You can even use the SD card formatter app developed by SD Association to format the SD card on Mac. This app is easy-to-use and can automatically detect your SD card, its size, and choose an appropriate file system. For example, if you connect a 64 GB SD card, it will detect the card easily and will only allow to format it to SDXC specification using exFAT.
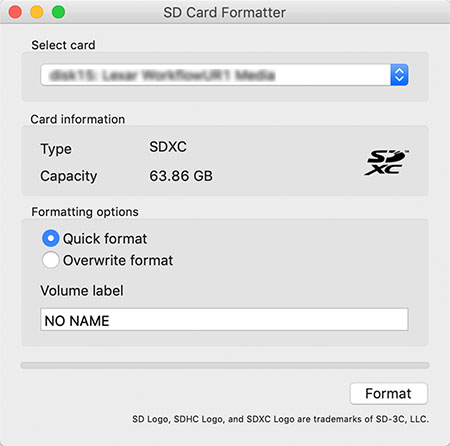
To use this app, you need to download it from here.
Conclusion
Now that you know how to format an SD card on Mac, you can easily use it, wipe it, and repurpose it freely without losing your photos, videos, and audio files.
However, ensure that the SD card is properly used and stored in a protective case. Try not to use the same card on multiple devices. Failure to do so can result in data loss.
If this happens, use the steps mentioned above to restore the data and then attempt to format the SD card. If you cannot format the card, replace it with a new one.


Vishakha Singh is a Senior Writer at Stellar with half a decade of experience in writing content in diverse verticals. She loves creating photo/video recovery & repair tutorials. Vishakha also specializes in writing full-blown iPhone and Android guides.

 6 min read
WHY STELLAR® IS GLOBAL LEADER
-
0M+
Customers
-
0+
Years of Excellence
-
0+
R&D Engineers
-
0+
Countries
-
0+
PARTNERS
-
0+
Awards Received
Technology You Can Trust A Brand Present Across The Globe


