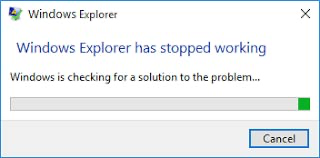
Imagine you double-click a folder and just when you think you’ll view your stuff, the File Explorer window vanishes with NTDLL.dll error flashing on your face. Frustrating, ain’t it? For many of us, File Explorer is like that little file cabinet so this sudden crash can just feel like losing access to all our files. NTDLL.dll is basically a core Windows system file that helps it to manage those low-level functions like memory and system calls. When it “fails,” it usually means something actually deeper is wrong, such as a buggy driver or a corrupt system file. In short, this error is just a symptom not the root cause. Don’t panic, though… With the right approach, we can track it down and fix it then and there.
Possible Causes of the Crash
File Explorer NTDLL.dll crashes can have many triggers. Some common ones out there include:
- Corrupt system files: If those critical Windows files (like the ntdll.dll itself) are damaged somehow, your File Explorer can just crash at a random time.
- Outdated drivers or software: Old graphics card’s drivers, audio drivers, or maybe your chipset’s drivers can cause some conflicts with Explorer and lead to a crash suddenly.
- Faulty Windows updates: On some occasions, a Windows 10/11 update has a bug, just like other software. Users report explorer crashing just when they have installed a new version of Windows.
- Broken Explorer history/cache: File Explorer keeps a quick-access cache of recent items. If this cache or history gets corrupted, it can repeatedly crash Explorer.
- Overloaded Jump Lists: The “Recent items” in Jump Lists (the menus for recently used files on Start or the taskbar) can malfunction and crash the shell. Simply disabling Jump Lists often prevents the error.
- Third-party conflicts: Non-Microsoft extensions or maybe those startup programs might also inject code into Explorer and give out the ntdll.dll issue as a result.
- Hardware issues: In some rare cases, failing RAM or that damaged hard drive can also produce system errors that just manifest as Explorer crashes.
Understanding these causes helps us apply the right fix. Let’s run through each solution step by step. After trying a method, test Explorer and then move on if the crash persists.
Methods to Fix File Explorer NTDLL.dll Crash
Each of the following methods has a quick intro explaining why it helps, followed by step-by-step instructions. After completing a method, retry Explorer to see if the issue is resolved.
1. Restart Your PC
Many glitches disappear after a reboot. Restarting Windows clears out stuck processes and memory hiccups that might cause Explorer to crash.
- Save your work and close all open apps.
- Click Start > Power > Restart.
- Wait for Windows to fully restart and load back to the desktop.
- Try using File Explorer again.
Restarting flushes temporary errors and gives Explorer a clean start. If the crash was due to a one-off glitch, it’s likely gone now. If Explorer still crashes, proceed to the next method.
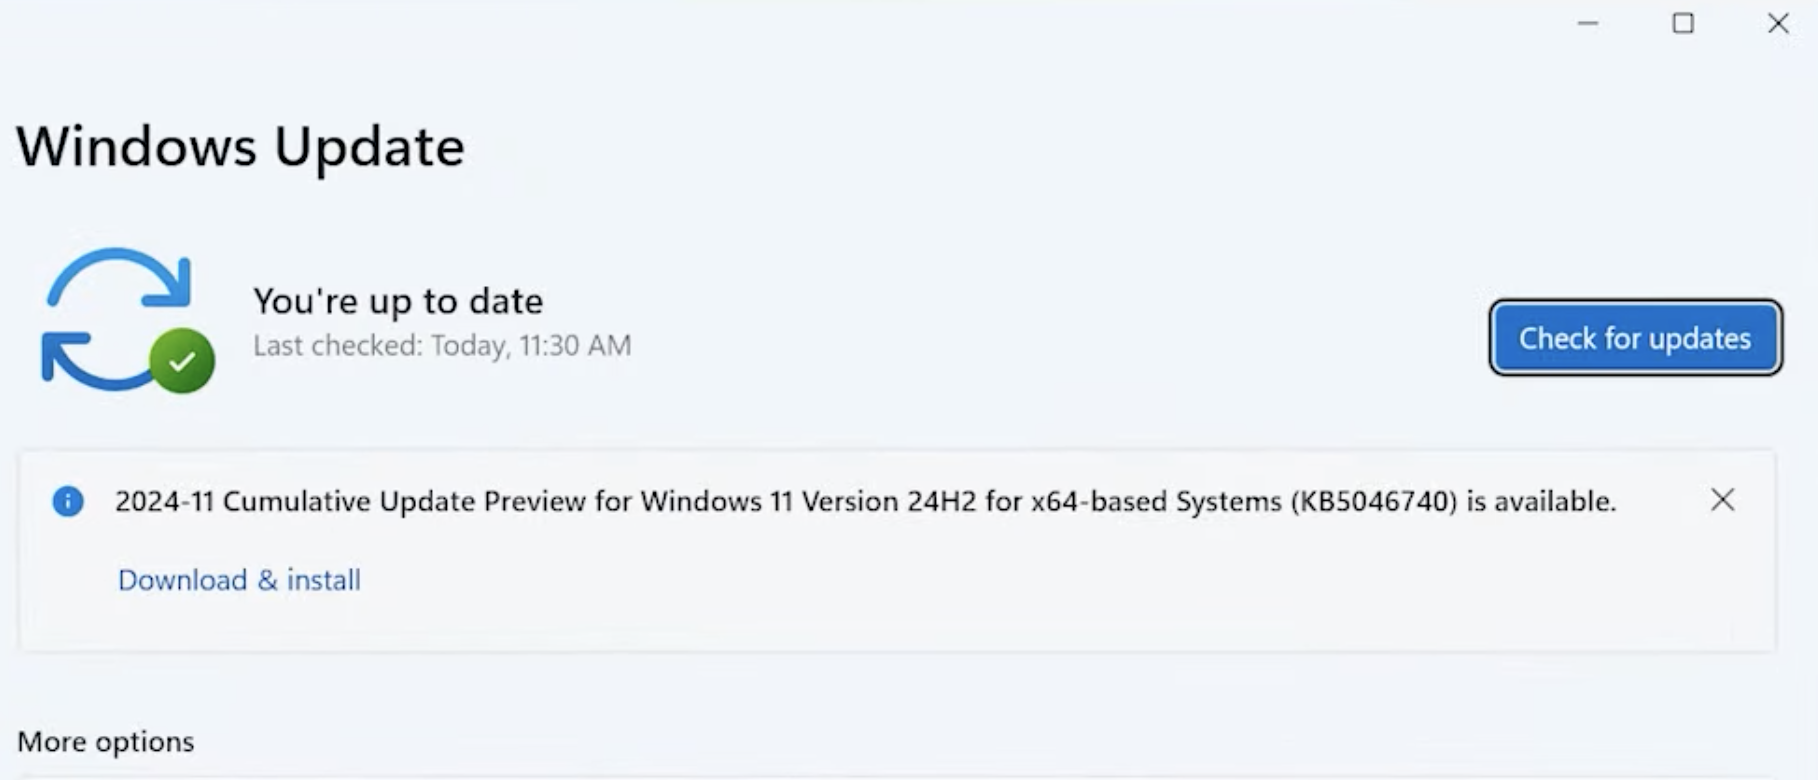
2. Update Windows and Drivers
Old system software or drivers is one common reason why your computer is not working properly. Keeping Windows and device drivers updated is the way to go here.
- Open Settings (press Windows + I) and go to the Windows Update section.
- Click on the "Check for updates" button. If an update shows up, install it, and then restart your PC.
- Open Device Manager (press Windows + X and choose Device Manager). Find Display Adapters and expand it.
- Right-click on your graphics adapter and select the "Update Driver" option. Then choose "Search automatically for drivers".
- Do the same thing for other important devices. Also, don’t forget to check sound, video and game controllers, network adapters, and everything. Else, you can download those latest drivers from the maker's website (NVIDIA, AMD, Intel, etc.).
- If you want, you definitely can also update your motherboard chipset and firmware (BIOS/UEFI) from your PC maker’s support site like Dell SupportAssist or HP Support Assistant.
- After all updates are done from your vside, restart your PC.
When you update Windows and those drivers, old bugs and problems get removed. Most of the time, those old graphics drivers or system files are the reason so this step fixes many things. If File Explorer is still crashing then try the next fix.
3. Restart Windows Explorer Process
Explorer.exe that we know is the process behind File Explorer that can at times just freeze or maybe glitch. Restarting that same process just refreshes that interface without even requiring a full reboot.
- Press Ctrl + Shift + Esc to open the Task Manager.
- Find that Processes tab and look for Windows Explorer. You may need to scroll here.
- Right-click Windows Explorer and click Restart.
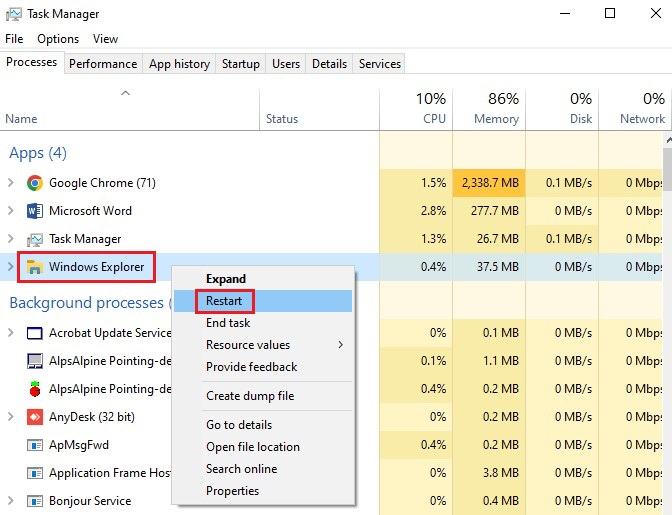
(Alternatively, select Windows Explorer and click the Restart button at the bottom-right of Task Manager.)
- Your desktop and taskbar will briefly disappear and then reappear as Explorer restarts.
This resets the File Explorer shell. After it restarts, try browsing your files. If it still crashes on opening folders, continue to the next step.
4. Clear File Explorer Cache and History
A corrupted quick-access cache or history can cause repeated crashes. Clearing it forces Windows to rebuild clean data.
- Press Windows + R, type control folders, and press Enter. This opens File Explorer Options (sometimes called Folder Options).
- In the General tab, find the Privacy section. Click Clear next to “Clear File Explorer history”.
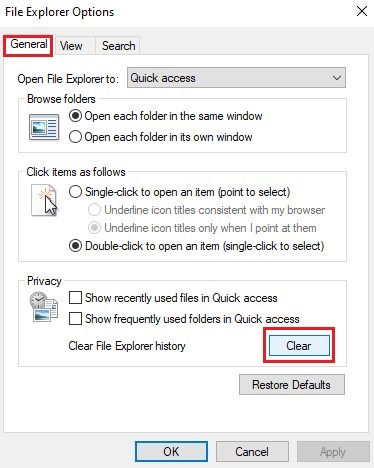
- Click Apply, then OK to close the dialog.
- Now, restart the Windows Explorer process as in Method 3 (via Task Manager).
With a fresh cache and history, Explorer won’t crash over old or corrupt entries. Try using File Explorer now to see if the error is gone.
5. Disable Jump Lists (Recent Items)
The Jump Lists feature can sometimes go awry. Disabling recent items prevents Explorer from loading possibly problematic history data.
- Press Windows + I to open Settings.
- Go to Personalization > Start.
- Turn off “Show recently opened items in Jump Lists on Start or the taskbar.”
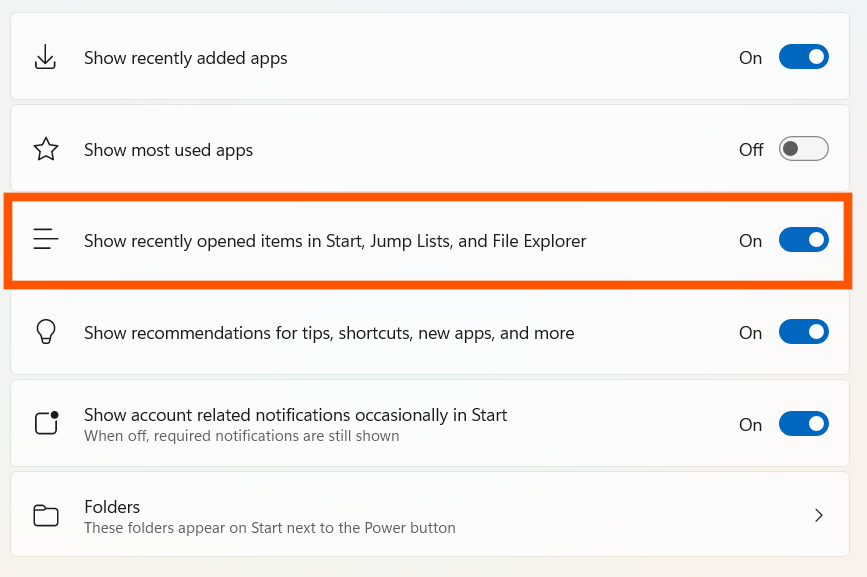
This change takes effect immediately. Now Windows won’t load your recent items at launch, which often stops the ntdll.dllcrash. Try opening File Explorer once more.
6. Perform a Clean Boot
A clean boot starts Windows with only those essential Microsoft services. If a third-party program or driver is causing this problem for you, this will be isolating it.
- Press Windows + R, type msconfig and hit that Enter button to open System Configuration.
- Go to Services tab, check the Hide all Microsoft services box and then just click Disable all.
- Go down to the Startup tab and click the Open Task Manager option.
- In Task Manager’s Startup, there will be a list. Just right-click each of these programs and choose Disable.
- Close Task Manager, click OK in System Configuration then restart your PC.
Now Windows runs only core services and no third-party startup apps. So test that File Explorer.
- If Explorer no more crashes, one of the disabled programs was the culprit.
- Re-open System Configuration in this case and re-enable services as well as those startup apps in small groups and reboot after each change until the crash returns. This will pinpoint the target software.
Clean booting is a powerful way to find incompatible apps. Once you identify the problematic program or driver, update or uninstall it, then reboot normally.
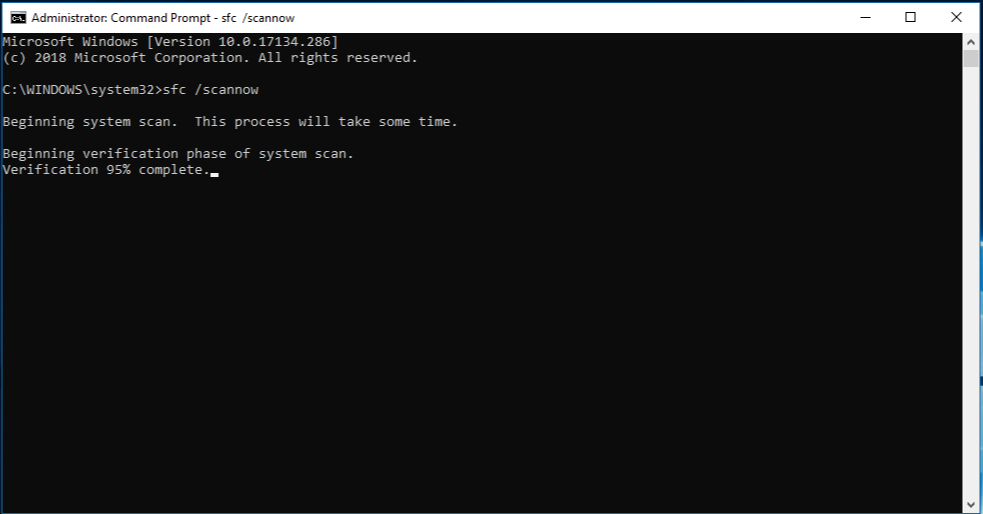
7. Run System File Checker and DISM
Corrupted Windows system files… even some parts of ntdll.dll can cause crashes. Those built-in tools we know i.e. System File Checker (SFC) and DISM repair those files, most of the times. Here you go:
- Open Command Prompt as Administrator. Do this by just pressing Windows + X and then choosing Windows Terminal or Command Prompt.
- Type that familiar sfc /scannow command and just hit Enter. Let it complete. It will find and fix those corrupted system files.
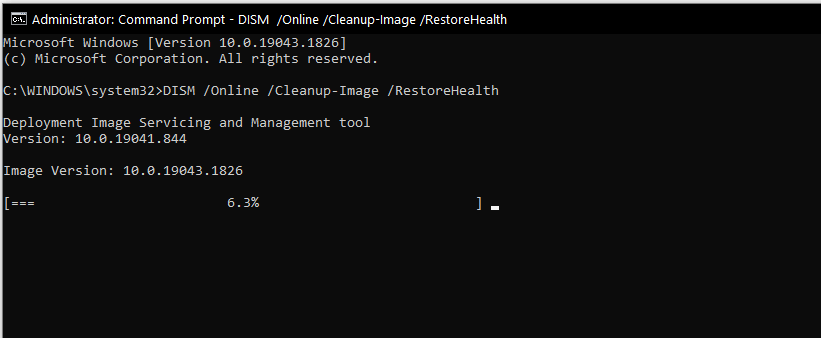
- Press Enter. DISM will check the Windows image and download any needed fixes.
- Restart your computer when DISM completes.
These utilities often fix deep system issues. After rebooting, try and open File Explorer again. If the crash was due to corrupt files then it should now be resolved.
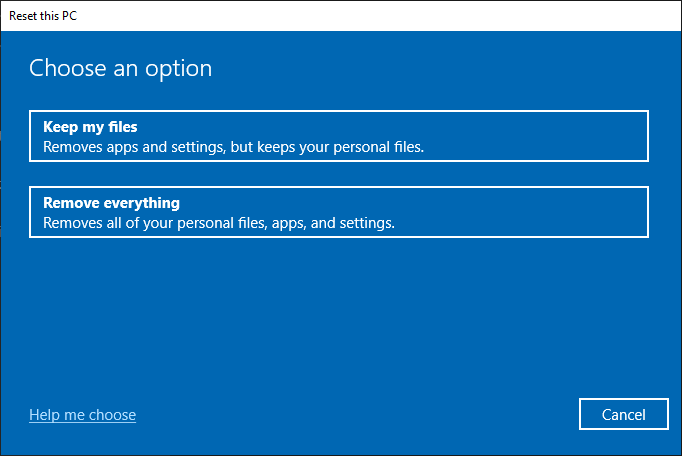
8. Reset Windows (Last Resort)
Resetting Windows reinstalls the OS while optionally keeping your files. It’s a brute-force fix that clears out stubborn problems. Backup is essential before doing this.
- Backup Your Data: Copy those important files of yours like documents, pictures, etc. to an external storage or some reliable cloud.
- Once it is backed up well and good, just go to Settings > System > Recovery > Troubleshoot. Under Reset this PC, click Reset PC.
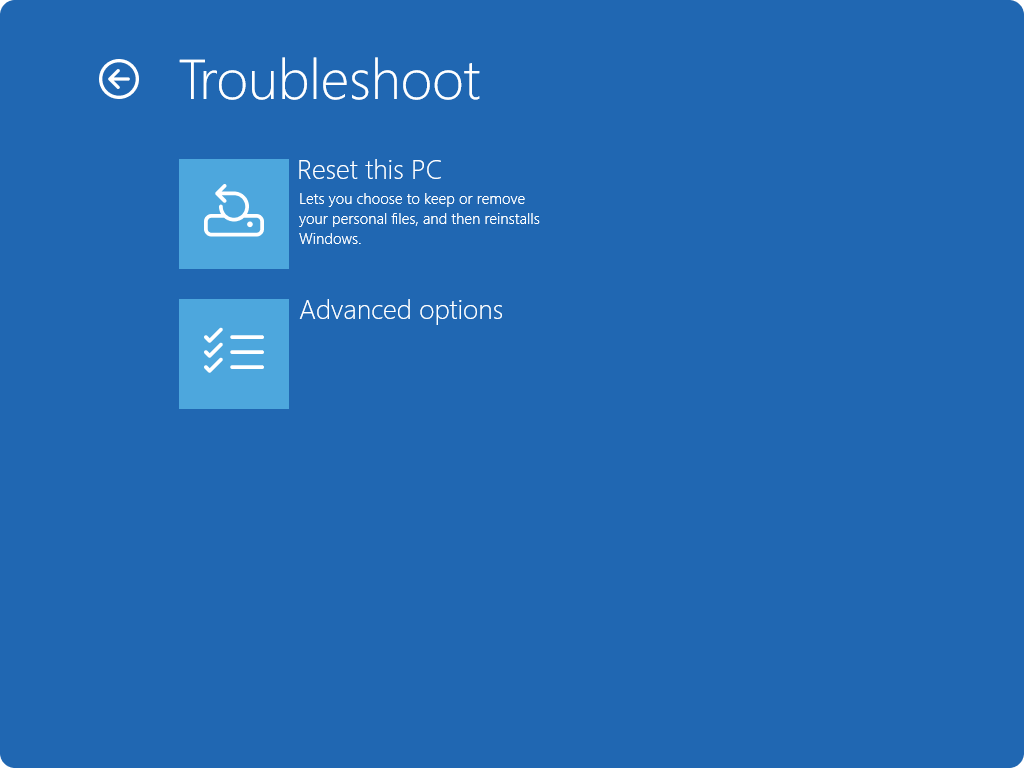
- Choose Keep my files to preserve that data of yours or Remove everything for a fresh start. Then just follow the prompts to reinstall Windows.
- Let Windows complete the reset. Afterward, reinstall your apps and restore your data.
Resetting Windows removes almost any software cause of the ntdll.dll crash. Use this only if needed, since it essentially gives your PC a fresh start.
9. Scan for Malware
Malicious software can damage system files or inject faulty code, triggering ntdll.dll crashes.
- Update those antivirus definitions and go ahead for a full system scan using Windows Defender or for that matter any reputable antivirus software.
- Consider running that Windows Defender Offline scan as well via Windows Security settings to catch some hidden malware.
- Remove threats if any are found and restart your PC.
Malware often masquerades as normal programs. A thorough scan ensures that no infection is causing the crash. Once clean, test File Explorer again.
If you’ve worked through all these steps, your File Explorer should be back to normal. However, along the way to resolve this one, if you lose your files somehow or find that some of those files of yours are missing all of a sudden… just don't worry at all. Stellar Data Recovery Professional for Windows, a reliable and professional data recovery software, is your way out. It can help you get those files back. The process is pretty easy. You can simply install the tool, choose what you want to recover, and then preview the files it recovers from your system.
Conclusion
NTDLL.dll crash in File Explorer is an annoying problem but don't you worry. Usually it is fixable. This file is the main part of our Windows system so when it is crashing, the real problem is something else. Maybe there is a bad driver, maybe a recent update created such a problem or maybe files are corrupt. First things first... update your software and drivers. After that, clear cache from your system. Then check if any new software is creating conflict. Delete it if it is a problem. If you are doing these steps one by one, your problem will be solved in most cases.
But before you go ahead and all of this, please just backup your system. This is a very safe idea. Also, keep your system updated always. This will help you avoid this problem in future. If the problem is still coming after trying everything, then maybe you need to repair Windows or do a fresh install. But mostly, one of these methods will work and File Explorer will be normal again. So be patient, try these steps slowly and carefully. Your File Explorer will come back to normal very soon!


Pallavi is a literature graduate turned content strategist, specializing in data recovery. She creates insightful, user-friendly content to help people rescue their data from hard drives, SSDs, memory cards, and more. When she’s not decoding tech for everyday users, she’s curled up with a book - or secretly planning her next adventure.
 17 min read
-1918.jpg)