You may want to restore your Android phone after a failed Android update or OS crash or get old Android phone data to a new one. For whatever reason, you’ve had to restore Android phone data; backup by Google One is the viable option to restore your Android device. No one wants to go through the process of manually re-installing and configuring all the apps.
The built-in Google Backup and Restore feature in Android devices can help you regain your lost data.
Read this guide to learn step-by-step how to restore an Android phone from Google Backup. There’s also a software-based method to restore Android phone data.
How to Restore Android Phone from Google Backup?
If you have set up an automatic backup on your Android, Google One will back up all your device data whenever your phone is turned on. This method will backup the following data of your device: App data, Contacts, Call history, Settings, Pictures, and videos, SMS, and MMS messages to the cloud.
Every time you take the backup of your Android phone, a new Google backup file is created in Google One. This backup will be helpful if you have deleted or lost your important Android data, be it media files or messages, due to some reasons and now wish to recover it.
In such a dire situation, restore the Android phone using Google backup and restore your lost data. However, to do so, you need to factory reset your Android to regain data from the Google backup. Moreover, remember that by doing so, your existing Android data will be erased and replaced with the backed-up data.
Important: Do’s before you restore Android from Google backup
- Back up your Android to Google One so as not to lose the existing data on your device.
- Ensure you have a stable and good internet connection.
- Ensure your Android is fully charged.
Here’s how to restore Android phone from Google Backup
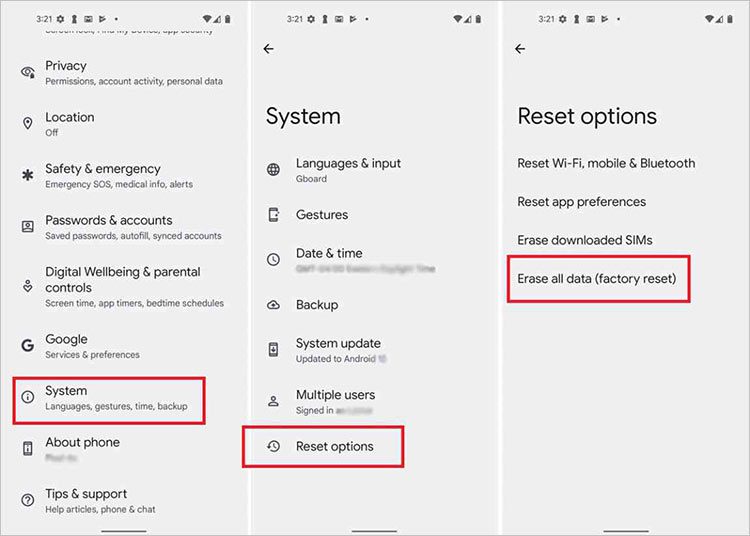
- On your Android, tap Apps > Settings > System Settings
- Tap the Reset option, click Erase all data (Factory reset).
- Follow on-screen instructions and wait.
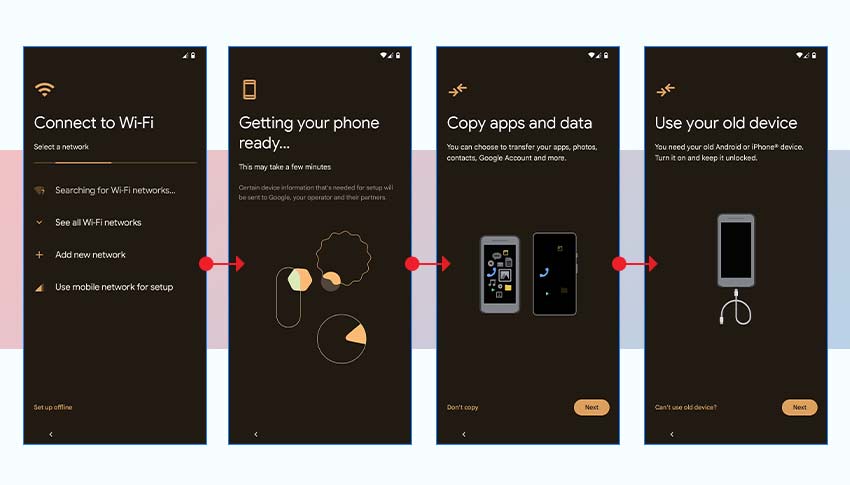
- Turn on your Android phone and follow the on-screen instructions to select a language and Wi-Fi network.
- Wait at the Getting your phone ready screen as your device is prepared for the next steps.
- Now, in the Copy apps and data screen, tap on Next.
- Then, if prompted to use your old device, transfer your apps, photos, and more, tap on the Can’t use old device option. Tap OK to continue without the old device.
- Login to your Google account to sync and restore your Google One backup.
- Select the device backup you wish to restore and then confirm your action by entering the passcode/pin for the old device and backup.
- In the next screen, select the data you wish to restore, including photos, videos, SMS messages, contacts, etc. Then tap Restore.
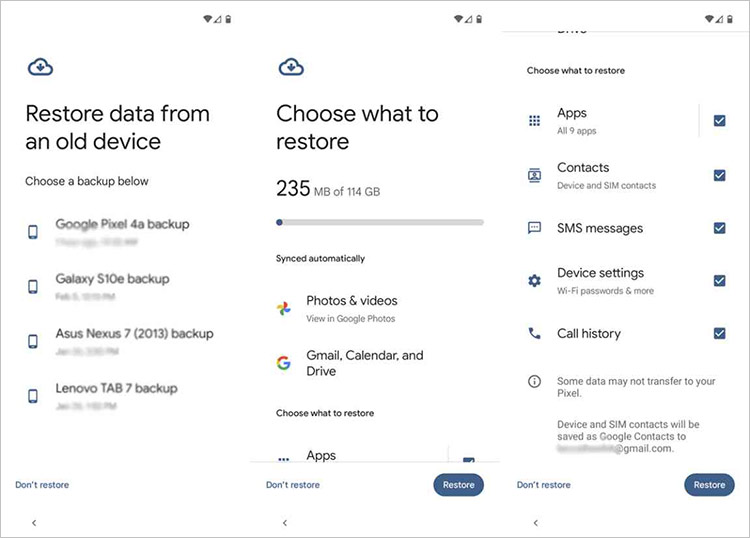
- Your Android data is restored, and you can finish setting up your device. Once restore is complete, check your phone to ensure all the media files and other data are on your Android device.
How to Restore Android Phone using Android Data Recovery Software?
You can recover your lost Android data without losing existing device data by using a professional Android data recovery software like Stellar Data Recovery for Android to recover lost photos, videos, and other data. This tool can easily recover deleted data from an Android phone's internal memory or SD card.
The software supports recovery from all popular Android phones, including Samsung, OPPO, OnePlus, etc. It supports recovery in almost all data loss scenarios like virus or malware-affected devices, accidental deletion, etc.
Stellar Data Recovery for Android
To see how software works on Windows, download the free version from here.

Steps to restore Android phone data using the Android Data Recovery tool.
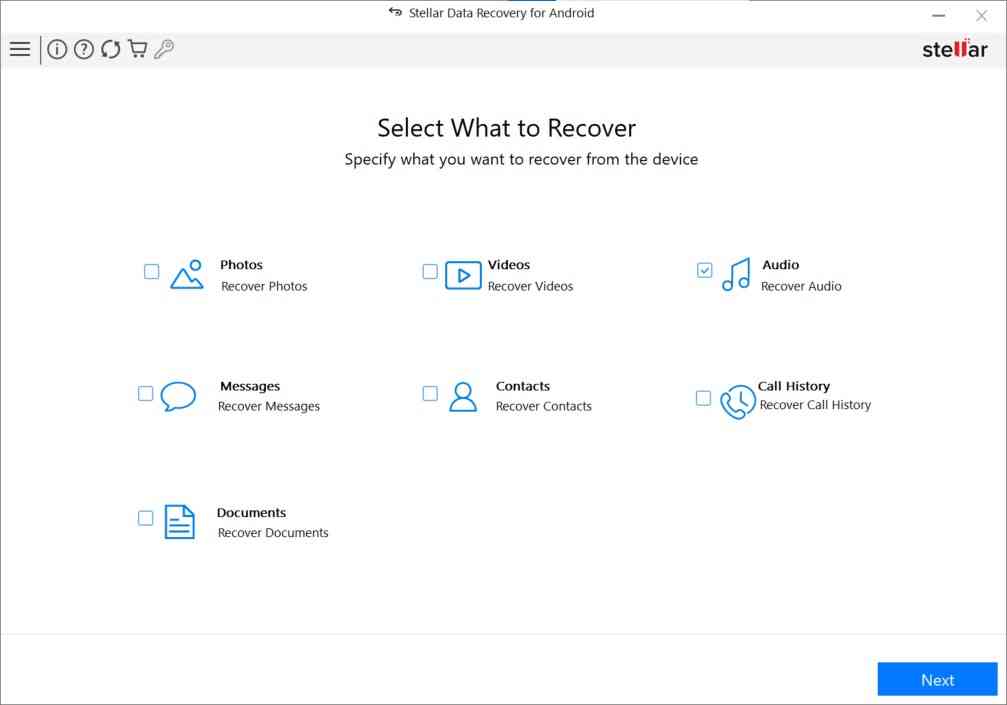
- Download, install, and launch Stellar Data Recovery for Android on your Windows PC.
- On the home screen, choose the type of data you want to restore and click Next.
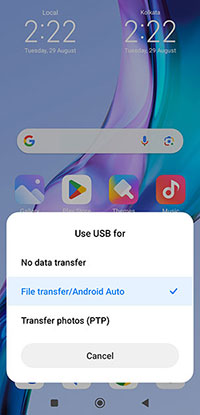
- Connect your Android phone to the computer via a USB cable.

- At the same time, a USB connection notification ‘Use USB for’ appears in your Android; choose the radio button next to the File Transfer/Android Auto option.
- Next, on your Android phone, go to Settings and enable USB debugging. Follow the steps in the screenshots below to enable USB debugging.
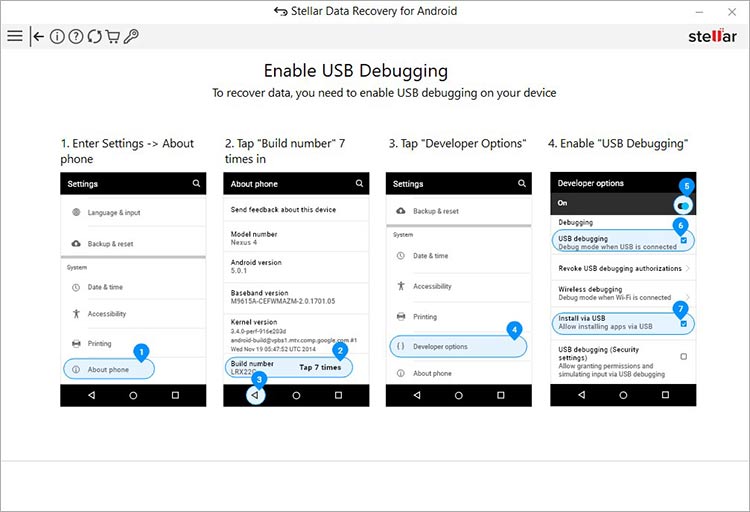
- However, the steps to enable the Developer option and then USB Debugging vary according to the Android smartphone brand and model.
Related Read: How do you enable USB Debugging on your Xiaomi phone?
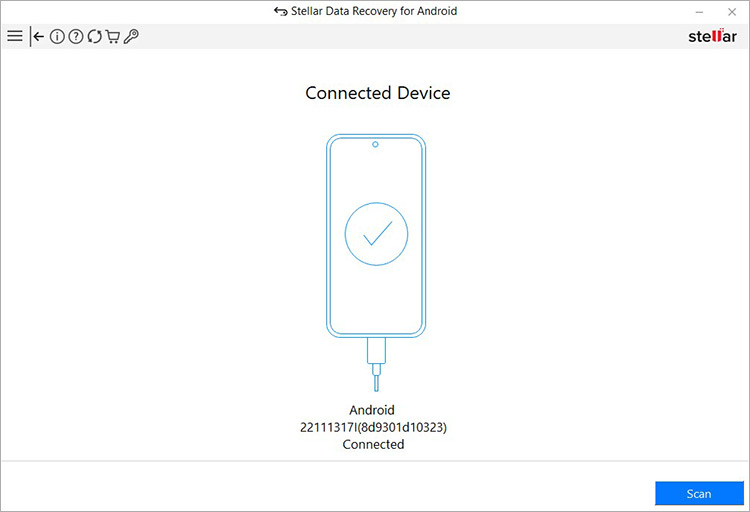
- Next, your Android phone is displayed as connected in the software interface. Select your device and click Scan.
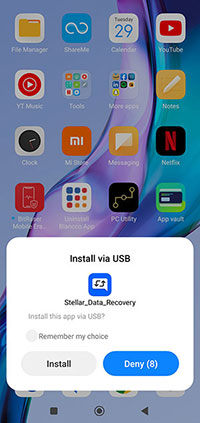
- Click Install when a pop-up Install via USB appears on your Android phone.
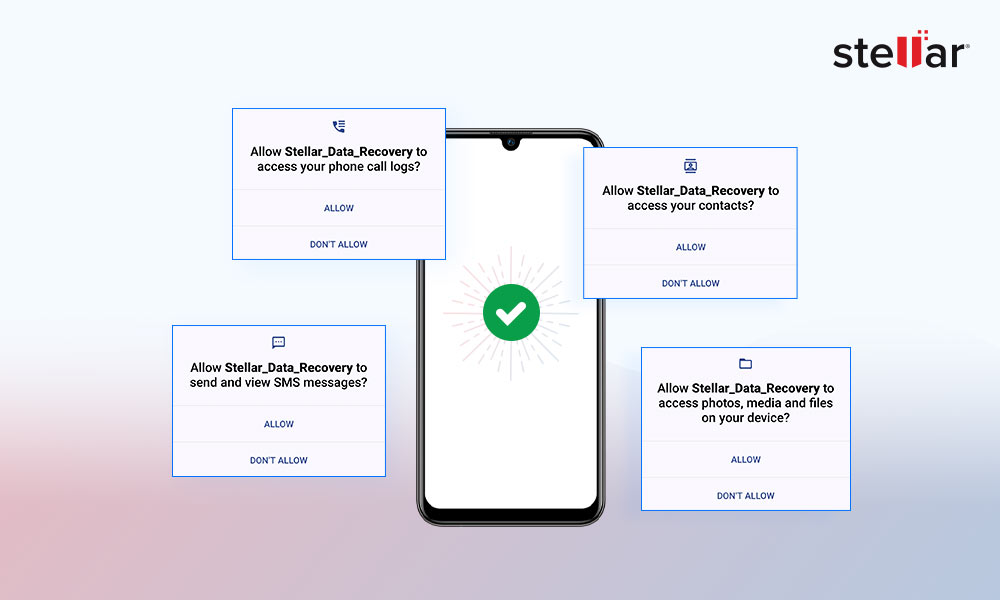
- When an authorization pop-up appears, click Allow to provide access to call logs, contacts, SMS messages, photos, media, and files from your Android phone.
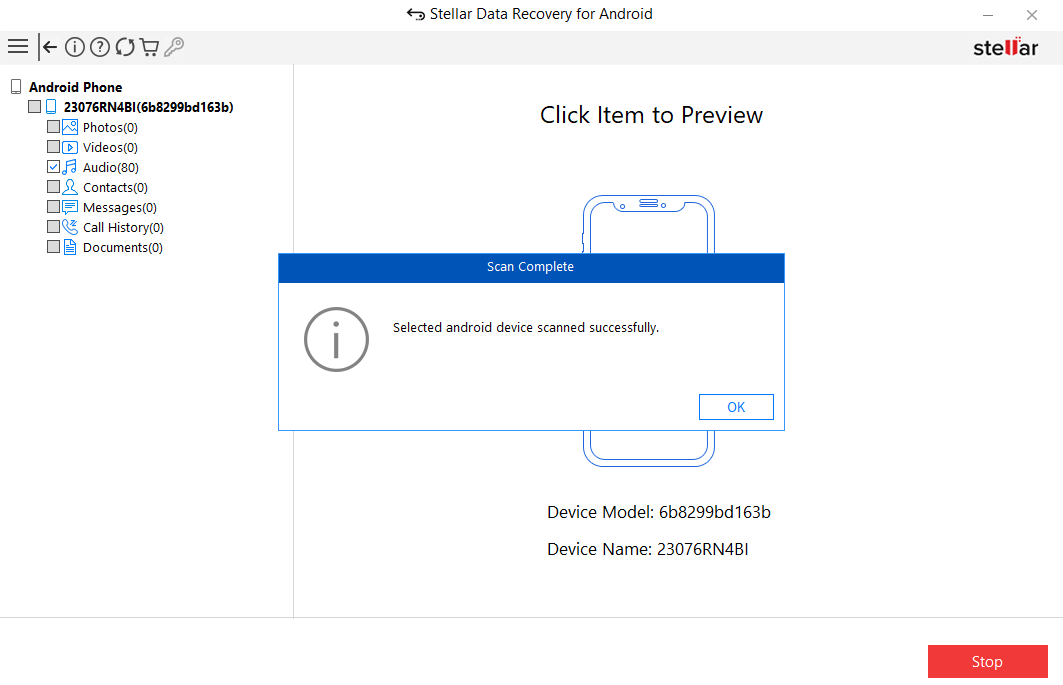
- Once done, the software will start scanning your Android device. The process will take some time to complete.

- Click OK once the Scan Complete pop-up appears.
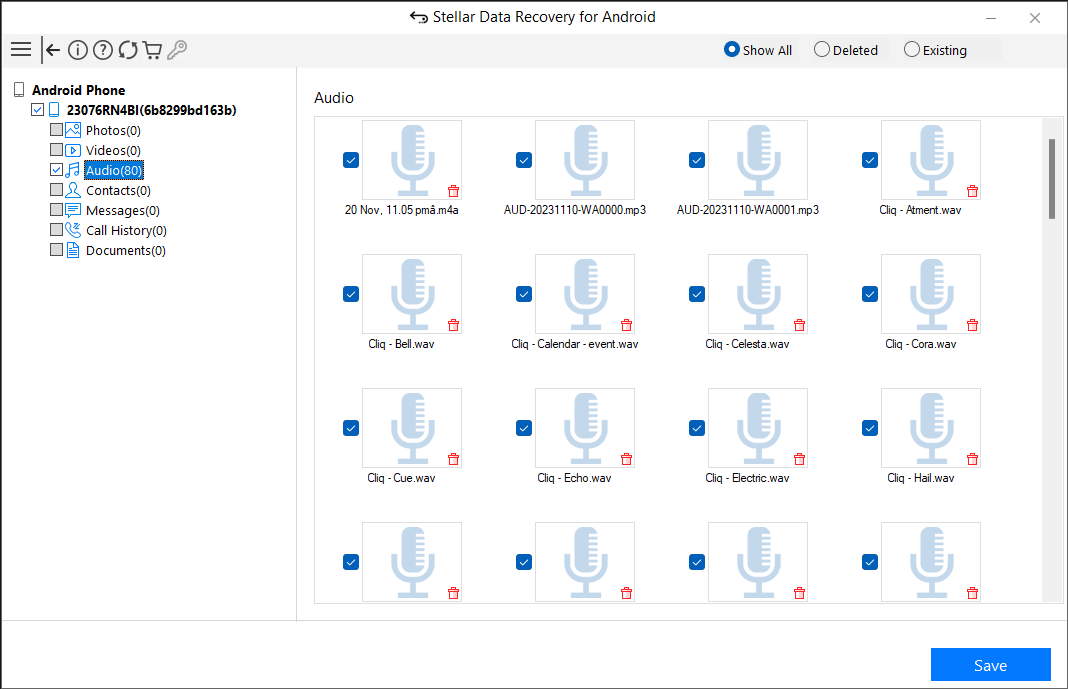
- Double-click the data folders in the left pane to preview the recovered files.
- Now, select the files you wish to recover and click Save.
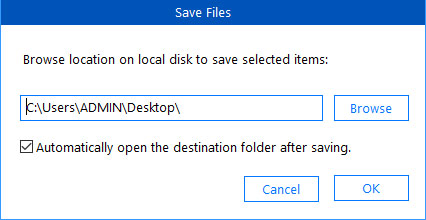
- Browse the location where you want to save the recovered files on the local disk. Click OK.
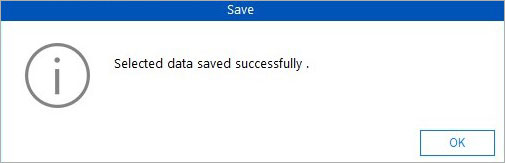
- Once the save process is completed, a pop-up saying ‘Selected data saved successfully’ appears, and click OK to close it.
Wrapping Up
You can restore your Android phone using the factory reset option on your device or with the help of Stellar Data Recovery for Android software.
Resetting the Android deletes the existing data on your device and lets you use Google Backup to restore the lost data. Restoring Android phone data using the software allows you to keep the current photos, videos, and other data on the device. Plus, with software, you can select and restore specific types of data on the Android phone instead of replacing everything on your Android with the Google backup.


Vishakha Singh is a Senior Writer at Stellar with half a decade of experience in writing content in diverse verticals. She loves creating photo/video recovery & repair tutorials. Vishakha also specializes in writing full-blown iPhone and Android guides.
 5 min read