Time Machine error codes are of no use unless you know what the code means. It will help if the error dialog window shares what went wrong with the backup app instead of codes. But the reality is, macOS doesn’t provide descriptive Time Machine errors that can help troubleshoot issues. Also, the numeric error codes are not publicly documented. So, it is challenging to take appropriate action whenever you encounter a Time Machine error.
The following sections describe a few most common Time Machine error codes with their solution.
Note: The methods shared below might not work in every case.
1. Error code 21 and 19
Error: Time Machine fails in the “preparing backup” phase while backing up Mac to NAS (Network-Attached Storage). The error code shown in the dialog window isn’t very helpful. But console presents the error from backupd as follows: “Failed to mount ‘/Volumes/{name of disk}/{name of}.sparsebundle’ because the image could not be attached, error: Error Domain = com.apple.backupd.ErrorDomain Code=21 “(null)” UserInfo = {MessageParameters = ("/Volumes/{name of disk}/{name of}.sparsebundle", 19)}
Solution: Possibly, the NAS login password is not updated in Keychain. To update the Keychain, do the following:
- Go to Apple menu > System Preferences > Time Machine.
- Select “Stop using Time Machine for Backup.”
- Go to Applications > Utilities > Keychain Access.
- Search NAS hostname and delete all matching passwords.
- Open Time Machine > Add Backup Disk.
- Select Time Machine, then enter a password.
2. Error code 45
Error: Time Machine could not complete the backup. The backup disk image ‘/Volumes/{name of disk}/{name of}.sparsebundle’ could not be created (error 45).
Solution: For a connected Time Machine drive, disconnect the backup drive from your MacBook and quit the Time Machine application. Now, reconnect the backup drive to your Mac, then run Time Machine once again.

For network drive, make sure your storage is available on your network. If you’re using Time Capsule, go to Applications > Utilities > Airport Utility. Scan for available wireless devices. If you can’t find Time Capsule, turn it off, then turn it on again. Reselect your Time Machine backup.
3. Error code 92
Error: The error code 92 "Backup failed - time machine could not back up to drive."
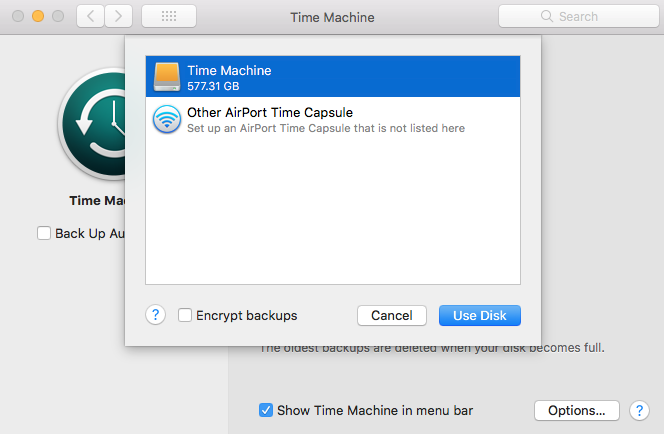
Solution: Navigate to Apple menu > System Preferences > Time Machine > click Add or Remove Backup Disk. Select the Backup Disk, then click Remove Disk. Select Stop Using This Disk.
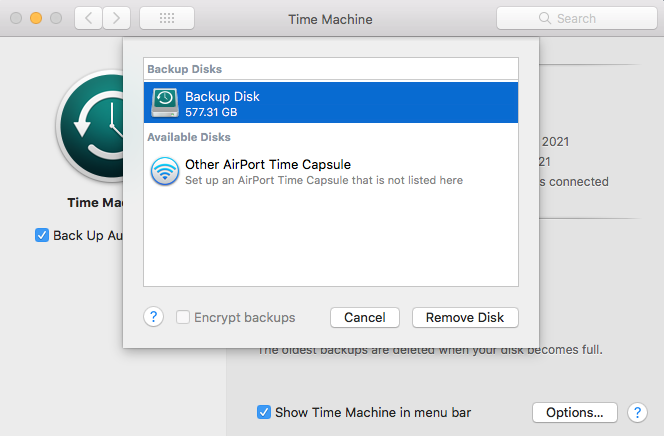
Go back, then click Add or Remove Disk, select the Time Machine Disk > click Use Disk to add the disk into the backup disk list.
4. Error code 112
Error: Time Machine backup to my Time Capsule fails. A dialog box says that disk image ‘/Volumes/{name of disk}/{name of}.sparsebundle’ could not be accessed (error 112).
Solution: Press and hold the Option key, click the Time Machine icon from the Menu bar, and select Verify Backup. Let the backup verification to complete.
5. Error code 404
Error: Time Machine couldn’t complete the backup to the drive. Error Code 404.
Solution: Type the following terminal command:
clear; printf '\e[3J' && log show --predicate 'subsystem == "com.apple.TimeMachine"' --info --last 48h | grep -F 'eMac' | grep -Fv 'etat' | awk -F']' '{print substr($0,1,19), $NF}'
Once you know the log status of Time Machine, act accordingly to fix Time Machine 404 error.
6. Error code 512
Error: Time Machine could not complete the backup. Error Code: 512
Solution: Delete the .sparsebundle file. Then create it once again in your local disk but not the Time Machine disk using the following terminal command:
sudo hdiutil create -size 50g -type SPARSEBUNDLE -nospotlight -volname "Time Machine Backup" -fs "Case-sensitive Journaled HFS+" -verbose ./Computername_MACaddress
Here, replace the size as per your choice, keep your own volume name, and replace it with your computer name and MAC address.
Now, log in to your NAS. Next, create a user account and create a shared folder. In Finder, navigate to Go > Connect to Server. Type smb://TimeMachine@ip-address-of-nas/shared-folder-name for server address. Click Connect. When requested, enter the password and save it in your keychain.
Now, copy the created sparsebundle file into the Time Machine share folder. The sparsebundle file is in your Home folder /Users/your-user-name. On NAS, check the file is copied under your correct user account. Finally, open Time Machine, select the Time Machine folder as the desired destination. The backup will now start without any error.
7. Error code 640
Error: Time Machine couldn't complete the backup. Error Code: 640
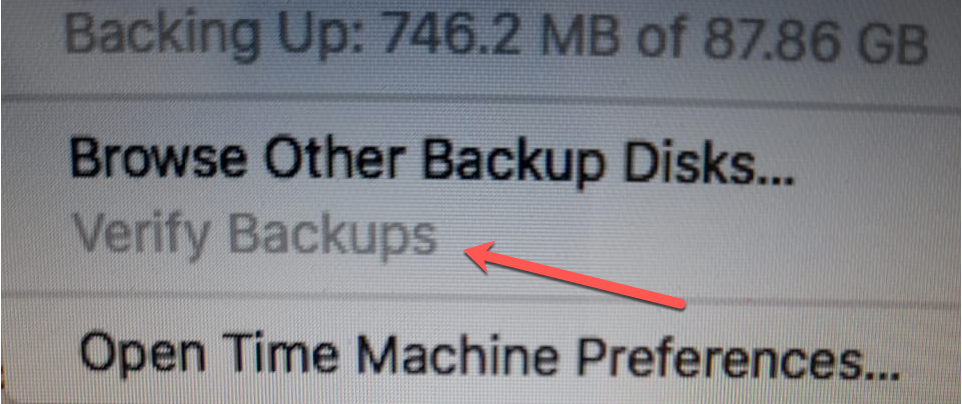
Solution: Hold the Option key on your Mac while you click on the Time Machine icon at the menu bar, then click on Verify Backups.
Time Machine Data Loss
Sometimes, a user may accidentally erase the Time Machine external hard drive using Disk Utility. Or, lose data through Command + Delete hotkey followed by emptying of Trash. What is supposed to be done if the backup drive itself is either deleted or corrupted?
A) Time Machine data can be restored using a professional Mac data recovery tool.>
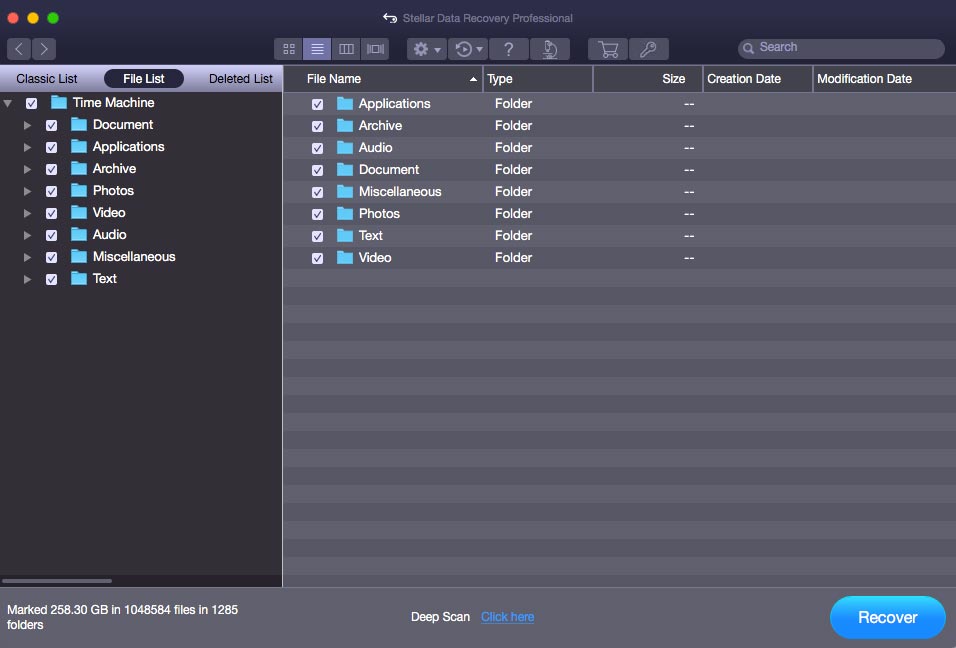
Step 1: Install Stellar Data Recovery Professional for Mac and mount the Time Machine device.
Step 2: Launch the software and choose the Time Machine device.

Step 3: Run Scan or Deep Scan on the Time Machine and preview all the recoverable files once the scan is complete.
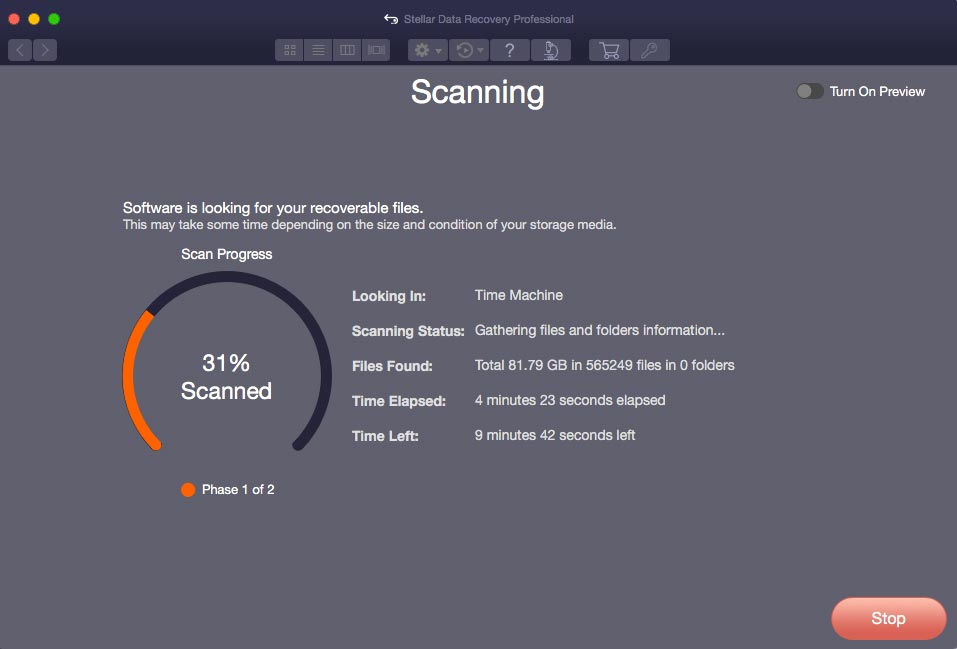
Step 4: Activate Stellar Data Recovery Professional for Mac software and press the Recover button to save the data.
Note: A free version of the Professional edition called – Stellar Data Recovery Free Edition for Mac is also available. You can install the free version on your Mac system and recover 1 GB of data for free. The free version doesn’t require any activation key for 1 GB data recovery.
Conclusion
We hope the blog helped you learn some of the standard Time Machine error codes and how to fix them if you encounter any. When you lose your Time Machine data, try using Stellar Data Recovery Professional for Mac to recover it from your MacBook, iMac, or Mac mini, wherever the data was once present. The software is compatible with macOS Ventura and even supports other earlier versions of macOS.


Data recovery expert on Mac & Windows platforms, with 10-year experience in writing
 10 min read
-1920.jpg)